Manual Philips HD4959 Hob

Need a manual for your Philips HD4959 Hob? Below you can view and download the PDF manual for free in English. This product currently has 3 frequently asked questions, 0 comments and has 0 votes. If this is not the manual you want, please contact us.

Is your product defective and the manual offers no solution? Go to a Repair Café for free repair services.

Manual

Loading…

www.philips.com/welcome
User manual
HD4959
www.philips.com/welcome
Safety leaflet
HD4959
www.philips.com/welcome
Warranty
HD4959
Меню
таймер
подогрев
Вкл/Выкл
Защита от
детей
10cm
10cm
c
a
b
d
e
f
g h i j k ml
s r q p
on
Меню
Вкл/Выкл
Вкл/Выкл
Меню
Вкл/Выкл
EN User manual
RU Руководствопользователя
Overview
Обзор
Using the induction cooker
Использованиеиндукционной
варочнойпанели
Using the timer
Использованиетаймера
Cleaning
Очистка
Preparing for use
Подготовкаприборакработе
Recommended types and sizes of cookware
Рекомендуемыеформыиразмерыемкостей
Specifications are subject to change without notice
© 2015 Koninklijke Philips N.V.
All rights reserved.
HD4959
Register your product and get support at
www.philips.com/welcome
English
1 Your induction cooker
Congratulations on your purchase and welcome to Philips! To fully
benet from the support that Philips offers, register your product at
www.philips.com/welcome.
2 What’s in the box
Induction cooker main unit Safety leaet
User manual Warranty card
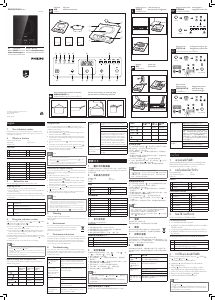
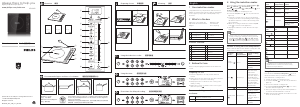
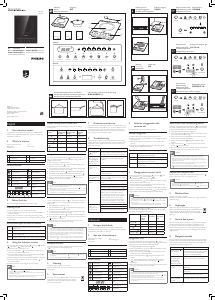
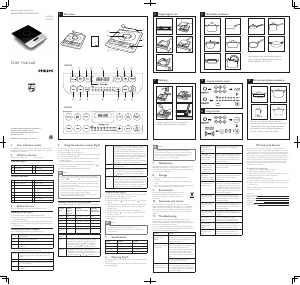
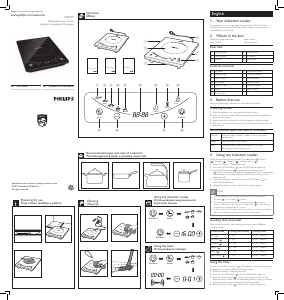
Overview
a
Cooking plate
d
Control panel
b
Cooking zone
e
Air outlets
c
Air inlet
f
Power cord
Controls overview
g
Fry mode
n
Keep warm button
h
Congee mode
o
Child lock button
i
Steam mode
p
On/Off button
j
Soup mode
q
Increase button
k
Hot pot mode
r
Decrease button
l
Screen
s
Menu button
m
Timer button
3 Before first use
Remove all packaging materials from the induction cooker.
Preparing for use
1 Place the appliance on a dry, stable and level surface.
2 Make sure there is at least 10cm free space around the appliance to
prevent overheating.
3 Always place the cookware on the cooking zone during cooking.
4 Make sure you use cookware of the correct types and sizes (see the
table below).
Recommended types and sizes of cookware
Material Cookware with a bottom made of iron or magnetic
stainless steel
Shape Cookware with a at bottom
Size Cookware with a bottom diameter of 10-23cm,
depending on the cooking mode
4 Using the induction cooker
There are six preset cooking modes: Fry ( ), Soup ( ), Steam
( ), Congee ( ), Hot pot ( ) and Keep warm ( ).
1 Follow the steps in “Preparing for use”.
2 Press the On/Off button (
), the On/Off indicator lights up.
3 Press the Menu button (
) repeatedly or the Keep warm
(
) button to choose the desired cooking mode. The corresponding
indicator lights up and the induction cooker starts working in the
selected mode.
4 When the cooking is nished, press the On/Off button (
) to
switch off the appliance.
5 Unplug the induction cooker after the fan stops working.
Note
During cooking, you can change the power level by pressing the
Increase (
) or Decrease ( ) button.
For cooking modes selected by the menu button ( ), cooking
power is displayed on the screen; for Keep warm (
) mode, cooking
temperature is displayed on the screen.
In Steam, Soup and Congee modes, the induction cooker automatically
adjusts the cooking temperature for better cooking result.
Cooking time and power
Refer to below table for the cooking time and power of different
cooking modes.
Cooking mode Cooking time (minute) Cooking Power
Fry (
) 1 - 120 800W - 2200W
Hot pot (
) 1 - 120 800W - 2200W
Congee (
) 30 - 180 800W - 2200W
Steam (
) 30 - 120 800W - 2200W
Soup (
) 30 - 180 800W - 2200W
Keep warm (
) 1 - 120 800W - 2200W
Using the timer
You can use the Timer button ( ) to decide how much time you want
the appliance to work in different cooking modes.
1 Follow the steps in “Preparing for use”.
2 Press the On/Off button (
), the On/Off indicator lights up.
3 Press the menu button (
) once or more times to choose the
desired cooking mode. The corresponding indicator lights up and the
induction cooker starts working in the selected mode.
4 Press the Timer button (
) and the timer indicator lights up.
Индукционная плитка
Аударуға мүмкіндік болмады
Download manual in English (PDF, 4.22 MB)
(Consider the environment and only print this manual if it is really necessary)

Loading…

Rating

Let us know what you think about the Philips HD4959 Hob by leaving a product rating. Want to share your experiences with this product or ask a question? Please leave a comment at the bottom of the page.
Are you satisfied with the Philips HD4959 Hob?
Yes No
Be the first to rate this product
0 votes

Join the conversation about this product

Here you can share what you think about the Philips HD4959 Hob. If you have a question, first carefully read the manual. Requesting a manual can be done by using our contact form.

More about this manual

We understand that it’s nice to have a paper manual for your Philips HD4959 Hob. You can always download the manual from our website and print it yourself. If you would like to have an original manual, we recommend you contact Philips. They might be able to provide an original manual. Are you looking for the manual of your Philips HD4959 Hob in a different language? Choose your preferred language on our homepage and search for the model number to see if we have it available.

Specifications

Brand Philips
Model HD4959
Category Hobs
File type PDF
File size 4.22 MB

All manuals for Philips Hobs
More manuals of Hobs

Frequently Asked Questions about Philips HD4959 Hob

Our support team searches for useful product information and answers to frequently asked questions. If you find an inaccuracy in our frequently asked questions, please let us know by using our contact form.

Which pans can be used on an induction hob? Verified

In general all pans that are magnetic can be used on an induction hob. Almost all new pans are suited for induction.

This was helpful (1368) Read more

My hob has a power plug that doesn't fit a regular socket, what should I do? Verified

Many electric hobs (both ceramic and induction) have a different plug. This is because these appliances require a lot of power. Have the installation of the appliance done by a professional.

This was helpful (1289) Read more

Why does the ignition on my range make a clicking sound? Verified

If the range has ben cleaned with a lot of water, the knobs might have gotten wet, triggering the ignition. Let the knobs dry. If the problem persists you should contact the manufacturer.

This was helpful (1095) Read more
Manual Philips HD4959 Hob

Related products

Related categories