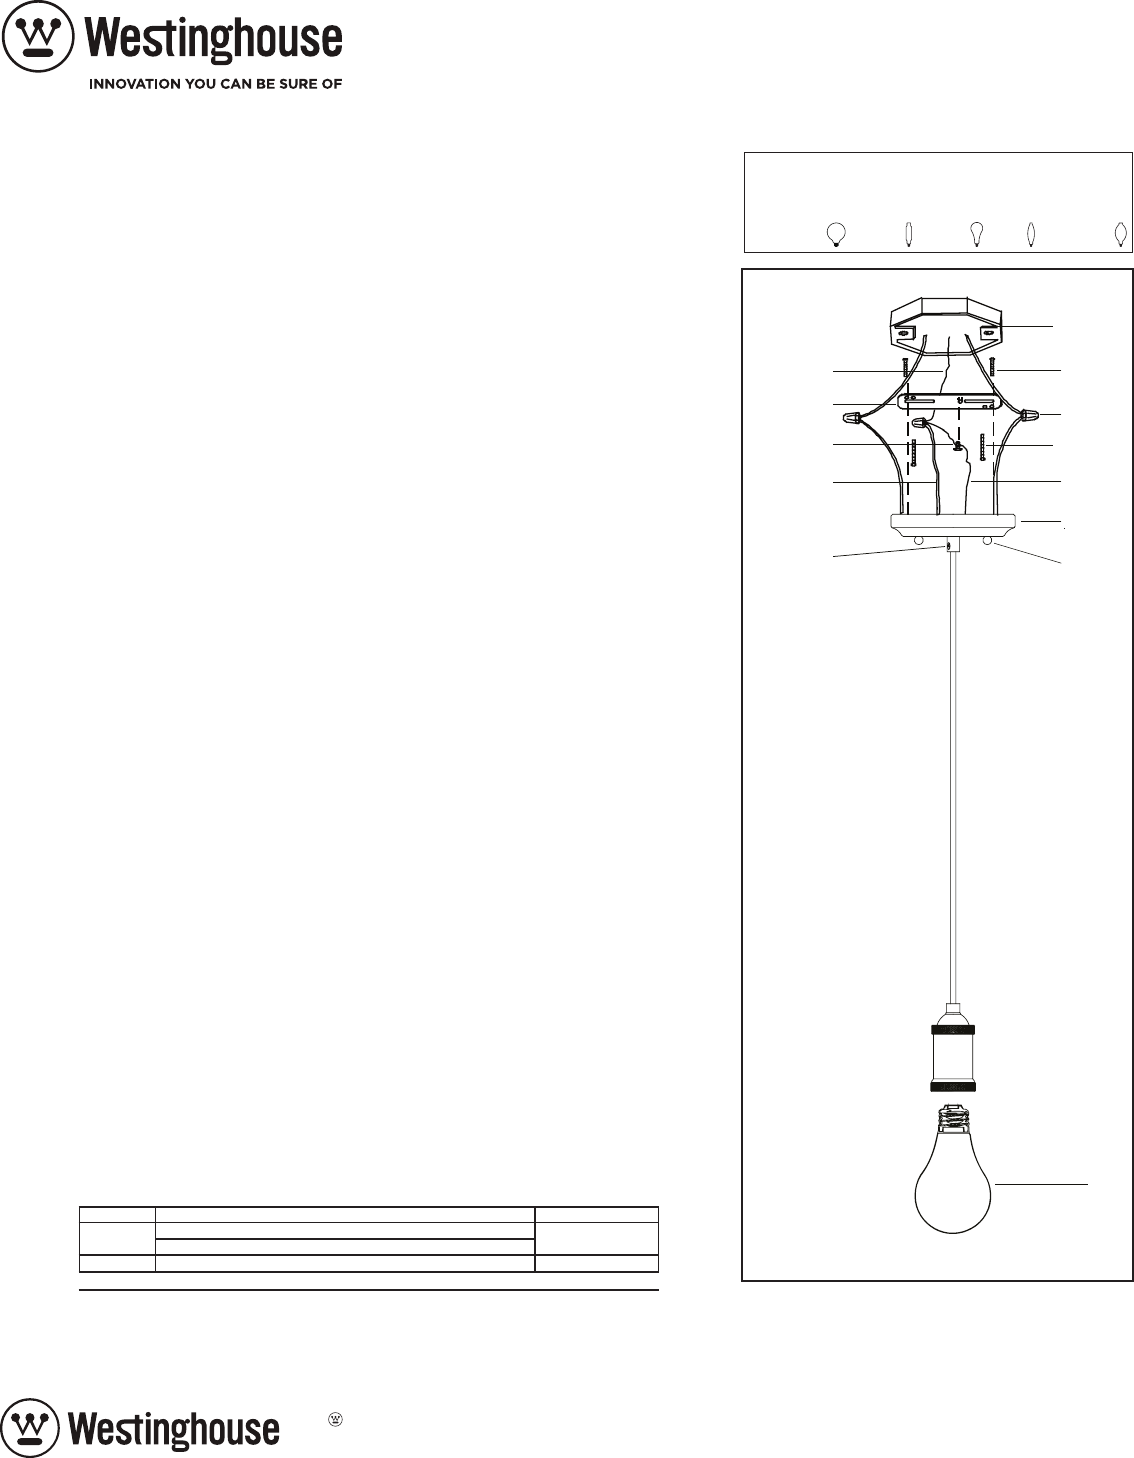
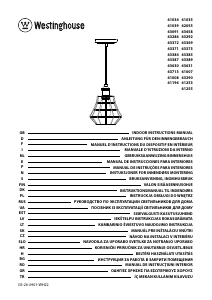
Manual Westinghouse 6357100 Lamp
Need a manual for your Westinghouse 6357100 Lamp? Below you can view and download the PDF manual for free in English. This product currently has 7 frequently asked questions, 0 comments and has 0 votes. If this is not the manual you want, please contact us.
Is your product defective and the manual offers no solution? Go to a Repair Café for free repair services.
Manual
Loading…

Loading…
Rating
Let us know what you think about the Westinghouse 6357100 Lamp by leaving a product rating. Want to share your experiences with this product or ask a question? Please leave a comment at the bottom of the page.More about this manual
We understand that it’s nice to have a paper manual for your Westinghouse 6357100 Lamp. You can always download the manual from our website and print it yourself. If you would like to have an original manual, we recommend you contact Westinghouse. They might be able to provide an original manual. Are you looking for the manual of your Westinghouse 6357100 Lamp in a different language? Choose your preferred language on our homepage and search for the model number to see if we have it available.
Specifications
| Brand | Westinghouse |
| Model | 6357100 |
| Category | Lamps |
| File type | |
| File size | 0.26 MB |
All manuals for Westinghouse Lamps
More manuals of Lamps
Frequently Asked Questions about Westinghouse 6357100 Lamp
Our support team searches for useful product information and answers to frequently asked questions. If you find an inaccuracy in our frequently asked questions, please let us know by using our contact form.
Is all LED lighting dimmable? Verified
No, not all LED lights are dimmable. This is indicated on the packaging or the light itself.
This was helpful (462) Read moreI put a new light in my lamp but it won't turn on, why is that? Verified
Some lamps are made for light sources of a specific wattage. When a light source is inserted that requires a higher wattage than the lamp can provide, the light may not turn on. If the lamp delivers a much higher wattage than what the light source is made for, the light source can burn out.
This was helpful (314) Read moreWhy is the colour of light important? Verified
There generally are two kinds of light, warm light and cold light. Cold light keeps you sharp and awake. Warm light has a relaxing effect. The warmth of the light is measured in Kelvin and is indicated on the packaging of the lamp itself.
This was helpful (255) Read moreWhat is lumen? Verified
Lumen is a measuring unit for the total amount of visible light emitted by a source.
This was helpful (190) Read moreWhat screw bases exist? Verified
Worldwide there many types of sockets, but most used are those based on the Edison screw, indicated with the letter E. In most countries screw bases E27 and E14 are standard. In the United States E26, E17, E12 and E10 are standard.
This was helpful (142) Read moreWhat do watts say about my lamp? Verified
Watt is a measuring unit for electricity consumption. Lamps that produce more light, generally use more Watt, but for comparing light output you should always use lumen.
This was helpful (113) Read moreWhat is LED? Verified
LED stands for Light-Emitting Diode. By running power through a semiconductor in the right direction, light is emitted.
This was helpful (97) Read more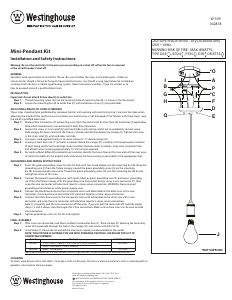


Join the conversation about this product
Here you can share what you think about the Westinghouse 6357100 Lamp. If you have a question, first carefully read the manual. Requesting a manual can be done by using our contact form.