Manual Kichler 16024CBR27 VLO Lamp

Need a manual for your Kichler 16024CBR27 VLO Lamp? Below you can view and download the PDF manual for free in English. This product currently has 7 frequently asked questions, 0 comments and has 0 votes. If this is not the manual you want, please contact us.

Is your product defective and the manual offers no solution? Go to a Repair Café for free repair services.

Manual

Loading…

For warranty information please visit: kichler.com/customer-care/warranty-information/landscape-warranty
IS-16023-US
We’re here to help 866-558-5706
Hrs: M-F 9am to 5pm EST
IMPORTANT! PLEASE READ
CAUTION – RISK OF SHOCK –
Disconnect Power at the main circuit breaker panel or main fusebox
before starting and during the installation.
This xture is intended for installation in accordance with the National
Electric Code (NEC) and Local code specications. Failure to adhere to
these codes and instructions may result in serious injury and/or property
damage and will void the warranty. If you are not familiar with code
requirements, installation by a certied electrician is recommended.
SAFETY INSTRUCTIONS
READ THIS FIRST
KEEP THESE INSTRUCTIONS
1) WARNING: This xture is not to be installed within 10 feet (3M) of
a pool, spa or fountain.
2) According to the requirements of the National Electric Code
(NEC), direct burial rated wire is to be buried a minimum of 6”
[152mm] beneath the surface of the ground.
NOTE: If additional Direct Burial wire is needed, contact your local
Kichler
®
landscape distributor.
8 GA wire can be purchased in length of 250’ (76 M),15503-BK.
10 GA wire can be purchased in length of 250’ (76 M),
15504-BK.
12 GA wire can be purchased in lengths of 100’ (30 M),
15501-BK; 250 (76 M), 15502-BK; 500’ (152M), 15505-BK;
and 1000’ (304 M), 15506-BK.
3) Wiring connections must be made with approved/listed wire connection
device(s) suitable for the application. Do not exceed manufacturers’
wiring combination specications for size and quantity of conductors.
CAUTION
WHEN INSTALLING KICHLER LANDSCAPE LIGHTING (LINE VOLTAGE
OR LOW VOLTAGE), CARE SHOULD BE TAKEN TO KEEP CLEAR OF
POTENTIALLY COMBUSTIBLE MATERIALS.
WHEN MAINTAINING THE FIXTURES, BE SURE TO REMOVE LEAVES,
PINE NEEDLES, GRASS CLIPPINGS, MULCH, OR ANY DEBRIS THAT
HAS ACCUMULATED ON THE LIGHT BULB, LENS, OR BODY OF THE
FIXTURE.
INSTALLATION
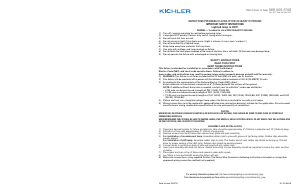
1) Determine desired location for xture and dig hole. Hole should be
approximately 6” (152mm) in diameter and 10” (254mm) deep.
2) Fill bottom of hole with approximately 3” (76mm) of pea gravel.
3) Lay xture in hole and backll around the xture with soil.
4) Make wire connection to main low voltage supply wire using supplied
twist-on wire connectors following instructions on bag.
BEAM ANGLE ADJUSTMENT
NOTE: Lighting xture comes from the factory with the light module aimed
vertically (straight upward). If beam adjustment is required, follow the
following steps:
Turn o󰀨 lighting xture before preparing to make beam adjustments.
NOTE: Necessary adjustments need to be made when dark.
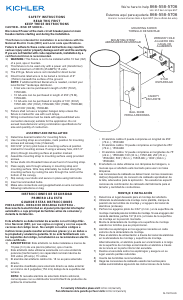
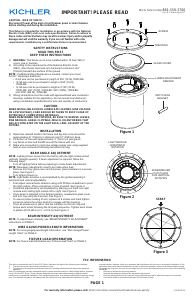
Remove trim ring, glass cover and 8 screws, place hardware in a secure
place. See Figure 1.
Turn lighting xture on.
NOTE: Light beam direction is accomplished by the gimbal assembly’s
horizontal and vertical adjustability.
First adjust vertical beam direction using a #2 Phillips screwdriver to pivot
the light module. Place screwdriver in hole provided. See Figure 2.
Horizontal adjustment is accomplished by placing your hand over light
module and rotating light module left or right. See Figure 2.
Once beam is adjusted to the desired position, reassemble glass cover
and trim ring using the 8 screws. See Figure 1.
To ensure proper sealing of unit, replace all 8 screws and hand tighten
screws to where the screw begins to engage with the housing.
Once all screws are in place, use the numbers on the trim ring and
torque each screw following the torqueing sequence. Tighten each screw
in pattern 20-25 LB-in (2.3 – 2.8 N-m) See Figure 3.
BEAM INTENSITY ADJUSTMENT
NOTE: To adjust beam intensity, see “BEAM INTENSITY ADJUSTMENT”
instructions on PAGE 2.
WIRE GAUGE/POWER/LENGTH INFORMATION
NOTE: For wire gauge/power/length information, see “Wire Gauge/Power/
Length Chart” on PAGE 2.
FIXTURE LOAD INFORMATION
NOTE: For xture load information,see “Fixture Load Chart” on PAGE 2.
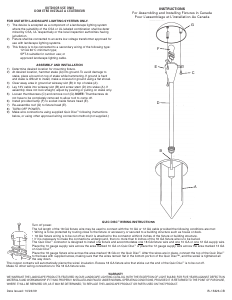
SCREW
TRIM RING
Figure 1
SWITCHING
MAGNET
GLASS COVER
1
8
4
6
2
7
3
5
Figure 2
Figure 3
START
LUMEN ADJUSTMENT
SENSOR
SCREWDRIVER
PIVOT HOLE
FOR VERTICAL
ROTATION
LIGHT MODULE
HORIZONTAL
ROTATION
PAGE 1
This device complies with part 15 of the FCC Rules. Operation is subject to the following two conditions:
1) This device may not cause harmful interference, and
2) This device must accept any interference received, including interference that may cause undesired
operation.
Note: This equipment has been tested and found to comply with the limits for a Class B digital device, pursuant
to part 15 of the FCC Rules. These limits are designed to provide reasonable protection against harmful
interference in a residential installation. This equipment generates, uses and can radiate radio frequency energy
and, if not installed and used in accordance with the instructions, may cause harmful interference to radio
communications. However, there is no guarantee that interference will not occur in a particular installation. If this
equipment does cause harmful interference to radio or television reception, which can be determined by turning
the equipment o󰀨 and on, the user is encouraged to try to correct the interference by one or more of the following
measures:
Reorient or relocate the receiving antenna.
Increase the separation between the equipment and receiver.
Connect the equipment into an outlet on a circuit di󰀨erent from that to which the receiver is connected.
Consult the dealer or an experienced radio/TV technician for help.
FCC INFORMATION
Download manual in English (PDF, 2.47 MB)
(Consider the environment and only print this manual if it is really necessary)

Loading…

Rating

Let us know what you think about the Kichler 16024CBR27 VLO Lamp by leaving a product rating. Want to share your experiences with this product or ask a question? Please leave a comment at the bottom of the page.
Are you satisfied with the Kichler 16024CBR27 VLO Lamp?
Yes No
Be the first to rate this product
0 votes

Join the conversation about this product

Here you can share what you think about the Kichler 16024CBR27 VLO Lamp. If you have a question, first carefully read the manual. Requesting a manual can be done by using our contact form.

More about this manual

We understand that it’s nice to have a paper manual for your Kichler 16024CBR27 VLO Lamp. You can always download the manual from our website and print it yourself. If you would like to have an original manual, we recommend you contact Kichler. They might be able to provide an original manual. Are you looking for the manual of your Kichler 16024CBR27 VLO Lamp in a different language? Choose your preferred language on our homepage and search for the model number to see if we have it available.

Specifications

Brand Kichler
Model 16024CBR27 VLO
Category Lamps
File type PDF
File size 2.47 MB

All manuals for Kichler Lamps
More manuals of Lamps

Frequently Asked Questions about Kichler 16024CBR27 VLO Lamp

Our support team searches for useful product information and answers to frequently asked questions. If you find an inaccuracy in our frequently asked questions, please let us know by using our contact form.

Is all LED lighting dimmable? Verified

No, not all LED lights are dimmable. This is indicated on the packaging or the light itself.

This was helpful (462) Read more

I put a new light in my lamp but it won't turn on, why is that? Verified

Some lamps are made for light sources of a specific wattage. When a light source is inserted that requires a higher wattage than the lamp can provide, the light may not turn on. If the lamp delivers a much higher wattage than what the light source is made for, the light source can burn out.

This was helpful (315) Read more

Why is the colour of light important? Verified

There generally are two kinds of light, warm light and cold light. Cold light keeps you sharp and awake. Warm light has a relaxing effect. The warmth of the light is measured in Kelvin and is indicated on the packaging of the lamp itself.

This was helpful (255) Read more

What is lumen? Verified

Lumen is a measuring unit for the total amount of visible light emitted by a source.

This was helpful (190) Read more

What screw bases exist? Verified

Worldwide there many types of sockets, but most used are those based on the Edison screw, indicated with the letter E. In most countries screw bases E27 and E14 are standard. In the United States E26, E17, E12 and E10 are standard.

This was helpful (142) Read more

What do watts say about my lamp? Verified

Watt is a measuring unit for electricity consumption. Lamps that produce more light, generally use more Watt, but for comparing light output you should always use lumen.

This was helpful (113) Read more

What is LED? Verified

LED stands for Light-Emitting Diode. By running power through a semiconductor in the right direction, light is emitted.

This was helpful (98) Read more
Manual Kichler 16024CBR27 VLO Lamp

Related products

Related categories