Manual Kichler 15079AZT Up Lamp

Need a manual for your Kichler 15079AZT Up Lamp? Below you can view and download the PDF manual for free in English. This product currently has 7 frequently asked questions, 0 comments and has 0 votes. If this is not the manual you want, please contact us.

Is your product defective and the manual offers no solution? Go to a Repair Café for free repair services.

Manual

Loading…

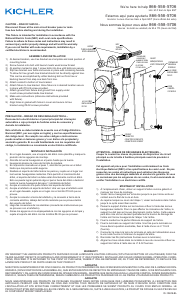
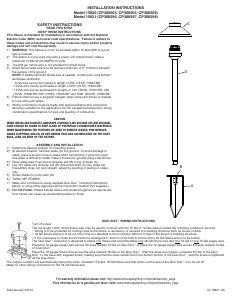
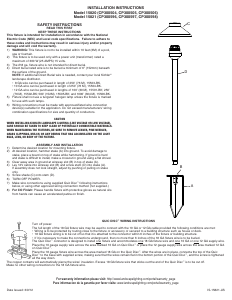
SAFETY INSTRUCTIONS
READ THIS FIRST
KEEP THESE INSTRUCTIONS
CAUTION – RISK OF SHOCK –
Disconnect Power at the main circuit breaker panel or main
fusebox before starting and during the installation.
This xture is intended for installation in accordance with the
National Electric Code (NEC) and Local code specications.
Failure to adhere to these codes and instructions may result in
serious injury and/or property damage and will void the warranty.
If you are not familiar with code requirements, installation by a
certied electrician is recommended.
1) WARNING: This xture is not to be installed within 10 feet (3M)
of a pool, spa or fountain.
2) This xture is to be used only with a power unit (transformer)
rated a maximum of 300 W (25 AMPS) 15 volts.
3) The #18 ga. xture wire is not intended for direct burial.
4) Direct burial rated wire is to be buried a minimum of 6"
(152mm) beneath the surface of the ground.
NOTE: If additional Direct Burial wire is needed, contact your
local Kichler
®
landscape distributor.
8 GA wire can be purchased in length of 250’ (76 M),
15503-BK.
10 GA wire can be purchased in length of 250’ (76 M),
15504-BK.
12 GA wire can be purchased in lengths of 100’ (30 M),
15501-BK; 250’ (76 M), 15502-BK; 500’ (152M), 15505-BK;
and 1000’ (304 M), 15506-BK.
5) Fixture shall not use a tungsten halogen lamp unless the
xture is marked for use with such lamps.
6) Wiring connections must be made with approved/listed wire
connection device(s) suitable for the application. Do not
exceed manufacturers’ wiring combination specications for
size and quantity of conductors.
ASSEMBLY AND INSTALLATION
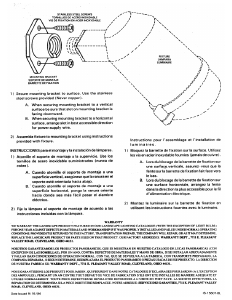
1) Determine desired location for mounting xture.
2) Use mounting strap as a template, mark position for mounting
screws and wireway hole (if desired).
3) Drill 3/32" (2 mm) pilot holes in mounting surface at position
marked for mounting screws. If using a wireway hole, drill 1/4"
(6mm) through mounting surface at position marked.
4) Assemble mounting strap to mounting surface using provided
screws.
5) Screw studs into threaded holes at each end of mounting strap.
6) Pass supply wire through wireway in mounting strap and
mounting surface. Wire may alternately be routed along the
mounting surface by routing the wire through the notch at the
bottom of the canopy.
7) Slip canopy over studs and secure in place using ball knobs.
8) Insert recommended bulbs.
9) Make wire connections using supplied twist-on wire connectors
following instructions on bag.
INSTRUCCIONES DE SEGURIDAD
PRIMERO LEA ESTO
GUARDE ESTAS INSTRUCCIONES
PRECAUCIÓN – RIESGO DE DESCARGA ELÉCTRICA
Desconecte la electricidad en el panel principal del interruptor
automático o caja principal de fusibles antes de comenzar y
durante la instalación.
Este artefacto se debe instalar de acuerdo con el Código Eléc-
trico Nacional (NEC, por sus siglas en inglés) y con las especi-
caciones del código local. No cumplir con estos códigos e
instrucciones puede resultar en lesiones graves y/ o en daños a
la propiedad y anulará la garantía. Si no está familiarizado con
los requisitos del código, la instalación se recomienda un electri-
cista certicado.
1) ADVERTENCIA: Este artefacto no debe instalarse a menos de
10 pies (3 m) de una piscina (alberca), spa o fuente.
2) Este artefacto debe utilizarse solamente con una unidad de
potencia (tranformador) con capacidad nominal máxima de
300 vatios (25 amp.) 15 voltios.
3) El alambre del artefacto calibre No. 18 no es para soterrado
directo.
4) El alambre clasicado para soterrado directo se debe enterrar
un mínimo de 6 pulgadas (152 mm) debajo de la supercie del
terreno.
NOTA: Si necesita alambre de soterrado directo adicional,
comuníquese con su distribuidor local Kichler® de productos de
jardinería ornamental.
For warranty information please visit: kichler.com/warranty
Para informacion de la garantia por favor visite: kichler.com/warranty
IS-15079-US
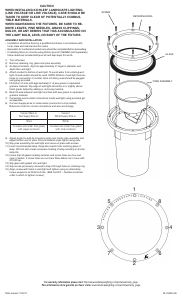
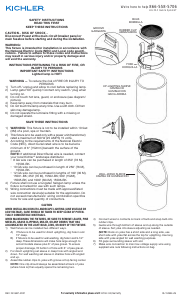
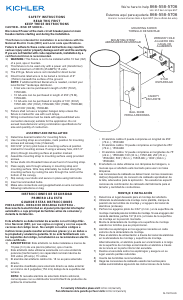
MOUNTING SCREW
TORNILLO DE MONTAJE
MOUNTING STRAP
ABRAZADERA DE MONTAJE
WIREWAY HOLE
AGUJERO DEL
CANAL DE
ALAMBRES
STUD
ESPARRAGO
BALL KNOB
PERILLA REDONDA
CANOPY
ESCUDETE
El alambre calibre 8 puede comprarse en longitud de 250’
(76 m.), 15503-BK
El alambre calibre 10 puede comprarse en longitud de 250’
(76 m.), 15504-BK
El alambre calibre 12 puede comprarse en longitudes de 75’
(22 m.), 15550-BK; 100’ (30 m.), 15501-BK; 250’ (76 m.),
15502-BK; 500’ (152 m.), 15505-BK; y 1000’ (304 m.),
15506-BK.
5) El artefacto no debe utilizarse con lámparas de halógeno, a
menoss que el artefacto esté marcado para usar con tales
lámparas.
6) Las conexiones de cableado se deben hacer con las conexiones
del(los) dispositivos) de conexión de cableado aprobados/ de
la lista, adecuados para la aplicación. No exceda las especi
caciones de combinación de cableado del fabricante para el
tamaño y cantidad de conductores.
MONTAJE E INSTALACIÓN
1) Determine el lugar deseado para el montaje del artefacto.
2) Utilizando la abrazadera de montaje como plantilla, marque la
posición de los tornillos de montaje y el agujero del canal de
alambres (si desea).
3) Perfore los agujeros piloto de 3/32" (2 mm.) en la supercie de
montaje marcada para los tornillos de montaje. Si usa el agujero del
canal de alambres, perfore 1/4" (6 mm.) a través de la supercie
de montaje en la posición marcada.
4) Monte la abrazadera de montaje a la supercie de montaje
usando los tornillos que se proporcionan.
5) Atornille los espárragos en los agujeros roscados en cada
extremo de la abrazadera de montaje.
6) Pase el alambre de alimentación a través del canal de alambres
en la abrazadera de montaje y supercie de montaje.
Alternativamente, el alambre puede ser encaminado a lo largo
de la supercie de montaje encaminando el alambre a través
de la ranura en la parte inferior del escudete.
7) Deslice el escudete sobre los espárragos y asegure en su
lugar usando perillas redondas.
8) Inserte las bombillas recomendadas.
9) Haga las conexiones de cableado usando las tuercas para
cables suministrados siguiendo las instrucciones de la bolsa.
We’re here to help 866-558-5706
Hrs: M-F 9am to 5pm EST
Estamos aquí para ayudarle 866-558-5706
Horario: Lunes-Viernes 9am a 5pm EST (hora ocial del este)
Download manual in English (PDF, 0.18 MB)
(Consider the environment and only print this manual if it is really necessary)

Loading…

Rating

Let us know what you think about the Kichler 15079AZT Up Lamp by leaving a product rating. Want to share your experiences with this product or ask a question? Please leave a comment at the bottom of the page.
Are you satisfied with the Kichler 15079AZT Up Lamp?
Yes No
Be the first to rate this product
0 votes

Join the conversation about this product

Here you can share what you think about the Kichler 15079AZT Up Lamp. If you have a question, first carefully read the manual. Requesting a manual can be done by using our contact form.

More about this manual

We understand that it’s nice to have a paper manual for your Kichler 15079AZT Up Lamp. You can always download the manual from our website and print it yourself. If you would like to have an original manual, we recommend you contact Kichler. They might be able to provide an original manual. Are you looking for the manual of your Kichler 15079AZT Up Lamp in a different language? Choose your preferred language on our homepage and search for the model number to see if we have it available.

Specifications

Brand Kichler
Model 15079AZT Up
Category Lamps
File type PDF
File size 0.18 MB

All manuals for Kichler Lamps
More manuals of Lamps

Frequently Asked Questions about Kichler 15079AZT Up Lamp

Our support team searches for useful product information and answers to frequently asked questions. If you find an inaccuracy in our frequently asked questions, please let us know by using our contact form.

Is all LED lighting dimmable? Verified

No, not all LED lights are dimmable. This is indicated on the packaging or the light itself.

This was helpful (462) Read more

I put a new light in my lamp but it won't turn on, why is that? Verified

Some lamps are made for light sources of a specific wattage. When a light source is inserted that requires a higher wattage than the lamp can provide, the light may not turn on. If the lamp delivers a much higher wattage than what the light source is made for, the light source can burn out.

This was helpful (315) Read more

Why is the colour of light important? Verified

There generally are two kinds of light, warm light and cold light. Cold light keeps you sharp and awake. Warm light has a relaxing effect. The warmth of the light is measured in Kelvin and is indicated on the packaging of the lamp itself.

This was helpful (255) Read more

What is lumen? Verified

Lumen is a measuring unit for the total amount of visible light emitted by a source.

This was helpful (190) Read more

What screw bases exist? Verified

Worldwide there many types of sockets, but most used are those based on the Edison screw, indicated with the letter E. In most countries screw bases E27 and E14 are standard. In the United States E26, E17, E12 and E10 are standard.

This was helpful (142) Read more

What do watts say about my lamp? Verified

Watt is a measuring unit for electricity consumption. Lamps that produce more light, generally use more Watt, but for comparing light output you should always use lumen.

This was helpful (113) Read more

What is LED? Verified

LED stands for Light-Emitting Diode. By running power through a semiconductor in the right direction, light is emitted.

This was helpful (98) Read more
Manual Kichler 15079AZT Up Lamp

Related products

Related categories