Manual Inventum MO2600 Freezer
Need a manual for your Inventum MO2600 Freezer? Below you can view and download the PDF manual for free in English. This product currently has 12 frequently asked questions, 0 comments and has 0 votes. If this is not the manual you want, please contact us.
Is your product defective and the manual offers no solution? Go to a Repair Café for free repair services.
Manual
Loading…


Loading…
Rating
Let us know what you think about the Inventum MO2600 Freezer by leaving a product rating. Want to share your experiences with this product or ask a question? Please leave a comment at the bottom of the page.More about this manual
We understand that it’s nice to have a paper manual for your Inventum MO2600 Freezer. You can always download the manual from our website and print it yourself. If you would like to have an original manual, we recommend you contact Inventum. They might be able to provide an original manual. Are you looking for the manual of your Inventum MO2600 Freezer in a different language? Choose your preferred language on our homepage and search for the model number to see if we have it available.
Specifications
| Brand | Inventum |
| Model | MO2600 |
| Category | Freezers |
| File type | |
| File size | 1.58 MB |
All manuals for Inventum Freezers
More manuals of Freezers
Frequently Asked Questions about Inventum MO2600 Freezer
Our support team searches for useful product information and answers to frequently asked questions. If you find an inaccuracy in our frequently asked questions, please let us know by using our contact form.
If I want my freezer to be colder, should I choose for a higher or lower setting? Verified
With most freezers a higher setting means the machine will cool harder. With a lower setting, the machine will cool less hard and the temperature in the freezer will be higher.
This was helpful (1959) Read moreHow often should I defrost my freezer? Verified
For optimal use of the freezer it is best to defrost it once every 3-6 months. Ice on the inside of the freezer reduces the available space and increases the use of energy. The thawing process can be accelerated by placing hot water in the drawer or placing bowls of hot water in the freezer.
This was helpful (917) Read moreWhat does NoFrost mean? Verified
Freezers that have NoFrost technology can keep the air in the freezer dry, resulting in less ice forming inside.
This was helpful (820) Read moreI bought a new freezer, can I turn it on immediately? Verified
No, the freezer needs to stand in an upright position for at least 4 hours before it can be turned on. This is because the coolant liquid needs to settle.
This was helpful (726) Read moreCan I put warm food or drinks in my freezer? Verified
Preferably not. The temperature in your freezer will rise, which negatively impacts the other items that are stored inside.
This was helpful (674) Read moreHow long does it take for my freezer to reach the set temperature after I turn it on? Verified
This depends on the size, age and model of the freezer. It may take several hours to 24 hours for the freezer to reach the set temperature. The process can be accelerated by placing non-perishable goods in the freezer.
This was helpful (644) Read moreWhat do the stars on the freezer mean? Verified
The stars indicate the freezing capacity. 1 star indicates a freezing capacity down to -6ºC. This makes the freezer suitable for making ice cubes or storing previously frozen goods for up to two weeks. Fresh food cannot be frozen. 2 stars indicates a freezing capacity down to -12ºC. This makes the freezer suitable for storing previously frozen goods for up to two months. Fresh food cannot be frozen. 3 stars indicates a freezing capacity down to -18ºC. This makes the freezer suitable
This was helpful (640) Read moreCan I change the opening direction of the door of my freezer? Verified
Yes, nearly all standing freezers offer the option to place the door on the other side. How to do this can generally be found in the manual.
This was helpful (638) Read moreHow much space should I leave betwee my freezer and the wall? Verified
To ensure a good ventilation it's best to leave at least 5cm of free space on both sides and the back of the freezer.
This was helpful (409) Read moreDe door of my freezer will not close properly, why is that? Verified
The two most common causes are that the freezer is not level and that the door seal is damaged or has food remains on it. Make sure the freezer is level and check the door seal. Replace the seal if neccesary.
This was helpful (366) Read moreThere is mold on the rubber seals of my freezer, what should I do? Verified
The rubber seals are not actually inside the freezer and are therefore warmer. This allows bacteria to grow and mold to form. Clean the rubbers regularly to prevent this.
This was helpful (219) Read moreWhat is R-410A? Verified
R-410A is a cooling agent that is used in appliances that cool up to 0°C, like refrigerators and air conditioners. It is the replacement of older cooling agents and does not damage the ozon layer.
This was helpful (201) Read more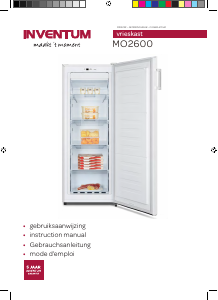

Join the conversation about this product
Here you can share what you think about the Inventum MO2600 Freezer. If you have a question, first carefully read the manual. Requesting a manual can be done by using our contact form.