Manual Hunter 19269 Felippe Lamp

Need a manual for your Hunter 19269 Felippe Lamp? Below you can view and download the PDF manual for free in English. This product currently has 7 frequently asked questions, 0 comments and has 0 votes. If this is not the manual you want, please contact us.

Is your product defective and the manual offers no solution? Go to a Repair Café for free repair services.

Manual

Loading…

INSTALLATION INSTRUCTIONS
INSTRUCCIONES DE INSTALACIÓN/ INSTRUCTIONS D’INSTALLATION
For Models:
Para los Modelos:
Pour les Modèles:
Here are the
tools you’ll
need to
complete your
installation:
Estas son las
herramientas
que usted
necesitará para
completar su
instalación:
Voici les outils
dont vous
aurez besoin
pour réaliser
l’installation:
Ladder
Escalera
Échelle
Pliers
Alicates
Pince
Wire Strippers
Pelacables
Pince à dénuder
READ AND SAVE THESE INSTRUCTIONS
These instructions are provided for your safety. It
is very important that they are read carefully and
completely before beginning installation of the
lighting xture.
LEA Y GUARDE ESTAS INSTRUCCIONES
Estas instrucciones se proporcionan para su
seguridad. Es muy importante leerlas detenid-
amente y completamente antes de comenzar la
instalación de la lámpara.
LISEZ ET CONSERVEZ CES INSTRUCTIONS
Ces instructions sont fournies pour votre sécurité.
Il est très important de les lire attentivement dans
leur intégralité avant d’entreprendre l’installation
du luminaire.
Fixture weight ±2 lbs:
Peso ±2 lb:
Poids xe ±2 lbs:
WARNING
All wiring must be in accordance with national
and local electrical codes ANSI/NFPA 70. If you
are unfamiliar with wiring or in doubt, consult a
qualied electrician.
• To avoid possible electrical shock, before
installing your light xture, disconnect the power
by turning off the circuit breakers to the outlet box
associated with the wall switch location.
The lighting xture must be grounded. If the
ground wire for the installation site is not present,
immediately STOP installation and consult a
qualied electrician.
Todo el cableado debe realizarse de acuerdo con
los códigos eléctricos locales y nacionales ANSI/
NFPA 70. Si no está familiarizado con el cableado,
o si tiene duda, consulte a un electricista calicado.
• Para evitar una posible descarga eléctrica, antes
de instalar su lámpara, desconecte la energía
apagando los interruptores automáticos (breakers)
que alimentan la caja de salida asociada con la
ubicación del interruptor de pared.
ADVERTENCIA
Lappareil d’éclairage doit être mis à la terre.
Si le l de terre du lieu d’installation n’est pas
présent, ARRÊTEZ immédiatement l’installation et
consultez un électricien qualié.
AVERTISSEMENT
Tout le câblage doit être conforme aux codes
électriques nationaux et locaux en vigueur et à la
norme ANSI/NFPA70. Si vous n'avez pas l'habitude
de faire ce câblage ou en cas de doute, adressez-
vous à un électricien qualié.
• Pour éviter tout choc électrique, avant d’installer
le luminaire, coupez le courant en éteignant les
disjoncteurs de la boîte électrique associée à
l’interrupteur mural.
Le luminaire doit être mis à la terre. Si le l
de terre du lieu d’installation n’est pas présent,
ARRÊTER immédiatement l’installation et
consulter un électricien qualié.
©2021 Hunter Fan Co.
Light Flush Mount
Luz Empotrado
Lumière Montage Afeurant
Part #/Pieza #/Pièce #
Hardware Service Kit/Kit De Mantenimiento Del Equipo/Trousse De
Maintenance Quincaillerie
Glass/Domo De Vidrio/Verre
Part #/Pieza #/Pièce #
ENGLISH
Finish/Finish/FiniModel/Modelo/Modèle
Type/Tipo/TypeModel/Modelo/ Modèle
Screwdriver
Destornilladore
Tournevis
A
B
E
D
C
F
G
I
H
J
K
19269
19979
Felippe
KD83301872
KD83301632
Natural Iron/Hierro Natural/
Fer Naturel
Onyx Bengal/Bengala Ónix/
Onyx du Bengale
19269
19979
KD52601046
Clear Seeded Glass/Vidrio
Transparente Con Burbujas/
Verre Piqueté Transparent
19269
19979
ML125
R_082321
6.17 lbs (2.80 kg)
4
4
4
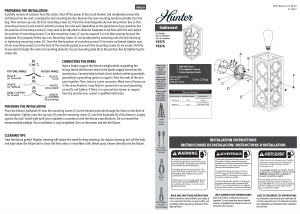
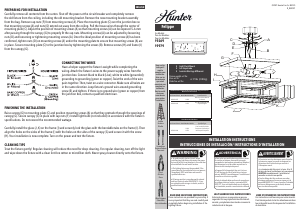
FINISHING THE INSTALLATION
CONNECTING THE WIRES
PREPARING FOR INSTALLATION
CLEANING TIPS
Treat the xture gently! Regular cleaning will reduce the need for deep cleaning. For regular cleaning, turn off the light
and wipe down the xture with a clean lint-free cotton or microber cloth. Never spray cleaner directly onto the xture.
Carefully remove all contents from the carton. Shut off the power at the circuit breaker and completely remove
the old xture from the ceiling, including the old mounting bracket. Remove the new mounting bracket assembly
from the bag. Remove cap nuts (F) from mounting screws (A). Place the mounting plate (C) over the junction box so
that mounting screws (A) and nuts (D) extend out away from the ceiling. Pull the house wires through the center of
mounting plate (C). Adjust the position of mounting screws (A) so that mounting screws (A) can be exposed 5–6 mm
after passing through the canopy (G) to properly t the cap nuts. Mounting screws (A) can be adjusted by loosening
nuts (D) and loosening or tightening mounting screws (A). Once the ideal position of mounting screws (A) has been
conrmed, tighten nuts (D) on mounting screws (A) under the mounting plate to ensure that mounting screws (A) are
in place. Secure mounting plate (C) to the junction box by tightening the screws (B). Remove screws (H) and frame (I)
from the canopy (G).
Have a helper support the xture’s weight while completing the
wiring. Attach the xture’s wires to the power supply wires from the
junction box. Connect black to black (Live); white to white (grounded);
grounding to grounding (green or copper). Twist the ends of the wire
pairs together. Then, twist on a wire connector. Make sure all twists are
in the same direction. Loop xture’s ground wire around grounding
screw (E) and tighten. If there is no ground wire (green or copper) from
the junction box, contact a qualied electrician.
Raise canopy (G) to mounting plate (C) and position mounting screws (A) so that they protrude through the openings of
canopy (G). Secure canopy (G) in place with cap nuts (F). Install light bulb (not included) in accordance with the xture’s
specications. Do not exceed the recommended wattage.
Carefully install the glass (J, K) on the frame (I) and securely lock the glass with the bendable tabs on the frame (I). Then
align the holes on the sides of the frame (I) with the holes on the sides of the canopy (G) and secure it with the screw
(H). Your installation is now complete. Turn on the power and test the xture.
Download manual in English (PDF, 0.65 MB)
(Consider the environment and only print this manual if it is really necessary)

Loading…

Rating

Let us know what you think about the Hunter 19269 Felippe Lamp by leaving a product rating. Want to share your experiences with this product or ask a question? Please leave a comment at the bottom of the page.
Are you satisfied with the Hunter 19269 Felippe Lamp?
Yes No
Be the first to rate this product
0 votes

Join the conversation about this product

Here you can share what you think about the Hunter 19269 Felippe Lamp. If you have a question, first carefully read the manual. Requesting a manual can be done by using our contact form.

More about this manual

We understand that it’s nice to have a paper manual for your Hunter 19269 Felippe Lamp. You can always download the manual from our website and print it yourself. If you would like to have an original manual, we recommend you contact Hunter. They might be able to provide an original manual. Are you looking for the manual of your Hunter 19269 Felippe Lamp in a different language? Choose your preferred language on our homepage and search for the model number to see if we have it available.

Specifications

Brand Hunter
Model 19269 Felippe
Category Lamps
File type PDF
File size 0.65 MB

All manuals for Hunter Lamps
More manuals of Lamps

Frequently Asked Questions about Hunter 19269 Felippe Lamp

Our support team searches for useful product information and answers to frequently asked questions. If you find an inaccuracy in our frequently asked questions, please let us know by using our contact form.

Is all LED lighting dimmable? Verified

No, not all LED lights are dimmable. This is indicated on the packaging or the light itself.

This was helpful (462) Read more

I put a new light in my lamp but it won't turn on, why is that? Verified

Some lamps are made for light sources of a specific wattage. When a light source is inserted that requires a higher wattage than the lamp can provide, the light may not turn on. If the lamp delivers a much higher wattage than what the light source is made for, the light source can burn out.

This was helpful (314) Read more

Why is the colour of light important? Verified

There generally are two kinds of light, warm light and cold light. Cold light keeps you sharp and awake. Warm light has a relaxing effect. The warmth of the light is measured in Kelvin and is indicated on the packaging of the lamp itself.

This was helpful (255) Read more

What is lumen? Verified

Lumen is a measuring unit for the total amount of visible light emitted by a source.

This was helpful (190) Read more

What screw bases exist? Verified

Worldwide there many types of sockets, but most used are those based on the Edison screw, indicated with the letter E. In most countries screw bases E27 and E14 are standard. In the United States E26, E17, E12 and E10 are standard.

This was helpful (142) Read more

What do watts say about my lamp? Verified

Watt is a measuring unit for electricity consumption. Lamps that produce more light, generally use more Watt, but for comparing light output you should always use lumen.

This was helpful (113) Read more

What is LED? Verified

LED stands for Light-Emitting Diode. By running power through a semiconductor in the right direction, light is emitted.

This was helpful (97) Read more
Manual Hunter 19269 Felippe Lamp

Related products

Related categories