Manual Brandt WTC1015K Washing Machine
Need a manual for your Brandt WTC1015K Washing Machine? Below you can view and download the PDF manual for free in English. This product currently has 12 frequently asked questions, 0 comments and has 0 votes. If this is not the manual you want, please contact us.
Is your product defective and the manual offers no solution? Go to a Repair Café for free repair services.
Manual
Loading…

Loading…
Rating
Let us know what you think about the Brandt WTC1015K Washing Machine by leaving a product rating. Want to share your experiences with this product or ask a question? Please leave a comment at the bottom of the page.More about this manual
We understand that it’s nice to have a paper manual for your Brandt WTC1015K Washing Machine. You can always download the manual from our website and print it yourself. If you would like to have an original manual, we recommend you contact Brandt. They might be able to provide an original manual. Are you looking for the manual of your Brandt WTC1015K Washing Machine in a different language? Choose your preferred language on our homepage and search for the model number to see if we have it available.
Specifications
| Brand | Brandt |
| Model | WTC1015K |
| Category | Washing Machines |
| File type | |
| File size | 0.65 MB |
All manuals for Brandt Washing Machines
More manuals of Washing Machines
Frequently Asked Questions about Brandt WTC1015K Washing Machine
Our support team searches for useful product information and answers to frequently asked questions. If you find an inaccuracy in our frequently asked questions, please let us know by using our contact form.
My washing machine won't start when I press the start-button, what can I do? Verified
In many cases the door of the washing machine hasn't closed properly. Open and close the door and try again.
This was helpful (23653) Read moreMy washing machine won’t drain, what can I do? Verified
The main reason a washing machine won’t drain is because of blockage in either the pump or the drain hose. If your washing machine has access to these parts, try to remove any blockage. If this does not solve the problem or if you don’t have access to these parts you should contact a mechanic or the manufacturer.
This was helpful (22848) Read moreThere is no water coming into my washing machine, what can I do? Verified
Check if the water inlet is open and if there aren't any kinks in the hose of the water inlet. If this doesn't solve the problem you should contact the manufacturer.
This was helpful (9075) Read moreThe door of my washing machine won't open, what can I do? Verified
There can be several causes. The most common cause is the filter being clogged. Unplug the appliance and check the filter. Remove any blockage if necessary. The location of the filter is different depening on the model. It is also possible that there is a special lever to open the door. If these options don't help, the last option is unplug the appliance for a period of 30-60 minutes and try to open the door after that. If this doesn't work, contact the manufacturer or a mechanic.
This was helpful (7674) Read moreMy washing machine makes a lot of noice and/or vibrates loudly, what can I do about that? Verified
It's possible that the washing machine has not been leveled. You can do this by adjusting the feet to make it perfectly level. The problem can also be caused by inserting to much clothes in the machine. If these are not the cause of your problem you should contact the manufacturer.
This was helpful (6528) Read moreIn which compartment should the detergent go? Verified
Most washing machines have 3 compartments for detergent. These compartments are often marked with I, II and * to show where the detergent goes. Compartment I is used for a pre-wash cycle, II is for the main wash cycle and * is for fabric softener. Compartment II is used most often.
This was helpful (4531) Read moreMy washing machine smells, what can I do about it? Verified
There are washing machines with self-cleaning features. If these features are not available it's possible to add 100ml of white vinegar or 100gr of soda crystals and have the washing machine run a 90 ℃ program.
This was helpful (3758) Read moreCan I connect my washing machine to a warm water outlet? Verified
Although washing machines can probably handle water intake up to 65°C, this is not recommended by most manufacturers. There are wash cycles that specifically make use of cold water. In those cases warm water can harm the results of your wash cycle. Also, many washing machines are designed to be connected to a cold water outlet.
This was helpful (2880) Read moreWhat should I pay attention to when moving a washing machine? Verified
When moving a washing machine, you should secure the drum. You can use the transit bolt which come with every washing machine and will prevent the drum from moving around inside the machine. You also need to drain all the water.
This was helpful (1460) Read moreWhat is the difference in usage between a washer-dryer and a separate washing machine and dryer? Verified
The biggest advantage of a washer-dryer is that it takes less space. However, a separate dryer will be able to dry more than a washer-dryer. A washer-dryer also uses relatively more energy and requires more time.
This was helpful (1161) Read moreCan I stack my dryer and washing machine? Verified
In general it is possible to directly stack a dryer and washing machine directly on top of each other. This only works with front loading models. However, it is advisable to use a fitting accessory to do so. This will prevent the machines from vibrating and falling off and also prevents damage to the bottom machine.
This was helpful (1160) Read moreCan I connect a washing machine to an extension cord? Verified
Appliances that require large amounts of power, like a washing machine, can not be connected to all extension cords. See what the power usage of the washing machine is, which is indicated in Watt, and check if the extension cord can handle this. There are extension cords with thicker cables that are made to handle larger appliances.
This was helpful (1159) Read more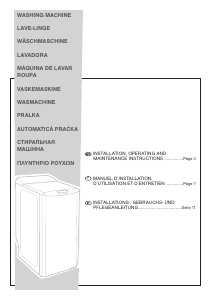


Join the conversation about this product
Here you can share what you think about the Brandt WTC1015K Washing Machine. If you have a question, first carefully read the manual. Requesting a manual can be done by using our contact form.