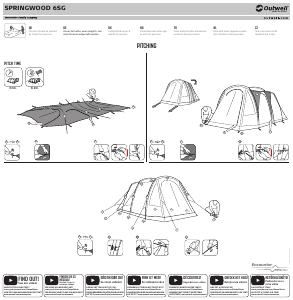
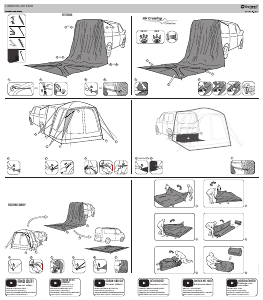
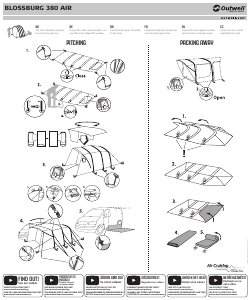
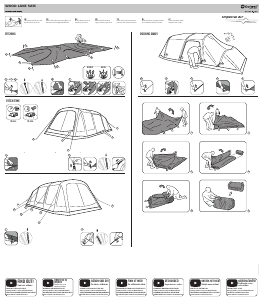
Manual Outwell Hartford XL Tent

Need a manual for your Outwell Hartford XL Tent? Below you can view and download the PDF manual for free in English. This product currently has 8 frequently asked questions, 0 comments and has 0 votes. If this is not the manual you want, please contact us.

Is your product defective and the manual offers no solution? Go to a Repair Café for free repair services.

Manual

Loading…

Entrance
UK Setting-up instructions
D Aufbauanleitung
DK Opstillingsvejledning
TELTET BØR REJSES AF MINDST 2 PERSONER
THIS TENT SHOULD BE ERECTED BY AT LEAST 2 PERSONS
DIESES ZELT SOLLTE, WENN MÖGLICH VON 2 PERSONEN
AUFGESTELLT WERDEN
ENDELIG FASTGØRELSE AF BARDUNLINER
FINALLY SECURE THE TENT AGAINST STRONG WIND
SPANNEN SIE ZUM SCHLUSS DAS ZELT
”RING & PIN” SYSTEM FOR NEM OPSÆTNING
”RING & PIN” SYSTEM FOR EASY SET UP
”RING & PIN” SYSTEM FÜR LEICHTEN AUFBAU
2
3
4
1
2
3
4
1
FØR STÆNGERNE IGENNEM KANALERNE MARKERET MED DE
MATCHENDE FARVER
PUSH IN THE POLES IN THEIR POLE SLEEVES MARKED WITH
MATCHING COLOURS
SCHIEBEN SIE DIE GESTÄNGE IN DIE KANÄLE MIT
ÜBEREINSTIMMENDER FARBKODIERUNG
1
2
1
2
3
4
4
3
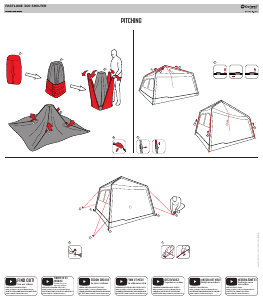
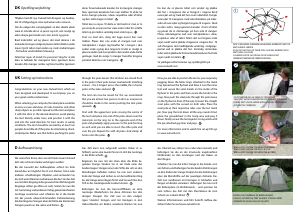
Congratulations on your new Outwell tent, which we
have designed and developed to accompany you on
your great outdoor adventures.
When selecting your campsite, the ideal place would be
an area as even and clean of rocks, branches and other
sharp objects as possible. Spread out the tent and place
it with the door in the desired direction, avoid placing
the tent directly under trees, and position it with the
end into the wind direction, for best results in windy
conditions. The tent should be erected by at least two
people! Assemble all of the poles be interlocking shock-
corded poles. Make sure that before pushing the poles
through the pole sleeves that all doors are closed. Push
in the pole in their pole sleeves marked with matching
colours – the 3 longest across the middle, the 3 shorter
poles at the sides and end.
The tent can now be raised. For this we recommend
that you are at least two persons to do it, as one person
should be inside in the centre pushing the tent poles
upwards.
Start with the uppermost pole crossing the centre of
the tent and place one end of the poles down over the
metal pin on the ring. Go to the opposite end of the
pole and gradually apply pressure to the pole forming
an arch until you are able to insert the other pole end
over the pin. Repeat this with all poles. And clamp all
hooks onto the poles.
Now you are able to position the tent as your require by
pegging down the fabric loops attached to the metal
ring. Spread out the flysheet and draw it over the inner
tent and secure the velco bands on the inside of the
flysheet to the poles and then secure the hooks to the
rings. Now push the steel pole through the pole sleeve
on the flysheet in front of the tent. Connect the straight
steel poles with the curved on both sides. Place the
steel pole at their respective sides over the last metal
pin. Now peg the tent down all the way round. At last
place the groundsheet in the living area and peg it
down. Finally secure the tent against strong winds with
the pre-attached guy lines and pegs.
For more information and to watch the set-up film go
to www.outwell.com
das Überzelt aus, ziehen Sie es über das Innenzelt, und
befestigen Sie die an der Innenseite angebrachten
Klettbänder an den Gestängen und die Haken an
den Ringen.
Schieben Sie nun die letzte Stange in die Kanäle vorn
am Zelt ein, und befestigen Sie die beiden Stahlstangen
an den Enden der Stange. Stülpen Sie die Stahlstangen
über die Metallstifte auf der jeweiligen Zeltseite. Das
Zelt nun rundherum mit Heringen in Schlaufen und
Ringen am Boden verankern. Befestigen Sie nun noch
die Bodenplane im Wohnbereich, - und spannen Sie
zum Schluss das Zelt mit den Sturmleinen ab zum
Schutz vor starkem Wind.
Weitere Informationen und Film betreffs Aufbau des
Zeltes finden Sie auf www.outwell.com
Wir wünschen Ihnen, dass Sie mit Ihrem neuen Outwell
Zelt viele schöne Urlaube verbringen werden.
Bei der Auswahl des Aufbauplatzes achten Sie bitte
darauf, dass er möglichst frei ist von Steinen, Ästen oder
anderen scharfkantigen Objekten, und vermeiden Sie,
das Zelt unter Bäumen aufzubauen. Breiten Sie das Zelt
aus, mit dem Eingang in der gewünschten Richtung (alle
Eingänge sollten geschlossen sein). Setzen Sie nun die
mit Gummizug verbundenen farbig gekennzeichneten
Gestänge zusammen und schieben Sie in die Kanäle
mit der jeweils übereinstimmenden Farbmarkierung,
die drei längsten Stangen über die Mitte, die drei kürzen
Stangen jeweils an die seiten und hinten.
Das Zelt kann nun aufgestellt werden. Dabei ist es
hilfreich, wenn eine zweite Person im Zelt die Gestänge
in der Mitte anhebt.
Beginnen Sie nun mit der oben über die Mitte lie-
genden Stange. Stecken Sie in ein Ende einer der
beiden langen Stangen einen der Stifte, die sich an den
Metallringen befinden. Gehen Sie nun zum anderen
Ende der Stange und ziehen sie am benachbarten Ring
bis die Stange einen Bogen formt und Sie auch hier den
Stift in das Gestängeende stecken können.
Befestigen Sie nun die Kunststoffhaken an dem
Gestänge. Wiederholen Sie diese Aktionen bei den
übrigen Stangen. Das Zelt nun an den endgül-
tigen Standort bringen und mit Heringen in den
Halteschlaufen am Boden verankern. Breiten Sie nun
Tillykke med dit nye Outwell telt designet og bearbej-
det til at følge dig på store oplevelser ude i naturen.
r du vælger din campingplads vil den ideelle plads
re et område der er så jævnt og rent som muligt og
uden skarpe genstande som sten, kviste og grene.
Bred inderteltet ud og placer det med dørene i de
ønskede retninger, undgå at placere teltet direkte under
træer. Opstil teltet med enden op mod vindretningen
- for bedste vindstabilitet i blæsevejr.
Teltet r rejses af mindst to personer! rg for at alle
re er lukkede før sngerne føres igennem deres
kanaler. Alle stænger samles og føres herefter igennem
deres farvemarkerede kanaler. De tre ngste stænger
res igennem kanalerne hen over midten. To af de tre
korte stænger placeres i deres respektive sider af teltet
og den sidste bagerst i teltet.
Teltet kan nu rejses. Til dette er det bedst at man er to
personer, da en person bør være inde i teltet for at løfte
teltet op midten samtidig med at det rejses.
Start nu med den stang der ligge øverst hen over
midten. Placer den ene ende af stangen ned over
metalpinden i ringen tag herefter fat i stangen i den
anden ende og bøj den langsomt til det er muligt at
placere enden ned over pinden i den anden ende. Dette
gentages med de øvrige 5 stænger hvorefter krogene
teltet klemmes om stængerne.
Nu kan du så placere teltet som ønsket og pløkke
det fast i stropperne der er fastgjort i ringene. Bred
oversejlet ud og træk det hen over inderteltet. Fastgør
oversejlet til stængerne med velcrobåndene på inder-
siden af oversejlet og fastgør krogene til ringene. Skub
nu den sidste stang igennem kanalen i front af teltet
og påsæt de to stålstænger hver side af stangen.
Placer stålstængerne ned over metalpindene i deres
respektive sider af teltet. Teltet skal nu fastgøres hele
vejen rundt ved at pkke stropperne i ringene fast. Til
sidst fastgøres det medfølgende underlag i indgangs-
partiet ved at pløkke det fast. Samtidig stormsikres
teltet ved at pløkke de formonterede barduner fast hele
vejen rundt om teltet.
Se yderligere informationer og opstillingsfilm
www.outwell.com
Download manual in English (PDF, 0.07 MB)
(Consider the environment and only print this manual if it is really necessary)

Loading…

Rating

Let us know what you think about the Outwell Hartford XL Tent by leaving a product rating. Want to share your experiences with this product or ask a question? Please leave a comment at the bottom of the page.
Are you satisfied with the Outwell Hartford XL Tent?
Yes No
Be the first to rate this product
0 votes

Join the conversation about this product

Here you can share what you think about the Outwell Hartford XL Tent. If you have a question, first carefully read the manual. Requesting a manual can be done by using our contact form.

More about this manual

We understand that it’s nice to have a paper manual for your Outwell Hartford XL Tent. You can always download the manual from our website and print it yourself. If you would like to have an original manual, we recommend you contact Outwell. They might be able to provide an original manual. Are you looking for the manual of your Outwell Hartford XL Tent in a different language? Choose your preferred language on our homepage and search for the model number to see if we have it available.

Specifications

Brand Outwell
Model Hartford XL
Category Tents
File type PDF
File size 0.07 MB

All manuals for Outwell Tents
More manuals of Tents

Frequently Asked Questions about Outwell Hartford XL Tent

Our support team searches for useful product information and answers to frequently asked questions. If you find an inaccuracy in our frequently asked questions, please let us know by using our contact form.

Can I store my tent when it's wet? Verified

Only for very short periods of time. When a tent is stored while wet for a week or longer, it can get moldy. This is harmful for your tent and possibly your health.

This was helpful (384) Read more

How do I impregnate a tent? Verified

Pitch the tent, clean the cloth and let it dry. Apply the impregnation agent on the cloth with a plant sprayer or other spray. It is also possible to use a paint roller or brush. The cloth needs to be fully saturated with the impregnation agent. Also treat the inside of the tent. Thoroughly clean any windows with a moist cloth. Do not let the impregnation agent dry on it. Let the tent cloth fully dry. Repeat the treatment if needed.

This was helpful (285) Read more

Can I repair a tear or hole in the canvas of my tent myself? Verified

There are special pieces of self-adhesive patches of cloth available for synthetic tent canvases. Stick one of these patches on both sides of the hole or tear. For cotton tent canvases or mixed material tent canvases it's best to use patches that can be ironed on. This will require an iron.

This was helpful (218) Read more

The zipper of my tent won't run smoothly, what can I do? Verified

When a zipper is running smoothly, use a dry PTFE spray or silicone spray. Do not spray onto the cloth and preventively spray to prevent future problems.

This was helpful (156) Read more

There are water drops on the inside of the tent, does this mean it is leaking? Verified

No, this is probably condensation. Make sure the tent is properly ventilated to keep condensation at a minimum.

This was helpful (129) Read more

What tent pegs are best to use for which surfaces? Verified

On grassland or forest surfaces you can use semi circular or plastic pegs. On rocky surfaces you need to use rock pegs. On clay surfaces you can use semi circular, plastic or universal pegs. On gravel surfaces you need semi circular or universal pegs and on sand you need to use wooden pegs.

This was helpful (105) Read more

The impregnation agent leaves white stains or a white haze on the tent cloth, what can I do about this? Verified

If the agent leaves a white haze or white stains on the tent cloth, this means you have applied more impregnation agent on those areas. This is not harmful and the stains often disappear over time. It is not advisable to use less impregnation agent to prevent stains. The cloth needs to be fully saturated with the impregnation agent to give good results.

This was helpful (97) Read more

Can I use my Outwell tent for a period of a month or longer? Verified

Outwell Tents are made for use during holidays and are not specifically designed or tested for use over extended periods of time.

This was helpful (40) Read more
Manual Outwell Hartford XL Tent

Related products

Related categories