Manual Whirlpool WOD77EC7HV Oven

Need a manual for your Whirlpool WOD77EC7HV Oven? Below you can view and download the PDF manual for free in English. This product currently has 6 frequently asked questions, 0 comments and has 0 votes. If this is not the manual you want, please contact us.

Is your product defective and the manual offers no solution? Go to a Repair Café for free repair services.
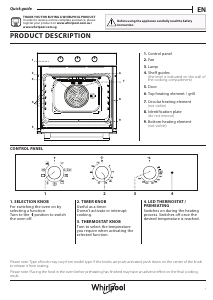
Manual

Loading…

6
5. When the oven is completely cooled, remove ash with a damp
cloth.
Version B:
1. Close the oven doors, and then press Delay Start
2. (For Double-Ovens) Select Upper Cavity or Lower Cavity. On
some models, select the "1" or "2" number keypad to select
the desired oven to clean.
3. Select the number keypads to enter the desired amount of
time by which you want to delay the start.
4. Press Self Clean.
5. Select level of cleaning.
6. Select Start for the selected oven.
The oven doors will automatically lock after the Delay Start
countdown.
When the Self-Cleaning cycle is complete and the oven cools,
the oven doors will unlock.
7. When the oven is completely cooled, remove ash with a damp
cloth.
To Stop Self-Cleaning Anytime:
Touch the Oven Cancel Keypad for single oven models, or the
keypads for double oven models. If the oven temperature is too
high, the door will remain locked. It will not unlock until the oven
cools.
Steam Clean (on some models)
The Steam Clean feature is designed for light oven cavity bottom
cleaning on models that have hidden bake in both ovens.
Allow the oven to cool to room temperature before using the
Steam Clean feature. If your oven cavity is above 200°F (93°C),
the Steam Clean feature will not activate until it cools down.
Remove all racks and accessories from the oven cavity.
For best results, use 10 oz (295.7 mL) of distilled or filtered water.
Do not use oven cleaners.
The Steam Clean feature will take approximately 1 hour. A tone
will sound at the end of the cycle.
IMPORTANT: Because the water in the oven bottom is hot, do not
open the oven door during the Steam Clean cycle.
Touch the Oven Cancel keypad for single oven models and the
Upper/Lower keypads for double oven models at any time to end
the cycle. The display will return to the time of day.
Helpful Hints
Once the Steam Clean cycle is complete and the oven is
completely cooled, remove all remaining water in the bottom of
the oven with a sponge or cloth.
Wipe any remaining moisture from the oven door interior, oven
cavity interior sides, and cooktop.
Use a soft brush or nylon scrubber to wipe the oven interior.
This may help with more stubborn stains.
It is recommended to use distilled or filtered water, as tap
water may leave mineral deposits on the oven bottom. Use a
cloth soaked with vinegar or lemon juice to remove any
mineral deposits that may be left after the Steam Clean cycle.
If the oven is heavily soiled, use the Self-Cleaning cycle. The
Steam Clean cycle may be used first to eliminate most of the
debris, resulting in a more effective self-cleaning.
To Steam Clean:
1. Open the oven door of the selected oven and remove all racks
and accessories from the oven cavity.
2. Pour 10 oz (295.7 mL) of distilled or filtered water into the
oven bottom. Then close the oven door.
3. Touch the Tools keypad.
(On double-oven models) Select Upper Cavity or Lower
Cavity.
4. Select STEAM CLEAN.
5. Select START.
6. After approximately 1 hour, a tone will sound to signal the end
of the cycle. Touch the keypad for single oven models and the
keypads for double oven models to clear the display.
7. When the oven is completely cooled, remove any excess
water with a sponge or cloth and wipe down oven interior. If
needed, use a non-scratch copper scrubbing pad to remove
stubborn soils.
INSTALLATION INSTRUCTIONS
REQUIREMENTS
Tools and Parts
Gather the required tools and parts before starting installation.
Read and follow the instructions provided with any tools listed
here.
Tools Needed
Phillips screwdriver
Measuring tape
Hand or electric drill (for wall cabinet installations)
1" (2.5 cm) drill bit (for wall cabinet installations)
Level
Flat-blade screwdriver
Parts Needed
UL-listed or CSA-approved conduit connector
UL-listed wire connectors
Parts Supplied
#8-14 x 3/4" (1.9 cm) screws - single ovens (2), double ovens
(4)
#8-18 x 3/8" (9.5 mm) screws - bottom vent (2)
#8-18 x 3/8" (9.5 mm) screws - bottom vent shield (2)
#8-18 x 3/8" (9.5 mm) screws - bottom vent trim (4)
Rear feet - double oven (2)
Front feet - double oven (2)
Bottom vent and shield
Check local codes. Check existing electrical supply. See the
“Electrical Requirements” section.
It is recommended that all electrical connections be made by a
licensed, qualified electrical installer.
NOTE: Be sure to purchase only whirlpool factory-certified parts
and accessories for your appliance. Your installation may require
additional parts. To order, refer to the contact information
referenced in your Quick Start Guide.
Location Requirements
IMPORTANT: Observe all governing codes and ordinances.
To eliminate the risk of burns or fire by reaching over heated
surface units, cabinet storage space located above the surface
units should be avoided. If cabinet storage is to be provided,
the risk can be reduced by installing a range hood that projects
horizontally a minimum of 5 inches beyond the bottom of the
cabinets.
Cabinet opening dimensions that are shown must be used.
Given dimensions provide minimum clearance with oven.
Recessed installation area must provide complete enclosure
around the recessed portion of the oven.
Grounded electrical supply is required. See “Electrical
Requirements” section.
Download manual in English (PDF, 1.83 MB)
(Consider the environment and only print this manual if it is really necessary)

Loading…

Rating

Let us know what you think about the Whirlpool WOD77EC7HV Oven by leaving a product rating. Want to share your experiences with this product or ask a question? Please leave a comment at the bottom of the page.
Are you satisfied with the Whirlpool WOD77EC7HV Oven?
Yes No
Be the first to rate this product
0 votes

Join the conversation about this product

Here you can share what you think about the Whirlpool WOD77EC7HV Oven. If you have a question, first carefully read the manual. Requesting a manual can be done by using our contact form.

More about this manual

We understand that it’s nice to have a paper manual for your Whirlpool WOD77EC7HV Oven. You can always download the manual from our website and print it yourself. If you would like to have an original manual, we recommend you contact Whirlpool. They might be able to provide an original manual. Are you looking for the manual of your Whirlpool WOD77EC7HV Oven in a different language? Choose your preferred language on our homepage and search for the model number to see if we have it available.

Specifications

Brand Whirlpool
Model WOD77EC7HV
Category Ovens
File type PDF
File size 1.83 MB

All manuals for Whirlpool Ovens
More manuals of Ovens

Frequently Asked Questions about Whirlpool WOD77EC7HV Oven

Our support team searches for useful product information and answers to frequently asked questions. If you find an inaccuracy in our frequently asked questions, please let us know by using our contact form.

My oven does not get warm enough, what should I do? Verified

The thermostat makes sure the ovens heats up to the designated temperature. It is likely that the thermostat is defective. Have it replaced. When in doubt, contact the manufacturer.

This was helpful (2771) Read more

What is pyrolysis? Verified

Some ovens are equipped with a pyrolysis function. This is a cleaning system that burns dirt and fat in the oven by using very high temperatures. After pyrolysis, all the dirt will have turned to ash and can be easily removed. If the oven has a pyrolysis function, it is advisable to use it 3 to 4 times a year to keep the oven clean.

This was helpful (2711) Read more

What does '6th Sense' mean? Verified

Whirlpool appliances that are equipped with 6th Sense technology have sensors that ensure optimal operation of the machine. For example in dryers, these sensors measure the moisture left in the wash and stops the machine when everything is completely dry.

This was helpful (795) Read more

Can I prepare several items simultaneously by using more grill trays? Verified

Technically this is possible. However, it depends on the type of food if you need to adjust the preparation time or swap the trays halfway during the preparation.

This was helpful (691) Read more

When I use the oven there often food remains that fall on the bottom, causing smoke. How can I prevent this? Verified

Many ovens come with both a grid and a baking tray. When food is prepared on the grid, the baking tray can be placed on the bottom to prevent food remains from burning and causing smoke.

This was helpful (665) Read more

Smoke is accumulating in the oven when warming up, why is that? Verified

Probably there are food remains from previous use left in the oven. Especially greasy food remains can generate smoke when heated. Clean the oven thoroughly.

This was helpful (664) Read more
Manual Whirlpool WOD77EC7HV Oven

Related products

Related categories