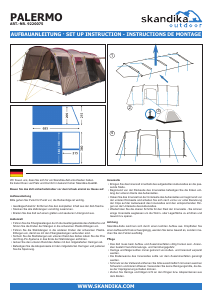
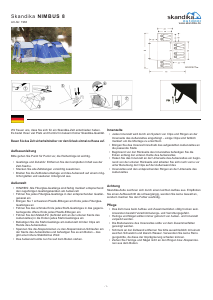
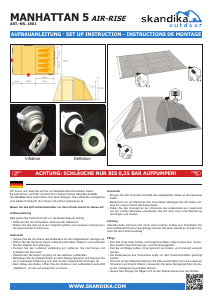
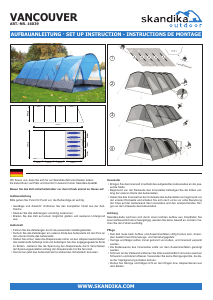
Manual Skandika Kardis Tent

Need a manual for your Skandika Kardis Tent? Below you can view and download the PDF manual for free in English. This product currently has 8 frequently asked questions, 0 comments and has 0 votes. If this is not the manual you want, please contact us.

Is your product defective and the manual offers no solution? Go to a Repair Café for free repair services.

Manual

Loading…

AUFBAU & PFLEGE SET UP & MAINTENANCE
Kardis
16525
BRAUCHEN SIE HILFE?
Sehen Sie sich unsere Aufbau-Videos mit einer
visuellen Schritt-für-Schritt-Präsentation an,
die Sie beim Aufbau begleiten.
www.skandika.com/zeltaufbau
Wenn Sie weitere Fragen haben, kontaktieren
Sie uns bitte unter service@skandika.com
NEED HELP?
See our set-up videos with a step by step
visual presentation to guide you along.
www.skandika.com/tentsetup
If you have any further questions, please
contact us at service@skandika.com
BESOIN D‘AIDE ?
Visionnez nos vidéos d‘installation avec une
présentation visuelle étape par étape pour vous
guider.
www.skandika.com/montagetente
Si vous avez d‘autres questions, n‘hésitez pas à
nous contacter à service@skandika.com
MONTAGE & ENTRETIEN
Thank you for choosing your new tent from the
Skandika range. It provides you with a lot of room
and high level of comfort in the well-known superior
quality of Skandika.
Before you go on holiday with the new tent, please
do a test set-up.
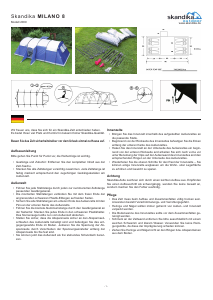
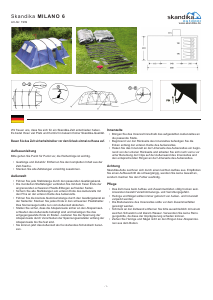
ASSEMBLY INSTRUCTIONS
Please follow these instructions point by point in the
given order.
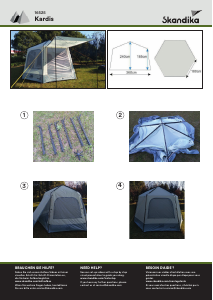
Poles and components: Remove all contents from
tent bag.
Extend all tent poles carefully. Do not let the
shock cords snap the poles together.
Unfold the fl ysheet and spread out on the ground
in the desired direction.
FLYSHEET
Insert each pole into one sleeve of the fl y from
one end to the other.
At the end of each tent pole, insert the metal pins
(found along the bottom edge of the rain fl y) into
both ends of each tent pole
The rain fl y is now standing up by itself, which can
be secured by anchoring down with steel stakes
at the PP webbings, located at the edges of the y
Tension of the fl y can be adjusted by the guy ro-
pes and buckles on the PP webbings joining all
sides of the fl y
IMPORTANT
If you have diffi culty with any step, please visit our
tent set-up video page below which gives imagery and
tips for each step.
If anything is still not clear then please feel free to
contact us at service@skandika.com.
CARE
When packing the tent make sure that it is com-
pletely dry, otherwise there is a danger of mildew
and rotting.
Always pack poles and tent pegs separately from
inner and outer tent.
Prior to folding, clean the basement of the inner
tent.
Use a soft sponge and clear water only to clean
the outer tent canvas. Don‘t use any cleaning
agent, for they may be harmful to the impregna-
tion.
Never pull tent pegs out by means of rings or ten-
sioning ropes.
Nous nous réjouissons que vous ayez choisi une tente
SKANDIKA. Ces tentes off rent beaucoup d’espace et
de confort et ceci en qualité supérieure marque Skan-
dika.
Pour ne pas courir de risques nous vous conseillons de
faire un essai de montage de la tente avant de partir en
vacances.
MONTAGE
Veuillez procéder point par point, l’ordre des diff é-
rentes étapes est important.
Arceaux et accessoires : Veuillez sortir le contenu
complet de la tente du sac.
Assembler prudemment toutes les barres de ten-
te.
Étalez le tapis de sol de tente et le tapis de
l’extérieur sur un sol lisse et autant que possible
propre. Veillez à ce qu‘il n‘y ait pas d‘objets poin-
tus (pierres, branches, etc.) sous la tente.
TENTE EXTÉRIEURE
Dépliez et étalez le tapis de sol sur cette surface
plate et propre, étendre la tente extérieure des-
sus. Trier et assembler les arceaux, introduire les
Faites glisser les arceaux dans les fourreaux de la
tente extérieure prévus à cet eff et en faisant glis-
ser doucement le tissu sur l’arceau
Une fois que tous les arceaux ont été introduits,
veuillez monter la tente en insérant les extrémi-
tés des arceaux dans les œillets de la tente exté-
rieure.
Accrocher la toile de tente intérieure à la tente ex-
térieure par les petits crochets prévus à cet eff et
Une fois les arceaux tendus, fi xez les points
d’ancrage dans le sol avec les sardines et tendre
les cordons d’ancrage
IMPORTANT
Si vous avez des diffi cultés à n‘importe quelle étape,
veuillez consulter notre page vidéo de montage de
tente ci-dessous qui donne des images et des conseils
pour chaque étape. Si toutefois quelque chose n‘est
toujours pas clair, n‘hésitez pas à nous contacter à
service@skandika.com.
ENTRETIEN
Lors du démontage et pliage, prendre le temps de
sécher chaque élément afi n d’éviter toute moisis-
sure et décomposition.
Toujours ranger les pointes et sardines séparé-
ment des toiles intérieures et extérieures.
Nettoyer le fond de la tente intérieure avant de
la plier.
Nettoyer d’éventuelles salissures sur la tente à
l’aide d’un linge doux et de l’eau claire. Ne pas
utiliser de détergent car ceci pourrait détériorer
l’enduction protectrice.
Ne pas tirer sur les cordes d’ancrage pour extraire
les sardines et pointes du sol.
Wir freuen uns, dass Sie sich für ein Skandika-Zelt ent-
schieden haben. Es bietet Ihnen viel Platz und Komfort
in bekannt hoher Skandika-Qualität.
Bauen Sie das Zelt sicherheitshalber vor dem Urlaub
einmal zu Hause auf.
AUFBAUANLEITUNG
Bitte gehen Sie Punkt für Punkt vor, die Reihenfolge
ist wichtig.
Gestänge und Zubehör: Entfernen Sie den kom-
pletten Inhalt aus der Zelt-Tasche.
Stecken Sie alle Zeltstangen vorsichtig zusam-
men.
Breiten Sie das Zelt auf einem möglichst glatten
und sauberen Untergrund aus. Achten Sie bit-
te darauf, dass sich keine spitzen Gegenstände
(Steine, Äste, usw.) unter dem Zelt befi nden.
AUSSENZELT
Schieben Sie die Gestä nge durch die dafü r vorge-
sehenen Gestä ngekanä le am Außenzelt.
Nachdem alle Gestä nge durchgeschoben worden
sind, richten Sie das Zelt bitte auf, indem Sie die
Gestä ngeenden in die Ö sen des Außenzeltes ste-
cken.
Nachdem Sie das Zelt aufgerichtet haben, fi xie-
ren Sie es bitte mit den dazugehö rigen Heringen
im Boden.
Sie kö nnen nun die Stahlaufstellstangen fü r das
Aufrichten des Einganges benutzen. Bitte achten
Sie darauf, dass diese Stahlaufstellstangen sofort
abgespannt werden mü ssen, da sie sonst keinen
Halt haben.
Zum Schluss müssen Sie noch die Abspannleinen
nach Bedarf befestigen und abspannen.
WICHTIG
Wenn Sie Schwierigkeiten bei einem der Schritte ha-
ben, besuchen Sie bitte unsere Zeltaufbau-Video Sei-
te, die Bilder und Tipps für jeden Schritt bereit hält.
Sollte noch etwas unklar sein, kontaktieren Sie uns
bitte unter service@skandika.com.
PFLEGE
Das Zelt muss beim Aufbau und Zusammenfalten
völlig trocken sein. Ansonsten besteht Verschim-
melungs- und Verrottungsgefahr.
Heringe und Nägel sollten immer getrennt von
Außen- und Innenzelt verpackt werden.
Die Bodenwanne des Innenzeltes sollte vor dem
Zusammenfalten gereinigt werden.
Schmutz an der Zeltwand entfernen Sie bitte
ausschließlich mit einem weichen Schwamm und
klarem Wasser. Verwenden Sie keine Reinigungs-
mitte, da diese der Imprägnierung schaden kön-
nen.
Ziehen Sie Heringe und Nägel nicht an den Rin-
gen bzw. Abspannleinen aus dem Boden.
Download manual in English (PDF, 0.36 MB)
(Consider the environment and only print this manual if it is really necessary)

Loading…

Rating

Let us know what you think about the Skandika Kardis Tent by leaving a product rating. Want to share your experiences with this product or ask a question? Please leave a comment at the bottom of the page.
Are you satisfied with the Skandika Kardis Tent?
Yes No
Be the first to rate this product
0 votes

Join the conversation about this product

Here you can share what you think about the Skandika Kardis Tent. If you have a question, first carefully read the manual. Requesting a manual can be done by using our contact form.

More about this manual

We understand that it’s nice to have a paper manual for your Skandika Kardis Tent. You can always download the manual from our website and print it yourself. If you would like to have an original manual, we recommend you contact Skandika. They might be able to provide an original manual. Are you looking for the manual of your Skandika Kardis Tent in a different language? Choose your preferred language on our homepage and search for the model number to see if we have it available.

Specifications

Brand Skandika
Model Kardis
Category Tents
File type PDF
File size 0.36 MB

All manuals for Skandika Tents
More manuals of Tents

Frequently Asked Questions about Skandika Kardis Tent

Our support team searches for useful product information and answers to frequently asked questions. If you find an inaccuracy in our frequently asked questions, please let us know by using our contact form.

Can I store my tent when it's wet? Verified

Only for very short periods of time. When a tent is stored while wet for a week or longer, it can get moldy. This is harmful for your tent and possibly your health.

This was helpful (384) Read more

How do I impregnate a tent? Verified

Pitch the tent, clean the cloth and let it dry. Apply the impregnation agent on the cloth with a plant sprayer or other spray. It is also possible to use a paint roller or brush. The cloth needs to be fully saturated with the impregnation agent. Also treat the inside of the tent. Thoroughly clean any windows with a moist cloth. Do not let the impregnation agent dry on it. Let the tent cloth fully dry. Repeat the treatment if needed.

This was helpful (285) Read more

Can I repair a tear or hole in the canvas of my tent myself? Verified

There are special pieces of self-adhesive patches of cloth available for synthetic tent canvases. Stick one of these patches on both sides of the hole or tear. For cotton tent canvases or mixed material tent canvases it's best to use patches that can be ironed on. This will require an iron.

This was helpful (218) Read more

The zipper of my tent won't run smoothly, what can I do? Verified

When a zipper is running smoothly, use a dry PTFE spray or silicone spray. Do not spray onto the cloth and preventively spray to prevent future problems.

This was helpful (156) Read more

There are water drops on the inside of the tent, does this mean it is leaking? Verified

No, this is probably condensation. Make sure the tent is properly ventilated to keep condensation at a minimum.

This was helpful (129) Read more

What tent pegs are best to use for which surfaces? Verified

On grassland or forest surfaces you can use semi circular or plastic pegs. On rocky surfaces you need to use rock pegs. On clay surfaces you can use semi circular, plastic or universal pegs. On gravel surfaces you need semi circular or universal pegs and on sand you need to use wooden pegs.

This was helpful (105) Read more

The impregnation agent leaves white stains or a white haze on the tent cloth, what can I do about this? Verified

If the agent leaves a white haze or white stains on the tent cloth, this means you have applied more impregnation agent on those areas. This is not harmful and the stains often disappear over time. It is not advisable to use less impregnation agent to prevent stains. The cloth needs to be fully saturated with the impregnation agent to give good results.

This was helpful (97) Read more

Do I need to impregnate my new Skandika tent? Verified

No, this is not necessary. All new Skandika tents already have a protective layer.

This was helpful (10) Read more
Manual Skandika Kardis Tent

Related products

Related categories