Manual Skandika Florenz 10 Tent

Need a manual for your Skandika Florenz 10 Tent? Below you can view and download the PDF manual for free in English. This product currently has 8 frequently asked questions, 0 comments and has 0 votes. If this is not the manual you want, please contact us.

Is your product defective and the manual offers no solution? Go to a Repair Café for free repair services.

Manual

Loading…

- 2 -
Thank you for choosing your new tent from the Skandika range. It pro-
vides you with a lot of room and high level of comfort in the well-known
superior quality of Skandika.
Before you go on holiday with the new tent, please built it once.
Assembly instructions
Please follow these instructions point by point in the given order.
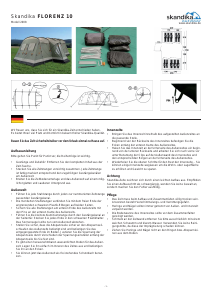
Poles and components: Remove all contents from tent bag
Extent all tent poles carefully. Each pole end is colored to match the
part of the tent that it belongs to.
Unfold inner tent and rain y and lay on ground
Rain Fly
Insert each steel pole through each sleeve channels according to
numbered poles.
Assembled steel poles into the free end of the adjacent black plastic
elbow on both sides.
Secure all steel poles to the bottom of the rain y using the pins found
along the bottom edge of the rain y.
Insert the smallest alu. pole through the pole sleeve located on the
side door? Insert each end into the black plastic holder? The awning
should stand out from the rain y taught.
Ensure that the guy ropes are secure to the guy rope tabs on the rain
y and stake the opposite ends of the guy ropes into the ground? Ad-
just the tension of the guy ropes by sliding the tension adjusters along
the guy ropes until they are taught.
There is a removable tub style water proof oor for the rain y? Simply
lay it out on the inside of the tent and stake it down at the comers.
You can now use the rain y as a free standing shelter.
Inner tents
Take an inner tent inside the assembled rain y to its appropriate
location.
Starting from the rear of the inner tent, stake down the corners along
the bottom edge of the rain y.
Hook the inner tent to the underside of the rain y starting from the
bottom rear and work your way forward to the top using the toggles on
the outer wall of the inner tent and loops running along the underside
of the rain y.
Repeat the above steps for the rest of the inner tents – you can leave
some of the inner tents out to increase the living or storage capacity
and to reduce the travel weight of the whole tent.
Attention
Skandika tents are very easy to pitch. If one step of the assembly seems
dif cult, don‘t use force, but locate the error.
Care
When packing the tent make sure that it is completely dry, otherwise
there is a danger of mildew and rotting.
Always pack poles and tent pegs separately from inner and outer tent.
Prior to folding, clean the basement of the inner tent.
Use a soft sponge and clear water only to clean the outer tent canvas.
Don‘t use any cleaning agent, for they may be harmful to the imp-
regnation.
Never pull tent pegs out by means of rings or tensioning ropes.
Nous nous réjouissons que vous ayez choisi une tente SKANDIKA. Ces
tentes offrent beaucoup d’espace et de confort et ceci en qualité supéri-
eure marque Skandika.
Pour ne pas courir de risques nous vous conseillons de faire un essai de
montage de la tente avant de partir en vacances.
Montage
Veuillez procéder point par point, l’ordre des différentes étapes est impor-
tant.
Tiges et accessoires : sortez le contenu complet du sac de tente
Assemblez prudemment toutes les barres de tente. Chaque barre est
marquée par une couleur correspondant à la couleur des fourreaux
sur la tente extérieure.
Ètalez le tapis de sol de la tente et la tente extérieure sur un sol lisse
et autant que possible propre.
Tente extérieure
Insérez chaque tige en acier numérotée dans les fourreaux de la tente
correspondants.
Reliez les tiges en acier montées avec le bout libre des coudes adja-
cents en plastique noir des deux côtés.
Sécurisez toutes les barres dans le bas de la tente avec les pins (gou-
pilles) se trouvant sur le bord inférieur de la tente extérieure.
Insérez les petites tiges en aluminium dans les fourreaux de la porte.
Fixez chaque bout dans le support en plastique noir. La marquise est
ainsi en place.
Assurez-vous que les cordes d‘ancrage sont bien xées sur les bouc-
les prévues à cet effet sur la tente extérieure et encrez l‘autre bout
dans le sol. Ajustez la tension des cordes en déplaçant le mécanisme
de tension le long de la corde jusqu‘à ce qu‘elles soient bien tendues.
Il y a un tapis de sol imperméable et amovible pour la tente extérieure.
Étalez-le à l‘intérieur de la tente et xez-le par les coins.
Vous pouvez maintenant utiliser la tente extérieure comme auvent
autonome.
Tentes intérieures / Cabines
Installez convenablement la cabine à l‘endroit prévu pour celle-ci à
l‘intérieur de la tente.
En commençant par l‘arrière de la cabine accrochez les coins le long
du bord inférieur de la tente extérieure.
Accrochez la cabine au dessous de la tente extérieure, en commen-
çant par le fond, travaillez de l’arrière vers l‘avant en utilisant les clips
sur la paroi extérieure de la cabine et les anneaux correspondants sur
l’intérieur de la toile extérieure.
Répétez les étapes précédentes pour les autres cabines – vous pou-
vez ne pas accrocher toutes les cabines pour augmenter la surface du
séjour ou de stockage ou pour diminuer le poids de la tente.
Attention
Les tentes Skandika sont très faciles à monter. En cas de dif culté ne
forcez pas mais cherchez la raison possible et la solution à la dif culté
avant de continuer.
Entretien
Lors du démontage et pliage, prendre le temps de sécher chaque
élément a n d’éviter toute moisissure et décomposition.
Toujours ranger les pointes et sardines séparément des toiles intéri-
eures et extérieures.
Nettoyer le fond de la tente intérieure avant de la plier.
Nettoyer d’éventuelles salissures sur la tente à l’aide d’un linge doux
et de l’eau claire. Ne pas utiliser de détergent car ceci pourrait détéri-
orer l’enduction protectrice.
Ne pas tirer sur les cordes d’ancrage pour extraire les sardines et
pointes du sol.
Download manual in English (PDF, 0.09 MB)
(Consider the environment and only print this manual if it is really necessary)

Loading…

Rating

Let us know what you think about the Skandika Florenz 10 Tent by leaving a product rating. Want to share your experiences with this product or ask a question? Please leave a comment at the bottom of the page.
Are you satisfied with the Skandika Florenz 10 Tent?
Yes No
Be the first to rate this product
0 votes

Join the conversation about this product

Here you can share what you think about the Skandika Florenz 10 Tent. If you have a question, first carefully read the manual. Requesting a manual can be done by using our contact form.

More about this manual

We understand that it’s nice to have a paper manual for your Skandika Florenz 10 Tent. You can always download the manual from our website and print it yourself. If you would like to have an original manual, we recommend you contact Skandika. They might be able to provide an original manual. Are you looking for the manual of your Skandika Florenz 10 Tent in a different language? Choose your preferred language on our homepage and search for the model number to see if we have it available.

Specifications

Brand Skandika
Model Florenz 10
Category Tents
File type PDF
File size 0.09 MB

All manuals for Skandika Tents
More manuals of Tents

Frequently Asked Questions about Skandika Florenz 10 Tent

Our support team searches for useful product information and answers to frequently asked questions. If you find an inaccuracy in our frequently asked questions, please let us know by using our contact form.

Can I store my tent when it's wet? Verified

Only for very short periods of time. When a tent is stored while wet for a week or longer, it can get moldy. This is harmful for your tent and possibly your health.

This was helpful (384) Read more

How do I impregnate a tent? Verified

Pitch the tent, clean the cloth and let it dry. Apply the impregnation agent on the cloth with a plant sprayer or other spray. It is also possible to use a paint roller or brush. The cloth needs to be fully saturated with the impregnation agent. Also treat the inside of the tent. Thoroughly clean any windows with a moist cloth. Do not let the impregnation agent dry on it. Let the tent cloth fully dry. Repeat the treatment if needed.

This was helpful (285) Read more

Can I repair a tear or hole in the canvas of my tent myself? Verified

There are special pieces of self-adhesive patches of cloth available for synthetic tent canvases. Stick one of these patches on both sides of the hole or tear. For cotton tent canvases or mixed material tent canvases it's best to use patches that can be ironed on. This will require an iron.

This was helpful (218) Read more

The zipper of my tent won't run smoothly, what can I do? Verified

When a zipper is running smoothly, use a dry PTFE spray or silicone spray. Do not spray onto the cloth and preventively spray to prevent future problems.

This was helpful (156) Read more

There are water drops on the inside of the tent, does this mean it is leaking? Verified

No, this is probably condensation. Make sure the tent is properly ventilated to keep condensation at a minimum.

This was helpful (129) Read more

What tent pegs are best to use for which surfaces? Verified

On grassland or forest surfaces you can use semi circular or plastic pegs. On rocky surfaces you need to use rock pegs. On clay surfaces you can use semi circular, plastic or universal pegs. On gravel surfaces you need semi circular or universal pegs and on sand you need to use wooden pegs.

This was helpful (105) Read more

The impregnation agent leaves white stains or a white haze on the tent cloth, what can I do about this? Verified

If the agent leaves a white haze or white stains on the tent cloth, this means you have applied more impregnation agent on those areas. This is not harmful and the stains often disappear over time. It is not advisable to use less impregnation agent to prevent stains. The cloth needs to be fully saturated with the impregnation agent to give good results.

This was helpful (97) Read more

Do I need to impregnate my new Skandika tent? Verified

No, this is not necessary. All new Skandika tents already have a protective layer.

This was helpful (10) Read more
Manual Skandika Florenz 10 Tent

Related products

Related categories