
4
5
Aan ieder einde van de stoksleuf zit een stelband met een kunststof voet eraan waar
later de stok ingeklikt dient te worden. Maak deze stelband zover mogelijk los zodat
de kunststof voet zo ver mogelijk van de tent af komt.
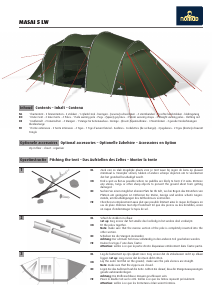
On either end of the pole sleeve there is an adjustment strap with a plastic base into
which the pole has to be clicked. Loosen this strap to the maximum so that the plastic
base is removed from the tent as far as possible.
An jedem Ende des Stangenschlitzes befindet sich ein Stellband mit einem Kunststoff-
fuß, in dem die Stange später eingeklickt werden muss. Lösen Sie das Stellband so
weit wie möglich, so dass der Kunststofffuß so weit wie möglich vom Zelt entfernt ist.
À chaque extrémité de fente se trouve une bretelle avec un pied en plastique dans
lequel la tige devra plus tard être enclenchée. Détendez le plus possible cette bretelle
de façon à ce que le pied en plastique soit aussi éloigné de la tente que possible.
Schuif voorzichtig de stokken erin. Let op:
- De stokken hebben aan 1 kant een bol en aan 1 kant zijn ze vlak. De vlakke kant
moet in de sleuf gestoken worden zodat de kant met de bol uitsteekt.
- De korte stok is voor de achterkant, de 2 lange stokken zijn voor het midden en de
voorzijde.
Slide the poles in carefully. Attention:
− The poles are convex on one side; they are flat on the other side. The flat side has to
be inserted into the sleeve so that the convex side protrudes.
− The short pole is meant for the rear; the two long poles are for the centre and front.
Schieben Sie die Stangen vorsichtig hinein. Achtung:
− Die Stangen besitzen an 1 Seite eine Kugel und sind an 1 Seite flach. Die flache Seite
muss in den Schlitz gesteckt werden, so dass die Seite mit der Kugel herausragt.
− Die kurze Stange ist für die Rückseite und die 2 langen Stangen sind für die Mitte und
die Vorderseite vorgesehen.
Glissez avec précaution les tiges à l’intérieur. Attention:
− Les tiges ont une boule d’un côté et de l’autre elles sont plates. Le côté plat doit être
enfoncé dans la fente afin que le côté avec la boule reste sorti.
− La tige courte est pour l’arrière, les 2 tiges longues sont pour le milieu et le devant.
Wanneer alle stokken in de sleuven zijn gestoken, kunnen de stokken op spanning
worden gebracht. Begin bij de 1e stok en druk deze zover mogelijk in de stoksleuf.
Druk als de stok niet verder gaat, het uiteinde van de stok (balletje) in de kunststof
voet. Herhaal dit voor de andere 2 stokken.
When all poles have been inserted in the sleeves, they can be tensioned. Start with the
first pole and push it into the sleeve as far as possible. When the pole stops, push its
extremity (little ball) in the plastic base. Repeat this for the two other poles.
Wenn alle Stangen in die Schlitze geschoben sind, können die Stangen gespannt
werden. Beginnen Sie bei der 1. Stange und schieben Sie diese so weit wie möglich in
den Stangenschlitz. Drücken Sie, wenn die Stange nicht weiter hineingeht, das Ende
der Stange (Kugel) in den Kunststofffuß. Wiederholen Sie das für die anderen 2
Stangen.
Lorsque toutes les tiges ont été enfoncées dans les fentes, elles peuvent être tendues.
Commencez par la 1ère tige et poussez-la le plus possible dans le fourreau. Lorsque la
tige est poussée au maximum, appuyez l’extrémité de la tige (boule) dans le pied en
plastique. Répétez cette procédure pour les 2 autres tiges.
NL
EN
DE
FR
NL
EN
DE
FR
EN
DE
FR
NL
NL
EN
DE
FR
NL
EN
DE
FR
Trek, als alle stokken in de kunststof voetjes zitten, de stelbanden aan.
When all the poles are in the plastic bases, tighten the adjustment straps.
Ziehen Sie, wenn alle Stangen in den Kunststofffüßen stecken, die Verstellbänder an.
Lorsque toutes les tiges sont dans les petits pieds en plastique, tendez les bretelles.
Zet de tent rechtop en zet deze aan de achterkant en voorkant vast met haringen.
De tent hoeft nog niet helemaal strak te staan.
Stand the tent upright and peg it down at the back and the front. The tent does not need
to be completely taut just yet.
Richten Sie das Zelt gerade auf und befestigen Sie es an der Rück- und Vorderseite mit
Heringen. Das Zelt braucht noch nicht ganz gespannt zu sein.
Redressez la tente et fixez-la à l’avant et à l’arrière avec des sardines. Inutile de tendre
complètement la tente à ce stade.
NL
EN
DE
FR
Pak nu de voorgebogen luifelstok. Steek deze door de stoksleuf van de luifel bij de
zijdeur en plaats deze in de ringetjes vlak naast de tentstok.
Now take the pre-bent awning pole. Slide it through the sleeve of the awning at the
side entrance and place it in the rings right next to the tent pole.
Nehmen Sie jetzt die vorgebogene Ausbaustange. Stecken Sie diese durch den
Stangenschlitz am Eingang des Ausbaus und bringen Sie sie in den Ringen direkt
neben der Zeltstange an.
Prenez à présent la fine tige courbe pour l'auvent. Enfoncez-là dans l’encoche de tige
du auvent, à l’endroit de la porte latérale et placez-là dans les anneaux proches du
tige de tente.
GBA 2014 Tellem 4.indd 2 06-01-14 15:32
8
9
7
4
5
6
Aan ieder einde van de stoksleuf zit een stelband met een kunststof voet eraan waar
later de stok ingeklikt dient te worden. Maak deze stelband zover mogelijk los zodat
de kunststof voet zo ver mogelijk van de tent af komt.
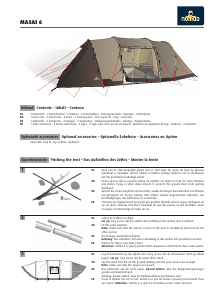
On either end of the pole sleeve there is an adjustment strap with a plastic base into
which the pole has to be clicked. Loosen this strap to the maximum so that the plastic
base is removed from the tent as far as possible.
An jedem Ende des Stangenschlitzes befindet sich ein Stellband mit einem Kunststoff-
fuß, in dem die Stange später eingeklickt werden muss. Lösen Sie das Stellband so
weit wie möglich, so dass der Kunststofffuß so weit wie möglich vom Zelt entfernt ist.
À chaque extrémité de fente se trouve une bretelle avec un pied en plastique dans
lequel la tige devra plus tard être enclenchée. Détendez le plus possible cette bretelle
de façon à ce que le pied en plastique soit aussi éloigné de la tente que possible.
Schuif voorzichtig de stokken erin. Let op:
- De stokken hebben aan 1 kant een bol en aan 1 kant zijn ze vlak. De vlakke kant
moet in de sleuf gestoken worden zodat de kant met de bol uitsteekt.
- De korte stok is voor de achterkant, de 2 lange stokken zijn voor het midden en de
voorzijde.
Slide the poles in carefully. Attention:
− The poles are convex on one side; they are flat on the other side. The flat side has to
be inserted into the sleeve so that the convex side protrudes.
− The short pole is meant for the rear; the two long poles are for the centre and front.
Schieben Sie die Stangen vorsichtig hinein. Achtung:
− Die Stangen besitzen an 1 Seite eine Kugel und sind an 1 Seite flach. Die flache Seite
muss in den Schlitz gesteckt werden, so dass die Seite mit der Kugel herausragt.
− Die kurze Stange ist für die Rückseite und die 2 langen Stangen sind für die Mitte und
die Vorderseite vorgesehen.
Glissez avec précaution les tiges à l’intérieur. Attention:
− Les tiges ont une boule d’un côté et de l’autre elles sont plates. Le côté plat doit être
enfoncé dans la fente afin que le côté avec la boule reste sorti.
− La tige courte est pour l’arrière, les 2 tiges longues sont pour le milieu et le devant.
Wanneer alle stokken in de sleuven zijn gestoken, kunnen de stokken op spanning
worden gebracht. Begin bij de 1e stok en druk deze zover mogelijk in de stoksleuf.
Druk als de stok niet verder gaat, het uiteinde van de stok (balletje) in de kunststof
voet. Herhaal dit voor de andere 2 stokken.
When all poles have been inserted in the sleeves, they can be tensioned. Start with the
first pole and push it into the sleeve as far as possible. When the pole stops, push its
extremity (little ball) in the plastic base. Repeat this for the two other poles.
Wenn alle Stangen in die Schlitze geschoben sind, können die Stangen gespannt
werden. Beginnen Sie bei der 1. Stange und schieben Sie diese so weit wie möglich in
den Stangenschlitz. Drücken Sie, wenn die Stange nicht weiter hineingeht, das Ende
der Stange (Kugel) in den Kunststofffuß. Wiederholen Sie das für die anderen 2
Stangen.
Lorsque toutes les tiges ont été enfoncées dans les fentes, elles peuvent être tendues.
Commencez par la 1ère tige et poussez-la le plus possible dans le fourreau. Lorsque la
tige est poussée au maximum, appuyez l’extrémité de la tige (boule) dans le pied en
plastique. Répétez cette procédure pour les 2 autres tiges.
NL
EN
DE
FR
NL
EN
DE
FR
EN
DE
FR
NL
NL
EN
DE
FR
NL
EN
DE
FR
Trek, als alle stokken in de kunststof voetjes zitten, de stelbanden aan.
When all the poles are in the plastic bases, tighten the adjustment straps.
Ziehen Sie, wenn alle Stangen in den Kunststofffüßen stecken, die Verstellbänder an.
Lorsque toutes les tiges sont dans les petits pieds en plastique, tendez les bretelles.
Zet de tent rechtop en zet deze aan de achterkant en voorkant vast met haringen.
De tent hoeft nog niet helemaal strak te staan.
Stand the tent upright and peg it down at the back and the front. The tent does not need
to be completely taut just yet.
Richten Sie das Zelt gerade auf und befestigen Sie es an der Rück- und Vorderseite mit
Heringen. Das Zelt braucht noch nicht ganz gespannt zu sein.
Redressez la tente et fixez-la à l’avant et à l’arrière avec des sardines.
Inutile de tendre
complètement la tente à ce stade.
NL
EN
DE
FR
Pak nu de voorgebogen luifelstok. Steek deze door de stoksleuf van de luifel bij de
zijdeur en plaats deze in de ringetjes vlak naast de tentstok.
Now take the pre-bent awning pole. Slide it through the sleeve of the awning at the
side entrance and place it in the rings right next to the tent pole.
Nehmen Sie jetzt die vorgebogene Ausbaustange. Stecken Sie diese durch den
Stangenschlitz am Eingang des Ausbaus und bringen Sie sie in den Ringen direkt
neben der Zeltstange an.
Prenez à présent la fine tige courbe pour l'auvent. Enfoncez-là dans l’encoche de tige
du auvent, à l’endroit de la porte latérale et placez-là dans les anneaux proches du
tige de tente.
GBA 2014 Tellem 4.indd 2 06-01-14 15:32
8
9
7
6
Aan ieder einde van de stoksleuf zit een stelband met een kunststof voet eraan waar
later de stok ingeklikt dient te worden. Maak deze stelband zover mogelijk los zodat
de kunststof voet zo ver mogelijk van de tent af komt.
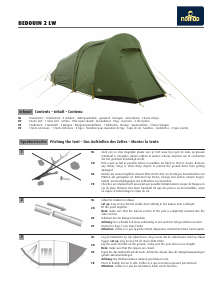
On either end of the pole sleeve there is an adjustment strap with a plastic base into
which the pole has to be clicked. Loosen this strap to the maximum so that the plastic
base is removed from the tent as far as possible.
An jedem Ende des Stangenschlitzes befindet sich ein Stellband mit einem Kunststoff-
fuß, in dem die Stange später eingeklickt werden muss. Lösen Sie das Stellband so
weit wie möglich, so dass der Kunststofffuß so weit wie möglich vom Zelt entfernt ist.
À chaque extrémité de fente se trouve une bretelle avec un pied en plastique dans
lequel la tige devra plus tard être enclenchée. Détendez le plus possible cette bretelle
de façon à ce que le pied en plastique soit aussi éloigné de la tente que possible.
Schuif voorzichtig de stokken erin. Let op:
- De stokken hebben aan 1 kant een bol en aan 1 kant zijn ze vlak. De vlakke kant
moet in de sleuf gestoken worden zodat de kant met de bol uitsteekt.
- De korte stok is voor de achterkant, de 2 lange stokken zijn voor het midden en de
voorzijde.
Slide the poles in carefully. Attention:
− The poles are convex on one side; they are flat on the other side. The flat side has to
be inserted into the sleeve so that the convex side protrudes.
− The short pole is meant for the rear; the two long poles are for the centre and front.
Schieben Sie die Stangen vorsichtig hinein. Achtung:
− Die Stangen besitzen an 1 Seite eine Kugel und sind an 1 Seite flach. Die flache Seite
muss in den Schlitz gesteckt werden, so dass die Seite mit der Kugel herausragt.
− Die kurze Stange ist für die Rückseite und die 2 langen Stangen sind für die Mitte und
die Vorderseite vorgesehen.
Glissez avec précaution les tiges à l’intérieur. Attention:
− Les tiges ont une boule d’un côté et de l’autre elles sont plates. Le côté plat doit être
enfoncé dans la fente afin que le côté avec la boule reste sorti.
− La tige courte est pour l’arrière, les 2 tiges longues sont pour le milieu et le devant.
Wanneer alle stokken in de sleuven zijn gestoken, kunnen de stokken op spanning
worden gebracht. Begin bij de 1e stok en druk deze zover mogelijk in de stoksleuf.
Druk als de stok niet verder gaat, het uiteinde van de stok (balletje) in de kunststof
voet. Herhaal dit voor de andere 2 stokken.
When all poles have been inserted in the sleeves, they can be tensioned. Start with the
first pole and push it into the sleeve as far as possible. When the pole stops, push its
extremity (little ball) in the plastic base. Repeat this for the two other poles.
Wenn alle Stangen in die Schlitze geschoben sind, können die Stangen gespannt
werden. Beginnen Sie bei der 1. Stange und schieben Sie diese so weit wie möglich in
den Stangenschlitz. Drücken Sie, wenn die Stange nicht weiter hineingeht, das Ende
der Stange (Kugel) in den Kunststofffuß. Wiederholen Sie das für die anderen 2
Stangen.
Lorsque toutes les tiges ont été enfoncées dans les fentes, elles peuvent être tendues.
Commencez par la 1ère tige et poussez-la le plus possible dans le fourreau. Lorsque la
tige est poussée au maximum, appuyez l’extrémité de la tige (boule) dans le pied en
plastique. Répétez cette procédure pour les 2 autres tiges.
EN
DE
FR
NL
NL
EN
DE
FR
NL
EN
DE
FR
Trek, als alle stokken in de kunststof voetjes zitten, de stelbanden aan.
When all the poles are in the plastic bases, tighten the adjustment straps.
Ziehen Sie, wenn alle Stangen in den Kunststofffüßen stecken, die Verstellbänder an.
Lorsque toutes les tiges sont dans les petits pieds en plastique, tendez les bretelles.
Zet de tent rechtop en zet deze aan de achterkant en voorkant vast met haringen.
De tent hoeft nog niet helemaal strak te staan.
Stand the tent upright and peg it down at the back and the front. The tent does not need
to be completely taut just yet.
Richten Sie das Zelt gerade auf und befestigen Sie es an der Rück- und Vorderseite mit
Heringen. Das Zelt braucht noch nicht ganz gespannt zu sein.
Redressez la tente et fixez-la à l’avant et à l’arrière avec des sardines. Inutile de tendre
complètement la tente à ce stade.
NL
EN
DE
FR
Pak nu de voorgebogen luifelstok. Steek deze door de stoksleuf van de luifel bij de
zijdeur en plaats deze in de ringetjes vlak naast de tentstok.
Now take the pre-bent awning pole. Slide it through the sleeve of the awning at the
side entrance and place it in the rings right next to the tent pole.
Nehmen Sie jetzt die vorgebogene Ausbaustange. Stecken Sie diese durch den
Stangenschlitz am Eingang des Ausbaus und bringen Sie sie in den Ringen direkt
neben der Zeltstange an.
Prenez à présent la fine tige courbe pour l'auvent. Enfoncez-là dans l’encoche de tige
du auvent, à l’endroit de la porte latérale et placez-là dans les anneaux proches du
tige de tente.
GBA 2014 Tellem 4.indd 2 06-01-14 15:32



Join the conversation about this product
Here you can share what you think about the Nomad Tellem 4 Tent. If you have a question, first carefully read the manual. Requesting a manual can be done by using our contact form.