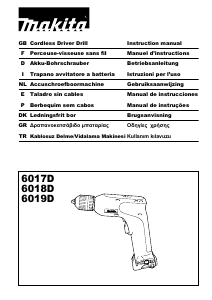
Manual Makita 6018D Drill-Driver

Need a manual for your Makita 6018D Drill-Driver? Below you can view and download the PDF manual for free in English. This product currently has 3 frequently asked questions, 0 comments and has 0 votes. If this is not the manual you want, please contact us.

Is your product defective and the manual offers no solution? Go to a Repair Café for free repair services.

Manual

Loading…

4
5. Always cover the battery terminals with the
battery cover when the battery cartridge is not
used.
6. Do not short the battery cartridge:
(1) Do not touch the terminals with any
conductive material.
(2) Avoid storing battery cartridge in a container
with other metal objects such as nails, coins,
etc.
(3) Do not expose battery cartridge to water or
rain.
A battery short can cause a large current flow,
overheating, possible burns and even a
breakdown.
7. Do not store the tool and battery cartridge in
locations where the temperature may reach or
exceed 50°C (122°F).
8. Do not incinerate the battery cartridge even if it is
severely damaged or is completely worn out. The
battery cartridge can explode in a fire.
9. Be careful not to drop or strike battery.
SAVE THESE INSTRUCTIONS.
Tips for maintaining maximum battery life
1. Charge the battery cartridge before completely
discharged. Always stop tool operation and
charge the battery cartridge when you notice less
tool power.
2. Never recharge a fully charged battery cartridge.
Overcharging shortens the battery service life.
3. Charge the battery cartridge with room
temperature at 10°C - 40°C (50°F - 104°F). Let a hot
battery cartridge cool down before charging it.
4. Charge the Nickel Metal Hydride battery cartridge
when you do not use it for more than six months.
FUNCTIONAL DESCRIPTION
CAUTION:
Always be sure that the tool is switched off and the
battery cartridge is removed before adjusting or
checking function on the tool.
Installing or removing battery cartridge
(Fig. 1)
Always switch off the tool before insertion or removal of
the battery cartridge.
To remove the battery cartridge, pull out the set plate
on the tool and grasp both sides of the cartridge while
withdrawing it from the tool.
To insert the battery cartridge, align the tongue on the
battery cartridge with the groove in the housing and slip
it into place. Snap the set plate back into place. Be sure
to close the set plate fully before using the tool to
prevent the battery cartridge from accidentally falling
out of the tool.
Do not use force when inserting the battery cartridge. If
the cartridge does not slide in easily, it is not being
inserted correctly.
Switch action (Fig. 2)
CAUTION:
Before inserting the battery cartridge into the tool,
always check to see that the switch trigger actuates
properly and returns to the “OFF” position when
released.
To start the tool, simply pull the switch trigger. Tool speed
is increased by increasing pressure on the switch trigger.
Release the switch trigger to stop.
Reversing switch action (Fig. 3)
This tool has a reversing switch to change the direction of
rotation. Move the reversing switch lever to the A side for
clockwise rotation or the B side for counterclockwise
rotation.
When the reversing switch lever is in the neutral position,
the switch trigger cannot be pulled.
CAUTION:
Always check the direction of rotation before operation.
Use the reversing switch only after the tool comes to a
complete stop. Changing the direction of rotation
before the tool stops may damage the tool.
When not operating the tool, always set the reversing
switch lever to the neutral position.
Speed change (Fig. 4)
To change the speed, first switch off the tool and then
slide the speed change lever to the “II” side for high speed
or “I” side for low speed. Be sure that the speed change
lever is set to the correct position before operation. Use
the right speed for your job.
CAUTION:
Always set the speed change lever fully to the correct
position. If you operate the tool with the speed change
lever positioned halfway between the “I” side and “II
side, the tool may be damaged.
Always make sure that the gear is engaged properly by
running the tool under no load after sliding the speed
change lever to the desired speed position. If you
operate the tool with the gear engaged improperly, the
tool may be damaged.
Do not use the speed change lever while the tool is
running. The tool may be damaged.
Adjusting the fastening torque (Fig. 5)
For model 6019D only
The fastening torque can be adjusted in 6 steps by turning
the adjusting ring so that its graduations are aligned with
the pointer on the tool body. The fastening torque is
minimum when the number 1 is aligned with the pointer,
and maximum when the marking is aligned with the
pointer.
The clutch will slip at various torque levels when set at the
number 1 to 5. The clutch is designed not to slip at the
marking.
Before actual operation, drive a trial screw into your
material or a piece of duplicate material to determine
which torque level is required for a particular application.
Download manual in English (PDF, 0.99 MB)
(Consider the environment and only print this manual if it is really necessary)

Loading…

Rating

Let us know what you think about the Makita 6018D Drill-Driver by leaving a product rating. Want to share your experiences with this product or ask a question? Please leave a comment at the bottom of the page.
Are you satisfied with the Makita 6018D Drill-Driver?
Yes No
Be the first to rate this product
0 votes

Join the conversation about this product

Here you can share what you think about the Makita 6018D Drill-Driver. If you have a question, first carefully read the manual. Requesting a manual can be done by using our contact form.

More about this manual

We understand that it’s nice to have a paper manual for your Makita 6018D Drill-Driver. You can always download the manual from our website and print it yourself. If you would like to have an original manual, we recommend you contact Makita. They might be able to provide an original manual. Are you looking for the manual of your Makita 6018D Drill-Driver in a different language? Choose your preferred language on our homepage and search for the model number to see if we have it available.

Specifications

Brand Makita
Model 6018D
Category Drill-Drivers
File type PDF
File size 0.99 MB

All manuals for Makita Drill-Drivers
More manuals of Drill-Drivers

Frequently Asked Questions about Makita 6018D Drill-Driver

Our support team searches for useful product information and answers to frequently asked questions. If you find an inaccuracy in our frequently asked questions, please let us know by using our contact form.

I keep stripping the screw head when using the drill-driver. Why is that? Verified

Most drill-drivers can be set to screw harder or softer. If the head keeps being stripped, the drill-driver should probably be put into a different setting. When it is a wireless device, always be sure the battery is charged for an optimal result.

This was helpful (97) Read more

Do I need to wear hearing protection when using a drill? Verified

Yes you should. Although the amount of noise produced by a drill can vary between brands and models, long term exposure to loud noise can cause permanent hearing damage. That is why it is a good idea to wear hearing protection.

This was helpful (37) Read more

Can I store power tools in a shed or garage? Verified

In general, you can store power tools in a shed or garage, even if it sometimes freezes there. However, it is better for the lifespan of the power tool to store it in a dry place without major temperature fluctuations. In a shed or garage, differences in temperature can cause condensation to form, which can cause rust. In addition, tools that run on batteries last shorter and do not charge as well at very low temperatures. To be sure how your power tool needs to be stored, always thoroughly read the user manual.

This was helpful (29) Read more
Manual Makita 6018D Drill-Driver

Related products

Related categories

×
Download