Manual Kichler 16094CBR VLO Lamp

Need a manual for your Kichler 16094CBR VLO Lamp? Below you can view and download the PDF manual for free in English. This product currently has 7 frequently asked questions, 0 comments and has 0 votes. If this is not the manual you want, please contact us.

Is your product defective and the manual offers no solution? Go to a Repair Café for free repair services.

Manual

Loading…

1
8
4
6
2
7
3
5
SAFETY INSTRUCTIONS
READ THIS FIRST
KEEP THESE INSTRUCTIONS
CAUTION – RISK OF SHOCK –
Disconnect Power at the main circuit breaker panel or main
fusebox before starting and during the installation.
This xture is intended for installation in accordance with the
National Electric Code (NEC) and Local code specications.
Failure to adhere to these codes and instructions may result in
serious injury and/or property damage and will void the warranty. If
you are not familiar with code requirements, installation by a
certied electrician is recommended.
Instructions for adding the Side Fire Trim Ring Part No. 16093CBR or
4 Way Trim Ring Part No. 16094CBR to the In-Ground Fixtures
16023CBR27, 16023CBR30, 16024CBR27, 16034CBR30,
16025CBR27 and 16025CBR30.
INSTALLATION
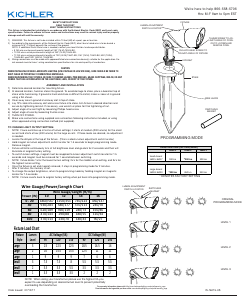
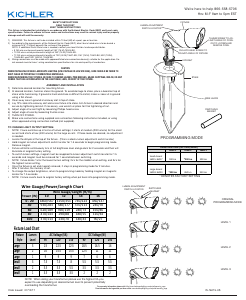
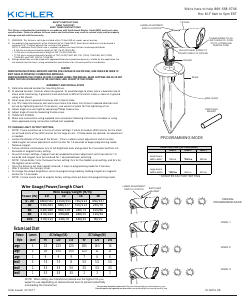
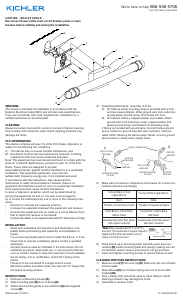
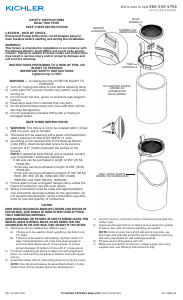
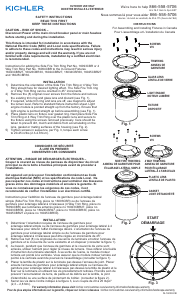
1) Determine the orientation of the Side Fire Trim Ring or 4 Way Trim
Ringshouldfacefordesiredlightinge󰀨ect.TheSideFireTrimring
or 4 Way Trim Ring can be oriented in 45° increments.
2) Removethe(8)originalcoverscrewsfromthextureandremove
the existing trim ring and glass lens and discard (see Fig. 1).
3) Ifrequired,whiletrimringandlensareo󰀨,usemagnettoadjust
thelumenlevel.Refertostandardxtureinstructionsheet.Light
engine module is pointed straight up from the factory. Ensure that
light engine is pointed straight up before assembling (see Fig. 1).
4) Placeplasticlensonxtureovergasketring.NextplaceSideFire
Trim Ring or 4 Way Trim Ring over the plastic lens and secure to
thextureusingthescrewsremovedpreviously.Careshouldbe
takentopreventdirt,mulchanddebrisfromaccumulatingonthe
lens,gasketormatingsurfacesofthehousing(seeFig.2).
5) Tighten screws in sequence, per Fig. 3, torque each screw to
20-25 in/lbs (2.3-2.8 N-m).
INSTRUCCIONES DE SEGURIDAD
PRIMERO LEA ESTO
GUARDE ESTAS INSTRUCCIONES
PRECAUCIÓN – RIESGO DE DESCARGA ELÉCTRICA
Desconecte la electricidad en el panel principal del interruptor
automático o caja principal de fusibles antes de comenzar y
durante la instalación.
Este artefacto se debe instalar de acuerdo con el Código
Eléctrico Nacional (NEC, por sus siglas en inglés) y con las
especicaciones del código local. No cumplir con estos códigos
e instrucciones puede resultar en lesiones graves y/ o en daños a
la propiedad y anulará la garantía. Si no está familiarizado con los
requisitos del código, la instalación se recomienda un electricista
certicado.
Instrucciones para agregar el anillo de guarnición contra incendios
lateral, pieza n.° 16093CBR o el anillo de guarnición de 4 vías, pieza
n.° 16094CBR a los artefactos de tierra 16023CBR27, 16023CBR30,
16024CBR27, 16034CBR30, 16025CBR27 y 16025CBR30.
INSTALACIÓN
1) Determine la orientación del anillo de guarnición contra incendios
lateral o del anillo de guarnición de 4 vías para obtener el efecto
de iluminación deseado. El anillo de guarnición contra incendios
lateral o el anillo de guarnición de 4 vías se pueden orientar en
incrementos de 45°.
2) Retire los (8) tornillos de la cubierta original del artefacto y retire el anillo de
guarnición y la lente de vidrio existentes y deséchelos (ver la Fig. 1).
3) Si es necesario, mientras el anillo de guarnición y la lente están retirados, utilice
unimánparaajustarelniveldelujoluminoso.Consultelahojade
instrucciones de los artefactos estándar. El módulo del motor de luminación
está apuntando directamente hacia arriba de fábrica. Asegúrese de que el
motordeiluminaciónestéapuntandohaciaarribaantesdelmontaje(verlaFig.1).
4) Coloquelalentedeplásticoenelartefactosobreelanillodelajunta.A
continuación, coloque el anillo de guarnición contra incendios lateral o el anillo de
guarniciónde4víassobrelalentedeplásticoyfíjeloalaunidadutilizandolos
tornillos que se quitaron anteriormente. Se debe tener cuidado para evitar que la
suciedad,elabonoylosresiduosseacumulenenlalente,lajuntaolas
superciesdecontactodelacarcasa(verlaFig.2).
5) Apriete los tornillos en secuencia, según la Fig. 3,
apriete cada tornillo a 20-25 pulg./libras (2,3-2,8 N-m).
For warranty information please visit: kichler.com/customer-care/warranty-information/landscape-warranty
Para informacion de la garantia por favor visite: kichler.com/customer-care/warranty-information/landscape-warranty
IS-16093-US
We’re here to help 866-558-5706
Hrs: M-F 9am to 5pm EST
Estamos aquí para ayudarle 866-558-5706
Horario:Lunes-Viernes9ama5pmEST(horaocialdeleste)
1
8
4
6
2
7
3
5
FIXTURE
ARTEFACTO
START
INICIO
1
8
4
6
2
7
3
5
Fig. 3
Fig. 1
SCREWS
TORNILLOS
TRIM RING
ANILLO DE
GUARNICIÓN
1
8
4
6
2
7
3
5
Fig. 2
GLASS LENS
LENTE DE VIDRIO
LIGHT ENGINE
MOTOR DE ILUMINACIÓN
SCREWS
TORNILLOS
1
8
4
6
2
7
3
5
SIDE FIRE TRIM RING
ANILLO DE GUARNICIÓN
CONTRA INCENDIOS LATERAL
4 WAY TRIM RING
ANILLO DE GUARNICIÓN
DE 4 VÍAS
PLASTIC LENS
LENTE DE PLÁSTICO
GASKET
JUNTA
Download manual in English (PDF, 1.2 MB)
(Consider the environment and only print this manual if it is really necessary)

Loading…

Rating

Let us know what you think about the Kichler 16094CBR VLO Lamp by leaving a product rating. Want to share your experiences with this product or ask a question? Please leave a comment at the bottom of the page.
Are you satisfied with the Kichler 16094CBR VLO Lamp?
Yes No
Be the first to rate this product
0 votes

Join the conversation about this product

Here you can share what you think about the Kichler 16094CBR VLO Lamp. If you have a question, first carefully read the manual. Requesting a manual can be done by using our contact form.

More about this manual

We understand that it’s nice to have a paper manual for your Kichler 16094CBR VLO Lamp. You can always download the manual from our website and print it yourself. If you would like to have an original manual, we recommend you contact Kichler. They might be able to provide an original manual. Are you looking for the manual of your Kichler 16094CBR VLO Lamp in a different language? Choose your preferred language on our homepage and search for the model number to see if we have it available.

Specifications

Brand Kichler
Model 16094CBR VLO
Category Lamps
File type PDF
File size 1.2 MB

All manuals for Kichler Lamps
More manuals of Lamps

Frequently Asked Questions about Kichler 16094CBR VLO Lamp

Our support team searches for useful product information and answers to frequently asked questions. If you find an inaccuracy in our frequently asked questions, please let us know by using our contact form.

Is all LED lighting dimmable? Verified

No, not all LED lights are dimmable. This is indicated on the packaging or the light itself.

This was helpful (492) Read more

I put a new light in my lamp but it won't turn on, why is that? Verified

Some lamps are made for light sources of a specific wattage. When a light source is inserted that requires a higher wattage than the lamp can provide, the light may not turn on. If the lamp delivers a much higher wattage than what the light source is made for, the light source can burn out.

This was helpful (347) Read more

Why is the colour of light important? Verified

There generally are two kinds of light, warm light and cold light. Cold light keeps you sharp and awake. Warm light has a relaxing effect. The warmth of the light is measured in Kelvin and is indicated on the packaging of the lamp itself.

This was helpful (283) Read more

What is lumen? Verified

Lumen is a measuring unit for the total amount of visible light emitted by a source.

This was helpful (228) Read more

What screw bases exist? Verified

Worldwide there many types of sockets, but most used are those based on the Edison screw, indicated with the letter E. In most countries screw bases E27 and E14 are standard. In the United States E26, E17, E12 and E10 are standard.

This was helpful (172) Read more

What do watts say about my lamp? Verified

Watt is a measuring unit for electricity consumption. Lamps that produce more light, generally use more Watt, but for comparing light output you should always use lumen.

This was helpful (147) Read more

What is LED? Verified

LED stands for Light-Emitting Diode. By running power through a semiconductor in the right direction, light is emitted.

This was helpful (127) Read more
Manual Kichler 16094CBR VLO Lamp

Related products

Related categories