Manual Kichler 16018AZT27 VLO Lamp

Need a manual for your Kichler 16018AZT27 VLO Lamp? Below you can view and download the PDF manual for free in English. This product currently has 7 frequently asked questions, 0 comments and has 0 votes. If this is not the manual you want, please contact us.

Is your product defective and the manual offers no solution? Go to a Repair Café for free repair services.

Manual

Loading…

Were here to help 866-558-5706
Hrs: M-F 9am to 5pm EST
IS-16015-US
Date Issued: 07/10/17
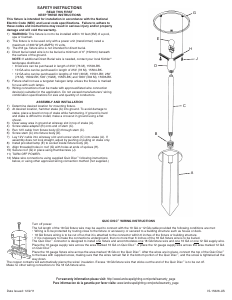
SAFETY INSTRUCTIONS
READ THIS FIRST
KEEP THESE INSTRUCTIONS
This fixture is intended for installation in accordance with the National Electric Code (NEC) and Local code
specifications. Failure to adhere to these codes and instructions may result in serious injury and/or property
damage and will void the warranty.
1) WARNING: This fixture is not to be installed within 10 feet (3M) of a pool, spa or fountain.
2) According to the requirements of the National Electric Code (NEC), direct burial rated wire is to be buried a
minimum of 6” [152mm] beneath the surface of the ground.
NOTE: If additional Direct Burial wire is needed, contact your local Kichler
®
landscape distributor.
8 GA wire can be purchased in length of 250’ (76 M),15503-BK.
10 GA wire can be purchased in length of 250’ (76 M),15504-BK.
12 GA wire can be purchased in lengths of 100’ (30 M),15501-BK; 250’ (76 M), 15502-BK; 500’ (152M),
15505-BK; and 1000’ (304 M), 15506-BK.
3) Wiring connections must be made with approved/listed wire connection device(s) suitable for the application. Do
not exceed manufacturers’ wiring combination specifications for size and quantity of conductors.
CAUTION
WHEN INSTALLING KICHLER LANDSCAPE LIGHTING (LINE VOLTAGE OR LOW VOLTAGE), CARE SHOULD BE TAKEN TO
KEEP CLEAR OF POTENTIALLY COMBUSTIBLE MATERIALS.
WHEN MAINTAINING THE FIXTURES, BE SURE TO REMOVE LEAVES, PINE NEEDLES, GRASS CLIPPINGS, MULCH, OR ANY
DEBRIS THAT HAS ACCUMULATED ON THE LIGHT BULB, LENS, OR BODY OF THE FIXTURE.
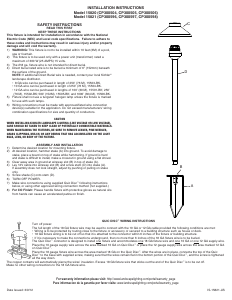
ASSEMBLY AND INSTALLATION
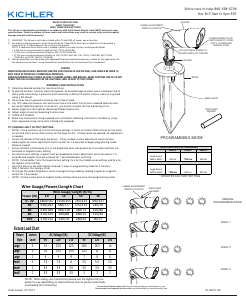
1) Determine desired location for mounting fixture.
2) At desired location, hammer stake into ground. To avoid damage to stake, place a board on top of
stake while hammering. If ground is hard and stake is difficult to install, make a crosscut in ground
using a flat shovel.
3) Clear away area in ground at wireway slot in top of stake.
4) Lay 12V cable into wireway slot and screw fixture into stake. Aim fixture in desired direction and
secure by tightening locknut. If necessary, use wrench or pliers for final tightening of nut.
5) Adjust angle of accent light by loosening Phillips head screw.
6) Adjust angle of cowl by loosening thumb screw.
7) TURN OFF POWER.
8) Make wire connections using supplied wire connectors following instructions included, or using
other approved wiring connection method (not supplied).
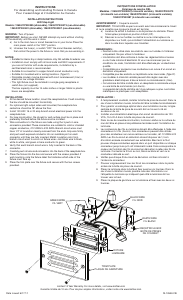
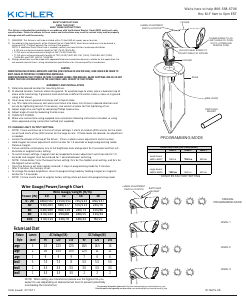
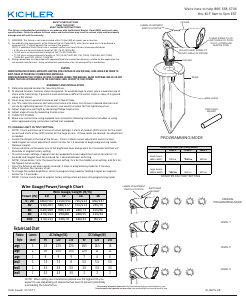
TO CHANGE LIGHT OUTPUT SETTING:
NOTE: Fixure switches up in terms of lumen settings; it starts at medium (200 lumens) for the small
accent and starts at low (400 lumens) for the large accent. If these levels are desired, no adjustment
is needed.
Locate the dimple at the top of the fixture. (This is called a lumen adjustment switch locator)
Hold magnet on lumen adjustment switch locator for 1.5 seconds to begin programming mode.
Remove magnet.
Fixture will blink continuously 4x’s at full brightness level and go dark for 2 seconds and then will
illuminate at original factory setting.
To switch lumen settings, magnet must be reapplied to lumen adjustment switch locator for 1.5
seconds and magnet must be removed for 1 second between switching.
NOTE: fixture blinks 1x for the lowest lumen setting; 2x’s for the middle lumen setting, and 3x’s for
the highest lumen setting.
Once the fixture is set and magnet removed, it stays in programming mode for 2 minutes.
After 2 minutes, the memory is set.
To change the output brightenss, return to programming mode by holding magnet on magnetic
locator for 1.5 seconds.
NOTE: Fixture reverts back to original factory setting when put back into programming mode.
For warranty information please visit: http://www.landscapelighting.com/portal/warranty_page
Para informacion de la garantia por favor visite: www.landscapelighting.com/portal/warranty_page
* DENOTES FACTORY SETTING
PROGRAMMING MODE
LUMEN ADJUSTMENT
SWITCH LOCATOR
SWITCHING
MAGNET
ORIGINAL
PROGRAMMING MODE
LEVEL 1
LEVEL 2
LEVEL 3
WireGauge/Power/LengthChart
10 12 14 16
020 1860/567 1150/351 730/223 450/137
40 930/283 580/177 370/113 230/70
60 620/189 390/119 240/73 150/46
80 470/143 290/88 180/55 110/34
100 370/113 230/70 140/43 90/27
Power(W)
WireGauge/Length(ft/m)
Gen3LumenTableforIS05112017.xlsx
Confidential 1
Level1 Level2 Level3
LumenLevelTable(For2700K/3000K)
SmallAccent
1601516017
LargeAccent
1601816020
100Lm
*400Lm
300Lm
950Lm
FixtureLoadChart
9V 12V 15V 9V 12V 15V
Large 3 23 22.5 22.5 18.5 16.5 16
Large 2 16 15.5 15.5 12.5 11 11
Large 1 9 9 9 7 6 6
Small 3 7.5 7.5 8 5.5 5.5 5.5
Small 2 5.5 5.5 5.5 3.5 3.5 3.5
Small 1 3.5 3.5 3.5 2 2 2
Fixture
Style
Lumen
Level
ACVoltage(VA)
DCVoltage(W)
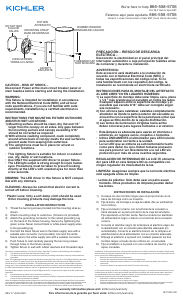
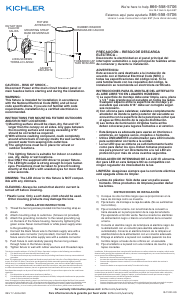
LUMEN ADJUSTMENT
SWITCH LOCATOR
FIXTURE
PHILLIPS HEAD SCREW TO
ADJUST ANGLE OF FIXTURE
THUMB SCREW TO AD-
JUST ANGLE OF COWL
OR TO LOOSEN AND
REMOVE COWL
LOCKNUT
STAKE
WIRE LEADS
SWITCHING
MAGNET
NOTE: When sizing your transformer please use the highest VA you
expect to use depending on desired lumen level to prevent potentially
overloading the transformer.
Download manual in English (PDF, 0.35 MB)
(Consider the environment and only print this manual if it is really necessary)

Loading…

Rating

Let us know what you think about the Kichler 16018AZT27 VLO Lamp by leaving a product rating. Want to share your experiences with this product or ask a question? Please leave a comment at the bottom of the page.
Are you satisfied with the Kichler 16018AZT27 VLO Lamp?
Yes No
Be the first to rate this product
0 votes

Join the conversation about this product

Here you can share what you think about the Kichler 16018AZT27 VLO Lamp. If you have a question, first carefully read the manual. Requesting a manual can be done by using our contact form.

More about this manual

We understand that it’s nice to have a paper manual for your Kichler 16018AZT27 VLO Lamp. You can always download the manual from our website and print it yourself. If you would like to have an original manual, we recommend you contact Kichler. They might be able to provide an original manual. Are you looking for the manual of your Kichler 16018AZT27 VLO Lamp in a different language? Choose your preferred language on our homepage and search for the model number to see if we have it available.

Specifications

Brand Kichler
Model 16018AZT27 VLO
Category Lamps
File type PDF
File size 0.35 MB

All manuals for Kichler Lamps
More manuals of Lamps

Frequently Asked Questions about Kichler 16018AZT27 VLO Lamp

Our support team searches for useful product information and answers to frequently asked questions. If you find an inaccuracy in our frequently asked questions, please let us know by using our contact form.

Is all LED lighting dimmable? Verified

No, not all LED lights are dimmable. This is indicated on the packaging or the light itself.

This was helpful (462) Read more

I put a new light in my lamp but it won't turn on, why is that? Verified

Some lamps are made for light sources of a specific wattage. When a light source is inserted that requires a higher wattage than the lamp can provide, the light may not turn on. If the lamp delivers a much higher wattage than what the light source is made for, the light source can burn out.

This was helpful (315) Read more

Why is the colour of light important? Verified

There generally are two kinds of light, warm light and cold light. Cold light keeps you sharp and awake. Warm light has a relaxing effect. The warmth of the light is measured in Kelvin and is indicated on the packaging of the lamp itself.

This was helpful (255) Read more

What is lumen? Verified

Lumen is a measuring unit for the total amount of visible light emitted by a source.

This was helpful (190) Read more

What screw bases exist? Verified

Worldwide there many types of sockets, but most used are those based on the Edison screw, indicated with the letter E. In most countries screw bases E27 and E14 are standard. In the United States E26, E17, E12 and E10 are standard.

This was helpful (142) Read more

What do watts say about my lamp? Verified

Watt is a measuring unit for electricity consumption. Lamps that produce more light, generally use more Watt, but for comparing light output you should always use lumen.

This was helpful (113) Read more

What is LED? Verified

LED stands for Light-Emitting Diode. By running power through a semiconductor in the right direction, light is emitted.

This was helpful (98) Read more
Manual Kichler 16018AZT27 VLO Lamp

Related products

Related categories