Manual Kichler 12602WH Shielded Lamp

Need a manual for your Kichler 12602WH Shielded Lamp? Below you can view and download the PDF manual for free in English. This product currently has 7 frequently asked questions, 0 comments and has 0 votes. If this is not the manual you want, please contact us.

Is your product defective and the manual offers no solution? Go to a Repair Café for free repair services.

Manual

Loading…

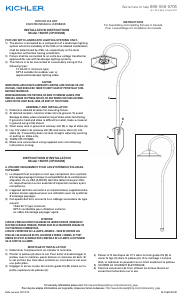
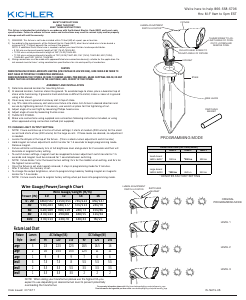
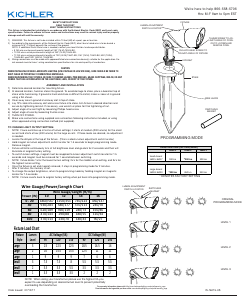
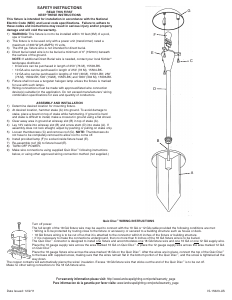
INSTALLATION INSTRUCTIONS
LED Step Light
Models: 12650/CP300385 (dimmable), 12600/CP300473 (non-dimmable)
12652/CP300481 (dimmable), 12602/CP300387 (non-dimmable)
WARNING: Turn off power.
IMPORTANT: Before you start, NEVER attempt any work without shutting
off the electricity until the work is done.
a) Go to the main fuse or circuit breaker box in your home. Place the
main power switch in the “OFF” position.
b) Unscrew the fuse(s), or switch “OFF” the circuit breaker switch(s),
that control the power to the fixture or room that you are working in.
NOTES:

 Installation must comply with all local code and NEC requirements. If
you are not familiar with code requirements, installation by a
certified electrician is recommended.
 
 
 
electronic low voltage dimmers.
 
switch box (not supplied).
The box capacity must be 14 cubic inches or larger. Metal or plastic
boxes are acceptable.
INSTALLATION:
1. At the desired fixture location, mount the receptacle box. If wall mounting,
the box should be mounted horizontally.
2. For optimum light output when wall mounted, the receptacle box
centerline should be 18” above the floor.
3. Install 120 VAC 15 or 20 amp branch circuit electrical power into the
receptacle box.
4. For new construction, the drywall or wall surface must be in place and
preferably finished before the fixture can be installed.
 
connectors provided. These connectors are suitable for solid or stranded
copper conductors, #12 AWG to #20 AWG. Branch circuit wires must
have 1/2” of insulation cleanly removed from the ends. Grip wire firmly
and push each exposed conductor into an available port on each
connector until they are fully inserted. Match insulation color from
branch circuit wires to colors on fixture wires. Join black wire to black,
white to white, and green or bare conductor to green.
6. Verify that each branch circuit wire is fully inserted to the back of the
connector.
7. Carefully push all wire and connectors into the back of the receptacle box.
8. Place the fixture into the box and secure with the screws provided. If
wall mounting, note the fixture label that indicates which side of the
fixture must face up.
9. Place the trim plate over the fixture and secure with the two screws
provided.
INSTRUCTIONS D’INSTALLATION
Éclairage de marche DEL
Modèles : 12650/CP300385 (à intensité variable), 12600/CP300473
(à intensité non variable) 12652/CP300481 (à intensité variable),
12602/CP300387 (à intensité non variable)
AVERTISSEMENT : Couper le courant.
IMPORTANT: 
et ne le remettre que lorsque le travail est terminé.
a) Localiser le coffret à fusibles ou le disjoncteur du domicile. Placer
l’interrupteur principal en position d’Arrêt (Off).
 
disjoncteur sur Arrêt, qui contrôlent l’alimentation au luminaire ou
dans la salle dans laquelle vous travaillez.
REMARQUES :
 
uniquement. Ne pas utiliser à l’extérieur.
 

conditions du code, l’installation doit être effectuée par un électricien
qualifié.
 
dérivation uniquement.
 
 
gradateurs électroniques à basse tension ou incandescents (triac).
 
ou une boîte de commande (non fourni).
La capacité de la boîte doit être de 14 po cubiques ou plus. Les boîtes
métalliques ou plastiques sont acceptables.
INSTALLATION :
 
cas d’une installation murale, la boîte doit être installée horizontalement.
2. Pour garantir un éclairage optimal dans une installation murale, la ligne
centrale de la boîte de prise de courant doit se trouver à 45 cm

3. Installer une alimentation électrique d’un circuit de dérivation de 120
VCA, 15 à 20 A dans la boîte de prises de courant.
 
mur doit être en place et de préférence terminée avant l’installation du
luminaire.
5. Les connexions des fils au luminaire doivent être effectuées à l’aide des
connecteurs à 3 fils (fournis). Ces connecteurs peuvent être utilisés
pour des conducteurs en cuivre centraux ou torsadés, réf. 12 AWG à 20
AWG. Les fils du circuit en dérivation doivent disposer de 1,3 cm
d’isolation enlevée correctement aux extrémités. Bien tenir le fil et
pousser chaque conducteur exposé dans un port disponible sur chaque
connecteur jusqu’à ce qu’il soit totalement inséré. Faire correspondre la
couleur de l’isolation des fils du circuit en dérivation à celles des fils du
luminaire. Connecter le fil noir au noir, blanc au blanc et vert ou le
conducteur dénudé au vert.
6. Vérifier que chaque fil du circuit de dérivation soit bien introduit à

7. Pousser soigneusement tous les fils et les connecteurs dans la partie

 
cas d’une installation murale, prendre note des informations sur
l’étiquette du luminaire qui indiquent quel côté le luminaire doit se
trouver vers le haut.
9. Placer la plaque de garniture sur le luminaire et fixer avec les deux vis
fournies.
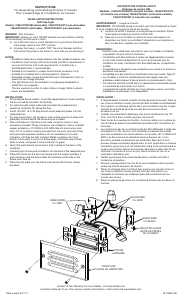
GREEN WIRE
FIL VERT
BLACK WIRE
FIL NOIR
WHITE WIRE
FIL BLANC
RECEPTACLE BOX


FIXTURE
LUMINAIRE
TRIM PLATE


Limited 10 Year Warranty. For more details, visit www.kichler.com
Garantie limitée de 10 ans. Pour de plus amples informations, visitez notre site www.kichler.com
INSTRUCTIONS
For Assembling and Installing Fixtures in Canada
Pour L’assemblage et L’installation Au Canada
Download manual in English (PDF, 0.12 MB)
(Consider the environment and only print this manual if it is really necessary)

Loading…

Rating

Let us know what you think about the Kichler 12602WH Shielded Lamp by leaving a product rating. Want to share your experiences with this product or ask a question? Please leave a comment at the bottom of the page.
Are you satisfied with the Kichler 12602WH Shielded Lamp?
Yes No
Be the first to rate this product
0 votes

Join the conversation about this product

Here you can share what you think about the Kichler 12602WH Shielded Lamp. If you have a question, first carefully read the manual. Requesting a manual can be done by using our contact form.

More about this manual

We understand that it’s nice to have a paper manual for your Kichler 12602WH Shielded Lamp. You can always download the manual from our website and print it yourself. If you would like to have an original manual, we recommend you contact Kichler. They might be able to provide an original manual. Are you looking for the manual of your Kichler 12602WH Shielded Lamp in a different language? Choose your preferred language on our homepage and search for the model number to see if we have it available.

Specifications

Brand Kichler
Model 12602WH Shielded
Category Lamps
File type PDF
File size 0.12 MB

All manuals for Kichler Lamps
More manuals of Lamps

Frequently Asked Questions about Kichler 12602WH Shielded Lamp

Our support team searches for useful product information and answers to frequently asked questions. If you find an inaccuracy in our frequently asked questions, please let us know by using our contact form.

Is all LED lighting dimmable? Verified

No, not all LED lights are dimmable. This is indicated on the packaging or the light itself.

This was helpful (495) Read more

I put a new light in my lamp but it won't turn on, why is that? Verified

Some lamps are made for light sources of a specific wattage. When a light source is inserted that requires a higher wattage than the lamp can provide, the light may not turn on. If the lamp delivers a much higher wattage than what the light source is made for, the light source can burn out.

This was helpful (355) Read more

Why is the colour of light important? Verified

There generally are two kinds of light, warm light and cold light. Cold light keeps you sharp and awake. Warm light has a relaxing effect. The warmth of the light is measured in Kelvin and is indicated on the packaging of the lamp itself.

This was helpful (288) Read more

What is lumen? Verified

Lumen is a measuring unit for the total amount of visible light emitted by a source.

This was helpful (228) Read more

What screw bases exist? Verified

Worldwide there many types of sockets, but most used are those based on the Edison screw, indicated with the letter E. In most countries screw bases E27 and E14 are standard. In the United States E26, E17, E12 and E10 are standard.

This was helpful (172) Read more

What do watts say about my lamp? Verified

Watt is a measuring unit for electricity consumption. Lamps that produce more light, generally use more Watt, but for comparing light output you should always use lumen.

This was helpful (149) Read more

What is LED? Verified

LED stands for Light-Emitting Diode. By running power through a semiconductor in the right direction, light is emitted.

This was helpful (130) Read more
Manual Kichler 12602WH Shielded Lamp

Related products

Related categories