Manual Horstmann Electronic 7 Thermostat

Need a manual for your Horstmann Electronic 7 Thermostat? Below you can view and download the PDF manual for free in English. This product currently has 2 frequently asked questions, 1 comment and has 0 votes. If this is not the manual you want, please contact us.

Is your product defective and the manual offers no solution? Go to a Repair Café for free repair services.

Manual

Loading…

MOUNTING
The Electronic 7 should be removed from the mounting box by opening the front flap and unscrewing
the 2 captive screws securing the unit to the mounting box. The flap, which is hinged along the
bottom edge may be opened by inserting fingernails simultaneously behind the flap on both sides
and gently levering forward.
CONDUIT BOX MOUNTING
Use either holes marked ‘A’ in Fig.1 to secure to a single gang box, or the two holes marked ‘C’ for a
double gang box. Cable entry is through the cut-out between the 2 fixing holes ‘A’
SPECIFICATION
13A 230V AC 50Hz
Suitable for immersion heaters up to 3kW
Live Parts - enclosed
Dirt protection - normal situation
Moisture protection - ordinary
Shock protection - Class 1
Contacts - Micro-disconnection
Battery Reserve - approximately 2 years total power dis-connection
Size - 170mm x 115mm x 60mm (excluding rocker switch)
ENSURE CORRECT SUMMER OR WINTER
TIME SETTING BY USING THE
SUMMER/WINTER BUTTON
ENSURE WINTER APPEARS
ON THE DISPLAY USING THE
SUMMER/WINTER BUTTON
ENSURE SLIDE SWITCH IS IN
THE MANUAL BOOST
SELECTION POSITION.
REPEAT FOR
REMAINING ON/OFF
PERIODS
USE THE HRS AND MINS
BUTTONS TO SET CORRECT TIME
SETTING THE TIME OF DAY
ENSURE THAT THE AM/PM SETTING ARE CORRECT (THIS COULD EFFECT YOUR OFF-PEAK PROGRAMMING)
SETTING THE OFF-PEAK TIMES
PRESS THE RECESSED SET BUTTON, USING A
PENCIL OR BALL POINT PEN (LOCATED NEXT
TO THE SUMMER/WINTER BUTTON)
USE THE HRS AND MINS
BUTTONS TO SET REQUIRED
1 ON TIME
PRESS THE SET
BUTTON AGAIN
USE THE HRS AND MINS
BUTTONS TO SET REQUIRED
1 OFF TIME
ENSURE CLOCK IS
DISPLAYED WHEN
COMPLETE
SHOULD YOU NOT REQUIRE ANY FURTHER OFF-PEAK SETTINGS ENSURE THAT THE REMAINING PERIODS ARE
SET AT THE SAME TIME EG; 2 ON 12:00PM - 2 OFF 12:00PM,
3 ON 12:00PM - 3 OFF 12:00PM (THESE ARE THE FACTORY DEFAULT SETTINGS)
ONCE THE CLOCK DISPLAY HAS BEEN RESTORED PLEASE ENSURE THE CORRECT SUMMER/WINTER SETTING IS
ON THE DISPLAY.
COMPLETING THE INSTALLATION
To assemble the controller to its mounting box first push the connectors numbered 1 - 5 into the
corresponding numbered terminal as shown in Fig.1
Carefully offer the controller to the box and secure with the fixing screws, ensuring the wiring does
not become damaged.
Switch on the mains supply, put the rocker switch in the TIMED position.
QUESTIONSANDANSWERS
The unit display has become frozen
There is no display on the
programmer
How do I know if the is still under warranty
This could be due to local electrical interference
Using the RESET procedure on page 3, may rectify the fault.
The commissioning switch located on the rear of the unit needs to be set in either
the GMT or GMT/BST position. The Electronic 7 must only be removed from it’s back-
box by a qualified electrician.
The Electronic 7 comes with a 2 year guarantee from the date of manufacture. This
date is located on the rear of the unit, indicated by a month over a year. The
Electronic 7 must only be removed from it’s backbox by a qualified electrician.
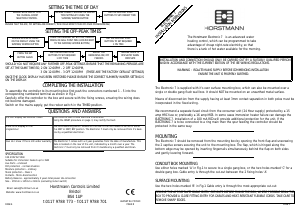
The Horstmann Electronic 7 is an advanced water
heating control, which can be programmed to take
advantage of cheap night-rate electricity, so that
there is a tank of hot water available for the morning.
PAGE 1PAGE 4
LEAFLET No P30910
ISSUE 8
INSTALLATION AND CONNECTION SHOULD ONLY BE CARRIED OUT BY A SUITABLY QUALIFIED PERSON
AND IN ACCORDANCE WITH THE CURRENT EDITION OF THE IEE WIRING REGULATIONS.
WARNING:ISOLATE MAINS SUPPLY BEFORE COMMENCING INSTALLATION
ENSURE THE UNIT IS PROPERLY EARTHED.
The Electronic 7 is supplied with it’s own surface mounting box, which can also be mounted over a
single or double gang flush wall box. It should NOT be mounted on an unearthed metal surface.
Means of disconnection from the supply having at least 3mm contact separation in both poles must be
incorporated in the fixed wiring.
We recommend a separate fused circuit from the consumer unit (24 Hour supply) protected by a 15
amp HRC fuse or, preferably a 16 amp MCB. In some cases immersion heater failure can damage the
ELECTRONIC 7. Installation of a 100 mA RCD will provide additional protection for the unit. If the
ELECTRONIC 7 is to be connected to a ring main then the spur feeding the controller should be
protected in the same way.
SURFACE MOUNTING
Use the two holes marked ‘B’ in Fig.1 Cable entry is through the most appropriate cut-out
REMOVE THE APPROPRIATE CABLE ENTRY CUT-OUTS BEFORE FIXING THE BOX, WHERE POSSIBLE DRILL THE
BOX TO PROVIDE A CLOSE FITTING ENTRY FOR CABLES AND HEAT-RESISTANT FLEXIBLE CORDS. TAKE CARE TO
REMOVE SHARP EDGES.
Horstmann Controls Limited
Bristol
BS4 1UP
t:0117 9788 773 - f:0117 9788 701
Website: www.horstmann.co.uk
Download manual in English (PDF, 0.1 MB)
(Consider the environment and only print this manual if it is really necessary)

Loading…

Rating

Let us know what you think about the Horstmann Electronic 7 Thermostat by leaving a product rating. Want to share your experiences with this product or ask a question? Please leave a comment at the bottom of the page.
Are you satisfied with the Horstmann Electronic 7 Thermostat?
Yes No
Be the first to rate this product
0 votes

Join the conversation about this product

Here you can share what you think about the Horstmann Electronic 7 Thermostat. If you have a question, first carefully read the manual. Requesting a manual can be done by using our contact form.

Ness L 10-07-2020
Hi, my Horstman boiler was working up until a power cut. After power cut, time was reset and boiler runs during off peak hours eg 2-7am. I’ve checked and confirm this. What I don’t understand is why the water is not hot at all if the boiler is functioning, what can be the reason for not hot water? In the morning the boiler feels warm to touch. Any advice would be greatly appreciated.

reply | This was helpful (0)

More about this manual

We understand that it’s nice to have a paper manual for your Horstmann Electronic 7 Thermostat. You can always download the manual from our website and print it yourself. If you would like to have an original manual, we recommend you contact Horstmann. They might be able to provide an original manual. Are you looking for the manual of your Horstmann Electronic 7 Thermostat in a different language? Choose your preferred language on our homepage and search for the model number to see if we have it available.

Specifications

Brand Horstmann
Model Electronic 7
Category Thermostats
File type PDF
File size 0.1 MB

All manuals for Horstmann Thermostats
More manuals of Thermostats

Frequently Asked Questions about Horstmann Electronic 7 Thermostat

Our support team searches for useful product information and answers to frequently asked questions. If you find an inaccuracy in our frequently asked questions, please let us know by using our contact form.

What is the dead zone of a thermostat? Verified

Many modern thermostats have a dead zone. If the temperature deviates less than 4°C from the set temperature, the system will not heat or cool. This so called dead zone of the thermostat prevents the system from turning on and off too often, saving energy.

This was helpful (1756) Read more

What is the best place to mount a thermostat? Verified

The best place for a thermostat is approximately 1,5 meter above the ground. Never place the thermostat nead a radiator or other heat emitting equipment or in direct sunlight. Choose a room that is used often. In most cases this is the living room.

This was helpful (1128) Read more
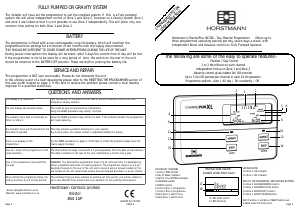
Manual Horstmann Electronic 7 Thermostat

Related products

Related categories

×
Download