Manual Horstmann Electronic 7 Thermostat

Need a manual for your Horstmann Electronic 7 Thermostat? Below you can view and download the PDF manual for free in English. This product currently has 2 frequently asked questions, 1 comment and has 0 votes. If this is not the manual you want, please contact us.

Is your product defective and the manual offers no solution? Go to a Repair Café for free repair services.

Manual

Loading…
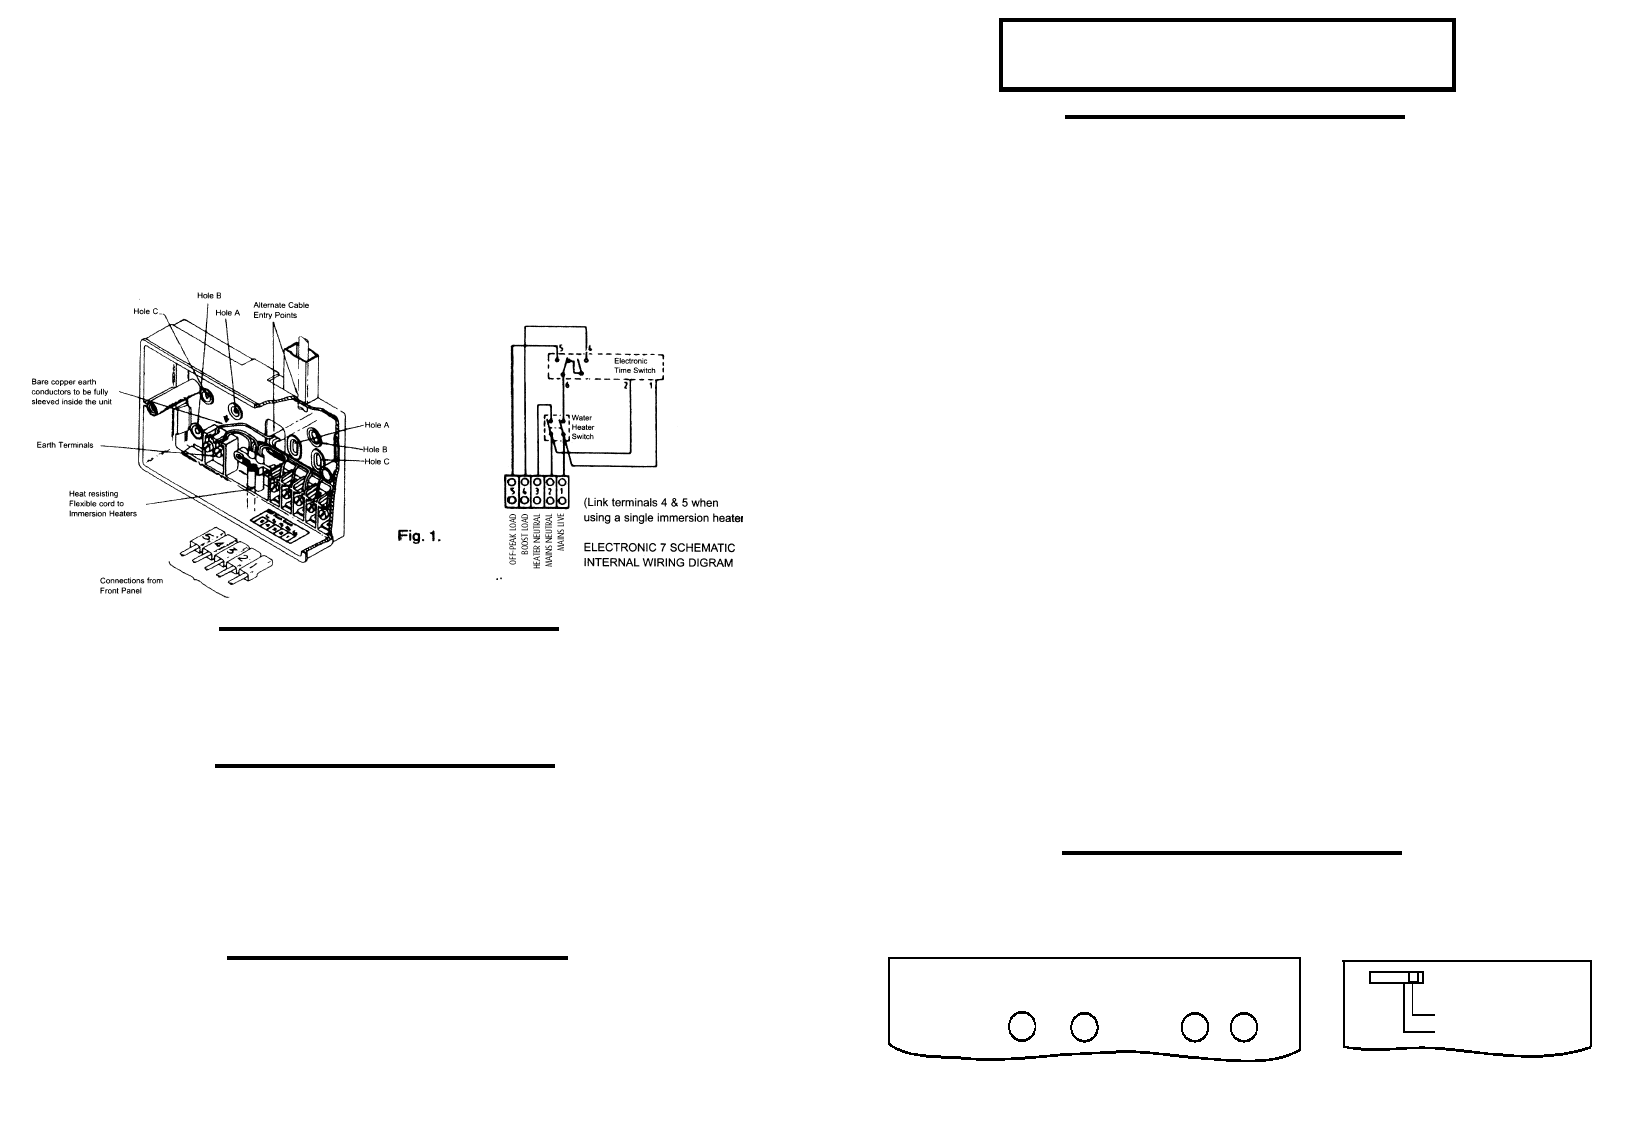
CONNECTIONS
Use a three-core cable with a minimum conductor size of 1.0mm
2
for a 2kW heater, or 1.5mm
2
for a
3kW heater to connect the unit to the supply. Connect the incoming wires to the terminal block as
follows;
TERMINAL 1 - LIVE in
TERMINAL 2 - NEUTRAL in
TERMINAL 3 - NEUTRAL(s) outtoimmersionheater(s)
TERMINAL 4 - LIVE out to Boost immersion heater
TERMINAL 5 - LIVE out to Off-Peak immersion heater
Clamp all surface wiring adjacent to the box or use trunking where appropriate. Secure the heat
resistant flexible cords from the immersion heaters using the cable clamp in the box.
SINGLE ELEMENT IMMERSION HEATERS
The 3 core flexible cord should be heat-resistant and rated to 85
o
C.
TERMINAL 4 (Boost live output) should be connected to TERMINAL 5(Off-Peak live output) and to the
immersion heater.
The Neutral connection should go to TERMINAL3 and the Earth connection to the EARTH TERMINALS.
DUAL ELEMENT IMMERSION HEATERS
The elements should be controlled through separate thermostats. In practice the thermostat for the
top short element is usually set
5-10
o
Cless than the thermostat for the long Off-Peak element.
The 3 core flexible cords should be heat-resistant and rated
85
o
C.
TERMINAL 4 (boost live output) should be connected to the short element and TERMINAL 5(Off-Peak
live output) to the long element.
The Neutral connections should go to TERMINAL 3and the Earth connection to the EARTH TERMINALS.
TWIN IMMERSION HEATERS
The thermostat for the top immersion element should be set lower than the thermostat for the
bottom immersion heater.
The 3 core flexible cords should be heat-resistant and rated
85
o
C.TERMINAL 4(boost live output)
should be connected to the top immersion heater and TERMINAL 5(off-peak live output)to the bottom
immersion heater. The two Neutral connections should go to TERMINAL 3and the Earth connections to
the EARTH TERMINALS
COMMISSIONING INSTRUCTIONS
SETTING THE CONTROLLER
A feature of this controller is that it allows the time of day and Off-Peak switching times to be set
before the unit is finally installed and powered up.
COMMISSIONING SWITCH
The commissioning switch which is on the back of the unit must now be set to achieve correct
operation of the controller and battery reserve. The display will remain blank with the switch in the
OFF position.
RESETTING THE ELECTRONIC 7
Before installing the off-peak heating periods it is important to reset the unit, this is achieved by
simultaneously pressing the Boost, Summer/Winter, HrsandMins buttons together. The Boost
selection switch must be in the Manual Boost Position.
Electronic equipment can sometimes be affected by sudden changes of atmosphere, this can result in
Display being fogged or Reset function failure. If this happens leave the unit switched on for 15
minutes and repeat the RESET function.
BOOST
SUMMER/
WINTER
HRS MINS
MANUAL BOOST
TIMED BOOST
BOOST SELECTION
SWITCHPOSITION - GMT or GMT/BST
It is essential that the correct commissioning switch position is selected. Incorrect setting of the
commissioning switch may result in inefficient use of the available Off-Peak supply.
GMT ONLY- Switching will always take place at GMTtimes (summer and winter).
GMT/BST- Switching time will be changed by one hour, when the user presses
SUMMER/WINTERbutton on the face of the unit. In the GMT/BSTmode the clock display will match
the actual switching time.
If connection is to be made where a 2-Rate electricity meter is controlled by a Radio Teleswitch or
other equipment, which control tariffs remotely or seasonally, it is essential that before setting the
commissioning switch you find out how the off-peak times are controlled.
The Customer Service Centre of your Electricity Supplier will confirm information regarding Off-Peak
electricity timing and the switching method used for your area. (see below)
GMT ONLY- Set the switch in the GMT position, switching will always take place at GMT
times (summer and winter).
GMT/BST- Set the commissioning switch in the GMT/BST position. Switching time will be
changed by one hour, when the user presses SUMMER/WINTERbutton on the face of the unit. In the
GMT/BSTmode the clock display will match the actual switching time.
On installations where the 2-Rate electricity meter is controlled by a mechanical Tariff Timeswitch the
commissioning switch should be set to GMT ONLY.
PAGE 2 PAGE 3
When wiring is complete ensure that all terminal screws,
including the earth terminal screws are securely tightened
to achieve a minimum torque of .75Nm.
Download manual in English (PDF, 0.1 MB)
(Consider the environment and only print this manual if it is really necessary)

Loading…

Rating

Let us know what you think about the Horstmann Electronic 7 Thermostat by leaving a product rating. Want to share your experiences with this product or ask a question? Please leave a comment at the bottom of the page.
Are you satisfied with the Horstmann Electronic 7 Thermostat?
Yes No
Be the first to rate this product
0 votes

Join the conversation about this product

Here you can share what you think about the Horstmann Electronic 7 Thermostat. If you have a question, first carefully read the manual. Requesting a manual can be done by using our contact form.

Ness L 10-07-2020
Hi, my Horstman boiler was working up until a power cut. After power cut, time was reset and boiler runs during off peak hours eg 2-7am. I’ve checked and confirm this. What I don’t understand is why the water is not hot at all if the boiler is functioning, what can be the reason for not hot water? In the morning the boiler feels warm to touch. Any advice would be greatly appreciated.

reply | This was helpful (0)

More about this manual

We understand that it’s nice to have a paper manual for your Horstmann Electronic 7 Thermostat. You can always download the manual from our website and print it yourself. If you would like to have an original manual, we recommend you contact Horstmann. They might be able to provide an original manual. Are you looking for the manual of your Horstmann Electronic 7 Thermostat in a different language? Choose your preferred language on our homepage and search for the model number to see if we have it available.

Specifications

Brand Horstmann
Model Electronic 7
Category Thermostats
File type PDF
File size 0.1 MB

All manuals for Horstmann Thermostats
More manuals of Thermostats

Frequently Asked Questions about Horstmann Electronic 7 Thermostat

Our support team searches for useful product information and answers to frequently asked questions. If you find an inaccuracy in our frequently asked questions, please let us know by using our contact form.

What is the dead zone of a thermostat? Verified

Many modern thermostats have a dead zone. If the temperature deviates less than 4°C from the set temperature, the system will not heat or cool. This so called dead zone of the thermostat prevents the system from turning on and off too often, saving energy.

This was helpful (1756) Read more

What is the best place to mount a thermostat? Verified

The best place for a thermostat is approximately 1,5 meter above the ground. Never place the thermostat nead a radiator or other heat emitting equipment or in direct sunlight. Choose a room that is used often. In most cases this is the living room.

This was helpful (1128) Read more
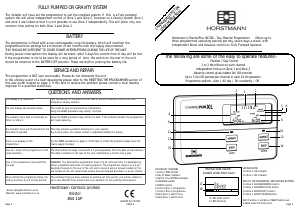
Manual Horstmann Electronic 7 Thermostat

Related products

Related categories

×
Download