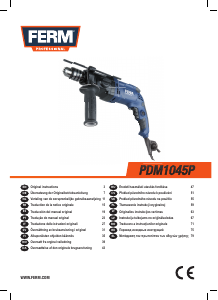
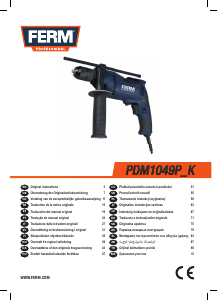
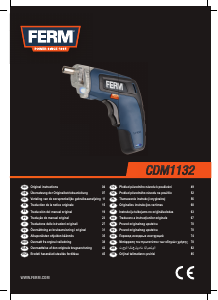
Manual FERM CDM1009 Drill-Driver

Need a manual for your FERM CDM1009 Drill-Driver? Below you can view and download the PDF manual for free in English. This product currently has 3 frequently asked questions, 0 comments and has 0 votes. If this is not the manual you want, please contact us.

Is your product defective and the manual offers no solution? Go to a Repair Café for free repair services.

Manual

Loading…

 
 (FTC-1440K2) 14.4 V
- - -
   230 V~
   50 Hz
  1.2 Ah (NiCd)
  3 - 5 
   2
   0-400/0-1150
/
  0.8 - 10 mm
   20 mm
   10 mm
   13 mm
 1.66 kg
Lpa ( ) 66.28 dB(A)
  < 2,5 m/s
2
 
     
      
 .      
       .
#       
 EN 60335,      
$  .
   
       
 ()    
.      
     .
  
   
,        
 .      1.5
mm
2
.    , 
       .
 
1  
2 
1  
1 
2  
1 
1  
1  
  ,      
    .
    
(.)
1  /
2  
3  
4     
5 
6 
 
   ",  
    .
    (.B)
  ,     
   .
       (5b) 
   (5a).
      .
•       
   .
       
.
    
(.)
     (2)
   ,    
   .
     
,    ,
   .    ,
     
  90.      
     .
•   ,  
  (6)    
    .
56 Ferm
OPERATION
Always observe the safety instructions and applica-
ble regulations.
Firmly hold the machine and push the bit with even pres-
sure into the workpiece. Do not force the machine.
Use only bits that do not yet show any signs of wear.
Worn bits have a negative effect on the efficiency of the
machine.
ADJUSTING THE SPEED (Fig.D)
The machine has two different drilling speeds.
Set the speed selection switch (3) on position '1' for
drilling at a low speed.
Set the speed selection switch on position '2' for dril-
ling at high speed.
TORQUE ADJUSTMENT (Fig.E)
The machine has different torque settings by means of
which the force for fastening and loosening screws can be
determined.
Put the torque setting ring (4) at the required torque.
Preferably select the lowest possible setting to move
the screw. Select a higher torque setting when the
motor is slipping.
Screwing screws in and out
Set the direction switch (2) on position 'R' for putting
in screws.
Set the direction switch on position 'L' for removing
screws.
Drilling
•Turn the torque setting ring (4) to drilling position.
Be sure that the direction switch (2) always in posi-
tion 'R' during drilling.
SWITCHING ON AND OFF (Fig.F)
Press the on/off switch (1) in. You regulate the speed
of the machine by the degree to which you keep the
switch pressed in.
•Releasing the on/off switch (1) causes the drill to stop
immediately
Slide the direction switch (2) to the middle to lock the
machine in switched off mode.
Do not put the machine away until the machine has com-
pletely stopped running. Do not store the machine on a
dusty surface. Dust particles can get into the mechanism.
CHARGING BATTERIES (Fig. G)
The enclosed battery charger has been exclusively de-
signed for loading batteries of the FTC-1440K2.
Position the battery in the battery charger as indica-
ted in the illustration.
Plug in the battery charger. The red “fast charging”
light is then illuminated
•As soon as the green light is illuminated, charging has
finished and the accumulator is ready for use
Only use the battery charger in a dry environment at
a temperature between 10 °C and 40 °C.
The accumulator on the drilling machine you have pur-
chased is not charged up. Before using it for the first time
leave it to charge for 5 - 7 hours in order for it to reach its
full capacity.
The total capacity of the accumulator will be reached af-
ter it has been charged 4 – 5 times.
Ferm 5
Download manual in English (PDF, 0 MB)
(Consider the environment and only print this manual if it is really necessary)

Loading…

Rating

Let us know what you think about the FERM CDM1009 Drill-Driver by leaving a product rating. Want to share your experiences with this product or ask a question? Please leave a comment at the bottom of the page.
Are you satisfied with the FERM CDM1009 Drill-Driver?
Yes No
Be the first to rate this product
0 votes

Join the conversation about this product

Here you can share what you think about the FERM CDM1009 Drill-Driver. If you have a question, first carefully read the manual. Requesting a manual can be done by using our contact form.

More about this manual

We understand that it’s nice to have a paper manual for your FERM CDM1009 Drill-Driver. You can always download the manual from our website and print it yourself. If you would like to have an original manual, we recommend you contact FERM. They might be able to provide an original manual. Are you looking for the manual of your FERM CDM1009 Drill-Driver in a different language? Choose your preferred language on our homepage and search for the model number to see if we have it available.

Specifications

Brand FERM
Model CDM1009
Category Drill-Drivers
File type PDF
File size 0 MB

All manuals for FERM Drill-Drivers
More manuals of Drill-Drivers

Frequently Asked Questions about FERM CDM1009 Drill-Driver

Our support team searches for useful product information and answers to frequently asked questions. If you find an inaccuracy in our frequently asked questions, please let us know by using our contact form.

I keep stripping the screw head when using the drill-driver. Why is that? Verified

Most drill-drivers can be set to screw harder or softer. If the head keeps being stripped, the drill-driver should probably be put into a different setting. When it is a wireless device, always be sure the battery is charged for an optimal result.

This was helpful (80) Read more

Do I need to wear hearing protection when using a drill? Verified

Yes you should. Although the amount of noise produced by a drill can vary between brands and models, long term exposure to loud noise can cause permanent hearing damage. That is why it is a good idea to wear hearing protection.

This was helpful (27) Read more

Can I store power tools in a shed or garage? Verified

In general, you can store power tools in a shed or garage, even if it sometimes freezes there. However, it is better for the lifespan of the power tool to store it in a dry place without major temperature fluctuations. In a shed or garage, differences in temperature can cause condensation to form, which can cause rust. In addition, tools that run on batteries last shorter and do not charge as well at very low temperatures. To be sure how your power tool needs to be stored, always thoroughly read the user manual.

This was helpful (12) Read more

Related products

Related categories