Manual Fagor 6H 114 AX Oven

Need a manual for your Fagor 6H 114 AX Oven? Below you can view and download the PDF manual for free in English. This product currently has 5 frequently asked questions, 3 comments and has 6 votes with an average product rating of 67/100. If this is not the manual you want, please contact us.

Is your product defective and the manual offers no solution? Go to a Repair Café for free repair services.

Manual

Loading…

español
1
1
Manual de instrucciones
Muy importante: Lee íntegramente este manual antes de utilizar el horno. La documentación y
accesorios, los encontrarás en el interior del horno.
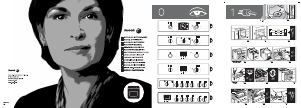
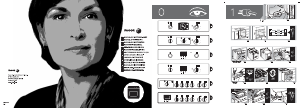
Este manual está diseñado de forma que los textos estén relacionados con los dibujos correspondientes.
2
Instalación
Uso
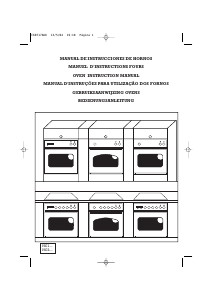
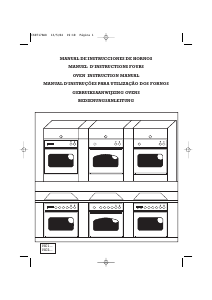
Identifi ca el modelo de tu horno (“a”, “b”, “c”,
d”, “e”, “f”) comparando el panel de mandos de tu
aparato con el de las ilustraciones.
1.1 Desembalaje. Retira todos los elementos de
protección.
1.2 Conexión a la red eléctrica. Ten siempre en
cuenta los datos de la placa de características
(1.2.1) y las medidas del mueble en el que se
va encastrar el horno (1.2.2, 1.2.3).
Hornos independientes: el aparato debe
conectarse a la red mediante una conexión
ja monofásica, en la cual, la conexión
neutro (color azul) con neutro debe quedar
garantizada (1.2.4). Introduce el horno en
el hueco cuidando que el cable sobrante
no quede en la parte superior (1.2.5, 1.2.6).
Sujétalo al mueble con los dos tornillos
suministrados (1.2.7).
Hornos polivalentes para placas
vitrocerámicas: el horno sólo se instalará con
las placas vitrocerámicas recomendadas por el
fabricante con el fi n de evitar un peligro. Coloca
la placa de cocción encima de la encimera
y suelta la caja de los conmutadores (1.2.8).
Introduce la placa en el hueco de la encimera
cumpliendo los requisitos de instalación (ver
manual de la placa) (1.2.9). Introduce el horno
en el hueco del mueble dejando espacio
para su manipulación (1.2.10). Atornilla la
caja al horno (1.2.11, 1.2.12). Conecta la
placa al horno (1.2.13). Introduce el horno
hasta el fondo y sujétalo con los dos tornillos
suministrados (1.2.14, 1.2.15). Coloca a
presión los suplementos de los mandos, según
el tipo de foco de calor (1.2.16) y los mandos
(1.2.17).
0
Identifi cación
Antes de utilizar tu nuevo horno por primera
vez caliéntalo en vacío (sin alimento, en posición
, 250ºC y 30 minutos de duración). Puede
producir humo o mal olor (es normal debido al
calentamiento de restos de grasa, etc). Una vez se
haya enfriado, efectúa una limpieza previa pasando
por el interior un paño húmedo.
2.1 Accesorios. Según modelo, dispones de
Bandeja Estándar
(2.1.1), Bandeja
Profunda
(2.1.2) y Parrilla Estándar
(2.1.3) que funcionan de forma independiente.
Además puedes combinar cualquier bandeja
con la parrilla estándar
(2.1.4)
formando un conjunto. La Parrilla de extracción
parcial (2.1.5) y la Parrilla de extracción total
(2.1.6, 2.1.7) son el soporte de las bandejas
o conjunto (2.1.8). Ten en cuenta la posición
de las parrillas al introducirlos en el interior.
Disponen de topes laterales antivuelco (2.1.9).
2.2 Posición accesorio. Dispones de 5
posiciones para colocar los accesorios
.
2.3 Ajuste de hora. Reloj convencional: Tira del
mando inferior y gira hacia la derecha (2.3.1).
Ajusta la hora (2.3.2). Reloj digital: pulsa la
tecla
y se pondrá a parpadear
(2.3.3).
Ajusta la hora con las teclas
, (2.3.4).
Después de unos segundos
dejará de
parpadear (2.3.5).
Nota: vuelve a ajustar la hora después de un
corte de suministro eléctrico o por cambio
horario.
2.4 Alimento a cocinar. Introduce el alimento en el
horno. Selecciona el accesorio(s) y su posición,
previa consulta de la tabla de cocción. Cierra la
puerta.
2.5 Selección función de cocinado.
Selecciona la función de cocinado según
modelo:
Calor tradicional ventilado. Para cualquier
tipo de plato. Se pueden cocinar varios platos
a la vez sin que se mezclen sabores ni olores.
Turbo plus. El calor es producido por la
resistencia central.
Grill fuerte ventilado. Gratina repartiendo el
calor de modo uniforme. Ideal para asados de
gran tamaño.
Grill fuerte. Gratinados: pastas, souffl é y salsa
bechamel.
Download manual in English (PDF, 1.37 MB)
(Consider the environment and only print this manual if it is really necessary)

Loading…

Rating

Let us know what you think about the Fagor 6H 114 AX Oven by leaving a product rating. Want to share your experiences with this product or ask a question? Please leave a comment at the bottom of the page.
Are you satisfied with the Fagor 6H 114 AX Oven?
Yes No
67%
33%
6 votes

Join the conversation about this product

Here you can share what you think about the Fagor 6H 114 AX Oven. If you have a question, first carefully read the manual. Requesting a manual can be done by using our contact form.

Eduardo perez 29-02-2020
The indications of operating modes of the cobtrols have been deleted

reply | This was helpful (6) (Translated by Google)
Federico del Cerro 15-04-2019
We have the Fagor 114 Oven at home but the number of the keys has been erased from use. If you send us the user manual, we would appreciate it.

reply | This was helpful (5) (Translated by Google)
Hernan Brito 03-06-2019
Dear, the bulb in the oven burned out. Can you tell me which is the model of the light bulb? Is it E14? Slds

reply | This was helpful (4) (Translated by Google)

More about this manual

We understand that it’s nice to have a paper manual for your Fagor 6H 114 AX Oven. You can always download the manual from our website and print it yourself. If you would like to have an original manual, we recommend you contact Fagor. They might be able to provide an original manual. Are you looking for the manual of your Fagor 6H 114 AX Oven in a different language? Choose your preferred language on our homepage and search for the model number to see if we have it available.

Specifications

Brand Fagor
Model 6H 114 AX
Category Ovens
File type PDF
File size 1.37 MB

All manuals for Fagor Ovens
More manuals of Ovens

Frequently Asked Questions about Fagor 6H 114 AX Oven

Our support team searches for useful product information and answers to frequently asked questions. If you find an inaccuracy in our frequently asked questions, please let us know by using our contact form.

My oven does not get warm enough, what should I do? Verified

The thermostat makes sure the ovens heats up to the designated temperature. It is likely that the thermostat is defective. Have it replaced. When in doubt, contact the manufacturer.

This was helpful (2726) Read more

What is pyrolysis? Verified

Some ovens are equipped with a pyrolysis function. This is a cleaning system that burns dirt and fat in the oven by using very high temperatures. After pyrolysis, all the dirt will have turned to ash and can be easily removed. If the oven has a pyrolysis function, it is advisable to use it 3 to 4 times a year to keep the oven clean.

This was helpful (2652) Read more

Can I prepare several items simultaneously by using more grill trays? Verified

Technically this is possible. However, it depends on the type of food if you need to adjust the preparation time or swap the trays halfway during the preparation.

This was helpful (683) Read more

When I use the oven there often food remains that fall on the bottom, causing smoke. How can I prevent this? Verified

Many ovens come with both a grid and a baking tray. When food is prepared on the grid, the baking tray can be placed on the bottom to prevent food remains from burning and causing smoke.

This was helpful (652) Read more

Smoke is accumulating in the oven when warming up, why is that? Verified

Probably there are food remains from previous use left in the oven. Especially greasy food remains can generate smoke when heated. Clean the oven thoroughly.

This was helpful (629) Read more
Manual Fagor 6H 114 AX Oven

Related products

Related categories