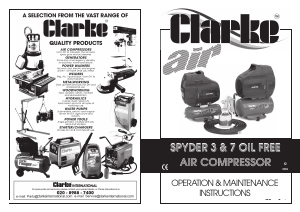
Manual Clarke Spyder 3 Compressor

Need a manual for your Clarke Spyder 3 Compressor? Below you can view and download the PDF manual for free in English. This product currently has 0 frequently asked questions, 0 comments and has 0 votes. If this is not the manual you want, please contact us.

Is your product defective and the manual offers no solution? Go to a Repair Café for free repair services.

Manual

Loading…

OPERATION (Numbers in brackets refer to fig. 1 below)
Before connecting your Spyder to the mains supply, check the following:-
The mains voltage is 230V.
The ON/OFF control knob (B) is in the OFF (inner) position.
The pressure regulator (E) should be set at its lowest setting, i.e. turned fully
anticlockwise, and the tap (F) screwed IN to its closed position.
If the machine has not been used for 24 hours or so, open the air receiver
drain valve (A) and turn it on its end in order to drain any condensate which
may have accumulated. When clear, close the valve, finger tight.
IMPORTANT: If the receiver is under pressure, keep your hands well away from the
air being expelled.... remember, compressed air is DANGEROUS!
Now connect a suitable air hose, fitted with quick-fit adaptors, between the air
outlet (G) and the spray gun or air tool being used.
Ensure that the rubber washers are in place to form the necessary air tight seals.
These fittings should be screwed by hand but take care not to over tighten. If a
rubber seal is damaged then it should be replaced.
If you do not wish to use the Quick Fit method of hose connection, simply remove
the Quick Fit nut and use an air hose fitted with conventional 1/4 BSP connectors.
Once the hose connections are complete, CHECK AGAIN to ensure the pressure
regulator (E) is turned fully anticlockwise so that compressed air cannot reach the
air tool, then plug the machine into the mains and switch ON, by pulling the ON/
OFF knob (B) out, until it clicks into position.
The air compressor will now start, and pressure will build up in the receiver to a
regulated max. pressure of 8 Bar (116 psi).
Should the motor fail to start immediately, it is probable that the air receiver is already
full of air. Check the pressure gauge (D). If you release air, by opening the drain
valve (A), the motor will start automatically once the cut-in pressure is reached.
- 6 -
A. Air Receiver Drain Valve
B ON / OFF Knob
C. Pressure Switch and Cutout
D. Receiver Pressure gauge
Fig.1
E Air Pressure Regulator Knob
F Air Outlet Tap
G Quick Fit Coupling Nut
H Non-Return Valve
Spyder 3
Spyder7
- 15 -
PARTS DIAGRAM - RECEIVER AND COMPONENTS
A. SPYDER 3
Download manual in English (PDF, 2.74 MB)
(Consider the environment and only print this manual if it is really necessary)

Loading…

Rating

Let us know what you think about the Clarke Spyder 3 Compressor by leaving a product rating. Want to share your experiences with this product or ask a question? Please leave a comment at the bottom of the page.
Are you satisfied with the Clarke Spyder 3 Compressor?
Yes No
Be the first to rate this product
0 votes

Join the conversation about this product

Here you can share what you think about the Clarke Spyder 3 Compressor. If you have a question, first carefully read the manual. Requesting a manual can be done by using our contact form.

More about this manual

We understand that it’s nice to have a paper manual for your Clarke Spyder 3 Compressor. You can always download the manual from our website and print it yourself. If you would like to have an original manual, we recommend you contact Clarke. They might be able to provide an original manual. Are you looking for the manual of your Clarke Spyder 3 Compressor in a different language? Choose your preferred language on our homepage and search for the model number to see if we have it available.

Specifications

Brand Clarke
Model Spyder 3
Category Compressors
File type PDF
File size 2.74 MB

All manuals for Clarke Compressors
More manuals of Compressors
Manual Clarke Spyder 3 Compressor

Related products

Related categories