
Certificat de garantie:
Expéditeur
Nom Prénom
Rue, Numéro Code postal/Ville
Numéro de téléphone Fax E-Mail
Raison de l‘envoi
Après le delai de garantie les réparations devront être faites jusqu‘à Euro
Guarantee certificate:
Sender:
Name First name
Street, No.
Code/Location
Telephone (during the day) Fax E-Mail
Reason for return:
After expiry of the guarantee: Repairs should be carried out up to a value of Euro
Contenu:
- CICLOMASTER CM 2.21
- Pile Type CR 2032
- Couvercle de pile
- Support du guidon avec dédecteur et attache de
cable
- Aimant de rayon
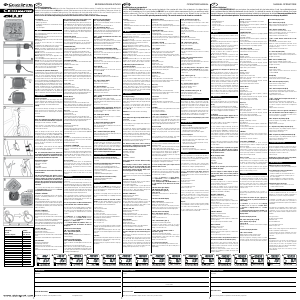
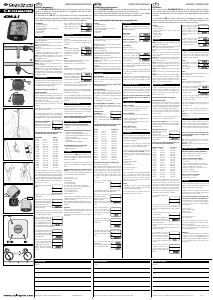
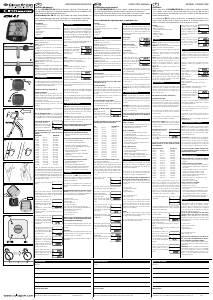
1. Montage
Le support de guidon peut aussi s’installer sur la
potence.
ill. 1: Montage au support (position A) et sur la potence
(postion B).
ill. 2: Retirez le film protecteur situé sous le support de
guidon pour le montage sur la potence.
Placez le support de guidon à l’endroit souhaité et
appuyez légèrement. Fixez avec le joint torique.
ill. 3: Enroulez le cable détecteur autour du frein droit
et au manche fourchu droit direction moyeu.
A l‘aide de l‘attache-câble, installez le capteur et
coupez les bouts qui dépassent.
ill. 5: Positionnez le capteur et l‘aimant de telle
manière que le fil indicateur du capteur soit en face
de l‘aimant.
L‘écart entre l‘aimant et le capteur doit être obliga-
toirement compris entre 1 et 3 mm.
ill. 6: Introduisez le CM 2.21 sur le support de manière
à entendre le déclic. Pour le détacher, tirez le CM 2.21
dans le sens de la selle en appuyant légèrement.
1.1 Montage de la fréquence de pédalage opti-
male
Montage du support voir ci-dessus. Le câble est mené
vers la manivelle (sur le côté gauche de préférence), le
capteur du câble court doit être attaché en face de la
manivelle avec le joint torique, le sensor du câble long
doit être attaché sur la roue arrière (ne pas encore fixer
l’attache-câble). L’aimant de fréquence de pédalage
doit être attaché à la manivelle, l’aimant de rayon est
attaché sur un rayon de la roue arrière (la distance au
sensor doit être max. 3 mm). Important : l’aimant doit
passer près de la marque du capteur. Vous pouvez
main tenant démarrer la mesure de fréquence de pé da-
lage du CM 2.21 (voir chap. 2.1), tourner la manivelle
et la roue arrière, pour vérifier si les signaux arrivent au
CM 2.21. Puis fixez l’attache-câble.
2. Mise en service
Installation de la pile:
placez la pile typ CR2032 avec le pôle positif vers le
haut. Fermez le boîtier à l‘aide d‘une pièce de mon naie
(ill. A).
Le CM 2.21 se trouve maintenant en mode réglage.
(Si l‘écran n‘affiche rien ou autre chose que souhaité,
pressez le bouton AC sur la partie inférieure du comp-
teur. Tous les réglages et mesures sont effacés).
2.1 Réglages
Pour revenir au mode réglage, appuyez de nou-
veau 3 secondes sur la touche du milieu. Sur le
display apparait ,SET BIKE1‘.
Vous pouvez quitter le mode réglage en appuyant 3
secondes sur la touche du milieu.
(Si vous souhaitez changer l‘affichage du CM 2.21
en texte allemand, appuyez la touche gauche, sur
le dis play apparait ,LANGUAGE‘. Confirmez avec la
touche du milieu et choisissez avec la touche droite
entre ,English‘ et ,Deutsch‘. Confirmez le choix avec la
touche gauche et appuyez la touche droite brièvement
pour retourner sur le display avec ,SET BIKE1‘ ou ,SET
RAD1‘).
Puisque le CM 2.21 peut afficher des textes allemand
et anglais, les affichages dans l‘instructions sont dans
les deux langues.
Avec la touche droite ou gauche vous pouvez
choisir entre les differents modes d‘emploi,
en appuyant brièvement la touche du milieu le
mode affiché est choisi.
Mode d‘emploi possible:
SET BIKE1 / SET RAD1
SET CLOCK / SET UHR
SET MISC
EXIT / ENDE
LANGUAGE / SPRACHE
Chaque mode d‘emploi peut avoir plusieurs
possibilités de réglage.
Pour ces réglages: la valeur clignote en appu-
yant la touche droite, avec la touche gauche la
valeur est enregistrée et la prochaine valeur est
affichée.
SET BIKE1 / SET RAD1
Ici vous pouvez régler le vélo 1, comme les kilomètres
en tout, périmètres de la roue, mesures etc.
Chosir avec la touche du milieu.
Pour faire les réglages du vélo 2, appuyez dans le
mode normal les touches de droite et gauche en même
temps, puis affichez de nouveau le mode d‘emploi (ici
apparait alors SET BIKE2 / SET RAD2).
DAY DST / TAGES-DST
Réglage des kilomètres du jour
Pré-réglage: 000.00 km
Plage de valeur: 000.00 à 99999 km ou m.
Réglez avec la touche droite ou gauche, continuez avec
la touche gauche.
Ici vous pouvez régler les kilomètres du jour, par ex:
lors du trajet avec un livre Tour-Guide.
Cette fonction compte seulement les kilomètres par-
courus.
TOT DST / GES.DST
Réglage des kilomètres totaux
Pré-réglage: 0000 km
Plage de valeur: 0 à 99999 km ou m
Réglez avec la touche droite ou gauche, continuez avec
la touche gauche.
Ici vous pouvez régler les kilomètres totaux.
Wheel / Radumf.
Réglage du tour de la roue
Pré-réglage: 2080 mm
Plage de valeur: 1000-3999 mm
Réglez avec la touche droite ou gauche, continuez avec
la touche gauche.
Ici vous pouvez régler le tour de la roue.
Reprenez la valeur correspondante du tableau ou
mesurez vous-même la circonférence (ill. 8).
Pour mesurer le tour du pneu soi-même, faites une
marque sur le pneu avant et sur le sol (à la craie, par
exemple). Avancez exactement d‘un tour de roue et
marquez l‘endroit sur le sol.
Mesurez (en mm) la distance exacte entre les deux
marques et enregistrez le résultat au moyen de la
méthode suivante.
Unit km ou Unit mi
Réglage des mesures en kilomètres ou en milles
Pré-réglages: km
Réglez avec la touche droite ou gauche, continuez avec
la touche gauche.
Ici vous pouvez choisir si l‘affiche doit être en kilomètre
(km/h) ou en mille (m/h).
CAD OFF/TRITT AUS
Allumer/éteindre la fréquence de pédalage (ON/AN
- OFF/AUS)
Préréglage: OFF/AUS
Réglez avec la touche droite ou gauche, continuez avec
la touche gauche.
Ici vous pouvez allumer ou éteindre la fréquence de pé -
dalage. Pour utiliser cette fonction vous avez besoin du
Set pour la fréquence de pédalage optionale.
SET CLOCK / SET UHR
Ici vous pouvez régler l‘heure et la date.
Choisissez avec la touche du milieu.
Time / Uhrzeit
Réglage de l‘heure
Plage de valeur: 00:00 à 23:59 ou 12:00 à 11:59 A/P
Réglez avec la touche droite ou gauche, continuez
avec la touche gauche.
En pressant brièvement la touche moyenne, la valeur
ajustée sera reculée au préréglage.
Ici vous pouvez réglez l‘heure actuelle. En premier
réglez l‘heure, puis les minutes.
Year / Jahr
Réglage de l‘année
Préréglage: 2007
Plage de valeur: 2007 à 2099
Réglez avec la touche droite ou gauche, continuez
avec la touche gauche.
En pressant brièvement la touche moyenne, la valeur
ajustée sera reculée au préréglage.
Ici vous pouvez régler l‘année actuelle.
Month / Monat
Réglage du mois
Préréglage: 01
Plage de valeur: 01 à 12
Réglez avec la touche droite ou gauche, continuez
avec la touche gauche.
En pressant brièvement la touche moyenne, la valeur
ajustée sera reculée au préréglage.
Ici vous pouvez régler le mois actuel.
Day / Tag
Réglage du jour
Préréglage: 01
Plage de valeur: 01 à 31
Réglez avec la touche droite ou gauche, continuez
avec la touche gauche.
En pressant brièvement la touche moyenne, la valeur
ajustée sera reculée au préréglage.
Ici vous pouvez régler la date du jour actuel.
Clock / Zeit
Réglage de l‘affichage de l‘heure
Pré-réglage: 24
Réglez avec la touche droite ou gauche, continuez avec
la touche gauche.
Ici vous pouvez choisir entre le mode d‘heure 24 et le
mode d‘heure 12 (AM/PM).
SET MISC
Ici vous pouvez démarrer le mode économie d‘élélic-
tricité (Powerdown) ou faire un reset (éffacer toutes
les valeurs).
Chosissez avec la touche du milieu.
Powerdown / STROMSPAR
Ici vous pouvez démarrer le mode économie
d‘élélictricité (par ex: avant de changer les piles pour
garder les valeurs).
Pour cela appuyez les touches droite et gauche en
même temps, le display du CM 2.21 devient noir et
le mode économique est démarré. En appuyant une
touche quelconque le CM 2.21 redémarre et se trouve
dans le mode d‘emploi normal.
Reset / Löschen
Ici vous pouvez éffacer toutes les valeurs (aussi les
valeurs totales). Pour cela appuyez les touches droite
et gauche en même temps, sur le display apparait
,reset‘, en suite le mode d‘emploi normal réapparait.
Pour éffacer seulement les valeurs du jours, appuyez
dans le mode d‘emploi normal les touches droite et
gauche en même temps pour 3sec.
3. Fonctions
Toutes les fonctions (à l‘exception de l‘heure) ont
un Start/Stop automatique pendant que vous roulez,
c‘est-à-dire que la mesure commence au démarrage
et se termine 4 secondes après l‘arrêt du vélo. 1 minu-
te après le dernier tour de la roue, le display devient
noir et montre l‘heure actuelle. Pour redémarrer le
display il suffit d‘appuyer une touche ou un mouve-
ment des roues.
Pour changer de l‘affichage du vélo 1 au vélo 2 ,
appuyez respectivement sur la touche gauche et la
touche droite.
Pour éffacer les valeurs du jour, appuyez les
touches de droite et gauche brièvement en
même temps.
Les fonctions, qui sont affichées dans le display
en haut, peuvent être régler avec la touche droite,
les fonctions du display en bas avec la touche
gauche.
En appuyant brièvement la touche du milieu , les
sous-fonctions des fonctions apparaissent sur le
display du bas.
Fonctions du display en haut:
TM – durée du trajet du jour (ill. B)
DST – distance du jour (ill. C)
L‘heure (ill. A)
(Explications de ces fonctions, voir ,fonctions du display
en bas‘)
Fonctions du display du milieu:
SPD – vitesse actuelle
Montre la vitesse actuelle en km/h ou m/h.
Plage de valeur: 0 à 199,9 km/h ou m/h
Une flèche à gauche du display, montre si la valeur
actuelle se trouve au-dessus (flèche vers le haut) ou
en-dessous (flèche vers le bas) de la vitesse moyenne.
Fonction du display en bas:
DST – distance du jour (ill. E)
Affiche le trajet déjà fait en kilomètre ou en mille.
Plage de valeur: 0 à 99999 km ou m
TOT – distance actuelle (ill. E)
Sous-fonction de la fonction distance du jour
Montre les kilomètres parcourus en tout (depuis le
dernier reset ou changement de pile).
Plage de valeur: 0 à 99999 km ou m.
∑TOT – somme distance totale du vélo 1 et du
vélo 2 (ill. K)
Sous-fonction de la fonction distance du jour
Montre la somme des kilomètres parcourus en tout
,du vélo 1 et du vélo 2 (depuis le dernier reset ou
changement de pile).
Plage de valeur: 0 à 99999 km ou m
Ø – vitesse moyenne (ill. G)
montre la vitesse moyenne actuelle en km/h ou m/h.
Plage de valeur: 0 à 199,9 km/h ou m/h (la valeur de
la virgule est montée)
MAX – vitesse maximale (ill. L)
montre la vitesse maximale en km/h ou m/h
Palge de valeur: 0 à 199,9 km/h ou m/h (la valeur de
la virgule est montée)
L‘heure (ill. H)
montre l‘heure actuelle
Plage de valeur: 00:00:00 à 23:59:59 ou 12:00:00 à
11:59:59 AM/PM
Date (ill. M)
Sous-fonction de la fonction heure
montre la date actuelle en forme TT.MM.JJ.
TM /- durée du trajet du jour (ill. F)
montre la durée du trajet actuelle
Plage de valeur: 0 à 9:59:59 h
TOT – durée du trajet totale (ill. N)
Sous-fonction de la fonction durée du trajet du jour
montre la durée du trajet totale (depuis le dernier reset
ou changement de pile).
Plage de valeur: 0 à 999:59 h
∑TOT – somme durée du trajet totale du vélo 1
et du vélo 2 (ill. O)
Sous-fonction de la fonction durée du trajet du jour
montre la somme de la durée du trajet totale du vélo
1 et du vélo 2 (depuis le dernier reset ou changement
de pile).
Plage de valeur: 0 à 999:59 h
La fonction si-dessous apparait seulement si
elle a été démarrée dans le mode d‘emploi (pour
mesurer la fréquence de pédalage, vous aurez besoin
du set de fréquence de pédalage).
CAD – fréquence de pédalage (ill. D)
montre la fréquence de pédalage actuelle (en rpm =
tour par minute)
Plage de valeur: 0 à 250 rpm
Ø – fréquence de pédalage moyenne (ill. P)
montre la fréquence de pédalage moyenne (depuis le
dernier reset ou changement de pile).
Plage de valeur: 0 à 250 rpm
MAX – fréquence de pédalage maximale (ill. Q)
montre la fréquence de pédalage maximale (depuis le
dernier reset ou changement de pile).
Plage de valeur: 0 à 250 rpm
4 . Remplacement de la pile
Au dos du compteur, tournez le couvercle du boîtier de
la pile vers la gauche à l‘aide d‘une pièce de monnaie.
Enlevez l‘ancienne pile et installez une nouvelle pile
au lithium CR 2032 de 3 V avec le pôle positif vers le
haut. Replacez ensuite le couvercle du
boîtier de la pile.
Veuillez ne pas jeter la pile usagée à la poubelle,
mais affectez-la plutôt au recyclage.
5. Guide de dépannage
Affichage anormal ou aucun affichage
- Vérifiez l’emplacement de la pile ou remplacez la pile
Pas d’affichage de la vitesse momentanée
- Vérifiez le montage de l’émetteur
- Vérifiez si l’aimant est correctement monté sur le
rayon (à 3 mm maximum de l’émetteur, juste en
face de la marque)
- Vérifiez l’installation du compteur sur l’applique
- Vérifiez le réglage de la circonférence de la roue
Indication de vitesse incorrecte
- Vérifiez le réglage de la circonférence de la roue
contrôlez l’unité de mesure
6. Garantie
La durée de garantie du CM 2.21 est de 24 mois. La
garantie ne concerne que les défauts de matériaux et
de fabrication. Les piles ne sont pas sous garantie.
La garantie n’est valable que si l‘ordinateur et ses
accessoires auront été utilisés avec précaution et
conformément aux instructions prévues dans la Notice
d‘utilisation.
Pour faire appel à la garantie, veuillez contacter votre
revendeur ou votre distributeur local ou bien envoyer
l’ordinateur et ses accessoires ainsi que la facture
(date) sous plis affranchi au tarif en vigueur à l’adresse
suivante:
CicloSport Service
K. W. Hochschorner GmbH
Einsteinstr. 39a
D-82152 Martinsried
www.ciclosport.com
Avant de nous envoyer l’appareil, relisez attentivement
la Notice d‘utilisation et vérifiez la pile.
Si vous bénéficiez des droits de garantie, nous vous
renverrons l’appareil réparé ou nous vous le rem-
placerons.
Réparations:
Si l’appareil nous est envoyé pour réparation (ou
remplacement de pile) ou si les droits de garantie
ne vous sont pas accordés, une réparation (ou un
remplacement de pile) sera effectuée automa tique-
ment jusqu’à un montant de 19 euros.
Puis l’appareil réparé vous sera renvoyé contre
remboursement.
Lieferumfang:
- CICLOMASTER CM 2.21
- Batterie Typ CR 2032
- Lenkerhalter mit Radsensor und Kabelbinder für die
Befestigung
- Speichenmagnet
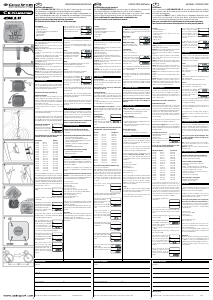
1. Montage
Der Lenkerhalter kann sowohl am Lenker als auch am
Vorbau befestigt werden.
Bild 1: Montage am Lenker (Position A) und am Vor-
bau (Position B) möglich
Bild 2: Für Montage am Vorbau (Position B) Oberteil
umschrauben
Schutzfolie auf der Unterseite des Lenkerhalters
ab ziehen
Lenkerhalter auf gewünschte Stelle setzen, leicht
an drücken und mit den Kabelbindern befestigen.
Bild 3: Sensorkabel spiralförmig um den rechten
Brems zug und rechten Gabelholm nach unten in Rich-
tung Nabe wickeln
Bild 4: Sensor mit den Kabelbindern befestigen und
überstehende Enden abschneiden
Bild 5: Magnet an einer Speiche gegenüber dem
Sensor befestigen
Sensor und Magnet ausrichten (Abstand max. 3 mm)
Bild 6: CM 2.21 um eine Vierteldrehung nach links
gedreht in den Lenkerhalter setzen, zum Einrasten
eine Vierteldrehung nach rechts machen (bitte darauf
achten, dass er richtig einrastet). Zum Abnehmen des
CM 2.21 wieder um eine Vierteldrehung nach links
drehen und aus dem Lenkerhalter nehmen.
1.1 Montage der optionalen Trittfrequenz
Lenkerhalter wie oben beschrieben montieren. Das
Kabel wird zur Kurbel geführt (am besten auf der linken
Seite), der Sensor am kurzen Kabel wird gegen über
der Kurbel mit den Kabelbindern befestigt, der Sensor
am langen Kabel wird weiter zum Hinterrad geführt
und an der Hinterradstrebe befestigt (Kabel binder noch
nicht festziehen). Der Trittfrequenzmagnet wird an der
Kurbel befestigt, der Speichen magnet an einer Speiche
am Hinterrad (Abstand zu den Sensoren max. 3 mm).
Wichtig: der Magnet muss an der je weiligen Markie-
rung des Sensors vorbeigehen. Tritt frequenzmessung
am CM 2.21 einschalten (siehe Kap. 2.1), Kurbel und
Hinterrad drehen und über prüfen, ob die Signale am
CM 2.21 ankommen. Dann die Kabel binder festziehen.
2. Inbetriebnahme
Einlegen der Batterie:
Batterie Typ CR2032 mit dem Pluspol nach oben
ein legen. Batteriedeckel auflegen und mit Hilfe einer
Münze schließen. Nach dem Einlegen der Batterie
er scheint im Display der normale Betriebsmodus.
(Bild A)
(Erscheint keine Anzeige im Display oder unsinnige
Werte, AC-Knopf auf der Rückseite kurz drücken.
Damit werden auch alle Einstellungen und Werte
ge löscht.)
2.1 Einstellungen
Durch drei Sekunden langes Drücken der mitt-
leren Taste wird der Einstellmodus aufgerufen.
Im Display erscheint die Anzeige ‚SET BIKE1’.
Durch erneutes 3 Sek. langes Drücken der mittleren
Taste kann der Einstellmodus in jeder Einstellung
wieder verlassen werden.
(Wenn die Anzeige des CM 2.21 auf deutsche Texte
umgestellt werden soll, jetzt linke Taste kurz drücken,
im Display erscheint die Anzeige ‚LANGUAGE’. Mit
der mittleren Taste bestätigen und dann kann mit der
rechten Taste zwischen ‚English’ und ‚Deutsch’ um ge-
schaltet werden. Mit der linken Taste die gewünschte
Einstellung bestätigen und dann kurz die rechte Taste
drücken, um wieder ‚SET BIKE1’ oder ‚SET RAD1’ im
Display zu sehen).
Da der CM2.21. sowohl deutsche als auch englische
Texte anzeigen kann, werden hier in der Anleitung
immer beide Anzeigen aufgeführt.
Mit der rechten bzw. linken Taste können die
verschiedenen Einstellmodi ausgewählt werden,
durch kurzes Drücken der mittleren Taste wird
der ange zeigte Einstellmodus aufgerufen.
Mögliche Einstellmodi:
SET BIKE1 / SET RAD1
SET CLOCK / SET UHR
SET MISC
EXIT / ENDE
LANGUAGE / SPRACHE
Jeder Einstellmodus kann mehrere Einstell mög-
lichkeiten haben.
Für diese Einstellungen gilt: mit der rechten
Taste wird der blinkende Wert verändert
(längeres drücken der rechten Taste bewirkt ein
schnelleres Hochzählen), mit der linken Taste
wird der Wert gespeichert und zum nächsten
Wert übergegangen bzw. die nächste Einstellung
angezeigt.
Zur besseren Unterscheidung sind im nachfolgenden
die Einstellmodi fett gedruckt und die Einstell-
möglichkeiten fett und kursiv.
SET BIKE1 / SET RAD1
Hier können die Einstellungen für Rad 1 wie Gesamt-
kilometer, Radumfang, Maßeinheit etc. gemacht
werden.
Anwählen mit mittlerer Taste
Um die Einstellungen für Rad 2 zu machen, im nor ma-
len Betriebsmodus rechte und linke Taste kurz gleich-
zeitig drücken, um zu Rad 2 zu wechseln, dann erneut
den Einstellmodus aufrufen (dort erscheint dann SET
BIKE2 /SET RAD 2).
DAY DST / TAGES-DST
Einstellen der Tageskilometer
Voreinstellung: 000.00 km
Wertebereich: 000,00 bis 999,99 km bzw. m
Einstellen mit rechter und linker Taste, weiter mit linker
Taste.
Hier können die Tageskilometer eingestellt werden,
z.B. bei Fahrten nach einem Tour-Guide-Buch.
Auf die Funktion Gesamtkilometer hat diese Einstellung
allerdings keine Auswirkung. Dort werden nur die
tatsächlich gefahrenen Kilometer gezählt.
TOT DST / GES. DST
Einstellen der Gesamtkilometer
Voreinstellung: 0000 km
Wertebereich: 0 bis 99999 km bzw. m.
Einstellen mit rechter und linker Taste, weiter mit linker
Taste.
Hier können die Gesamtkilometer eingestellt werden.
Wheel/Radumf.
Einstellen des Radumfangs
Voreinstellung: 2080 mm
Wertebereich: 1000-3999 mm
Einstellen mit rechter und linker Taste, weiter mit linker
Taste.
Hier kann der Radumfang eingestellt werden.
Der Radumfang kann der Tabelle (Abb. 8) ent-
nommen oder selber ge messen werden.
Wenn der Radumfang selber gemessen werden soll,
eine Markierung am Vorderreifen und auf dem Boden
(z.B. mit Kreide) setzen. Mit dem Rad geradeaus,
genau eine Reifenumdrehung (mit richtigem Luftdruck
und Fahrergewicht) fahren und Stelle am Boden
markieren. Jetzt kann der exakte Radumfang zwischen
den beiden Markierungen am Boden abgemessen
werden (in mm) – s. Abb. 7.
Unit km bzw. Unit mi
Einstellen der Maßeinheit Kilometer oder Meilen
Voreinstellung: km
Einstellen mit rechter Taste, weiter mit linker Taste.
Hier kann ausgewählt werden, ob die Anzeige in
Kilometern (km/h) oder in Meilen (m/h) erfolgen soll.
CAD OFF/TRITT AUS
Ein-/Ausschalten der Trittfrequenz (ON/AN – OFF/AUS)
Voreinstellung: OFF/AUS
Einstellen mit rechter Taste, weiter mit linker Taste.
Hier kann die Trittfrequenzmessung ein- bzw. ausge-
schaltet werden. Zur Nutzung dieser Funktion ist das
optionale Trittfrequenz-Set nötig (erhältlich bei Ihrem
Fachhändler).
SET CLOCK / SET UHR
Hier können Uhrzeit, Datum und Uhrzeitformat einge-
stellt werden.
Anwählen mit mittlerer Taste
Time / Uhrzeit
Einstellen der Uhrzeit
Wertebereich: 00:00 bis 23:59 bzw. 12:00 bis 11:59 A/P
Einstellen mit rechter Taste, weiter mit linker Taste.
Durch kurzes Drücken der mittleren Taste wird der
eingestellte Wert auf die Voreinstellung zurückgesetzt.
Hier kann die aktuelle Uhrzeit eingestellt werden.
Dabei werden zuerst die Stunden und dann die
Minuten eingestellt.
Year / Jahr
Einstellen des Jahres
Voreinstellung: 2012
Wertebereich: 2012 bis 2099
Einstellen mit rechter Taste, weiter mit linker Taste.
Durch kurzes Drücken der mittleren Taste wird der
eingestellte Wert auf die Voreinstellung zurückgesetzt.
Hier kann das aktuelle Jahr eingestellt werden.
Month / Monat
Einstellen des Monats
Voreinstellung: 01
Wertebereich: 01 bis 12
Einstellen mit rechter Taste, weiter mit linker Taste.
Durch kurzes Drücken der mittleren Taste wird der
eingestellte Wert auf die Voreinstellung zurückgesetzt.
Hier kann der aktuelle Monat eingestellt werden.
Day / Tag
Einstellen des Tagesdatums
Voreinstellung: 01
Wertebereich: 01 bis 31
Einstellen mit rechter Taste, weiter mit linker Taste.
Durch kurzes Drücken der mittleren Taste wird der
eingestellte Wert auf die Voreinstellung zurückgesetzt.
Hier kann der aktuelle Tag eingestellt werden.
Clock / Zeit
Einstellen der Uhrzeitanzeige
Voreinstellung: 24
Einstellen mit rechter Taste, weiter mit linker Taste.
Hier kann ausgewählt werden, ob die Uhrzeit im 24-
Stundenformat oder im 12-Stundenformat (AM/PM)
an gezeigt werden soll.
SET MISC
Hier kann der Stromspar-Modus (Powerdown) einge-
schaltet werden oder ein Reset (Löschen aller Daten)
durch geführt werden.
Anwählen mit mittlerer Taste
Powerdown / STROMSPAR
Hier kann der Stromspar-Modus eingeschaltet werden
(z.B. vor dem Batteriewechsel, um die Daten zu
erhalten).
Dazu rechte und linke Taste kurz gleichzeitig drücken,
damit erlischt das Display und der CM 2.21 ist im
Strom spar-Modus. Durch kurzes Drücken einer belie-
bigen Taste ‚startet’ der CM 2.21 wieder und der
normale Betriebsmodus erscheint.
Reset / Löschen
Hier können alle Werte (auch die Gesamtwerte)
gelöscht werden. Dazu rechte und linke Taste kurz
gleichzeitig drücken, im Display erscheint kurz die
Anzeige ‚reset’, anschließend erscheint der normale
Betriebsmodus.
Um nur die Tageswerte zu löschen, im normalen
Betriebsmodus rechte und linke Taste 3 Sek. lang
drücken.
3. Funktionen
Der CM 2.21 hat einen automatischen Start/Stopp im
Fahrbetrieb.
D.h. bei der ersten Radumdrehung erscheint der nor-
male Betriebsmodus und nach ca. 4 Sekunden wird die
aktuelle Geschwindigkeit angezeigt. 1 Minute nach der
letzten Radumdrehung bzw. dem letzten Tasten druck
schaltet das Display in den Schlafmodus und zeigt nur
noch die Uhrzeit an. Durch Tastendruck oder erneute
Radumdrehung springt das Display wieder an.
Um in der Anzeige von Rad 1 auf Rad 2 zu wechseln
(und umgekehrt), rechte und linke Taste kurz gleich-
zeitig drücken (im Display links wechselt dann die
Anzeige von 1 auf 2 und umgekehrt).
Um die Tageswerte auf Null zurückzusetzen,
rechte und linke Taste 3 Sekunden drücken.
Der CM 2.21 hat ein dreizeiliges Display. Im mittleren
Teil wird immer die Geschwindigkeit angezeigt, dabei
wird links von der Geschwindigkeit mit einer kleinen
1 bzw. 2 angezeigt, ob die Werte für Rad 1 oder Rad
2 gelten.
Die Funktionen, die im oberen Display angezeigt
werden, können mit der rechten Taste weiter ge-
schaltet werden, die Funktionen des unteren
Displays mit der linken Taste.
Jeweils kurzes Drücken der mittleren Taste zeigt
die Unterfunktionen der Funktion im unteren
Display an.
Funktionen im oberen Display:
TM - Tages-Fahrzeit (Bild B)
DST - Tages-Distanz (Bild C)
Uhrzeit (Bild A)
(Erklärung zu diesen Funktionen siehe ‚Funktionen im
unteren Display’)
Funktion im mittleren Display:
SPD – aktuelle Geschwindigkeit
Zeigt die aktuelle Geschwindigkeit in km/h bzw. m/h
an.
Wertebereich: 0 bis 199,9 km/h bzw. m/h
Dabei wird mit dem Pfeil links im Display angezeigt,
ob die aktuelle Geschwin dig keit über (Pfeil nach oben)
oder unter (Pfeil nach unten) der momentanen Durch-
schnittsgeschwindigkeit liegt.
Funktionen im unteren Display:
DST - Tages-Distanz (Bild E)
Zeigt die bisher zurückgelegte Strecke in Kilometer
oder Meilen an.
Wertebereich: 0 bis 999,99 km bzw. m
TOT - Gesamtdistanz (Bild J)
Unterfunktion der Funktion Tages-Distanz
Zeigt die gesamten (seit dem letzten Zurückstellen bzw.
Batteriewechsel) bisher zu rück gelegten Kilometer an.
Wertebereich: 0 bis 99999 km bzw. m
TOT - Summe Gesamtdistanz von Rad 1 und
Rad 2 (Bild K)
Unterfunktion der Funktion Tages-Distanz
Zeigt die Summe der gesamten (seit dem letzten
Zu rück stellen bzw. Batterie wechsel) bisher zurück ge-
legten Kilometer von Rad 1 und Rad 2 an.
Wertebereich: 0 bis 99999 km bzw. m
Ø - Durchschnittsgeschwindigkeit (Bild G)
Zeigt die momentane Durchschnittsgeschwindigkeit in
km/h bzw. m/h an.
Wertebereich: 0 bis 199,9 km/h bzw. m/h (dabei ist
die Kommastelle hochgestellt)
MAX - Maximalgeschwindigkeit (Bild L)
Zeigt die höchste bisher erreichte Geschwindigkeit in
km/h bzw. m/h an.
Wertebereich: 0 bis 199,9 km/h bzw. m/h (dabei ist
die Kommastelle hochgestellt)
Uhrzeit (Bild H)
Zeigt die aktuelle Uhrzeit an.
Wertebereich: 00:00:00 bis 23:59:59 bzw. 12:00:00
bis 11:59:59 AM/PM
Datum (Bild M)
Unterfunktion der Funktion Uhrzeit
Zeigt das aktuelle Datum in der Form TT.MM.JJ an.
TM /- Tages-Fahrzeit (Bild F)
Zeigt die aktuelle Fahrzeit an.
Wertebereich: 0 bis 9:59:59 h
TOT – Gesamt-Fahrzeit
Unterfunktion der Funktion Tages-Fahrzeit
Zeigt die gesamte Fahrzeit (seit dem letzten Zurück-
stellen bzw. Batteriewechsel) an.
Wertebereich: 0 bis 999:59 h
TOT – Summe Gesamtfahrzeit von Rad 1 und
Rad 2 (Bild O)
Unterfunktion der Funktion Tages-Fahrzeit
Zeigt die Summe der gesamten Fahrzeit (seit dem
letzten Zurückstellen bzw. Batteriewechsel) von Rad 1
und Rad 2 an.
Wertebereich: 0 bis 999:59 h
Die folgende Funktion erscheint nur, wenn sie im
Einstellmodus einge schaltet wurde (zum Messen
der Trittfrequenz wird das separat erhältliche Trittfre-
quenzset benötigt).
CAD – Trittfrequenz (Bild D)
Zeigt die aktuelle Trittfrequenz an (in rpm = Umdreh-
ungen pro Minute)
Wertebereich: 0 bis 250 rpm
Ø – Durchschnittstrittfrequenz (Bild P)
Unterfunktion der Funktion Trittfrequenz
Zeigt die durchschnittliche Trittfrequenz an (seit dem
letzten Zurücksetzen).
Wertebereich: 0 bis 250 rpm
MAX – maximale Trittfrequenz (Bild Q)
Zeigt die höchste bisher erreichte Trittfrequenz an (seit
dem letzten Zurücksetzen an).
Wertebereich: 0 bis 250 rpm
4 . Wechseln der Batterie
Schraubverschluss auf der Rückseite des Computers
mit Hilfe einer Münze nach links aufdrehen. Alte
Batterie entfernen und neue 3V-Lithium-Batterie
Typ CR 2032 mit dem Pluspol nach oben einlegen.
Schraubverschluss wieder zudrehen.
Bitte die entleerte Batterie nicht in den Hausmüll
werfen, sondern fach gerecht entsorgen.
5. Störungsbeseitigung
Fehlerhafte oder keine Anzeige im Display
- Batterie auf korrekten Sitz überprüfen bzw. Batterie
erneuern
Momentangeschwindigkeit wird nicht angezeigt
- Sender auf korrekte Montage prüfen
- überprüfen, ob Speichenmagnet richtig an der
Speiche montiert ist (direkt gegenüber dem Sender
mit max. 3 mm Abstand)
- überprüfen, ob CM 2.21 richtig im Lenkerhalter
eingerastet ist
- eingestellten Radumfang überprüfen
Geschwindigkeit zu hoch bzw. zu niedrig
- eingestellten Radumfang überprüfen
Maßeinheit überprüfen
6. Garantie
Wir leisten auf den CM 2.21 eine Garantie von 24
Monaten. Die Garantie beschränkt sich auf Material-
und Verarbeitungsfehler. Ausgenommen von der
Garantie ist die Batterie.
Die Garantie ist nur gültig, wenn der Computer mit
Zubehör vorschriftsmäßig und sorgfältig behandelt
wurde.
Im Garantiefall wenden Sie sich bitte an Ihren
Händler oder Ihren lokalen Distributor oder schicken
Sie den Computer mit dem Kaufbeleg (Datum) und
allen Zube hörteilen ausreichend frankiert an:
CicloSport Service
K. W. Hochschorner GmbH
Einsteinstr. 39a
D-82152 Martinsried
Tel.: 0900 / 123 5000
Euro 0,99 / min. aus dem deutschen Festnetz
Euro 1,99 / min. aus dem deutschen Mobilfunknetz
(Mobilfunkpreise können variieren)
Fax: +49 89 859 63 01
www.ciclosport.com
Bitte lesen Sie vor Einsendung des Gerätes nochmals
sorgfältig die Bedienungsanleitung durch und über-
prüfen Sie die Batterie.
Bei berechtigten Garantieansprüchen wird das repa-
rierte Gerät oder ein Austauschgerät kostenlos zurück-
gesandt.
Reparatur:
Wird das Gerät zur Reparatur eingesandt oder wird ein
Garantieanspruch nicht anerkannt, erfolgt eine Repa-
ratur bis Euro 19.- automatisch.
Die Rücksendung des reparierten Gerätes erfolgt per
Nachnahme.
BEDIENUNGSANLEITUNG
Contents:
- CICLOMASTER CM 2.21
- battery type CR 2032
- battery cap
- handlebar bracket with wheel-sensor and cable ties
for mounting
- spoke magnet
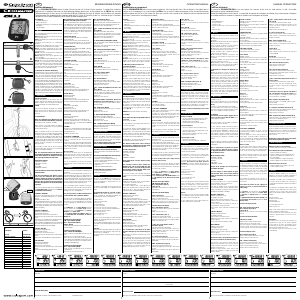
1. Mounting
The handlebar bracket can be mounted on the
handlebar and also on the stem.
Picture 1: Mounting is possible on handlebar (Position
A) or stem (Position B)
Picture 2: For using it on the stem, change bracket
mounting orientation from Position A to Position B.
Remove the protective tape
Place the handle bar and fasten it with the cable ties
Picture 3: Wrap the sensor-cable round the brake
wire and fork of front wheel
Picture 4: Secure the sensor by tightening the cable
ties and cut off the loose ends
Picture 5: Fix the magnet on a spoke so that it will
face the mark on the sensor
Adjust the magnet position and fine tune the sensor if
necessary
Picture 6: Rotate the CM 2.21 to 45 degree left and
install it into the bracket. Then rotate it 45 degrees
right to lock it. To unlock, rotate 45 degrees to the left.
1.1 Mounting of optional cadence-set
(separately available)
Mount the handlebar as described above on the
handlebar or on the stem.
Place the sensor at the shorter cable-end on the left
chain-brace in height of the crank with help of cable-
ties so that it is still loose enough to be lined up. Place
the other sensor further back at the left brace in same
manner.
Mount the cadence-magnet (with help of a cable tie)
on the inside of the crank and the spoke-magnet on
a spoke of the back wheel. The distance between
magnet and sensor should be max. 3 mm.
The magnets must point directly to the mark on the
sensors. Now switch on the cadence measuring in
the setting mode of the CM2.21 (see chap. 2.1). Turn
crank and wheel a few times to check if the mounting
is correct. Now tighten the cable-ties.
2. Preparation
Inserting the battery
Insert battery type CR2032 with plus-pole facing up.
Close battery cap with a coin, being sure not to over
tighten. After inserting the battery the display will show
normal mode.
(If nothing or incomprehensible signs appear in
the display, press the AC-button on the rear of the
computer with help of a ballpoint pen or a similar
object. (Pict. A)
Attention: this will delete all values and setting).
2.1 Settings
Enter setting mode by pressing middle button for
3 seconds.
Display shows ‘SET BIKE1’.
To quit setting mode press again middle button for 3
seconds in any setting.
(To change the display to german language, press
left button short, display shows ‚LANGUAGE’. Press
middle button to choose this function and then switch
bet ween ‘English’ and ‘Deutsch’ with right button. To
store press left button and then get back to setting
mode with short pressing of right button).
Though CM 2.21 can show german and english words,
this manual shows both possible displays.
The different setting modes can be shown by
pressing right or left button, by pressing middle
button the shown setting mode is chosen.
Possible setting modes:
SET BIKE1 / SET RAD1
SET CLOCK / SET UHR
SET MISC
EXIT / ENDE
LANGUAGE / SPRACHE
Each setting mode can have different setting
possibilities.
The following is valid for these settings: the
blinking value can be changed with the right
button, the value is stored by shortly pressing
the left button and the next value blinks or the
next value appears on the display.
For a better reading in the following chapters the
setting modes are fat printed and the settings fat and
italic.
SET BIKE1 / SET RAD1
Adjustment of bike-specific values, e.g. total distance,
circumference, unit and more for bike 1.
Choose with middle button.
To do these settings for bike 2, press right and left
button short simultaneously in normal mode. CM 2.21
switches to bike 2, then enter again setting mode
(display then shows SET BIKE2/SET RAD2).
DAY DST / TAGES-DST
Adjustment of the daily distance
Default: 000.00 km
Range: 000,00 to 999,99 km or m
Set with right and left button, store with left button.
Here the daily distance can be adjusted, e.g. the point
of starting a tour, when using a printed tour-guide.
(This setting doesn’t change the total distance. There
only really ridden kilometres are counted).
TOT DST / GES. DST
Adjustment of the total distance
Default: 0000 km
Range: 0 to 99999 km or m.
Set with right and left button, store with left button.
Here the total distance can be adjusted.
Wheel/Radumf.
Adjustment of circumference
Default: 2080 mm
Range: 1000-3999 mm
Set with right and left button, store with left button.
Here the circumference can be adjusted.
The circumference of the wheel can be taken
from the chart (pict. 8) or be measured by your-
self.
Measuring the circumference of the wheel (for a more
precise setting):
Put a marking at the front-tire and on the ground
(e.g. with chalk). Ride straight ahead exactly one turn
of a tire (for a very exact measurement, check the
pressure of the tire before getting on your bike) and
mark this position on the ground. Now measure the
exact circumference of the wheel between the two
markings at the ground (in mm) – see pict. 7
Unit km bzw. Unit mi
Adjustment of the measuring unit (kilometres or miles)
Default: km
Set with right button, store with left button
Here you can choose whether the display should show
kilometres (km/h) or miles (m/h).
CAD OFF/TRITT AUS
Switch cadence on/off (ON/AN – OFF/AUS)
Default: OFF/AUS
Set with right button, store with left button
Here you can switch on/off the cadence measuring. To
use this function you need the optional cadence-set
(available at your local dealer).
SET CLOCK / SET UHR
Adjustment of clock, date and clocktime-format.
Choose with middle button
Time / Uhrzeit
Time / Uhrzeit
Range: 00:00 to 23:59 or 12:00 to 11:59 A/P
Set with right button, store with left button.
A short press of the middle button resets the set value.
Here you can set the current clocktime. First you set
the hours, then the minutes.
Year / Jahr
Adjustment of the year
Default: 2012
Range: 2012 to 2099
Set with right button, store with left button.
A short press of the middle button resets the set value.
Here you can set the current year.
Month / Monat
Adjustment of the month
Default: 01
Range: 01 to 12
Set with right button, store with left button.
A short press of the middle button resets the set value.
Here you can set the current month.
Day / Tag
Adjustment of the day
Default: 01
Range: 01 to 31
Set with right button, store with left button,
A short press of the middle button resets the set value.
Here you can set the current day.
Clock / Zeit
Adjustment of the clock format
Default: 24
Set with right button, store with left button
Here you can select between 24- or 12-hour format
(AM/PM).
SET MISC
Here you can switch on the powerdown-mode or make
a reset (delete all values).
Choose with middle button
Powerdown / STROMSPAR
Switch on the powerdown-mode (e.g. before changing
of the battery, to save the values).
To switch it on, press right and left button short
simultaneously, display fades out and CM 2.21 is in
powerdown-mode. By short pressing of any button,
CM 2.21 starts again and shows normal mode.
Reset / Löschen
Here you can delete all values (including the total
values). For this press right and left button short
simultaneously, display shows ‘reset’ and then normal
mode.
If you only want to delete the day values, press right
and left button for three seconds in normal mode.
3. Functions
The CM 2.21 has an automatic start/stop when on the
handlebar bracket.
That means, 4 sec. after the first wheel turn the display
shows normal mode and the current speed.
1 minute after the last wheel turn (and without a button
is pressed) the display changes to an “energy save“
mode. During this mode, only the time is displayed.
If the wheel turns or a button is pushed, the computer
will resume normal functions.
To change from bike 1 to bike 2 (and back) press right
and left button short simultaneously (in the left part of
the display the 1 changes to 2 and back).
To reset all day values, press right and left
button for three seconds.
The CM 2.21 has a three–lined display. In the middle
part always the current speed is shown, with a small 1
or 2 left beside, that shows whether the current values
are valid for bike 1 or bike 2.
To advance the functions of the upper display,
press right button, to advance the functions of the
lower display press left button.
Always short pressing of the middle button shows
the sub-functions of the function in the lower
display.
Functions in the upper display:
TM – Daily ride-time (pict. B)
DST – Daily distance (pict. C)
Time (pict. A)
(Explanation of these functions see ‚functions in the
lower display’)
Function in the middle display:
SPD – current speed
Inidcates the current speed in km/h or m/h .
Range: 0 to 199,9 km/h or m/h
An arrow on the left side of the display indicates,
whether the current speed is faster (arrow up) or
slower (arrow down) than the current average speed.
Functions in the lower display:
DST – daily distance (pict. E)
Indicates the distance ridden up to now in kilometres
or miles..
Range: 0 to 999,99 km or mi
TOT – totale distance (pict. J)
Sub-function of function daily distance
Indicates the total distance ridden up to now in
kilometres or miles (since last reset or battery change).
Range: 0 to 99999 km or mi
∑TOT – sum of total distance of bike 1
and bike 2 (pict. K)
Sub-function of function daily distance
Indicates the sum of the total distance ridden up to
now in kilometres or miles (since last reset or battery
change) of bike 1 and bike 2.
Range: 0 to 99999 km or mi
Ø - average speed (pict. G)
Indicates the current average speed in km/h or mi/h.
Range: 0 to 199,9 km/h or m/h (the decimal place is
highranking)
MAX - maximum speed (pict. L)
Sub-function of function average speed
Indicates the highest speed ridden up to now in km/h
or mi/h.
Range: 0 to 199,9 km/h or m/h (the decimal place is
highranking)
Time (pict. H)
Indicates the current time.
Range: 00:00:00 to 23:59:59 or 12:00:00 to 11:59:59
AM/PM
Date (pict. M)
Sub-function of function time
Indicates the current date (dd.mm.yy).
TM – daily ride time (pict. F)
Indicates the current daily ride time.
Range: 0 to 9:59:59 h
TOT – total ride-time
Sub-function of function daily ride time
Indicates the total ride time (since last reset or battery
change).
Range: 0 to 999:59 h
TOT – sum of total ride time of bike 1
and bike 2 (pict. O)
Sub-function of function daily ride time
Indicates the sum of the total ride time (since last reset
or battery change) of bike 1 and bike 2.
Range: 0 to 999:59 h
The following function only appears, when
switched on in the setting mode (for the measu-
ring of the cadence you need the separately available
cadence set).
CAD – cadence (pict. D)
Indicates the current cadence (rpm = rounds per
minute)
Range: 0 to 250 rpm
Ø – average cadence (pict. P)
Sub-function of function cadence
Indicates the average cadence.
Range: 0 to 250 rpm
MAX – maximum cadence (pict. Q)
Sub-function of function cadence
Indicates the maximum reached cadence.
Range: 0 to 250 rpm
4 . Changing batterie
Open battery cap with a coin (unscrew to the left).
Insert battery type CR2032 (please use battery with
smooth minus-pole) with plus-pole facing up. Close
battery cap, being sure not to over tighten. After
inserting the battery the display will show normal
mode.
(If nothing or incomprehensible signs appear in the
display, press the AC-button on the rear of the com-
pu ter with help of a ballpoint pen or a similar object.
Attention: this will delete all values and setting).
Please do not throw away battery in your normal
garbage.
5. Trouble shooting
Faulty or no display
- check to see if battery is installed properly or replace
battery (Attention: removing battery will clear all
settings and values in the CM 2.21)
- press AC-button on the rear of the computer
Speed not displayed
- check to see if wheel-sensor is mounted properly
- check the position of the spoke magnet (max. 3 mm
distance to wheel-sensor)
- make sure CM 2.21 is mounted in bracket correctly
- check wheel circumference
Speed to high or to low
- check wheel circumference
- check to see if you are using miles or kilometers
6. Guarantee
We offer a guarantee for 24 months from the date of
purchase on the CM 2.21. The guarantee is limited
to material and processing faults. The batteries are
excluded from the guarantee.
The guarantee is valid only if the computer, with
accessories, has been handled and maintained
carefully and according to operating instructions.
To return the CM 2.21 under conditions/terms of the
guarantee, please refer to your dealer, your local
distributor or send the computer with the proof of
purchase (date) and all accessories and with sufficient
postage, to:
CicloSport Service
K. W. Hochschorner GmbH
Einsteinstr. 39a
D-82152 Martinsried
www.ciclosport.com
Please read through the instruction manual carefully
before sending us your computer and check the
battery. An exchange-device or the repaired device
will sent back to you free of charge if justifiable
guarantee-claims have come into question. Please
contact our local distributor.
Repair:
If your CM 2.21 is sent in for repair (or battery change)
or if a guarantee claim is not valid, repairs up to EUR
19.- will be carried out automatically.
In case of higher repair costs you will be notified. The
repaired device will be sent back COD.
Herzlichen Glückwunsch!
Mit dem CICLOMASTER CM 2.211 haben Sie einen Fahrradcomputer von höchster Präzision erworben. Er verfügt über modernste Elektronik und ist
wetterfest. Als Besonderheit hat der CM 2.21 eine optionale Trittfrequenzmessung: mit dem separat im Fachhandel erhältlichen Trittfrequenz-Set kann die
aktuelle, durchschnittliche und maximale Trittfrequenz einer Tour angezeigt werden. Außerdem verfügt der CM 2.21 über das TwoInOne-System: d.h. Sie
können ihn mit 2 Fahrrädern benutzen und sich für jedes Rad getrennt oder in Summe die Werte anzeigen lassen.
Bitte lesen Sie diese Bedienungsanleitung genau durch. Die Aktuellste Version finden sie bei uns auf der Homepage.
Garantieschein:
Absender:
Name Vorname
Straße, Nr. PLZ/Ort
Telefon (tagsüber) Fax E-Mail
Grund der Einsendung:
Nach Ablauf der Garantie sollen Reparaturen bis Euro durchgeführt werden.
!
!
!
D
MANUEL OPÉRATOIRE
Toutes nos félicitations !
En achetant le CICLOMASTER CM 2.21, vous vous équipez d‘un compteur de vélo de la plus haute précision. Il s‘agit d‘un modèle électronique de
pointe, parfaitement étanche. Veuillez lire attentivement ce mode d‘emploi. Sa particularité: les mesures de la fréquence de pédalage. Vous pouvez
mesurer la fréquence de pédalage actuelle, en moyenne et maximale en achetant le set de fréquence de pédalage. Nous vous conseillons de lire
attentivement le présent manuel opératoire. Vous trouvérez notre manuel actuel opératoire sur notre page de publicité.
F
Congratulations on your purchase!
With the CICLOMASTER CM 2.21 you have acquired an electronic bike computer with state of the art electronics, the highest level of
precision and it is weatherproof. As a special feature the CM 2.21 has an optional cadence measurement (for this you need the separately
available cadence-set). The Two in One-System: this allows you to use this cycle computer for two different bicycles and view the
combined total values. Please read this operating manual carefully. The current manual can be found on our website.
OPERATING MANUAL
GB/USA
Reifengröße Umfang
Tire size Circumference
Dimension du pneu Tour de roue
40-559 26 x 1,5 2026 mm
44-559 26 x 1,6 2051 mm
47-559 26 x 1,75 2070 mm
50-559 26 x 1,9 2026 mm
54-559 26 x 2,00 2089 mm
57-559 26 x 2,125 2114 mm
37-590 26 x 1 3/8 2133 mm
32-620 27 x 1 1/4 2199 mm
40-622 28 x 1,5 2224 mm
47-622 28 x 1,75 2268 mm
40-635 28 x 1 1/2 2265 mm
37-622 28 x 1 3/8 2205 mm
20-622 700 x 20C 2114 mm
23-622 700 x 23C 2133 mm
25-622 700 x 25C 2146 mm
28-622 700 x 28C 2149 mm
32-622 700 x 32C 2174 mm
8
A
km/h
SPD
1
B
km/h
SPD
1
TM
C
km/h
SPD
km
1
DST
D
km/h
SPD
1
TM
km/h
SPD
1
TM
E
km/h
SPD
1
TM
F
km/h
SPD
1
TM
G
km/h
SPD
1
TM
H
km/h
SPD
1
TM
2
TOT 9999
J
km/h
SPD
1
TM
2
K
km/h
SPD
1
TM
L
km/h
SPD
1
TM
M
km/h
SPD
1
TM
N
km/h
SPD
ø
1
TM
TOT999:59
O
km/h
SPD
1
TM
100
P
km/h
SPD
1
TM
Max350
Q



Join the conversation about this product
Here you can share what you think about the CicloSport CicloMaster CM 2.21 Cycling Computer. If you have a question, first carefully read the manual. Requesting a manual can be done by using our contact form.
reply | This was helpful (0) (Translated by Google)