1
2
m
a
x
8
0
m
m
3
5
6
C
A
A
2
-
2
,5
Nm
B
4
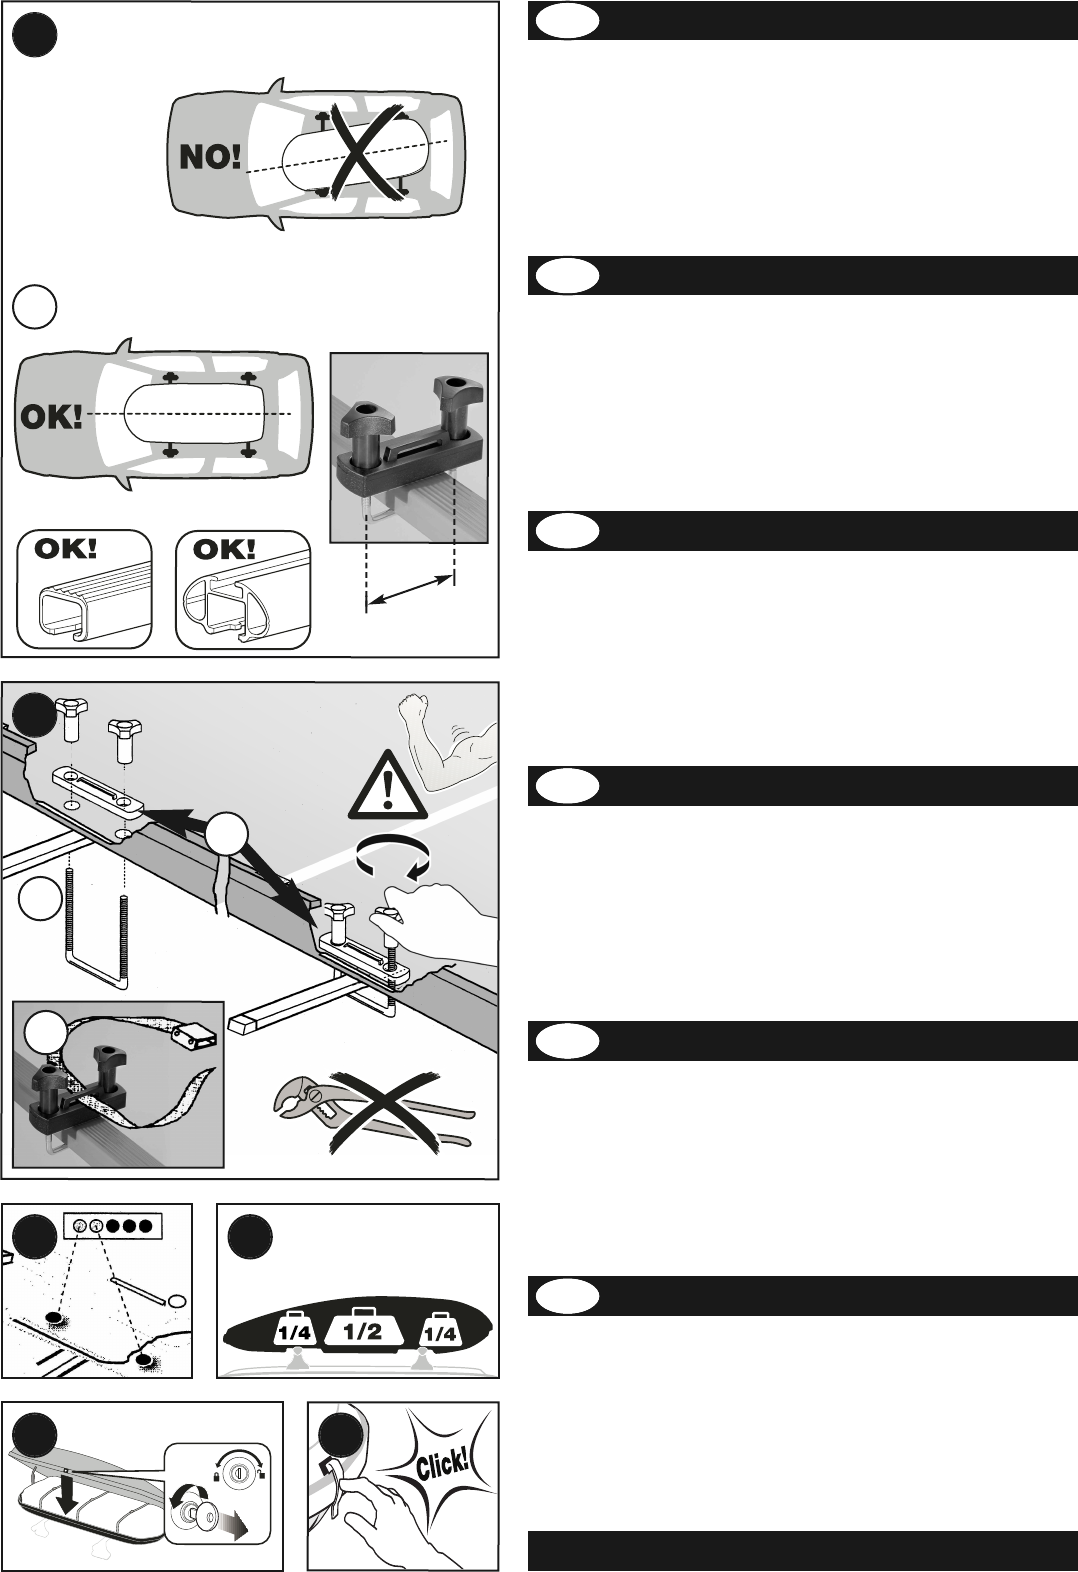
1 Posizionare il box portatutto sulle barre
portanti, allineandolo correttamente all'asse
della vettura (fig. 1-A).
2 Fissate il box alle barre passando il gancio ad
U (fig. 2-A) attraverso i due fori sul fondo del
box, posizionare la piastrina, fissarla con il
gancio ad U (fig. 2-B) e avvitare bene
i pomelli di serraggio.
- Infilare il cinghetto nel passante (fig. 2-C).
- Se la distanza tra i fori di fissaggio sul
fondo del box è diversa da quella richiesta,
fissare il box alle barre anteriori e praticare
nuovi fori per fissarlo a quelle posteriori.
3 Per evitare infiltrazioni, chiudere i fori che non
vengono usati sigillandoli con gli adesivi in
dotazione (fig. 3).
4 Distribuire il carico in modo uniforme (fig. 4).
5 Non eccedere con il carico:
il coperchio non deve forzare in chiusura.
- Chiudere e togliere la chiave (fig. 5).
6 Chiudere le clips di sicurezza (fig. 6).
1 Poser le coffre sur les barres de toit et
l'aligner dans l'axe du véhicule (fig. 1-A).
2 Fixer le coffre aux barres en coulissant le
crochet à U (fig. 2-A) à travers les deux trous
préformés. Positionner la plaque, fixez-la au
crochet à U (fig. 2-B) et visser les volants de
serrage. Introduire les sanges de retenue
dans les passants (fig. 2-C).
- Si la distance entre les trous de fixation
est differente de celle demandé, fixer le cof-
fre aux barres antérieures, préparer deux
nouveaux trous et fixer le coffre aux
barres posterieures.
3 Afin d'éviter tout infiltration, obturer les
trous du fond en utilisant les etiquettes
adhésif (fig.3).
4 La charge à l'interieur du coffre doit être bien
repartie (fig.4).
5 Ne dépassez en aucun cas la charge
maximale. Fermer le coffre et enlever
la clé (fig. 5).
6 Fermer la clip de sécurité (fig.6).
1 Setzen Sie die Dachbox auf die montierten
Dachlastträger. Dachbox eingemittet auf den
Träger stellen (fig. 1-A).
2 Führen Sie die Metallhaken U (fig.2-A) durch die
Löcker im Boden der Box und befestigen Sie die innere
Gegenplatte mit haken U (fig. 2-B) und ziehen die
Schraubgriffe an. Führen Sie Gepäckbefestigungsgurten
durch die Öffnungen (fig. 2-C).
- Sollte der Abstand zwischen den Befestigungslöchern
auf den Boden des Dachkoffers nicht passen,
muss der Dachkoffer auf die Vorderlastenträger
fixiert werden; neue Löchern müssen hinten
gebohrt werden um den Dachkoffer an die
Hinterbarre zu befestigen.
3 Um Infiltrationen zu vermeiden, müssen die nicht
benutzten Löcher durch den ausgerüsteten
Klebstoff versiegelt werden (fig. 3).
4 Das Laden im Box gleichmäßig zu verteilen (fig. 4).
5 Überschreiten Sie keinesfalls die maximale
Zuladung.Schließen Sie die Box und ziehen Sie
den Schlüssel (fig. 5).
6 Schließen Sie die Sicherungsclips (fig. 6).
1 Coloque el cofre centrado entre las barras
(fig. 1-A).
2 Fije el cofre a las barras mediante la fijación
en U (fig. 2-A), introduciéndolos a través de
las perforaciones da la base del cofre, desde
fuera hacia el interior. En el cofre, coloque las
piezas de plástico y fije los tornillos (fig. 2-B)
con los pomos de apriete. Inserte las correas
del equipaje en las aberturas (fig. 2-C).
-
Si la distancia requerida es distinta, fijar el
cofre a la barra delantera y realizar los orificios
necesarios en la base para fijarlo a la barra trasera.
3 Las perforaciones de la base del cofre que no
se usen, se deben taponar con los adhesivos
suministrados para evitar la entrada de
polvo y aqua (fig.3).
4 La carga del cofre debe repartirse
uniformemente (fig.4).
5 No superar nunca la carga máx.No hay que
forzar la tapa para encajar el cierre del cofre.
- Cerrar y retirar la llave.(fig. 5).
6 Fijar el cierre de seguridad (fig.6).
1
Plaats de dakbox op de dakdragers en centreer
de box in het midden van de auto (fig. 1-A).
2
Monteer de dakbox op de dakdragers middels de
U-Beugel (fig. 2-A) door de gaten in de bodem
van de dakbox. Monteer de montageplaat en span
de U-Beugel (fig. 2-B) aan middels de draaiknoppen.
-
Monteer de bagagespanbanden in de daarvoor
bedoelde haken
(fig. 2-C).
- Mits de montagegaten in de dakbox niet over-
seen komen met de afstand van uw dakdragers,
monteer dan altijd eerst de voorste beugels en
boor nieuwe gaten in de bodem ter hoogte van
de achterste drager.
3 De gaten welke niet gebruikt worden moeten
opgevuld worden om binnendringen van stof
en vocht te vermijden (fig. 3).
4 Bagage moet degelijk geplaatst worden in
de dakbox (fig. 4).
5 Niet overladen.
Sluit af en neme de sleutel uit(fig. 5).
6 Sluit de voorste veiligheidsclip (fig. 6).
1 Place the box on the roofbars in the centre
of the vehicle (fig.1A).
2 Fix the box to the bars inserting the U hook
(fig. 2-A) through the holes in the bottom of
the box. Place the plate and fix it with the
U hook (fig. 2-B) and finally tighten the knobs.
-
Insert the luggage straps into the loop (fig. 2-C).
- Should the distance between the holes in
the bottom of the box be different from the
one needed, the box must be fixed to the
front bar and new holes must be made to fix
it to the rear bars.
3 The holes that won't be used must be filled up
with adhesives in equipment to avoid dust or
water infiltration (fig. 3).
4 Load must be properly distributed
in the box (fig. 4).
5 Do not overload.
Lock and withdraw the key (fig. 5).
6 Lock the front security clip (fig.6).
FIXING INSTRUCTION TO THE BARS
INSTRUCTION POUR LA FIXATION AUX BARRES
MONTAGE AUF DEN DACHTRÄGER
FISSAGGIO DEL BOX ALLE BARRE
FIJAR EL COFRE A LAS BARRAS
GB
F
D
I
E
MONTAGEHANDLEIDING T.B.V. DE DRAGERS
NL
Junior s.r.l. 15033 Casale Monferrato (Alessandria) Italy Via G. di Vittorio, 17-19
Tel.+39 0142 782237 - e-mail: sales@junior.191.it -
www.juniorbox.it
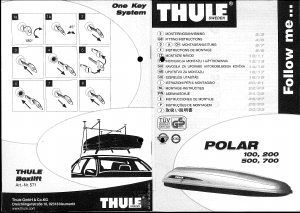
Max.
50 kg
FL 580 - Spazio 580
Max.
75 kg


Join the conversation about this product
Here you can share what you think about the Junior Spazio 460 Roof Box. If you have a question, first carefully read the manual. Requesting a manual can be done by using our contact form.