
• 5-Year
Limited Warranty
WGNBPA-220
WIC 899709
AUTOMATIC ARM
Blood Pressure
Monitor
4
IMPORTANT PRODUCT NOTICES
AND SAFETY INSTRUCTIONS
When using your blood pressure monitor, basic precautions should
always be followed. Please read and follow all instructions and warnings
before using this product. Save these instructions for future reference.
• This is a home health care product only and it is not intended
to serve as a substitute for the advice of a physician or
medical professional.
• This device uses the oscillometric method to measure systolic and
diastolic blood pressure, as well as heart rate.
• DO NOT use this device for diagnosis or treatment of any health
problem or disease. Measurement results are for reference only.
Consult a health care professional for interpretation of pressure
measurements. Contact your physician if you have or suspect any
medical problem. Do not change your medications without the advice
of your physician or health care professional.
• Proper cuff size is critical for accurate measurements. Follow the
instructions in this manual and printed on the arm cuff to ensure the
appropriate size cuff is being used.
• For those who have undergone mastectomy surgery (especially
those who have had lymph nodes removed), it is recommended to
take a measurement on the unaffected side.
• Wearing the arm cuff properly is critical for accurate measurements.
If the circumference of the upper arm differs largely from the
circumference of the forearm, an excessive gap may occur between
the arm and the arm cuff, which could result in an inaccurate
measurement. Please consult your healthcare professional if you
have questions on how to properly wear the arm cuff.
• This product is not suitable for people with arrhythmias, those
undergoing intravenous injections on any limb, or those currently
on dialysis treatment. This device may have difficulty determining
the proper blood pressure for pregnant women and for users with
irregular heartbeat, diabetes, poor circulation of blood, kidney
problems, or for users who have suffered from a stroke.
5
• Excessive use may result in blood flow interference, which is likely
to cause uncomfortable sensations, such as partial subcutaneous
hemorrhage, or temporary numbness to your arm. In general, these
symptoms should not last long. However, if symptoms persist, please
seek advice from a medical professional.
• The pulse display is not suitable for checking the frequency of
heart pacemakers.
• Electromagnetic interference: The device contains sensitive electronic
components. Avoid strong electrical or electromagnetic fields in the
direct vicinity of the device (ex. mobile telephones, microwave ovens).
These may lead to temporary impairment of measurement accuracy.
• Consider the electromagnetic compatibility of the device (ex. power
disturbance, radio frequency interference, etc.). Please use this
device in a home healthcare environment only.
• Use blood pressure monitor only for its intended use.
• DO NOT wrap the cuff around body parts other than your arm.
• DO NOT touch, move, or shake the device during a measurement as
this could cause an inaccurate blood pressure reading.
• DO NOT talk or move your arm or hand muscles during a
measurement as this could cause an inaccurate blood pressure
reading.
• DO NOT use this device on infants, children, or those who cannot
express their own intention.
• Not for use by or on persons under the age of 18.
• Use only 1.5V “AAA” alkaline batteries for power supply.
• The patient is an intended operator.
• The applied part is the cuff.
Blood pressure measurements determined with this device are
equivalent to those obtained by a trained observer using the
cuff/stethoscope auscultatory method, within the accuracy limits
prescribed by the American National Standard, manual, electronic,
or automated sphygmomanometers. The sphygmomanometer was
clinically investigated according to the requirement of ISO 81060-2: 2013.
6
ABOUT BLOOD PRESSURE
What is Blood Pressure?
Blood pressure is the pressure exerted on the artery walls while blood
flows through the arteries. The pressure measured when the heart
contracts and sends blood out of the heart is systolic (highest) blood
pressure. The pressure measured when the heart dilates with blood
flowing back into the heart is called diastolic (lowest) blood pressure.
Both the systolic and diastolic pressure are necessary for a physician to
evaluate the status of a patient’s blood pressure.
Why Measure Your Blood Pressure?
Among today’s various health problems, those associated with high
blood pressure are very common. High blood pressure dangerously
correlates with cardiovascular disease. Therefore, blood pressure
monitoring is important for identifying those at risk.
Why Do My Readings Vary?
Blood pressure is a body parameter that is subject to normal variations
throughout the day. A single reading that is different from yours or
your doctor’s readings are not necessarily inaccurate. The average of
several readings, taken under similar conditions, using the same arm, is
preferred for accurate blood pressure readings.
Why Are My Readings Different Than Those Taken at My
Doctor’s Office?
Many experience a phenomenon called “White Coat Hypertension”
when measured by a doctor. White Coat Hypertension refers to blood
pressure that rises above its usual level when measured in a clinical
setting, such as a doctor’s office.
7
BLOOD PRESSURE STANDARD
The table below contains defined levels for hypertension that are
publicly available from the American Heart Association
®
(AHA 2017).
Users can compare their own blood pressure readings against these
defined levels to determine if they may be potentially at increased risk.
This table is applicable to most adults aged 18 and older.
Blood Pressure Category
Systolic mmHg
(upper number)
Diastolic mmHg
(lower number)
Indicator
Color
Normal <120 and <80 Green
Elevated 120–129 and <80 Yellow
High Blood Pressure (hypertension) Stage 1 130–139 or 80–89
Red
High Blood Pressure (hypertension) Stage 2 140–180 or 90–120
Hypertensive Crisis (consult your doctor
immediately)
>180
and/
or
>120
*Source: AHA 2017
Blood pressure tends to go up and down, even in people who normally
don’t have high readings. If your numbers stay above the normal range
most of the time, you may be at increased risk and should consult
your physician.
Although one can easily find where their own blood pressure readings
fall on this table, this monitor comes equipped with a Risk Category
Index that automatically compares each reading to the defined levels
and provides a helpful cue if your reading falls into one of the stages
that could potentially indicate increased risk. See Risk Category Index
section for more information on this feature.
8
Please note that cues provided by this monitor are only intended to
assist you in using this table. The table and cues are only provided for
convenience to help you understand your noninvasive blood pressure
reading as it relates to the American Heart Association
®
information.
They are not a substitute for a medical examination by your physician.
It is important for you to consult with your physician regularly. Your
physician will tell you your normal blood pressure range as well as the
point at which you may actually be considered to be at risk.
HOW THIS BLOOD PRESSURE
MONITOR WORKS
This monitor uses innovative GentleInflate
®
technology to measure your
blood pressure. With one touch of a button, the monitor automatically
takes the reading during inflation, then deflates, delivering a quick,
comfortable, and quiet measurement every time.
Please note that any muscle movement during inflation will cause
measurement error. When measurement is complete, the monitor will
display your systolic pressure, diastolic pressure, and pulse readings.
The monitor automatically finds where your measurement results fall
on the American Heart Association (AHA 2017) table and provides a
cue if your reading falls into one of the stages that could potentially
indicate increased risk. Please refer to Risk Category Index section for
more information on this feature.
The appearance of the
icon indicates that a pulse irregularity
consistent with an irregular heartbeat was detected during
measurement. See Irregular Heartbeat Detector section.
9
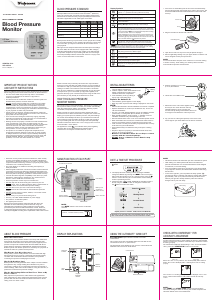
NAME/FUNCTION OF EACH PART
START/STOP
Air Tube and Connector
Arm Cuff
Other Accessories:
4 AAA size, 1.5V alkaline batteries (included)
Battery Cover
(Located on
bottom of unit)
NOTE:
The “MEM” button is also used to set the date
and time.
LCD Display
Date & Time Set
Memory Recall/
Date & Time Select
10
DISPLAY EXPLANATIONS
Date/Time
Indicator
Diastolic
Pressure
Systolic
Pressure
Heart
Rate
Irregular
Heartbeat
Detector
11
Low Battery Symbol: Appears when batteries should be
replaced, or +/- polarities have been positioned incorrectly.
Pulse Symbol: Shows the heart rate per minute.
Irregular Heartbeat Detector: See Irregular
Heartbeat Detector section for more information.
Risk Category Index: See
Risk Category Index section
for more information.
Memory Average: Displays average of last 3 readings.
Excessive Body Motion Detector: Appears when excessive
body movement, especially of the arm the cuff is worn, is detected
during the measurement. See
Excessive body Motion Detector section
for more information. Note: The measured blood pressure reading
may not be accurate if the icon is displayed.
Properly wrapping the arm cuff is important. If the circumference of
the upper arm differs largely from the circumference of the forearm,
an excessive gap may occur between the arm and the arm cuff, and
result in the false detection of excessive body motion.
Check-with-Confidence
TM
:$SSHDUVXSRQÚUVWXVHDQGWKHQ
every 30th use, during the self-check function. See Check-with-
Confidence for Accuracy Assurance section for more information.
Display Symbols:
Measurement Error: Wrap the cuff correctly and keep arm
steady during measurement. Measure again.
Air Circuit Abnormality: Check cuff connection. Measure again.
Pressure Exceeding 300 mmHg: Turn the unit off to clear,
then measure again.
Error Determining Measurement Data: Wrap the cuff
properly, keep steady, and measure again.
System Error: Turn off monitor and measure again. If EP error
still appears on the display, please call a Consumer Relations
representative.
If
and any of the following letters and numbers appear in the area that
systolic pressure should be displayed, an error has occurred with your reading.
See Troubleshooting section of this manual for more information.
12
INSTALLING BATTERIES
1. Press down on latch and lift the battery cover to
open the battery compartment.
2. Install or replace 4 “AAA ” sized batteries in the
battery compartment according to the
indications inside the compartment.
3. Close the battery cover by pushing in
the top end of the battery door.
Replace the batteries if:
• The low battery symbol appears on the display.
• When any button is pressed and nothing is displayed on the screen.
NOTE:
• Date and time will need to be reset if batteries are removed or replaced.
• Replace all batteries at one time (as simultaneous set). Do not mix
old and new batteries.
• Use only 1.5V “AAA” alkaline batteries. Do not mix alkaline, standard
(carbon-zinc) or rechargeable (Ni-Cad, Ni-MH, etc.) batteries.
• When installing batteries, observe proper +/- polarities. Incorrect
installation of batteries may cause damage to the unit.
• Remove batteries when unit is not in use for extended periods of time.
• When the batteries are removed, the measurement values stored in
memory are retained. However, the date and time must be reset.
• Clean contacts on battery and in battery compartment with a soft dry
cloth each time you install batteries.
• Keep batteries away from children as they could pose a choking
hazard.
• Recycle or dispose of properly in accordance with all local, state,
province, and country regulations.
• Batteries are hazardous waste. Do not dispose of them
together with the household garbage.
• DO NOT dispose of batteries in fire. Batteries may
explode or leak.
Battery
Cover
13
DATE & TIME SET PROCEDURE
1. To adjust the date and time, press the “DATE & TIME SET”
button.
2. The display will show a blinking number showing the MONTH.
Change the MONTH by pressing the “MEM” button. Each press
will increase the number by one in a cycling manner. Press the
button to confirm the entry. The screen will then show a blinking
number representing the DAY.
3. Change the DAY, YEAR, HOUR, & MINUTE as described in Step 2
above, using the “MEM” button to change the numbers and
the
button to confirm the entries.
Press the button
MEM
Repeat process to set DAY, YEAR, HOUR, and MINUTE.
IMPORTANT: IF YOU ARE USING THIS BLOOD PRESSURE MONITOR FOR THE FIRST
TIME, PLEASE REMOVE THE PROTECTIVE FILM FROM THE DISPLAY SCREEN.
Blinking Month
Increase Month
Confirm Entry
14
USING THE ULTRASOFT
®
ARM CUFF
Very Important: Proper cuff size is critical to accurate
measurement.
This monitor comes with one UltraSoft Upper Arm Cuff that fits arm
circumferences from 9"-17" (23cm-43cm).
The appropriate cuff is suitable for your use if the colored arrow falls
within the solid color line as shown below.
ARROW MUST FALL
WITHIN BLUE BAND
ARROW MUST FALL
WITHIN BLUE BAND
Center tube over
middle of arm
Position cuff
edge 0.8˝
–
1.2˝
(2
–
3 cm) above elbow.
Center tube over
middle of arm.
Fit cuff secure ly. Allow room for
two fingers to fit between the cuff
and your arm.
Solid-Colored Line
Colored Arrow
15
1. If the cuff is not assembled, pass the end of the cuff furthest away
from the tubing through the metal D-ring in order to form a loop. The
smooth side without the felt material should be on the inside of the
cuff loop.
2. Plug the cuff tube into the left side of the unit.
3. Open the arm cuff so that your arm may be placed through it.
4. Remove tight-fitting clothing from your upper left arm so that the cuff
can be wrapped around your exposed arm.
NOTE:
It is recommended to wrap the cuff on a bare arm or over thin clothing
to ensure accuracy. Thick clothing or a rolled up sleeve will cause
inaccurate blood pressure measurements.
ARROW MUST FALL
WITHIN BLUE BAND
D-ring
End of Cuff
2~3 cm
(0.8”~1.2”)
Position cuff edge
0.8
–
1.2 inches (2
–
3cm)
above elbow.
Fit cuff securely.
Allow room for 2 fingers
to fit between the cuff
and your arm.
Insert Plug Here
16
5. Position cuff edge 0.8–1.2 inches
(2–3 cm) above elbow.
6. Center tube over middle of arm.
7. Pull the end of the cuff so that it tightens evenly
around your arm. Press the hook and loop
material together to secure, ensuring the
cuff does not slip during measurement. Allow room
for 2 fingers to fit between the cuff and your arm.
8. Lay your arm on a table (palm upward) so the cuff is at the
same height as your heart. Make sure the tube is not kinked.
17
NOTE:
• This device should not be used when your arm is wounded or injured.
• Thick clothing or a rolled up sleeve will cause inaccurate blood
pressure measurements. It is recommended that the cuff be wrapped
on a bare arm, or over thin clothing.
• If it is not possible to fit the cuff on your left arm, it can also be placed
on your right arm. However, all measurements should be made using
the same arm.
• To use on the right arm, you must position the artery symbol “
”
over the main artery. Locate the main artery by pressing with 2 fingers
approximately 1 inch (2 cm) above the bend of your elbow on the
inside of your right arm. Identify where the pulse can be felt the
strongest. This is your main artery.
Main Artery
18
CHECK-WITH-CONFIDENCE
TM
FOR
ACCURACY ASSURANCE
This monitor includes a built-in Check-with-Confidence feature provides
accuracy assurance function, which enables the device to automatically
perform a self-check. It provides a convenient way to ensure the monitor
is working properly.
The Check-with-Confidence default setting is “ON.” To turn this feature
“OFF,” press the “START/STOP” button for 3 seconds.
On first use, then on every 30th use, the cuff will partially inflate and then
deflate. The monitor will display “OK”, confirming the monitor is working
properly.
NOTE:
If the “MEM” and “START/STOP” buttons are pressed at the
same time, erasing the values in memory, the monitor will perform the
self-check feature on the next measurement.
Check-with-Confidence
feature ON
Check-with-Confidence
feature OFF
If the monitor is not working properly, “Err” will be displayed on the screen.
Please call Consumer Relations at the number listed in the warranty
section.
A
Doc # L-01536, Rev.
• 5-Year
Limited Warranty
El manual en español
empieza en la página 34
WGNBPA-220
WIC 899709
Doc # L-01536, Rev.1
AUTOMATIC ARM
Blood Pressure
Monitor



Join the conversation about this product
Here you can share what you think about the Walgreens WGNBPA-220 Blood Pressure Monitor. If you have a question, first carefully read the manual. Requesting a manual can be done by using our contact form.