
C
FM/AM
Portable CD Player
Operating Instructions
Manual de instrucciones
3-252-536-21 (1)
“WALKMAN” is a registered trademark of Sony Corporation to represent Headphone Stereo
products.
is a trademark of Sony Corporation.
“WALKMAN” es una marca registrada de Sony Corporation que representa los productos
audífonos estéreo. es una marca de fábrica de Sony Corporation.
Sony Corporation ©2003
D-FJ211
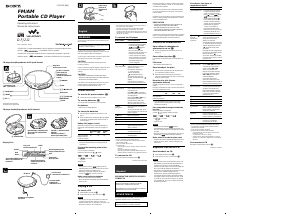
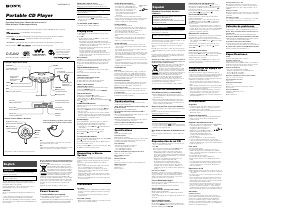
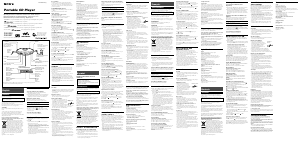
CD player (front)/Reproductor de CD (parte frontal)
A
DC IN 4.5 V (external
power input) jack
Toma DC IN 4.5 V
(entrada de alimentación
externa)
*The button has a tactile dot.
*El botón tiene un punto táctil.
Strap holes
Orificios para la correa
1 SOUND/AVLS
Display/Visor
4 ./>
2 P MODE/
OPEN
i (headphones) jack
Toma i (auriculares)
qa HOLD
3 VOL +*/–
5 u*
6 7 x•RADIO OFF
8 9 q; RADIO ON/
BAND•MEMORY
CD player (inside)/Reproductor de CD (interior)
Insert the # end first (for both
batteries).
Introduzca el extremo #
primero (para ambas pilas).
B
Open the battery compartment lid.
Abra la tapa del compartimiento
de las pilas.
qs G-PROTECTION
AVLS
Sound mode
Modo de sonido
Track number/PRESET number
Número de pista/Número de
presintonía
Playing time/Frequency
Tiempo de reproducción/
Frecuencia
Display/Visor
PRESET
Band
Banda
Remaining battery power
Energía restante de la pila
to an AC outlet
a una toma de corriente de ca
i
AC power adaptor
Adaptador de
alimentación de ca
Headphones or earphones
Auriculares
DC IN 4.5V
English
WARNING
To prevent fire or shock hazard, do not expose the unit to
rain or moisture.
Do not install the appliance in a confined space, such as
a bookcase or built-in cabinet.
To prevent fire, do not cover the ventilation of the
apparatus with newspapers, tablecloths, curtains, etc. And
don’t place lighted candles on the apparatus.
To prevent fire or shock hazard, do not place objects filled
with liquids, such as vases, on the apparatus.
CAUTION
The use of optical instruments with this product will
increase eye hazard.
Certain countries may regulate disposal of the battery used
to power this product. Please consult with your local
authority.
CAUTION
• INVISIBLE LASER RADIATION WHEN OPEN
• DO NOT STARE INTO BEAM OR VIEW DIRECTLY
WITH OPTICAL INSTRUMENT
The validity of the CE marking is restricted to only those
countries where it is legally enforced, mainly in the
countries EEA (European Economic Area).
Power Sources
To use the AC power adaptor (C)
1 Connect the AC power adaptor to an AC outlet.
To use the batteries (B)
Use only the following batteries for your CD player:
Dry batteries
• LR6 (size AA) alkaline batteries
To insert the batteries
1 Open the battery compartment lid inside your CD
player.
2 Insert two batteries by matching the 3 to the diagram
in the battery compartment and close the lid until it
clicks into place.
Battery life* (approx. hours)
(When the CD player is used on a flat and stable place.)
Playing time varies depending on how the CD player is
used.
G-PROTECTION RADIO
ON OFF ON
Two Sony alkaline 40 36 70
batteries LR6 (SG)
(produced in Japan)
* Measured value by the standard of JEITA (Japan
Electronics and Information Technology Industries
Association).
To check the remaining power of the
batteries
You can check it in the display.
Replace the batteries when “
” flashes.
t t t
t t Lo batt*
*Beep sounds.
Notes
• The indicator sections of roughly shows the
remaining battery power. One section does not always
indicate one-fourth of the battery power.
• Depending on operating conditions, the indicator
sections of
may increase or decrease.
Notes on using the dry batteries
• Be sure to remove the AC power adaptor.
• When the batteries are depleted, replace both batteries
with new ones.
Playing a CD
To insert a CD
1 Press OPEN to open the lid (A).
2 Fit the CD to the pivot, then close the lid (D).
Notes
• This CD player can play CD-Rs/CD-RWs recorded in the
Compact Disc Digital Audio (Audio CD) format, but
playback capability may vary depending on the quality of the
disc and the condition of the recording device.
• This product is designed to play back discs that conform to
the Compact Disc (CD) standard.
Recently, various music discs encoded with copyright
protection technologies are marketed by some record
companies. Please be aware that among those discs, there are
some that do not conform to the CD standard and may not be
playable by this product.
To operate the CD player
Button/Switch Function/Operation
1 SOUND/AVLS*
1
• Use to emphasize the bass-
boosted sound. Press repeatedly
to select BASS
or BASS
. BASS enhances
more than BASS
.*
2
• Also use to keep down the
maximum volume to protect your
hearing. Press and hold until
“AVLS” appears in the display.
The AVLS function is turned on.
To turn off the AVLS function,
press and hold again until
“AVLS” disappears.
2 P MODE/ For CD player: Press repeatedly
(play mode/repeat) until the play mode you want
appears in the display.
No indication: Normal play
“1”: Single track play
“SHUF”: Shuffle play
“
”: Bookmark track play
To repeat the play mode you
selected, press and hold until “
”
appears.
For radio: Press to switch the
tuning mode and the preset mode.
3 VOL+/– Press to adjust the volume.
4 ./> For CD player: Press . or >
(AMS*
3
/search) once to find the beginning of the
current/next track.
Press . or > repeatedly to
find the beginning of the previous/
succeeding tracks.
Press and hold . or > to go
backward/forward quickly.
For radio: Press to tune in the
station you want. Also press to
select the preset station you want.
5 u Press to start play. Press again to
(play/pause) pause play.
To play from the first track, press
for 2 seconds or more while the CD
player is stopped.
6 x (stop) Press to stop playing.
7 RADIO OFF Press to turn off the radio.
8 RADIO ON Press to turn on the radio.
9 BAND Press to change the band.
q; MEMORY Press and hold to enter the preset
mode. Also press to store the
station in memory.
qa HOLD Use to lock the controls to prevent
accidental button presses.
qs G-PROTECTION Set it to ON to protect against
sound skipping.*
4
*
1
AVLS = Automatic Volume Limiter System
*
2
If the sound is distorted when using the SOUND function,
turn down the volume.
*
3
AMS = Automatic Music Sensor
*
4
Sound may skip:
– if the CD player receives stronger continuous shock than
expected,
– if a dirty or scratched CD is played or
– when using poor-quality CD-Rs/CD-RWs or if there is a
problem with the recording device or application software.
To remove the CD
Remove the CD while pressing the pivot (E).
(Continue to the reverse side)
MONO
D E
Label side up
El lado de la
etiqueta hacia
arriba
Español
REPRODUCTOR PORTATIL DE DISCO
COMPACTO
POR FAVOR LEA DETALLADAMENTE ESTE
MANUAL DE INSTRUCCIONES ANTES DE
CONECTAR Y OPERAR ESTE EQUIPO.
RECUERDE QUE UN MAL USO DE SU APARATO
PODRÍA ANULAR LA GARANTÍA.
ADVERTENCIA
Para evitar el riesgo de incendios o electrocución, no
exponga la unidad a la lluvia o a la humedad.
No instale el aparato en un espacio cerrado, como una
estantería para libros o un armario empotrado.
Para evitar incendios, no cubra la ventilación del aparato
con periódicos, manteles, cortinas, etc. No coloque velas
encendidas sobre el aparato.
Para evitar el riesgo de incendios o descargas eléctricas,
no coloque recipientes llenos de líquido, como jarrones,
sobre el aparato.
Es posible que en ciertos países se regule el desecho de la
pila que se utiliza para alimentar este producto. Consulte
con las autoridades locales.
PRECAUCIÓN
• CUANDO EL DISPOSITIVO ESTÁ ABIERTO SE
EMITE RADIACIÓN LÁSER INVISIBLE
• NO MIRE FIJAMENTE EL HAZ DE LUZ NI
VISUALICE EL DISPOSITIVO DIRECTAMENTE
CON INSTRUMENTOS ÓPTICOS
La validez de la marca CE se limita únicamente a aquellos
países en los que la legislación la impone, especialmente
los países del EEE (Espacio Económico Europeo).
Fuentes de alimentación
Para utilizar el adaptador de
alimentación de ca (C)
1 Conecte el adaptador de alimentación de ca a una
toma de ca.
Para utilizar las pilas (B)
Use solamente las siguientes pilas con el reproductor de
CD:
Pilas secas
• Pilas alcalinas LR6 (tamaño AA)
Para introducir las pilas
1 Abra la tapa del compartimiento de las pilas situado
en el interior del reproductor de CD.
2 Inserte dos pilas de modo que 3 coincida con la
marca del compartimiento de las pilas y cierre la tapa
hasta que quede encajada.
Duración de la pila* (número
aproximado de horas)
(Cuando el reproductor de CD se usa en un lugar plano y
estable.)
El tiempo de reproducción varía en función de la forma en
que se usa el reproductor de CD.
G-PROTECTION RADIO
ON OFF ON
Dos pilas alcalinas 40 36 70
Sony LR6 (SG)
(fabricadas en Japón)
* Valor determinado por la normativa de la JEITA
(Japan Electronics and Information Technology
Industries Association).
Para comprobar la energía restante de
las pilas
Puede comprobarlo en la pantalla.
Cuando “
” parpadee, sustituya las pilas.
t t t
t t Lo batt*
* Suena una señal.
Notas
• Las secciones del indicador muestran
aproximadamente la energía restante de las pilas. Una
sección no siempre indica una cuarta parte de la energía
de la pila.
• Según las condiciones de funcionamiento, las secciones
del indicador
pueden aumentar o disminuir.
Notas sobre el uso de las pilas secas
• Asegúrese de retirar el adaptador de alimentación de ca.
• Cuando las pilas se agoten, sustituya ambas pilas por
unas nuevas.
Reproducción de un CD
Para introducir un CD
1 Pulse OPEN para abrir la tapa (A).
2 Ajuste el CD en el pivote y cierre la tapa (D).
Notas
• Este reproductor de CD puede reproducir CD-R o CD-
RW grabados en formato de audio digital para discos
compactos (CD de audio), pero la capacidad de
reproducción puede variar en función de la calidad del
disco y del estado del dispositivo de grabación.
• Este producto se ha diseñado para reproducir discos que
cumplen con el estándar Compact Disc (CD).
Recientemente, algunas compañías discográficas
comercializan discos de música codificados mediante
tecnologías de protección de derechos de autor. Tenga
en cuenta que, entre estos discos, algunos no cumplen
con el estándar CD, por lo que no podrán reproducirse
mediante este producto.
Para hacer funcionar el
reproductor de CD
Botón/Interruptor Función/Operación
1 SOUND/AVLS*
1
• Úselo para potenciar el sonido
con graves reforzados. Púlselo
varias veces para seleccionar
BASS
o BASS . BASS
potencia los graves en
mayor medida que BASS
.*
2
• Úselo también para mantener
limitado el volumen máximo y
proteger sus oídos. Manténgalo
pulsado hasta que aparezca
“AVLS” en la pantalla. La
función AVLS está activada.
Para desactivar la función AVLS,
manténgalo pulsado de nuevo
hasta que desaparezca “AVLS”.
2 P MODE/ Con el reproductor de CD: Púlselo
(
modo de
varias veces hasta que el modo
reproducción/
de reproducción que desee
repetición) aparezca en la pantalla.
Sin indicador: Reproducción normal
“1”:
Reproducción de una sola pista
“SHUF”: Reproducción aleatoria
“
”: Reproducción de pistas
con marcas
Para repetir el modo de reproducción
que seleccionó, manténgalo pulsado
hasta que aparezca “ ”.
Con la radio: Púlselo para cambiar
el modo de sintonización y el modo
de preselección.
3 VOL+/– Púlselo para ajustar el volumen.
4 ./> Con el reproductor de CD: Pulse
(AMS*
3
/búsqueda) una vez . o > para buscar
el principio de la pista actual o
siguiente. Pulse . o >
varias veces para buscar el
principio de las pistas anteriores
o siguientes. Mantenga pulsado
. o > para retroceder o
avanzar rápidamente.
Con la radio: Púlselo para
sintonizar la emisora que desee.
Púlselo también para seleccionar la
emisora preseleccionada que desee.
5 u
Púlselo para iniciar la reproducción.
(reproducir/pausa) Vuélvalo a pulsar para introducir
una pausa en la reproducción.
Para reproducir desde la primera
pista, púlselo durante 2 segundos
o más cuando esté detenido el
reproductor de CD.
6 x (parada)
Púlselo para detener la reproducción.
7 RADIO OFF Púlselo para apagar la radio.
8 RADIO ON Púlselo para encender la radio.
9 BAND Púlselo para cambiar la banda.
q; MEMORY Púlselo y manténgalo pulsado para
activar el modo de preselección.
Púlselo también para guardar la
emisora en la memoria. .
qa HOLD Utilícelo para bloquear los
controles y evitar de este modo que
se pulsen botones accidentalmente.
qs G-PROTECTION Colóquelo en la posición ON para
evitar que se se produzcan
interrupciones del sonido.*
4
*
1
AVLS = Sistema de limitación automática del volumen
*
2
Si se distorsiona el sonido cuando se utiliza la función
SOUND, baje el volumen.
*
3
AMS = Sensor automático de música
*
4
Es posible que se produzcan saltos de sonido:
– si el reproductor de CD recibe golpes continuos más
fuertes de lo normal,
– si se reproduce un CD sucio o rayado,
– si utiliza CD-R o CD-RW de baja calidad o si existe un
problema con el dispositivo de grabación o el software de
aplicación.
Para extraer el CD
Extraiga el CD presionando el pivote (E).
(Continúa en el reverso)
Play mode
Modo de reproducción



Join the conversation about this product
Here you can share what you think about the Sony D-FJ211 Discman. If you have a question, first carefully read the manual. Requesting a manual can be done by using our contact form.