
Points out a situation that
could lead to serious,
moderate, or minor injuries
Indicates possible property
damage
Advice and tips on how to
handle your device better
Information and warnings
for children with hearing
instruments
Optional symbol for custom
models with wireless functionality
12
CE compliance label,
confi rms compliance
with certain European
Directives, refer to section
“Conformance information”
Indicates the legal
manufacturer of the device
Do not dispose of the device
with general domestic
waste. Read more in section
“Disposal information”
Read and follow the
instructions in the user guide
Changing the batteries
Open the battery
compartment
Remove coloured sticker
from new battery, place battery
in drawer with + symbol on
battery + side up. (You should
only remove the protective sticker
if you actually use the battery)
Close battery door
Carefully close the
battery compartment.
If you feel resistance, the
battery is not inserted correctly.
Do not attempt to close the
battery compartment by force.
It can be damaged.
Batteries
To insert the hearing instrument:
Hold the tube at the bend
that is closer
to the ear
piece.
Carefully push
the ear piece
in the ear canal
.
Twist it slightly
until it sits well.
Open and close your mouth to
avoid accumulation of air in the
ear canal.
Lift the hearing instrument
and slide it over the top
of your ear
.
ঔ Insert the right hearing
instrument with the right
hand and the left hearing
instrument with the left
hand.
ঔ If you have problems
inserting the ear piece,
use the other hand to
gently pull your earlobe
downwards. This opens
the ear canal and eases
insertion of the ear piece.
Inserting
Your hearing instruments have been
fi ne-tuned for your right and left
ear. Coloured markers indicate
the side:
ঔ red marker = right ear
ঔ blue marker = left ear
Daily use
ঔ If you are wearing two
hearing instruments, you
have to lock or unlock the
controls on each hearing
instrument separately.
ঔ Locking or unlocking can
optionally be indicated by
an acoustic signal.
ঔ When you turn your
hearing instruments
off and on again, the
key lock remains in the
previously selected state.
Whether this function is confi gured
for your hearing instruments is
listed in section “Controls”.
Further adjustments
(optional)
The controls of your hearing
instruments can also be used
to change, for example, the
tinnitus noiser level.
Refer to section “Controls” for your
personal settings.
Locking the controls
(optional)
To prevent any accidental operation
you can lock the controls. When the
controls are locked, both push button
and rocker switch are disabled.
To lock the controls, press
the top of the rocker switch
and hold it. Simultaneously
press the push button on the
same hearing instrument for
3 seconds.
To unlock the controls, press the
bottom of the rocker switch
and hold it. Simultaneously
press the push button on the
same hearing instrument for
3 seconds.
On the phone
When you are on the phone, hold
the telephone receiver slightly above
your ear. The hearing instrument
and telephone receiver have
to be aligned. Turn the
receiver slightly so that
the ear is not completely
covered.
Telephone program
You may prefer a certain volume
when using the phone. Ask your
NHS Provider to confi gure a
telephone program.
Switch to the telephone
program whenever you are on
the phone.
Whether a telephone program
is confi gured for your hearing
instrument is listed in section
“Settings”.
Using two hearing
instruments
When controlling two instruments
you have the following options to,
for example, change the hearing
program:
You can control each hearing
instrument separately.
You can control both hearing
instruments simultaneously.
Your NHS Provider has to activate
the “e2e wireless” function, enabling
both hearing instruments to
exchange information. You can then
use either a remote control or the
user controls on either of your
instruments for the desired function
e.g. volume change.
The control elements of both
instruments can even be set
differently – thus offering you the
degree of control you really need.
With an audio shoe you can
connect your hearing instrument to
an FM system. An FM system gathers
speech at the voice source (via a
separate microphone) and transmits
the sound directly to the hearing
instrument. This can be useful for
adults in diffi cult listening situations
and for children in classrooms.
Nowadays, most FM systems allow
for coupling with audio devices like
a MP3 player.
Your NHS Provider can confi gure
your hearing instruments so that
they switch automatically to the
audio shoe program if the audio
shoe has been attached.
If you want to use an
audio shoe, a special battery
compartment is required.
Ask your NHS Provider to
exchange the battery
compartment.
WARNING
Risk of electric shock!
Connect audio input only
to a device conforming to
IEC 60065, the IEC-Norm
for audio, video and other
electronic devices.
NOTICE
Use an approved audio shoe
only. Ask your NHS Provider
for this accessory.
The audio shoe is only
available for Octiv M+ & HP+
hearing instruments.
Audio input
NOTICE
For instruments with wireless
connectivity:
When the telecoil program
is active, the remote control
may cause a pulsing noise.
Use the remote control
with a distance greater
than 10 cm (4 inches).
Many telephones as well as public
places like theatres offer the audio
signal (music and speech) via an
audio induction loop. With this
system, your hearing instruments
can directly receive the desired signal
– without distracting noise in the
environment.
You can usually
recognise audio
induction loop
systems by certain
signs.
Ask your NHS Provider to confi gure a
telecoil program.
Switch to the telecoil program
whenever you are in a place with
an audio induction loop.
Whether the telecoil program
is confi gured for your hearing
instrument is listed in section
“Settings”.
Telecoil program and
remote control
Audio induction loops
Attaching and removing the
audio shoe
The audio shoe is integrated into a
battery compartment.
To attach or remove the audio shoe,
the battery compartment has to be
exchanged. A special tool is required.
Ask your NHS Provider to attach or
remove the audio shoe.
Your hearing instrument may be
programmed to inform you when
the battery should be replaced for
best system performance. You may
hear an intermittent series of beeps
and/or experience low amplifi cation
power or volume. Change the
battery when either of these occur.
Remove empty batteries immediately
and dispose of according to local
regulations.
Low Battery indicator
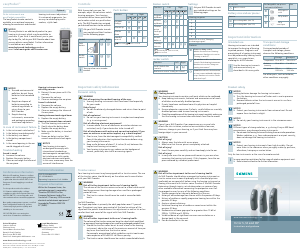
Always use the right size
batteries
ঔ Remember to have your
replacement batteries with
you at all times.
ঔ Only use zinc-air batteries or
nickel-metal hydride (NiMH)
rechargeable batteries.
ঔ Do not use e.g. silver-zinc
or lithium-ion rechargeable
batteries.
Your Octiv
™
+ hearing instrument
Getting to know your
hearing instruments
It is recommended to familiarise
yourself with your new hearing
instruments. With the instruments
in your hand try using the controls and
note their location on the instrument.
This will make it easier for you to feel
and press the controls while wearing
the hearing instruments.
Components and names
Ear piece (LifeTip)
Concha lock (option)
Tube (LifeTube)
EarHook
ૠMicrophone openings
ૡPush button
ૢRocker switch
ૣBattery compartment
Octiv S+
If you have problems pressing
the controls of your hearing
instruments while wearing
them, you can ask your NHS
Provider about a remote
control option.
CAUTION
Read this user guide
thoroughly and completely
and follow the safety
information in this document
to avoid damage or injury.
Removing
Lift the hearing instrument and
slide it over the top of your ear
.
Hold the tube
and pull the ear
piece carefully
out
.
Clean and dry your hearing
instruments after usage. Read more
in section “Maintenance and care”.
Adjusting the volume
Your hearing instruments automatically
adjust the volume to the listening
situation.
If you prefer manual volume
adjustment, press the rocker
switch briefl y or use a remote
control.
Refer to section “Controls” for
your personal settings.
An optional signal can indicate the
volume change.
Changing the hearing
program
Hearing programs change the
characteristics of the sound coming
through the hearing instrument.
They help you to select the optimal
setup for every listening situation.
An optional signal can indicate the
change of the hearing program.
To change the hearing program,
press the push button briefl y or
use a remote control.
Refer to section “Controls” and
to section “Settings” for your
personal settings and for a list of
your hearing programs.
Your NHS Provider can
confi gure your hearing
instruments so that they
switch automatically to the
audio shoe program if the
audio shoe has been
attached. Read more in
section “Audio input”.
Your hearing instruments are so
robust that they will function
reliably for years. It is, however,
important that you take care of your
instruments and observe a few basic
rules, which will soon become habit.
Cleaning
For hygiene reasons and to maintain
functionality, clean your hearing
instruments daily.
Maintenance and care
NOTICE
Do not put
the hearing
instruments
in water.
Do not put LifeTubes or
LifeTips in water.
Ask your NHS Provider for
recommended cleaning products,
special care sets and further
information on how to keep your
hearing instruments in good
condition.
For a more thorough professional
cleaning, take your instruments
to your NHS Provider.
Cleaning the LifeTubes
If your hearing instruments are
equipped with LifeTubes, you can
remove cerumen from the tubes using
a special cleaning wire. Ask your NHS
Provider for suitable cleaning wires.
Screw off
the tube.
Carefully insert
the cleaning wire
into the tube.
Start from the
side opposite to
the ear piece
adapter.
Push the cleaning wire
all the way through the tube.
Wipe away any cerumen or debris
that is dislodged from the tube.
Completely remove the cleaning
wire from the tube.
Screw the tube onto the hearing
instrument.
Storage
During longer periods of non-use,
store your hearing instruments
with open battery compartment
(and batteries removed) in a
drying system in order to prevent
the penetration of moisture.
Clean your hearing instruments
with a soft, dry tissue.
If your hearing instruments are
equipped with LifeTubes, regularly
clean the tubes with special
cleaning wires.
Refer to section
“Cleaning the LifeTubes” for details.
CAUTION
Risk of damage to ear canal
and ear drum.
Always remove the Life
Cleaning Wire from
the LifeTube before
reattaching it to your
hearing instrument.
Drying
Dry you hearing instruments
overnight.
Ask your Hearing Care
Professional for recommended
drying products.
ঔ When wearing the
hearing instruments,
an optional signal can
indicate when an
instrument is turned
on or off.
ঔ Remove the batteries if
the hearing instruments
are not used for several
days.
When the power-on delay is
activated, the hearing instruments
turn on after a delay of several
seconds. During this time you can
insert the hearing instruments
without experiencing unpleasant
whistling.
The “power-on delay” can be
activated by your NHS Provider.
Turning on and off
You have several options to turn
your hearing instruments on or off.
Via battery compartment:
Turning on: Close the battery
compartment. The default
volume and hearing program
are set.
Turning off: Open the battery
compartment.
Via push button or rocker switch:
Turning on or off: Press the
push button. Refer to section
“Controls” for your personal
settings.
After turning on, the previously
used volume and hearing
program are set.
Via remote control:
Follow the instructions in the
remote control’s user guide.
After turning on, the previously
used volume and hearing
program are set.
To benefi t most from your hearing
instrument, wear it daily and all day
long. Especially after long periods of
living with hearing loss, a dedicated
hearing training is recommended -
ask your NHS Provider.
Note that manual volume
adjustment may not be
available for Octiv S+
instruments.
The optional concha lock helps to
securely retain the ear piece in your
ear. To position the concha lock:
Bend the concha
lock and position
it carefully into the
bowl of your ear
(refer to the picture)
WARNING
Note that any unauthorized
changes to the product may
cause damage to the product
or cause injury.
Use only approved parts
and accessories. Ask your
NHS Provider for support.
Exchanging ear pieces
and tubes
Ask your NHS Provider to
exchange the LifeTube
approximately every 3 to 6
months or as needed.
Ask your NHS Provider to
exchange LifeTips every 1 to 2
months or as needed.
Octiv M+
Octiv HP+
Explanation of symbols


Join the conversation about this product
Here you can share what you think about the Siemens Octiv HP+ Hearing Aid. If you have a question, first carefully read the manual. Requesting a manual can be done by using our contact form.