
■ Ensure your skin is free of oils.
■ Wait at least 15 minutes after getting
up before shaving, to ensure your face
is free of puffiness that may be present
from sleeping.
■ Always hold the shaver at a right angle
to the skin so that all three heads are
touching the skin with equal pressure.
■ Stretch skin with the free hand so hairs
stand upright, making it easier for them
to enter the cutting chamber.
■ Use moderate to slow, circular stroking
movement.
■ The use of short, circular motions in
stubborn areas may obtain a closer shave,
especially along the neck and chin line.
■ Do not press hard against the skin to
avoid skin irritation and/or damage to the
rotary heads.
**We recommend that you use your
new shaver daily for up to four
weeks to allow time for your hair
and skin to become accustomed to
the new shaving system**
Before using, read the important
safety instructions in front of the
manual.
1. Plug power adaptor into charging stand.
(Dia A)
2. Place shaver into charging
stand. (Dia B)
3. Charge shaver for 24 hours
before its first use. Note:
During initial charge ignore
the electronic indicators as they are in
“start up cycle”. (Dia C)
4. Use shaver until
recharge is required.
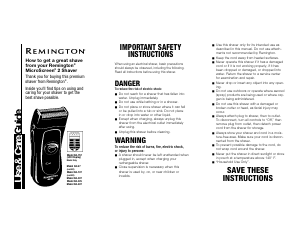
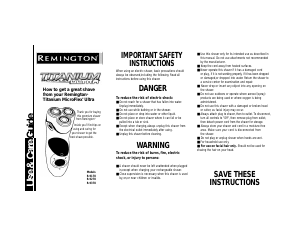
IMPORTANT SAFETY
INSTRUCTIONS
SAVE THESE INSTRUCTIONS
Charging
Setting Travel Lock
■ Always store this appliance and cord in
a moisture-free area. Do not store it in
temperatures exceeding 140°F (60°C).
■ Do not use this appliance with a
damaged or broken head or cutters, as
facial injury may occur.
■ The power unit is intended to be
correctly oriented in a vertical or floor
mount position.
■ Shavers, including the trimmer, are for
use on facial hair only. They should not
be used for shaving the hair on your
head or any other part of your body.
■ For additional protection the installation
of a residual current device (RDC) with
a rated residual operating current not
exceeding 30mA is advisable. Ask an
electrician for advice (Argentina/Chile).
When using an electrical appliance, basic
precautions should always be observed,
including the following. Read all instruc-
tions before using this shaver.
DANGER
To reduce the risk of fire or electric
shock, carefully follow these instruc-
tions:
■ Do not reach for an appliance that has
fallen into water. Unplug it immediately.
■ Detach the appliance from the power
supply cord before cleaning.
■ Except when charging, always unplug
this appliance from the electrical outlet
immediately after using.
■ Unplug this appliance before cleaning.
WARNING
To reduce the risk of burns, fire, electric
shock, or injury to persons:
■ An appliance should never be left
unattended when it’s plugged in, except
when charging a rechargeable appliance.
■ This appliance is not intended for use by
persons (including children) with reduced
physical, sensory or mental capabilities,
or lack of experience and knowledge,
unless they have been given supervision
or instruction concerning use of the
appliance by a person responsible for
their safety.
■ Children should be supervised to ensure
they do not play with the appliance.
■ Use this appliance only for its intended
use as described in this manual. Do not
use attachments not recommended by
the manufacturer.
■ Never operate this appliance if it has
a damaged cord or plug or if it is not
working properly, if it has been dropped
or damaged, or if it has been dropped
into water.
■ Keep the cord away from heated
surfaces.
■ Never drop or insert any object into any
of the appliance’s openings.
■ Household use only.
■ Do not use outdoors or operate where
aerosol (spray) products are being used
or where oxygen is being administered.
■ Always attach the plug to the appliance,
then to the outlet. To disconnect, turn all
controls to OFF, then remove plug from
outlet. Detach removable power cords
from appliances for storage.
■ Do not plug or unplug this appliance
when your hands are wet.
■ The device must only be used with the
power unit supplied with the device.
■ Class III devices must establish that they
must only be supplied with a very low
safety voltage corresponding to the one
marked on the device.
■ For washable models that have supports
or bases, they must be installed so that
they can not fall into the water.
■ Do not use an extension cord or a
voltage converter with this appliance.
■ Do not wrap the cord around the
appliance.
Cleaning and Maintenance Performance Guarantee - See insert
© 2020 Spectrum Brands, Inc.
All rights reserved
® Registered Trademark and TM
Trademark of Spectrum Brands, Inc.
Spectrum Brands, Inc.
Middleton, WI 53562
10/20 Job#18818-01 T22-0001936-F
DESIGNED IN USA
MADE IN CHINA
XR-1430, XR-1395:
Electrical Characteristics
100-240V~, 50/60Hz 200mA
This warranty shall not be valid
where it is contrary to U.S. and
other applicable laws, or where the
warranty would be prohibited under
any economic sanctions, export control
laws, embargos, or other restrictive
trade measures enforced by the United
States or other applicable jurisdictions.
This includes, without limitation, any
warranty claims implicating parties
from, or otherwise located in, Cuba,
Iran, North Korea, Syria and the disputed
Crimea region.
Feature XR-1430 XR-1395
Power System
Lithium
Rechargeable
Lithium
Rechargeable
Full Charge Time
4 hours 90 minutes
Cordless Shave Time
50 minutes 60 minutes
Quick Charge
No Yes
Indicators
Charging/Low
Battery
Runtime
Gauge
Voltage Type
Worldwide Worldwide
Replacemnt Part
SPRXR SPRXR
Wet/Dry
Yes Yes
Use with gel or
foam in the shower
for ultimate comfort.
Shaving
Shaving Tips (In Shower With Gel or Foam)
Shaving Tips (Dry)
The shaver is a wet/dry appliance. The shaver may be
cleaned under warm water.
Cleaning & Care
NOTE: **When cleaning your shaver,
make sure the shaver is turned off
and disconnected from the power
cord.**
CAUTION!
■
To clean the external surfaces of the
shaver, use a damp cloth. Do not use
strong detergents or other chemicals.
■ To dry, wipe the surface of the shaver
with a dry towel. Do not use a hair dryer
or heater to dry the shaver.
■ If you use shave foam or gel with your
shaver, it is important to open and rinse
the head of your shaver thoroughly after
each use to avoid dried gels or foam
from clogging the cutters and hindering
shave performance.
Daily:
1. Pull rotary head face of shaver off of
lower hairpocket. (Dia G)
2. Tap out excess hair shavings. (Dia H)
3. Rinse the head of the shaver in running
water. (Dia L)
4. Close head assembly. (Dia P)
Weekly:
1. Perform the daily cleaning steps 1 and 2.
2. Remove the cover from the hair pocket
assembly. (Dia G) Place the body of the
shaver aside to ensure that it will not
get wet.
3. Release the inner cutter lock by sliding
out of support. (Dia I)
4. Remove the inner cutter carrier away
from the cutters. (Dia J)
5. Remove the cutters. (Dia K)
6. Thoroughly rinse away any debris from
inner and outer cutters. (Dia L)
7. Replace the inner cutters. (Dia M)
8. Place inner cutter lock back into position
by sliding it back into the support until it
snaps into place. For best performance,
match color coded hubs on cutters.
(Dia N, O)
9. Lubricate each cutter with household oil.
10. Snap head assembly back onto neck/hair
pocket. (Dia P)
** Trimmer: Lubricate teeth with oil every
six months.
When your rechargeable shaver reach-
es the end of its useful life, the LiFePO
4
batteries must be removed from the
shaver and be recycled or disposed of
properly in accordance with your state
and local requirements. If this is not
required by law, you may elect to dis-
pose of the shaver with the batteries.
CAUTION! Do not put in fire or muti-
late your batteries when disposing
as they may burst and release toxic
materials. Do not short circuit as it may
cause burns. Dispose of properly in
accordance with your local and state
requirements.
To Remove the Rechargeable Battery:
1. Unplug the shaver.
2. Run shaver until the motor stops.
3. Remove the head from the shaver (Pull
head up and off).
4. Using a small screwdriver, pry the ‘collar’
off of the top of the handle.
5. Using a small screwdriver, pry the front
cover from the body.
6. Remove three screws located on front of
shaver.
7. Using a small screw driver, pry up the
newly unsecured inner housing to expose
the battery.
8. Pry battery free from
circuit board. (Dia Q, R)
9. Dispose of battery
properly.
Battery Removal
This shaver is a wet/dry appliance, the hand-held
part of which may be used in a bath or shower.
H
G
P
J
K
L
M
N
I
O
Model XR-1395 has an interchangeable
triple rotary shaving head and beard
grooming head.
To remove the attachments
1. Grasp the shaver handle in one hand
and with the other hand grip the cutting
head with your fingers.
2. Pull the attachment
straight up and off the
handle. It will require a
firm but minimal force
to separate the snap fit.
(Dia F)
To insert the attachments
1. Note the hexagon shape of the
attachment coupling has a point on the
top and bottom.
2. Align the shapes of the handle and
attachment couplings.
3. Press the attachment head into the
handle. The attachment will snap into
place securely.
4. Proper orientation of the rotary shaver
head is to have two rotary cutters at the
top of the handle.
5. Proper orientation of the groomer
attachment is to have the grooming
blades toward the top of the handle.
Beard Groomer Comb attachment
1. The beard groomer attachment has an
adjustable comb.
2. The beard groomer can be used without
the adjustable comb to cut to a length
of .5mm or to trim sideburns and beard
edges.
3. The adjustable comb has five settings to
provide hair cut at lengths from 1 mm to
5 mm.
4. Attach the comb to the groomer head
by hinging the front of the comb at the
groomer cutting blade edge and then
rotating it down to snap onto the top of
the groomer.
5. To adjust the comb cutting lengths,
press the small black button at the back
of the comb attachment in slightly and
then rotate to the left or right to move
the comb position.
6. Note the small white number at the top
of the comb will indicate the cutting
length.
7. Release the button to lock the comb in
the desired position.
8. During use, hold the comb against your
skin and move through your beard to cut
to the desired length.
Interchangeable Heads
A
D
B
E
CA
B
Travel Lock feature
Model XR-1395 are equipped
with a Travel Lock feature, intended
to prevent the shaver from turning
on and discharging accidently while
packed in luggage.
To set the travel lock:
1. Depress and hold the on switch for 3
seconds. The shaver will turn on, then
will shut off after the 3 seconds. The LED
display will flash five times to indicate
the lock is set.
2. While the travel lock is set, if the on
switch is pressed, the LED display will
flash three times to indicate the shaver
is in travel lock mode.
To unlock the travel lock:
1. Depress and hold the on switch for 3
seconds. The LED display will flash three
times while the button is being held and
then the shaver will turn on.
Quick Charge
Shaver will charge long enough for one shave in 5 minutes.
Voltage Type
Worldwide Voltage – shaver automatically adapts to an outlet voltage between 100V or
240V, depending on the country where the product was sold.
1. Press power button to turn on. (Dia D)
2. Shave face and neck using short, circular
strokes. (Dia E)
**For optimal results, shave with gel in
shower.
1. While in shower, wet face.
2. Apply shave gel or foam to applicable shaving area.
3. Shave face and neck using short, circular strokes.
4. When finished shaving, rinse face.
5. Follow cleaning and care instructions.
F
R
Q
XR series
For shavers equipped with a quick
charge:
A 5 minute quick charge will allow for
3 minutes of shaving.
CAUTION!
■
Make sure the shaver and your hands
are dry when charging the shaver.
■ Always charge the shaver in a cool,
dry place.
Cleaning Brush
1. Add a drop of facial cleanser to the brush
head and place under the shower.
2. Press the On / Off button to turn on.
3. Divide the face into 4 main sections:
forehead, nose and chin, left cheek, and
right cheek.
4. While applying the product on the face,
press gently. Move the rotating brush
with circular movements over each
section for about 30 seconds.
Use and Care Guide
1. ActiveContour™ XL Head Flex
2. HYPERFlex™ neck suspension
3. PrecisionPlus™ Heads
4. On/Off Button
5. Battery Display
6. Pop-up Trimmer
7. Power port charge pins
8. Charging stand
9. Adaptor
10. Trimmer Head (only XR-1395)
11. Cleaning Brush (only XR-1395)
SHAVER PARTS
1
2
3
4
7
5
6
XR-1430 XR-1395
9
10
8
11
For digital manual,visit www.remingtonlatam.com
SKU: XR1395 (BV) A, XR1430 (BV) F, XR1430 (BV) R, XR1430 (BV) A


Join the conversation about this product
Here you can share what you think about the Remington XR1395 Shaver. If you have a question, first carefully read the manual. Requesting a manual can be done by using our contact form.