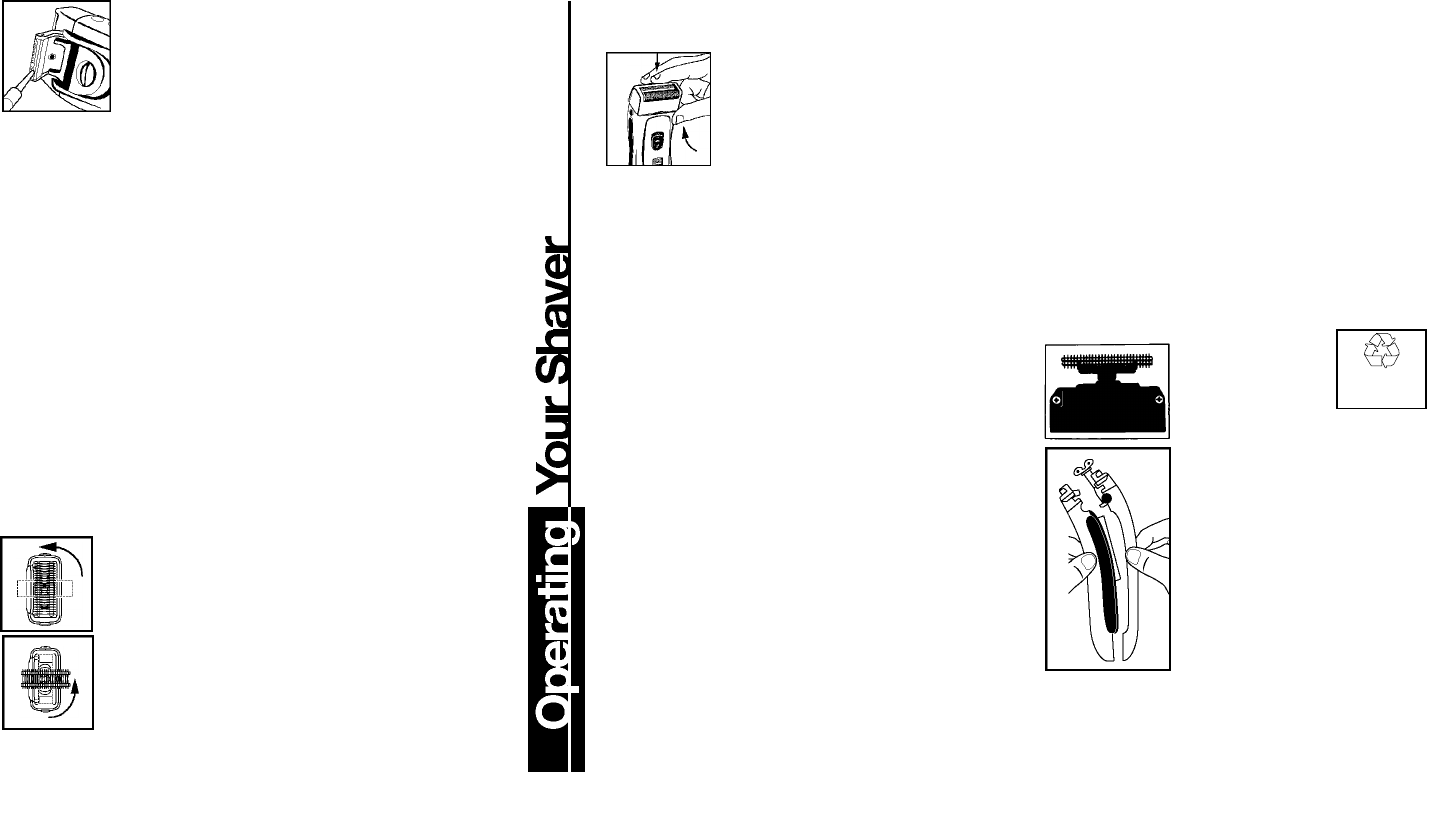
■ Every six months, lubricate the trimmer
teeth by applying a drop of light machine
oil one-third and two-thirds of the way along
the blade. Using your finger tip, spread the
oil along the teeth, and run the trimmer for a
few seconds.
Replacing Foils and Cutters
Because they are subject to daily use, the cutters and foils of your
R e m i n g t o n
®
MicroScreen
®
2 Shaver will wear and eventually re q u i re
replacement to maintain a close, comfortable shave. Depending on your
shaving technique and habits, the foils will usually last six months; the
cutters, one year. Model DA-757 has a foil replacement indicator.
The foil icon on the LCD display will flash when the foil is due for
replacement. Some signs that your foils and cutters need replacing are :
■ Irritation. As foils get worn, you may notice your skin feeling
sensitive after a shave, particularly when you apply aftershave.
■ Pulling. As cutters wear, your shave may not feel as close, and you
may feel your shaver is pulling at your whiskers.
■ Wear-through. You may notice that the cutters have worn through
the foil.
To order replacement foils and cutters, call 1-800-736-4648.
To prevent inadvertent damage to the Foils and Cutter Assembly,
do not attempt to remove them unless you are replacing them. To
remove the old foil and cutters follow the instructions that come with the
foil and cutter replacement package. It's always a good idea to replace
the foils when you replace the Cutter Assembly.
To Replace a Cutter Assembly That is Removed
Unintentionally:
■ Hold the assembly in the middle of the "T."
■ Gently place the forked legs into the open-
ing at the top of the oscillator tips.
■ Do not push downward on the ends of the
cutters, as you may bend the cutter, reducing
its ability to operate smoothly.
■ Do not remove cutters from the plastic
pieces to which they are attached, as you may
damage the assembly.
Removing the Headguard
Before operating your
MicroScreen
®
2 Shaver, remove
the Headguard, which protects
the Foils and Cutter Assembly.
It is important to remove the
Headguard correctly to avoid
damaging the clips that hold
it firmly to the shaver.
■ Press lightly on the top of the Headguard.
■ Lift the lower rear edge.
■ Pull the Headguard away from the shaver.
Operation
Use of a shaver at voltages other than the ones
specified below will damage it and void the warranty.
Model DA-57, DA-107 - Corded Shavers 120 Volts A.C.
Model DA-307, DA-325 - Rechargeable Shaver
World-wide A.C.voltage:105-130 Volts A.C.
at 60 Hz,and 105-240 Volts,A.C. at 50 Hz.
Model DA-407 - Cord/Cordless Shaver World-wide A.C.
voltage:100-240 Volts A.C.,50-60 Hz.
Model DA-757 - Cord/Cordless Shaver With LCD Display
World-wide A.C.voltage:100-240 Volts A.C.,50-60 Hz.
Charging
Charge your shaver 24 hours before initial use.
Make sure the ON/OFF button is set to OFF (with
“O” visible). Connect the cord to the shaver and then
to the electric outlet.
Model DA-307, DA-325,and DA-407 The Green indicator
light will glow indicating that the shaver is charging.
The shaver will be completely re c h a rged in 14-16 hours.
The red indicator light in the DA-325 model will glow
when the shaver needs to be re c h a rg e d .
Model DA-757 This shaver has an LCD display. The bars
on the display give the % of battery power left in your
shaver. The plug icon will flash when your shaver needs
to be recharged. There is also a foil replacement indica-
tor. The foil icon on the display will flash when the foil is
due for replacement. The one hour quick charge fea-
ture in this model gives up to 60 minutes of cordless
shaving time. A 5 minute quick charge gives enough
shaving time for one shave
To Shave
Model DA-57,and DA-107
Connect cord to shaver and then
to electric outlet.Slide the ON/OFF button upward to turn ON
.
CAUTION: THESE NICKEL-CADMIUM BATTERIES MUST BE RECYCLED OR DISPOSED IN
A C C O R DANCE WITH STATE AND LOCAL REGULAT I O N S . Do not burn or mutilat e , as they
m ay burst or release toxic mat e r i a l s . Do not short-circuit, as it may cause burns.
Model DA-307 and DA-325 With the shaver unplugged,press in on the
Switch Lock and slide the ON/OFF button upward to turn ON.Note that this
shaver is designed only to operate from its batteries; it must be charged
before using.
Model DA-407,and DA-757 These shavers can be powered from either
the cord or the battery. To shave using the battery, make sure that the
shaver has been charged. To shave using the cord,connect cord to shaver
and then to electric outlet.Press in on the Switch Lock and slide the ON/OFF
button upward to turn ON.
Trouble Shooting
■
If your DA-407, 757 shaver bat t e ry is completely discharged or the shaver has
not been used for an extended period of time, the shaver may not start when oper-
ated using the cord. If this condition occurs,charge the shaver for ap p r o x i m at e ly
five minutes before shav i n g .
■
Your DA-407, 757 cord/cordless shaver should not be used strictly as a cord-
o p e r ated shav e r, as continued cord only use will result in reduction of bat t e ry life.
■
In order to preserve the life of the bat t e r i e s ,t h ey should be fully discharged every
six months and then fully charged for 24 hours.
Battery Removal
(Cord/Cordless and Cordless
Rechargeable Models Only)
When your rechargeable shav e r
reaches the end of its useful life, t h e
b atteries must be removed from the shaver and be recy cled
or disposed of properly in accordance with your local and stat e
r e q u i r e m e n t s .
The following procedure should be followed
for battery removal:
• To avoid a possible electrical shock hazard,unplug cord
from electrical outlet and shaver.
• Remove the head assembly by pushing in on the
head assembly release buttons.
• Remove the two screws on the upper back side of the
shaver.
• Pull or pry the shaver halves apart.
• Pull out the motor and frame assembl y.
• Pull or pry the batteries outward from the shaver’s
circuit board.
• Pull and twist the batteries to break the wire connections.
• CAUTION:Do not put in fire or mutilate your batteries when
disposing as they may burst or release toxic materials.Do
not short circuit as it may cause burns.Dispose of properly
in accordance with your local and state requirements.






Join the conversation about this product
Here you can share what you think about the Remington DA-107 Shaver. If you have a question, first carefully read the manual. Requesting a manual can be done by using our contact form.