
English
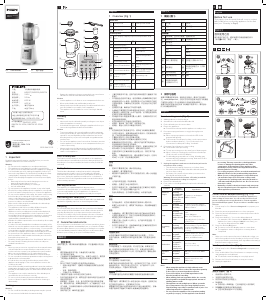
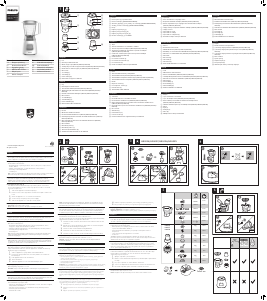
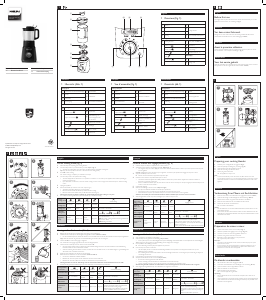
Manual blending mode (Fig. 4)
1 Add ingredients to the blender jar.
2 Assemble the exhaust lid and blender lid.
3 Fix the blender jar to the motor base.
4 Plug in the appliance.
» You will hear a beep and the appliance is ready to use.
5 Press timer button (-/+) to adjust the processing time (range
from ve seconds to three minutes).
6 Press speed button (-/+) to adjust the processing speed
(range from one to nine 9/H).
7 Press start/cancel button to start blending.
» The blender starts processing.
» To stop processing, press the start/cancel button again.
» When blending is completed, you will hear a few beeps.
8 Unplug the appliance and remove the blender jar from the
motor base after blending.
9 Remove the blender lid.
10 Pour out the blended ingredients from the blender jar carefully.
简体中文
手动搅拌模式(图
4
)
1 将食材加入搅拌杯中。
2 安装排气盖和搅拌杯盖。
3 将搅拌杯安装到主机底座上。
4 接通电源。
» 您将听到一声蜂鸣音,之后料理机进入待机模式。
5 按时间
-/+
按钮调节搅拌时间(可调范围
: 5
秒
至
3
分钟)
6 按速度
-/+
按钮调节搅拌速度(可调范围
: 1
至
9/H
)。
7 按开始
/
取消按钮开始搅拌。
» 料理机开始工作。
» 如要中途停止,
按开始
/
取消按钮。
» 搅拌完成后,您会听到几次声蜂鸣音。
8 搅拌完成后,拔掉产品插头并从主机底座上卸下搅
拌杯。
• 这样做可使加热元件快速冷却。
• 请注意,搅拌后杯盖和搅拌杯会很烫。
• 当您提起杯盖和排气盖时,请注意蒸汽释放。
9 移除搅拌杯盖。
10 将搅拌好的食材缓慢从搅拌杯中倒出。
English
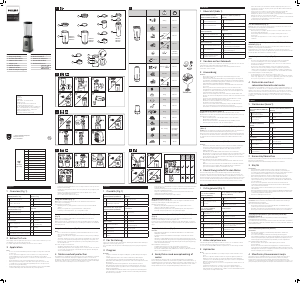
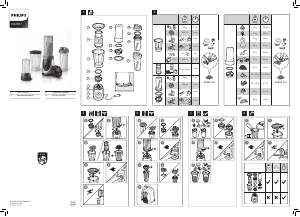
Use your multi-chopper (HR2179 only) (Fig. 5)
The multi-chopper is intended for:
• Chopping ingredients like onion, garlic, or fresh herbs.
• Grinding dry ingredients like peppercorns, rice, coee
beans, or dried soy beans.
Note: Do not process hard ingredients (such as rock sugar
and some dried medicinal plants) in this multi-chopper.
This may damage the beaker and pose a hazard.
Follow the steps below to use your multi-chopper:
1 Add ingredients to the multi-chopper beaker.
Note: Do not ll the multi-chopper beyond the maximum
indication. See Table 7 (Fig. 7) for the advised quantities.
2 Assemble the blade unit.
3 Fix the multi-chopper to the motor base.
4 Plug in the appliance.
» You will hear a beep and the appliance is ready to use.
5 Press timer button (-/+) to adjust the processing time (range
from 2 to 30 seconds).
6 Press speed button (-/+) to adjust the processing speed
(range from speed 1 to 7).
7 Press start/cancel button to start.
» The appliance starts processing.
» To stop processing, press the start/cancel button again.
» When processing is completed, you will hear a few beeps.
“End” is shown on the LED display.
8 Unplug the appliance and remove the multi-chopper from
the motor base after processing.
9 Remove the blade unit.
10 Pour out the ingredients from the beaker carefully.
English
Cleaning(Fig. 6)
1 Pour in washing-up liquid and warm water (no more than
half of maximum capacity).
2 Insert the exhaust cover and close the lid.
3 Press Pulse/Clean button for three to ve times. Keep the
washing-up liquid in the blender jar for 15 minutes.
4 Unplug the appliance and then pour out to empty the
blender jar. Rinse under tap to clean the blender jar.
5 Use dry cloth to clean the driving shaft head.
6 Use dry cloth to clean the bottom of the blender jar.
Note:
• Do not soak the blender jar in water to avoid damaging the
electronic devices at the bottom.
• Do not use any metallic or sharp-edged utensils on the
blade unit to avoid scratching on the surface.
• Do not use metal wool or brush to wash the blade unit to
avoid scratching.
• Use only soft cloth when cleaning the motor unit and blade
unit.
• Do not put the blender jar into the dishwasher.
• Do not rinse the motor base or the bottom of blender jar.
Tip:
• Use soft cloth to clean the heating element after using. This
can ensure the best and consistent cooking performance.
• Do not use sharp-edged tools to remove the burnt
ingredients from the blender jar. To clean the jar in this case,
add warm water to the jar and keep it for two hours and
then use brush to remove the residue.
• For better result, soak beans or rice for a few hours before
cooking with soy milk or grain congee program.
简体中文
清洗(图
6
)
1 倒入洗洁精和温水(不超过最大容量的一半)。
2 安装搅拌杯盖。
3 按点动
/
清洗按钮
3
到
5
次。将洗洁精留在搅拌杯中
15
分钟。
4 拔掉产品插头,然后倒空搅拌杯。在水龙头下冲洗以清洁
搅拌杯。
5 用干布擦干净驱动头。
6 用干布擦干净搅拌杯底部。
注意:
• 请勿将搅拌杯浸泡在水中以免搅拌杯底部的电子元件受损
失效。
• 不要在刀片组件上使用任何金属或锋利的器具,以免刮伤
表面。
• 不要使用金属丝或金属刷清洗刀片组件,以免刮伤。
• 只能使用软布清洁马达组件和刀片组件。
• 请勿将搅拌杯放入洗碗机清洗。
• 不可直接冲淋主机以及搅拌杯底部。
提示:
• 使用后,使用软布清洁加热元件。这可以确保始终如一的
最佳烹饪效果。
• 当测试出现糊底时,不能使用锋利的工具来清洗,最好先
用热水泡净
2
个小时,然后用刷子清洗才是最好的办法。
• 在使用豆浆程序或者杂粮粥程序烹饪之前,建议先将豆子
或者大米浸泡几个小时来达到更好的烹饪效果。
• 如要预设延时烹饪的时间,
使用预约按钮和时间按钮
(-/+)
来设置计时器。详情请参考“预设延迟烹饪时间”。
6 按开始
/
取消按钮开始烹饪。
» 料理机开始工作。
» 如要中途停止,按开始
/
取消按钮。
» 烹饪完成后,您会听到几声蜂鸣音。同时数码屏幕上显
示“
End
”。
» 若使用带有搅拌的烹饪程序时,搅拌机会在处理过程中
会不时搅拌食材。请等待数码屏幕上显示“
End
”。
7 烹饪完成后,拔掉产品插头并从主机上卸下搅拌杯。
• 这样做可使加热元件快速冷却。
• 请注意,烹饪后杯盖和搅拌杯会很烫。
• 当您提起杯盖和排气盖时,请注意蒸汽释放。
警告:请勿在烹饪后触摸搅拌杯的底部及加热元件。
它非常烫!
8 移除搅拌杯盖。
9 将煮熟的原料
/
汤缓慢从搅拌杯中倒出。
功能说明 功能说明 食材用量说明
营养米糊
伴有搅拌的烹
饪程序以达到
丝滑的处理效
果,如米糊
大米
45
克,水约
500 mL
豆浆
伴有搅拌的烹
饪程序
黄豆
45
克(约二分之一量杯),
水约
450 mL
浓汤
伴有搅拌的烹
饪程序用来制
作顺滑浓汤
啡蘑菇
120
克
马铃薯小块
100
克
橄榄油
½
汤匙
蔬菜汤(或清鸡汤)
375
毫升
滋补汤
伴有轻微搅动
的烹饪程序
银耳
15
克,红枣
15
克,桂圆干
15
克,
水
600 mL
(烹饪前请充
分浸泡食材)
杂粮粥
伴有轻微搅拌
的烹饪程序
精米
20
克,黑米和其他豆类谷物
12
克,水
470 mL
碎冰
搅拌程序用来
将冰块打碎成
小片
4
至
6
个冰块
(2 cm x 2 cm x 2 cm)
蔬果汁 搅拌程序 胡萝卜
100
克,水
200 mL
果仁奶 搅拌程序 混合坚果
50
克,牛奶
500 mL
注意:
• 当您在高海拔地区(>
1000
米)使用本机器时
,
务必减
少上述食材表中的食材用量以避免食材溢出。
• 本机器在工作过程中禁止添加食材,以免发生意外。
• 在制作果蔬类饮品时,请预先将有核的食材去核后方可
放入杯桶中,并加入适量的饮用水或牛奶。
• 本搅拌机高速工作。当您制作果汁时,果汁在搅拌后温
度会升高。这个现象对于少量果汁尤其明显。建议使用
冷冻过的食材来达到更好的处理效果。
• 本机器在制作豆浆(或米糊、香粥)时,如中途停电或
制作完成后,请不要再次开启功能,否则会造成焦糊或
损坏发热盘等元器件,从而造成机器不能正常工作。
注意:出现以上情况的时候,应重新投放食材再使用
机器。
• 使用烹饪程序时,添加食材不要超过最大杯上的最大刻
度(
800mL
)。
• 使用烹饪程序来制作含肉菜品时,请将肉类切成大片来
达到最好效果。
• 为达到更好的碎冰效果,请在使用搅拌机之前,将杯用
冰水冲洗然后擦干。请勿一次性处理超过
6
个冰块。
• 艳色的食材如西红柿和胡萝卜可能会使机器的塑料部分
变色。这不会影响机器正常使用。
预设延迟烹饪时间(图
3-4
)
如果您希望设备稍后再开始烹饪,则可以使用预设功能。您可
以在所有预设烹饪模式下使用此功能
(除碎冰,
蔬果汁和果
仁奶程序以外)。预设计时器最长可达
12
小时。
1 按照“预设烹饪模式”中的步骤
1
至
3
来准备搅拌机。
2 按下预设程序按钮以选择程序。
3 按下预约按钮即可进入预设模式,从而调整烹饪程序时长。
4 按时间
-/+
按钮以设设置延迟时长。
• 例如,如果当前时间是
10:00
,您希望设备在
18:00
(
8
小时后)开始烹饪,则可将延迟时长设置为
8:00
。
5 按下确定按钮以确认和启动程序。
»
LED
显示屏上的计时器开始倒计时。
» 倒计时间到后,产品开始烹饪。
注意:
• 当您使用预设延迟烹饪功能时,您会将食材在搅拌杯中放
置一段时间。为了保证您的食材健康卫生,请避免使用可
能会变质的新鲜食材,例如鸡蛋或肉类。
使用点动功能(图
3
)
1 按照“预设烹饪模式”中的步骤
1
至
4
来准备料理机。
2 按住点动
/
清洗按钮开始加工,直至获得所需效果。
» 料理机开始持续高速搅拌。
3 松开点动
/
清洗按钮来停止加工
4 拔掉产品插头。
问题 回答
搅拌出来的成
品不够细腻怎
么办?
在搅拌之前先将水果和蔬菜切成小块,这样
成品就会更细腻了
能不能使用
料理机来煮
牛奶?
我们不推荐使用本机来加热含有大量牛奶、
奶油或者淀粉的液体。因为这些原材料很容
易粘在杯底造成烧焦。您可以先用本机搅拌
这些原材料,然后再去灶台加热来浓缩此类
食材。
刀片下面的部
分很难清洗。
有没有好办法
可以把它洗
干净?
1.
打开杯盖,然后加入自来水。(勿超过最
大容量的一半。)
2.
放入排气盖后,盖上杯盖。
3.
插好电源线。
4.
选择浓汤程序。
5.
按开始
/
取消按钮启动程序。
6.
程序结束后,让液体在搅拌杯中浸泡
一小时。
7.
浸泡结束后,倒入非腐蚀性的清洗剂。
8.
按点动清洁按钮三到五次。
9.
拔掉电源然后将搅拌杯里的水倒干净。
10.
将搅拌杯卸下,然后用自来水冲洗干净。
料理机不工作
该怎么办?
本机配有安全机制来防止超负荷运转。当料
理机过载时,本机会自动启动保护流程并停
止工作。
如果此情况发生,拔下插头。让机器冷却
15
分钟。移除搅拌杯中的食材并清理干净
后,再重新使用料理机。
料理机发出异
味或者冒烟。
当料理机第一次使用的时候,您若闻到异味
或是工作时伴有少量烟,这是正常的。这些
现象会在机器多次使用后消失。
当料理机长时间工作后,您若闻到异味或是
工作时伴有一些烟,您可以关机冷却
60
分钟后再使用。
制作好的粥、
汤、豆浆口感不
好,煮不透,应
该怎么办?
制作粥、汤、豆浆等必须选择对应的功能。
出现食材溢出
或者糊底是什
么原因?
请勿超过最大容量。
制作前不能放糖。
如果选错了功
能,应该如何
处理?
按下启动
/
停止按键以取消当前的功能。如
果食物不烫并且还未被切碎,请选择正确的
功能并重新开始程序。如果食物已经很烫
(大于
70
℃),请替换食材并重新开始程序。
如果刀片被
卡住,如何
处理?
请先拔下电源插头再清除原料。清空搅拌杯
和清洁时要非常小心。建议您减少原料量
,
并将非常硬的原料先切成小块再加工。
故障排除
产品中有害物质的名称及含量
部件
名称
有害物质
铅
(Pb)
汞
(Hg)
镉
(Cd)
六价铬
(Cr6+)
多溴联苯
(PBB)
多溴二苯醚
(PBDE)
塑料件
O O O O O O
硅胶件
O O O O O O
刀组件
O O O O O O
玻璃杯
O O O O O O
电路板中
的电子元
器件
x
O
x
O O O
电机
O O O O O O
本表格依据
SJ/T 11364
的规定编制。
○:
表示该有害物质在该部件所有均质材料中的含量均在
GB/T 26572
规定的限量要求以下。
×:
表示该有害物质至少在该部件的某一均质材料中的含量超出
GB/T 26572
规定的限量要求。
食品接触用飞利浦加热破壁料理机
HR2077, HR2078, HR2179
产品信息
本产品适用于接触食品,请根据说明书要求正常使用本产品。
本产品食品接触用材料及部件符合
GB 4806.1-2016
和相应食品安全国家
标准要求,具体信息如下:
食品接触用材料 用途 执行标准(国标) 备注
塑
料
PP
量杯,杯盖,排气盖,
刀座(多功能切碎器)
GB4806.7-2016
AS
多功能切碎器杯体
GB4806.7-2016
PA
轴承套(多功能切碎器)
GB4806.7-2016
PTFE
垫片(多功能切碎器)
GB4806.7-2016
使用温度不
得高于
250
℃
金
属
不锈钢
12Cr17Ni7
刀片,刀片(多功能
切碎器)
GB4806.9-2016
不锈钢
06Cr19Ni10
刀轴,刀座,
NTC
探
头,发热盘盖,刀轴
(多功能切碎器)
GB4806.9-2016
硅橡胶
刀密封圈
,
发热盘
密封圈,杯盖密封
圈,
NTC
密封圈,
刀座密封圈(多功能
切碎器)
GB4806.11-2016
合成橡胶
电机轴封,刀轴密封
圈(多功能切碎器)
GB4806.11-2016
高硼玻璃杯 玻璃杯
GB4806.5-2016
可用于烹
饪,不能用
于微波炉
备注:
注
1
:产品不宜作为容器长期存储食品。
注
2
:
本系列产品包含以上食品接触材料,部分机型可能不含个别材料,
以实际产品为准!
6
1
3 4
5
6
2
1
3
4
2
1
2
3
1
2
5
1
2
8
4
10
9
1
2
6
5
6
6
6
7
2
1
MAX
7
(MAX)
(MAX) (MAX)
(MAX)
1-3 Pulse
2x2x2 cm
50 - 80 g
50 g
10 - 20 g
25 - 50 g
50 g
50 g
50 g
30 sec
30 sec
30 sec
30 sec
30 sec
1-3 Pulse
ߕ
6
5
5
6
8
1
2
9 10
7
4
4
1
3
2
1
3
4
2
Pulse processing mode
1 Follow step 1 to 4 in “Use your multi-chopper” to prepare
your multi-chopper.
2 Press Pulse/clean button to start processing until getting the
result desired.
• To protect the motor, the appliance will stop if you press
the button for longer than 30 seconds.
3 Release the Pulse/clean button to stop processing
4 Unplug the appliance.
Cleaning your multi-chopper
Clean the blade unit and the beaker with mild detergent and water.
Beware of sharp blades when cleaning.
简体中文
使用您的多功能切碎器
(HR2179 only)
(图
5
)
多功能切碎器用于
• 切碎洋葱、大蒜、新鮮香草等原料。
• 碾磨胡椒、大米、
咖啡豆、干大豆等干原料。
注意:请勿使用本多功能切碎器来处理坚硬的食材(如冰
糖)或者硬质中药材(如田七和石斛)。这样做可能会损
坏加工杯并造成隐患。
请按照下面的步骤使用
1 将食材加入多功能切碎器中。
注意:请勿加入过量食材超过最大刻度。食材用量请参见
表
7
(图
7
)。
2 安装好刀头。
3 将多功能切碎器安装到主机底座上。
4 接通电源。
» 您将听到一声蜂鸣音,之后料理机进入待机模式。
5 按时间
-/+
按钮调节处理时间
(可调范围
: 2
至
30
秒)
6 按速度
-/+
按钮调节处理速度
(可调范围
: 1
至
7
)。
7 按开始
/
取消按钮开始处理。
» 料理机开始工作。
» 如要中途停止,按开始
/
取消按钮。
» 处理完成后,您会听到几声蜂鸣音。同时数码屏幕上显
示“
End
”
8 处理完成后,拔掉产品插头并从主机底座上卸下多功能切
碎器。
9 移除刀头。
10 将处理好的食材缓慢从搅拌杯中倒出。
使用点动功能(图
5
)
1 按照“使用多功能切碎器”中的步骤
1
至
4
来准备功能切
碎器。
2 按住点动
/
清洗按钮开始加工,直至获得所需效果。
• 出于保护机制,使用点动功能时料理机工作不会超过
30
秒。
3 松开点动
/
清洗按钮来停止加工。
4 拔掉产品插头。
清洗您的多功能切碎器
使用低浓度的洗洁精和水来清洗多功能切碎器的刀头和加工杯。
清洗时请注意锋利的刀片。
Issue Potential solution
What should I do if the
nished result is not
smooth enough after
blending?
You can obtain a smoother result by cutting
the fruit and vegetables into smaller pieces
before blending.
Can I use the appliance
to heat milk?
We do not recommend using this appliance
to heat liquids with large amounts of milk,
cream or starch. These ingredients can stick
to the bottom of the jar and can burn. You
can rst blend these types of ingredients
using this appliance and then heat them up
on the stove to reduce them down.
The underside of the
blade is dicult to
clean. Is there a good
way to clean it?
1. Open the lid and add water. (Do not ll the
jar more than half way.)
2. Once the exhaust lid is in place, close the
blender lid.
3. Plug in the power cord.
4. Select the soup program.
5. Press the Start/Cancel button to start the
program.
6. After the program is nished, let the liquid
soak in the blender jar for one hour.
7. After soaking, pour in a non-corrosive
cleaning agent.
8. Press Pulse/Clean button three to ve
times.
9. Unplug the power supply and pour out
the water from the blender jar.
10. Remove the blender jar from the base
and rinse it clean using tap water.
What should I do if
the appliance is not
working?
This appliance is equipped with a safety
mechanism to prevent overloading. When
the appliance is overloaded, the appliance
automatically initiates the safety mechanism
and it stops functioning.
If this occurs, unplug it. Let the appliance
cool down for 15 minutes.
The appliance emits an
odor or smoke
When the appliance is rst used, it is normal
to smell an odor or notice a small amount
of smoke when it is operating. This will stop
once the appliance has been used a few
times.
If you smell an odor or notice some smoke
when the appliance is operating for
extended periods, switch the appliance o
and allow it to cool down for 60 minutes
before using it again.
What should I do when
nished congee, soups,
and soy milk do not
taste good or are not
cooked through?
To prepare congee, soups, and soy milk, you
must select the correct function.
Why do the ingredients
spill over or stick to the
bottom?
Do not exceed the max level.
Do not add sugar before preparation.
What should I do if I
have chosen a wrong
program?
Press the Start/Stop button to cancel the
current program. If the food is not too hot
and is not chopped, you can select the
correct program and start again. If the food
is hot (above 70℃), please replace the
ingredients and start the correct program.
What if the blade gets
stuck?
Unplug the power cord before removing
the ingredients. Exercise caution when
emptying the blender jar and during
cleaning. It is recommended to add fewer
ingredients and to cut hard ingredients into
small pieces before blending.
Troubleshooting




Join the conversation about this product
Here you can share what you think about the Philips HR2179 Blender. If you have a question, first carefully read the manual. Requesting a manual can be done by using our contact form.