
- Thank you for your purchase of this Clock.
- In order to optimize its function, be sure to read this manual
carefully and keep it for future reference.
INSTRUCTION MANUAL
FEATURES
- Unique Night Finder
TM
feature to locate the clock in the dark.
- View the current time and alarm time simultaneously.
- Wake gently! The audible alarm initially sounds with a series of
beeps at a low level, and gradually increases in volume.
- Eight minute snooze function activates with unique Lite Touch
feature.
- Bright blue HiGlo
TM
backlight illuminates the display for easy
night-time viewing and flashes when the alarm goes off.
- Protective hinged cover keeps buttons from resetting in transit
and also acts as a table-top stand.
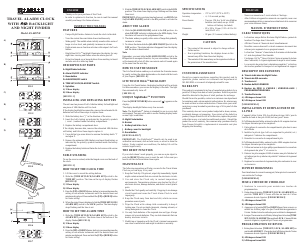
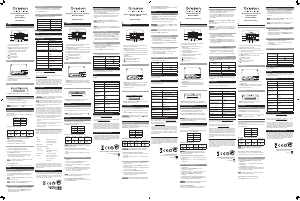
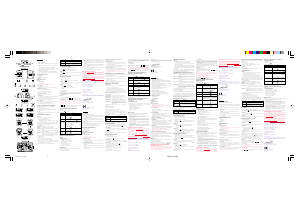
DESCRIPTION OF PARTS
A. Night Finder indicator
B. Alarm ON/OFF indicator
C. Down button
D. ALARM ON/OFF switch
E. TIME SET/LOCK/ALARM SET switch
F. Up button
A) 12 hour display
B) 24 hour display
[ SEE FIG. I ]
INSTALLING AND REPLACING BATTERY
The unit uses two pieces of AAA Alkaline battery for backlight and
one piece of LR44 button cell for clock.
If the display backlight becomes dim, remove the exhausted AAA
batteries and follow these steps to replace them:
1. Slide the battery door “J” in the direction of the arrow.
2. Insert the AAA battery as indicated by the polarity symbols
( + and - ) marked inside the battery compartment.
3. Replace the battery compartment door.
If the display becomes dim, remove the exhausted LR44 button
cell battery and follow these steps to replace it:
1. Use a philips type screw driver to unscrew the battery hatch “I”
and open it.
2. Remove the exhausted LR44 battery and insert fresh battery as
indicated by the polarity symbols marked inside the battery
compartment.
3. Replace the battery hatch and fasten the lock-screw with a screw
driver.
TABLE STANDING
To use the cover as a stand, rotate the hinged cover over the back of
the clock.
[ SEE FIG. 5 ]
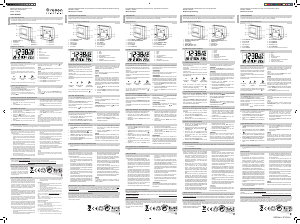
HOW TO SET THE CLOCK TIME
1. Lift the cover to reveal the setting buttons.
2. Slide the [TIME SET/LOCK/ALARM SET] switch to the
TIME SET position. The time on the top of display flashes
[SEE FIG.2] :
C) 12 hour display
D) 24 hour display
3. Press the [UP] or [DOWN] arrow button to increase/decrease the
setting in one minute increments until the desired hour and
minute are dis-played. Press and hold the [UP] or [DOWN] button
for faster setting.
4. When the correct time is displayed, slide the [TIME SET/LOCK/
ALARM SET] switch to the LOCK position. The time display
stops flashing and the time is set.
HOW TO SET THE ALARM TIME
1. Slide the [TIME SET/LOCK/ALARM SET] switch to the
ALARM SET position. The alarm time at the bottom of the
display flashes [SEE FIG.3]:
E) 12 hour display
F) 24 hour display
2. Press the [UP] or [DOWN] arrow button to increase/decrease the
setting in one minute increments until the desired hour and
minute are displayed. Press and hold the [UP] or [DOWN] button
for faster setting.
3. Slide the [TIME SET/LOCK/ALARM SET] switch to the LOCK
position. The alarm time display stops flashing and the alarm
time is set.
IMPORTANT: After your alarm time has been set, you MUST slide
the [ALARM ON/OFF] switch to the ON position to activate the
alarm.
ABOUT THE ALARM
1. Slide the [ALARM ON/OFF] switch to the ON position. An
alarm ON/ OFF indicator is displayed on the LCD display. Now
the alarm will sound at the programmed time.
2. The alarm wakes you gently with a series of beeps that gradually
increase in volume.
3. To silence the alarm slide the [ALARM ON/OFF] switch to the
OFF position. The alarm indicator disappears from the display
and the alarm is deactivated.
Note:
Remember, you must slide the [ALARM ON/OFF] switch to the
ON position to use again. However, for your convenience, the alarm
will automatically shut off after one minute and will sound again
at the same time the next day.
HOW TO USE THE SNOOZE
The Lite Touch feature enables you to activate the 8 minute snooze
by gently rocking the alarm backwards on its stand with the touch
of your fingers. [ SEE FIG. 4 ]
LITE TOUCH HiGlo
TM
BACKLIGHT
Using the Lite Touch feature, the display backlight will be activate
for three seconds so you can see the display in the dark. The light
then automatically turns off.
[ SEE FIG. 4 ]
UNIQUE Nightfinder
TM
FUNCTION
Press the [NIGHT FINDER] button once and [ ] appears on the
display.
The display backlight flashes every few seconds.
Note: The Nightfinder
TM
feature is intended for use in a very dark
environment. You may not be able to see the flashing display under
normal light conditions.
G. Night Finder button
H. Buzzer
I. Battery hatch for clock
J. Battery cover for backlight
K. Reset button
[SEE FIG.6 & FIG.7]
IMPORTANT: The Nightfinder
TM
should only be used in an
unfamiliar enviroment, such as hotel room, so as not to drain the
battery. Under constant use conditions, the battery life will be
reduced significantly.
THE RESET FUNCTION
If your clock doesn’t work properly, you can use a pin object to
push the [RESET] button once to reset the unit. After reset you
need to set the clock and alarm times again.
MAINTENANCE
The following suggestions will help you care for the Travel Alarm
Clock so you can enjoy it for years.
1. Keep the Clock dry. If it gets wet, wipe it dry immediately, liquids
might contain minerals that can corrode the electronic circuits.
2. Use and store the Clock only in normal temperature
environments. Temperature extremes can shorten the life of
electronic devices, damage batteries, and distort or melt plastic
parts.
3. Handle the Clock gently and carefully. Dropping it can damage
circuit boards and cause the Travel Alarm Clock to work
improperly.
4. Keep the Clock away from dust and dirt, which can cause
premature wear of parts.
5. Wipe the Clock with a damp cloth occasionally to keep it
looking new. Do not use harsh chemicals, cleaning solvents, or
strong detergents to clean the Clock.
6. Use only fresh batteries of the required size and type. Always
remove old or weak batteries. They can leak chemicals that can
destroy electronic circuits.
7. Modifying or tampering with the Clock’s internal components
can cause a malfunction and might invalidate is warranty.
SPECIFICATIONS
Operation temperature : 0°C to 50°C (32°F to l22°F)
Accuracy : +/- 0.5 seconds per day
Power Source : Two pcs. UM-4 or ‘AAA’ size Alkaline
batteries (excluded) one pc. LR44
button cell battery (included)
Dimension : 82 x 108 x 15 mm / 3.23 x 4.25 x 0.6
inch (H x W x D)
Weight : 92 gms / 3.3 ounces (without battery)
CAUTION
— The content of this manual is subject to change without
further notice.
— Due to printing limitation, the displays shown in this
manual may differ from the actual display.
— The contents of this manual may not be reproduced without
the permission of the manufacturer.
CUSTOMER ASSISTANCE
Should you require assistance regarding this product and its
operation, please contact our customer care department at
WARRANTY
This product is warranted to be free of manufacturing defects for a
period of 90 days from date of retail purchase. Defective product
should be directed to the place of retail purchase for exchange.
Should this not be possible, contact our customer care department
for assistance and a return material authorization. No returns may
be made without a return authorization. Please retain your retail
receipt as you may be asked to provide a copy of it for proof of date
purchased.
This warranty does not cover product subjected to abuse, misuse,
accidental damage or tampering. Upon return of the defective
product, Oregon Scientific will at its discretion, replace the product
with either a new or a tested reconditioned product. Should the
product be out of warranty, the consumer may purchase directly
from Oregon Scientific a replacement at reasonable cost plus
shipping and handling.
TRAVEL ALARM CLOCK
WITH BACKLIGHT
AND NIGHT FINDER
Model AS-688NE
FIG.1
FIG.2
FIG.3
FIG.4
FIG.5
FIG.6
FIG.7
- Nous vous remercions d’ avoir acheté ce l’horloge..
- Afin d’utiliser cet appareil au mieux de ces capacités, nous vous
recommandons de lire ce manuel avec attention et de le conserver
pour votre référence future.
MANUEL D’INSTRUCTIONS
CARACTERISTIQUES
- La fonction unique Balise Nocturne Night Finder
TM
permet de
localiser l’horloge dans l’obscurité.
- Affichez l’heure et l’heure de réveil simultanément.
- Reveillez-vous en douceur! Le réveil commence à sonner à bas
volume puis augmente le son progressivement.
- La fonction “Somme” d’une durée de 8 minutes est déclenchée
à l’ aide du système Ultra-Sensible
- L’éclairage HiCilo
TM
bleu vif éclaire l’écran et permet la lecture
dans l’obscurité; il clignote également lorsque le réveil sonne.
- Le couvercle de protection à charnières empêche l’ activation
des touches pendant le transport et sert également de support
DESCRIPTIF DES ELEMENTS
A. Témoin indicateur du Night Finder.
B. Témoin de M/A sonnerie
C. Touche recul
D. Bouton de M/A SONNERIE
E. Bouton de MISE A L’HEURE / VERROUILLAGE /
PROGRAMMA TION REVEIL
F. Touche d’avancée
A) Affichage en format 12H
B) Affichage en format 24H
[VOIR SCHEMA 1]
INSTALLATION ET REMPLACEMENT DE
LA PILE
L’ appareil utilise 2 piles UM-4 ou Alcaline du tupe ‘AAA’ pour la
lumière de fond et une pile LR44 (incluse) pour l’heure.
Si l’affichage devient faible, enlevez les piles AAA usagées et suivez
les étapes suivantes pour les remplacer:
1. Faites glisser le couvercle du compartiment à pile dans le sens
de la flèche.
2. Installez la pile de type AAA en respectant la polarité (+et-)
indiquée à l’intérieur du compartiment.
3. Remettez le couvercle du compartiment à pile.
Si l’affichage devient faible, enlevez la piles LR44 usagées et suivez
les étapes suivantes pour les remplacer:
1. Utiliser un tournevis du type philips pour desserrer la couverture
du logement des piles “I” et ouvrez-la.
2. Enlevez les piles usagées LR44 et insérez une pile fraîches tel
qu’indiqué par les symboles de polaritè l’intérieur du logement
des piles.
3. Replacez la couverture du logement des piles and serrez-la avec
un tournevis.
SUPPORT HORIZONTAL
Pour transformer le couvercle en support, faites pivoter le couvercle’
vers arrière de l’horloge.
[VOIR SCHEMA 5]
MISE A L’HEURE DE L’HORLOGE
1. Soulevez le couvercle pour accéder aux touches de
programmation.
2. Faites glisser le bouton [TIME SET / LOCK / ALARM SET] en
position TIME SET. L’heure affichée en haut de l’écran
commence alors à clignoter. [VOIR SCHEMA 2]
C) Affichage en format 12H
D) Affichage en format 24H
3. Appuyez sur la touche [UP] ou [DOWN] pour faire avancer ou
reculer les chiffres jusqu’a ce que l’heure désirée apparaisse à
l’écran. Gardez la touche enfoncée pour accélérer le changement.
4. Lorsque l’heure exacte est affichée, faites glisser le bouton [TIME
SET / LOCK / ALARM SET] en position LOCK. L’heure affichée
cesse de clignoter, signalant que l’heure est programmée.
PROGRAMMATION DU REVEIL
1. Faites glisser le bouton [TIME SET / LOCK / ALARM SET] en
position ALARM SET. L’heure de réveil affichée en bas de l’écran
commence alors à clignoter. [VOIR SCHEMA 3]
E) Affichage en format 12H
F) Affichage en format 24H
FRANCAIS
ENGLISH
A)
B)
C)
D)
E)
F)


Join the conversation about this product
Here you can share what you think about the Oregon AS688NE Alarm Clock. If you have a question, first carefully read the manual. Requesting a manual can be done by using our contact form.