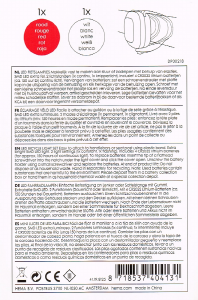
x2
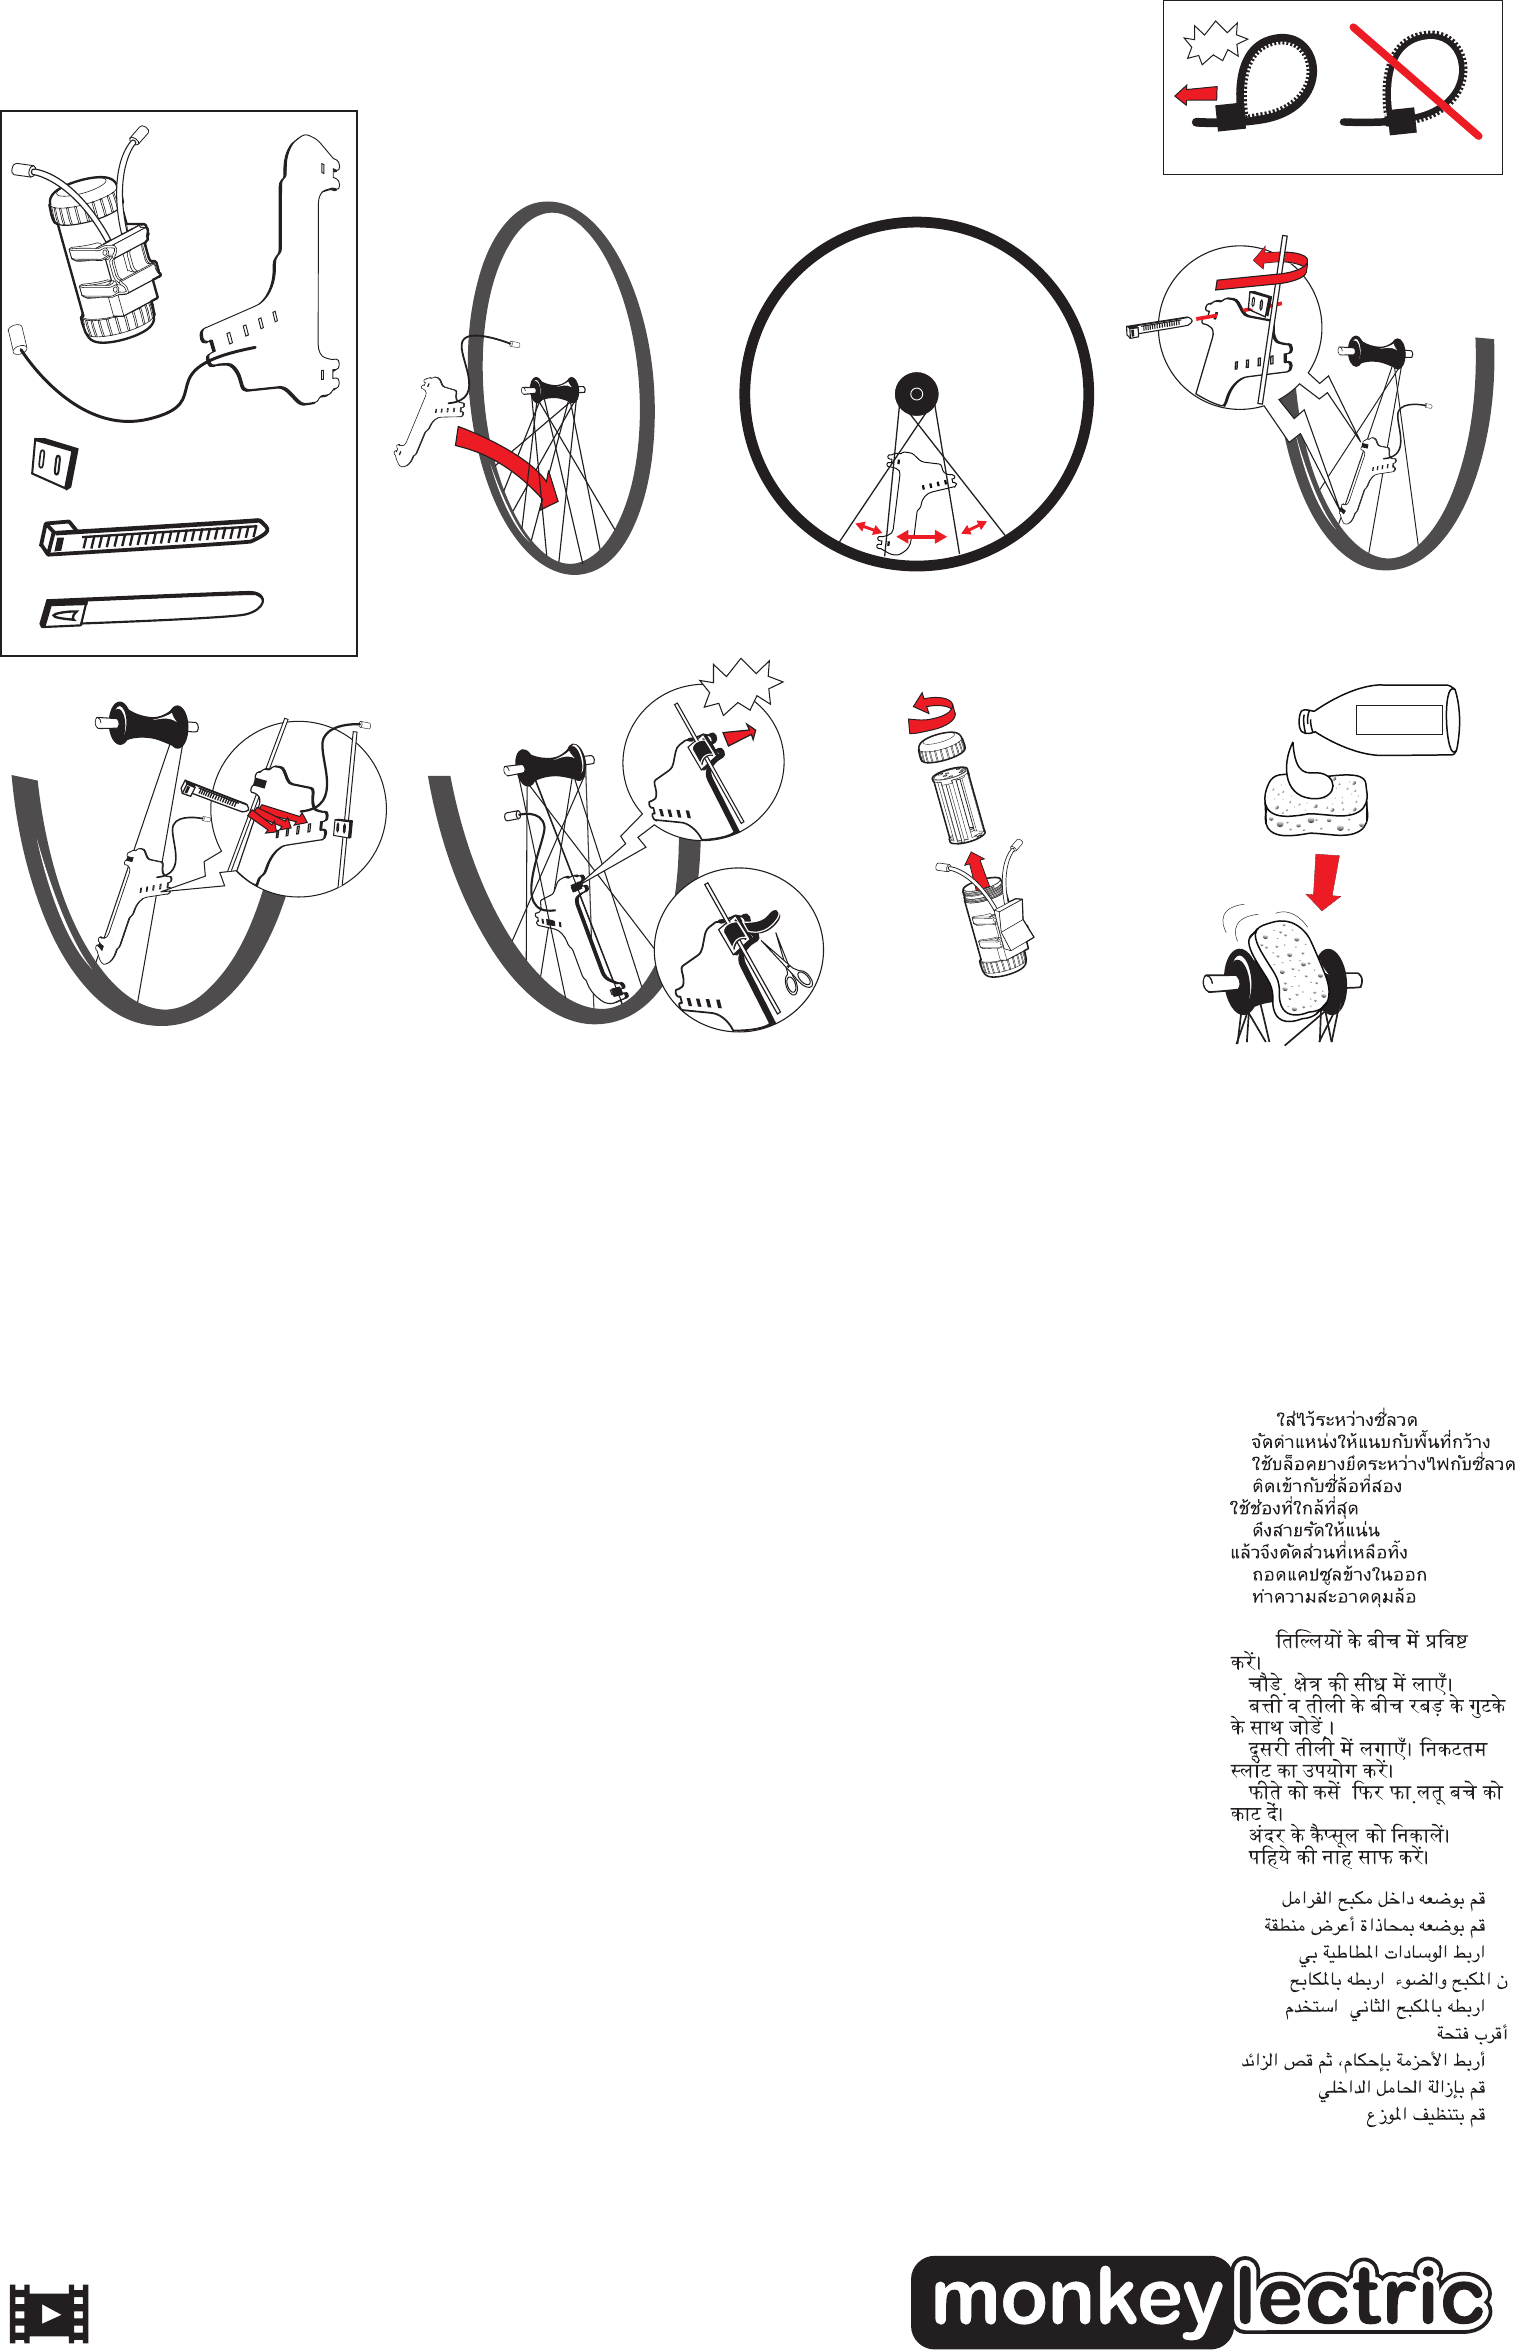
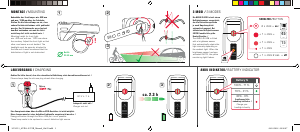
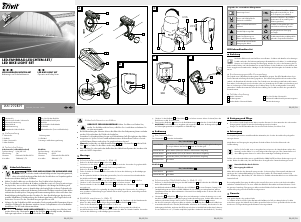
7. Clean hub.
copyright MonkeyLectric LLC
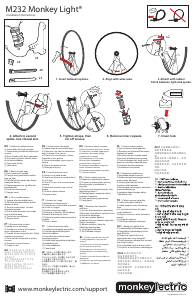
www.monkeylectric.com/support
x1
x5
x1
x1
x3
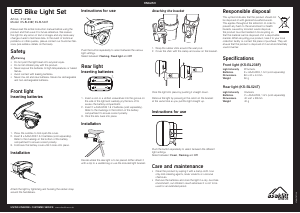
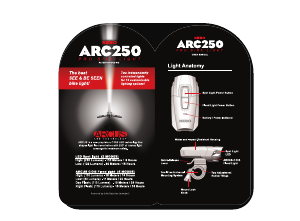
M232 Monkey Light®
Installation Instructions
®
5. Tighten straps, then
cut off excess.
6. Remove inner capsule.
2. Align with wide area.
Zzzzzt!
x3
Zzzzzt!
Alcohol
1. Insert between spokes.
3. Attach with rubber
block between light and spoke.
4. Attach to second
spoke. Use closest slot.
DA 1) Sæt in mellem eger.
2) Ret til med bredt område.
3) Fastgør med gummiklods mellem
lygte og eger.
4) Sæt fast på den anden ege. Benyt
nærmeste åbning.
5) Stram stropperne op og afklip det
overskydende.
6) Fjern den indre kapsel.
7) Rengør navet.
ZH-S
2)与宽阔区域对齐。
3)将橡胶块放在车灯和辐条之间。
4)固定到第二根辐条上。使用距离
最近的插孔
5)拉紧捆绑带,并剪掉多余部分
6)去除内套
7)清洁集线器。
FR
1) Insérez entre les rayons.
2) Aligner avec la zone la plus large.
3) Fixez avec une cale en caoutchouc
entre le phare et les rayons.
4) Fixer sur le second rayon. Utiliser
l'encoche la plus proche.
5) Serrer les sangles, puis couper le
surplus.
6) Retirer la capsule interne.
7) Nettoyez le moyeu.
IT 1) Inserire tra i raggi.
2) Allinearsi con l'area ampia.
3) Collegare con il blocchetto di gomma
tra la luce e il raggio.
4) Fissare al secondo raggio.
5) Stringere le fascette, quindi tagliare
Utilizzare la fessura più vicina.
6) Togliere la capsula interna.la parte in
eccesso.
7) Pulire il mozzo.
NO
1) Settes inn mellom eikene.
2) Innrett etter det brede området.
3. Festes med gummiblokk mellom lykt
og eike.
4) Reim til andre eike. Bruk nærmeste.
5) Dra reimene stramt, deretter kutter
du av det overflødige.
6) Fjern indre holder.
7) Vask navet.
SE 1) För in mellan ekrarna.
2) Justera efter den breda delen.
3) Sätt fast med gummiblock mellan
lampa och eker.
4) Rem för andra ekern. Använd
närmaste öppning.
5) Dra åt remmarna hårt, skär sedan
bort överblivna delar.
6) Ta bort den inre hållaren.
7) Rengör navet.
RU 1) Вставьте между спицами.
2) Расположите в широком зазоре.
3) Закрепите, вставив квадратную
резиновую прокладку между
подсветкой и спицей.
4) Прикрепите ко 2-й спице.
Используйте ближайшее
установочное отверстие.
5) Затяните крепежные хомуты, а
затем обрежьте лишнее.
6) Извлеките внутреннюю крышку.
7) Очистите втулку.
EL 1) Εισάγετε μεταξύ των ακτινών.
2) Ευθυγραμμίστε με την φαρδιά
πλευρά.
3) Συνδέστε με το ελαστικό κομμάτι
μεταξύ φωτός και ακτίνας.
4) Προσαρμόστε στην 2η ακτίνα.
Χρησιμοποιήστε την πλησιέστερη
εγκοπή.
5) Σφίξτε τα λουριά, έπειτα κόψτε ό,τι
περισσεύει.
6) Αφαιρέστε την εσωτερική κάψουλα.
7) Καθαρίστε τον άξονα.
TR 1) Tellerin arasına yerleştirin.
2) Geniş alana göre hizalayın.
3) Lastik tamponu ışıkla tel arasına
takın.
4) 2. jant teline iliştiriniz. En yakın
yuvayı kullanınız.
5) Kayışları sıkınız ve artan kısımlarını
kesiniz.
6) İç kapsülü çıkarınız.
7) Tekerleğin göbeğini temizleyin.
ID 1) Sisipkan di antara jeruji.
2) Sesuaikan dengan luasnya.
3) Kaitkan dengan penyangga karet di
antara lampu dan jeruji.
4) Pasang pada jari-jari kedua.
Gunakan celah terdekat.
5) Kencangkan tali pengikat, kemudian
potong kelebihannya.
6) Lepaskan kapsul bagian dalam.
7) Bersihkan hub.
JP 1)スポークの間に挿入します。
2)幅の広い部分に揃えます。
3)ライトとスポークの間にゴムのブロ
ックを使って取り付けます。
4)2番目のスポークに取り付けます。最
も近い
5)ストラップを堅く引き締め、余った
部分を切り取ります。
6)内部カプセルを取り外します。
7)ハブを綺麗に洗浄します。。
KO 1) 바퀴살 사이에 삽입합니다.
2) 넓은 지역에 맞춰 정렬시킵니다.
3) 조명과 바퀴살 사이 고무 블럭에
부착합니다.
4) 두 번째 바퀴살에 붙이기. 가장
가까운 구멍 사용하기.
5) 줄을 단단히하고, 여분 자르기.
6) 안쪽의 캡슐 제거하기.
7) 자전거 허브를 청소하십시오.
ZH-T 1)在輪輻之間插入。
2)對齊寬闊區域。
3)將橡膠塊置於車燈與輪輻之
間。
4)固定在第二根幅條上。使用
最接近的插槽。
5)綁緊固定帶,然後剪掉多餘
部份。
6)取出內盒。
7)清潔集線器。
PL
1) Wsuń między szprychy.
2) Dopasuj w najszerszym miejscu.
3) Przymocuj umieszczając gumowy
bloczek między oświetleniem a
szprychą.
4) Przymocuj do drugiej szprychy. Użyj
najbliższego otworu.
5) Naciągnij paski, następnie odetnij
wystające fragmenty.
6) Usuń wewnętrzny pojemniczek.
7) Umyj piastę.
DE 1) Zwischen den Speichen
einführen.
2) An den Zwischenräumen ausrichten.
3)Mit einem Gummiblock zwischen Licht
und Speiche befestigen.
4) An einer zweiten Speiche
befestigen.Den am nähesten liegenden
Schlitz verwenden.
5) Bänder anziehen, dann die
Überlänge abschneiden.
6) Innenkapsel entfernen.
7) Die Radnabe reinigen.
ES 1) Inserte entre los rayos.
2) Alinee con la zona ancha.
3) Sujete con bloque de goma entre la
luz y el rayo.
4) Una al 2º rayo. Use la ranura más
cercana.
5) Ajuste las correas, luego corte el
exceso.
6) Quite la cápsula interna.
7) Limpie el buje.
PT 1)Encaixe entre os raios.
2) Alinhe com a área larga.
3) Prenda com o bloco de borracha
entre a lâmpada e o raio.
4) Prenda a tira no segundo raio. Utilize
a fenda mais próxima.
5) Puxe as tiras firmemente e corte o
excesso.
6) Remova o suporte interno.
7) Limpe o cubo.
NL 1) Voeg in tussen spaken.
2) Lijn uit met het brede gedeelte.
3) Bevestig met rubberen blok tussen
fietslamp en spaak.
4) Bevestig aan een tweede spaak.
Gebruik de dichtstbijzijnde opening.
5) Trek de bandjes aan, snijd vervol-
gens het overtollige materiaal weg.
6) Verwijder de binnencapsule.
7) Achteras schoonmaken.
HI 1)
2)
3)
4)
5)
,
6)
7)
TH 1)
2)
3)
4)
5)
6)
7)
1. .
2.
.
3.
. .
4.
.
.
5.
.
6.
.
7.
.
FI
1) Asenna pinnojen väliin.
2) Kohdista leveämpään pinnaväliin.
3) Kiinnitä nippusiteillä käyttäen
välissä kumipalaa.
4) Kiinnitä toinen pää sopivasta
kohdasta pinnaan.
5) Kiristä kaikki nippusiteet ja katkaise
ylinmääräiset pois.
6) Poista sisäkapseli.
7) Pese keskiö.
HU
1) Illeszd be a küllők közé.
2) A szélesebbik küllőközben legyen.
3) Rögzítsd két kábelkötegelővel az
egyik küllőhöz.
4) Rögzísd a másik küllőhöz a
legközelebb eső résen keresztül.
5) Húzd szorosra a kötegelőket és vágd
le a kilógó végüket.
6) Az elemtokból vedd ki a belső tartót.
7) Pucold le a zsíros koszt a kerékagyról.


Join the conversation about this product
Here you can share what you think about the Monkeylectric Monkey Light M232 Bicycle Light. If you have a question, first carefully read the manual. Requesting a manual can be done by using our contact form.