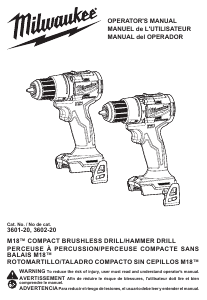
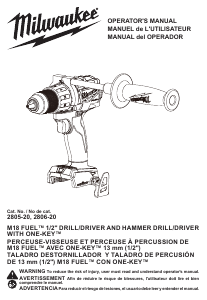
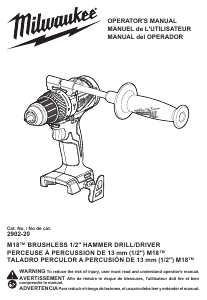
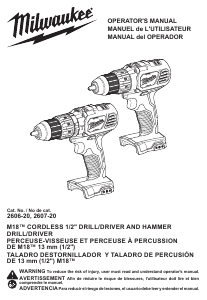
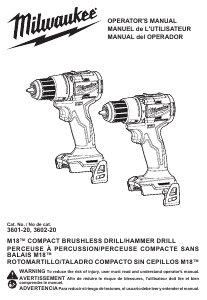
Manual Milwaukee 3601-20 Drill-Driver

Need a manual for your Milwaukee 3601-20 Drill-Driver? Below you can view and download the PDF manual for free in English. This product currently has 3 frequently asked questions, 0 comments and has 0 votes. If this is not the manual you want, please contact us.

Is your product defective and the manual offers no solution? Go to a Repair Café for free repair services.

Manual

Loading…

4
3. To use the driving screws mode
rotate the torque selector collar
until the desired clutch setting ap-
pears in line with the arrow.
The adjustable clutch, when prop-
erly adjusted, will slip at a preset
torque to prevent driving the screw too deep into
di󰀨erent materials and to prevent damage to the
screw or tool.
The torque specications shown here are approximate
values obtained with a fully charged battery pack.
TORQUE SPECIFICATIONS
Clutch
Setting
in. lbs
Clutch Setting
Applications
1-3 8-16 Small cabinet screws
4-6 19-25
Medium cabinet screws
Fine thread drywall screws
7-10 28-34
Large cabinet screws
Coarse thread drywall
screws
11-13 37-50 Deck screws
NOTE: Because the settings shown in the table are
only a guide, use a piece of scrap material to test
the di󰀨erent clutch settings before driving screws
into the workpiece.
Selecting Speed
The speed selector is on top of the motor housing.
Allow the tool to come to a complete stop before
changing speeds. See “Applications” for recom-
mended speeds under various conditions.
1. For Low speed, push the speed selector to display
“1”.
2. For High speed, push the speed selector to display
“2”.
Using the Control Switch
The control switch may be set to three positions:
forward, reverse and lock. Due to a lockout mecha-
nism, the control switch can only be adjusted when
the ON/OFF switch is not pressed. Always allow the
motor to come to a complete stop before using the
control switch.
For forward (clockwise) rotation, push in the control
switch
from the right side of the tool. Check the
direction of rotation before use.
For reverse (counterclockwise) rotation, push in the
control switch
from the left side of the tool. Check
direction of rotation before use.
To lock the trigger, push the control switch to the
center position. The trigger will not work while the
control switch is in the center locked position. Always
lock the trigger or remove the battery pack before
performing maintenance, changing accessories,
storing the tool and any time the tool is not in use.
WARNING
To reduce the risk of injury, always
hold or brace securely.
Starting, Stopping and Controlling Speed
1. To start the tool, grasp the handle(s) rmly and
pull the trigger.
NOTE: An LED is turned on when the trigger is
pulled and will go o󰀨 shortly after the trigger is
released.
2. To vary the speed, increase or decrease the pres-
sure on the trigger. The further the trigger is pulled,
the greater the speed.
ASSEMBLY
WARNING
Recharge only with the charger
specied for the battery. For spe-
cic charging instructions, read the operators
manual supplied with your charger and battery.
Removing/Inserting the Battery
To remove the battery, push in the release buttons
and pull the battery pack away from the tool.
WARNING
Always lock the trigger or remove
the battery pack any time the tool
is not in use.
To insert the battery, slide the pack into the body
of the tool. Make sure it latches securely into place.
WARNING
Always remove battery pack before
changing or removing accesso-
ries. Only use accessories specically recom-
mended for this tool. Others may be hazardous.
Installing Bits
Always remove the battery before inserting or remov-
ing bits. Select the proper style and size bit for the job.
This tool is equipped with a spindle lock. The chuck
can be tightened with one hand, creating higher grip
strengths on the bit.
1. To open the chuck jaws, turn the sleeve in the
counterclockwise direction.
When using drill bits, allow the bit to strike the
bottom of the chuck. Center the bit in the chuck
jaws and lift it about 1/16" o󰀨 of the bottom.
When using screwdriver bits, insert the bit far
enough for the chuck jaws to grip the hex of the bit.
2. To close the chuck jaws, turn the sleeve in the
clockwise direction. The bit is secure when the
chuck makes a ratcheting sound and the sleeve
cannot be rotated any further.
3. To remove the bit, turn the sleeve in the counter-
clockwise direction.
NOTE: A ratcheting sound may be heard when the
chuck is opened or closed. This noise is part of the
locking feature, and does not indicate a problem with
the chuck’s operation.
OPERATION
WARNING
To reduce the risk of injury, always
wear proper eye protection marked
to comply with ANSI Z87.1.
When working in dusty situations, wear appro-
priate respiratory protection or use an OSHA
compliant dust extraction solution.
Selecting Hammer, Drill or Drive Action
1. To use the hammer-drilling mode
(3602-20 only), rotate the torque
selector collar until the hammer
symbol
appears in line with the
arrow. Apply pressure to the bit to
engage the hammering mecha-
nism.
NOTE: When using carbide bits, do not use water
to settle dust. Do not attempt to drill through steel
reinforcing rods. This will damage the carbide bits.
2. To use the drilling only mode
(3601-20 only), rotate the torque
selector collar until the drill symbol
appears in line with the arrow.
NOTE: The number selected on the
torque selector collar has no e󰀨ect on
operation of the drill in drilling mode.
Download manual in English (PDF, 3.71 MB)
(Consider the environment and only print this manual if it is really necessary)

Loading…

Rating

Let us know what you think about the Milwaukee 3601-20 Drill-Driver by leaving a product rating. Want to share your experiences with this product or ask a question? Please leave a comment at the bottom of the page.
Are you satisfied with the Milwaukee 3601-20 Drill-Driver?
Yes No
Be the first to rate this product
0 votes

Join the conversation about this product

Here you can share what you think about the Milwaukee 3601-20 Drill-Driver. If you have a question, first carefully read the manual. Requesting a manual can be done by using our contact form.

More about this manual

We understand that it’s nice to have a paper manual for your Milwaukee 3601-20 Drill-Driver. You can always download the manual from our website and print it yourself. If you would like to have an original manual, we recommend you contact Milwaukee. They might be able to provide an original manual. Are you looking for the manual of your Milwaukee 3601-20 Drill-Driver in a different language? Choose your preferred language on our homepage and search for the model number to see if we have it available.

Specifications

Brand Milwaukee
Model 3601-20
Category Drill-Drivers
File type PDF
File size 3.71 MB

All manuals for Milwaukee Drill-Drivers
More manuals of Drill-Drivers

Frequently Asked Questions about Milwaukee 3601-20 Drill-Driver

Our support team searches for useful product information and answers to frequently asked questions. If you find an inaccuracy in our frequently asked questions, please let us know by using our contact form.

I keep stripping the screw head when using the drill-driver. Why is that? Verified

Most drill-drivers can be set to screw harder or softer. If the head keeps being stripped, the drill-driver should probably be put into a different setting. When it is a wireless device, always be sure the battery is charged for an optimal result.

This was helpful (73) Read more

Do I need to wear hearing protection when using a drill? Verified

Yes you should. Although the amount of noise produced by a drill can vary between brands and models, long term exposure to loud noise can cause permanent hearing damage. That is why it is a good idea to wear hearing protection.

This was helpful (23) Read more

Can I store power tools in a shed or garage? Verified

In general, you can store power tools in a shed or garage, even if it sometimes freezes there. However, it is better for the lifespan of the power tool to store it in a dry place without major temperature fluctuations. In a shed or garage, differences in temperature can cause condensation to form, which can cause rust. In addition, tools that run on batteries last shorter and do not charge as well at very low temperatures. To be sure how your power tool needs to be stored, always thoroughly read the user manual.

This was helpful (11) Read more
Manual Milwaukee 3601-20 Drill-Driver

Related products

Related categories