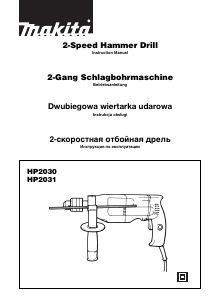
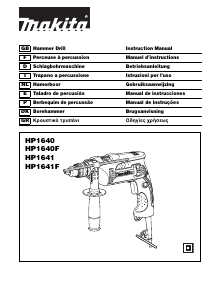
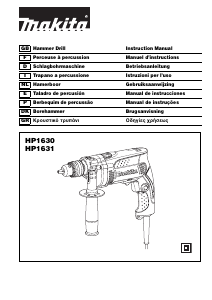
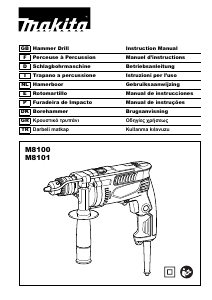
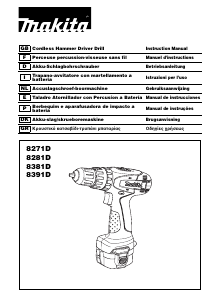
Manual Makita 8281D Impact Drill

Need a manual for your Makita 8281D Impact Drill? Below you can view and download the PDF manual for free in English. This product currently has 3 frequently asked questions, 0 comments and has 0 votes. If this is not the manual you want, please contact us.

Is your product defective and the manual offers no solution? Go to a Repair Café for free repair services.

Manual

Loading…

6
Adjusting the fastening torque (Fig. 6)
The fastening torque can be adjusted in 16 steps by turn-
ing the adjusting ring so that its graduations are aligned
with the arrow on the tool body. The fastening torque is
minimum when the number 1 is aligned with the arrow,
and maximum when the number 16 is aligned with the
arrow.
Before actual operation, drive a trial screw into your
material or a piece of duplicate material to determine
which torque level is required for a particular application.
ASSEMBLY
CAUTION:
Always be sure that the tool is switched off and the bat-
tery cartridge is removed before carrying out any work
on the tool.
Installing or removing driver bit or drill bit (Fig. 7)
Hold the ring and turn the sleeve counterclockwise to
open the chuck jaws. Place the bit in the chuck as far as
it will go. Hold the ring firmly and turn the sleeve clock-
wise to tighten the chuck.
To remove the bit, hold the ring and turn the sleeve coun-
terclockwise.
OPERATION
Hammer drilling operation
CAUTION:
There is a tremendous and sudden twisting force
exerted on the tool/bit at the time of hole break-
through, when the hole becomes clogged with chips
and particles, or when striking reinforcing rods embed-
ded in the concrete.
First, turn the action mode changing ring so that the
arrow on the tool body points to the marking. The
adjusting ring can be aligned in any torque levels for this
operation.
Be sure to use a tungsten-carbide tipped bit.
Position the bit at the desired location for the hole, then
pull the switch trigger. Do not force the tool. Light pres-
sure gives best results. Keep the tool in position and pre-
vent it from slipping away from the hole.
Do not apply more pressure when the hole becomes
clogged with chips or particles. Instead, run the tool at an
idle, then remove the bit partially from the hole. By
repeating this several times, the hole will be cleaned out
and normal drilling may be resumed.
Blow-out bulb (optional accessory) (Fig. 8)
After drilling the hole, use the blow-out bulb to clean the
dust out of the hole.
Screwdriving operation (Fig. 9)
First, turn the action mode changing ring so that the
arrow on the tool body points to the marking. Adjust
the adjusting ring to the proper torque level for your work.
Then proceed as follows.
Place the point of the driver bit in the screw head and
apply pressure to the tool. Start the tool slowly and then
increase the speed gradually. Release the switch trigger
as soon as the clutch cuts in.
CAUTION:
Make sure that the driver bit is inserted straight in the
screw head, or the screw and/or bit may be damaged.
NOTE:
When driving wood screws, predrill pilot holes to make
driving easier and to prevent splitting of the workpiece.
See the chart.
Drilling operation
First, turn the adjusting ring so that the pointer points to
the m marking. Then proceed as follows.
Drilling in wood
When drilling in wood, the best results are obtained with
wood drills equipped with a guide screw. The guide
screw makes drilling easier by pulling the bit into the
workpiece.
Drilling in metal
To prevent the bit from slipping when starting a hole,
make an indentation with a center-punch and hammer at
the point to be drilled. Place the point of the bit in the
indentation and start drilling.
Use a cutting lubricant when drilling metals. The excep-
tions are iron and brass which should be drilled dry.
CAUTION:
Pressing excessively on the tool will not speed up the
drilling. In fact, this excessive pressure will only serve
to damage the tip of your bit, decrease the tool perfor-
mance and shorten the service life of the tool.
There is a tremendous force exerted on the tool/bit at
the time of hole break through. Hold the tool firmly and
exert care when the bit begins to break through the
workpiece.
A stuck bit can be removed simply by setting the
reversing switch to reverse rotation in order to back out.
However, the tool may back out abruptly if you do not
hold it firmly.
Always secure small workpieces in a vise or similar
hold-down device.
If the tool is operated continuously until the battery car-
tridge has discharged, allow the tool to rest for 15 min-
utes before proceeding with a fresh battery.
MAINTENANCE
CAUTION:
Always be sure that the tool is switched off and the bat-
tery cartridge is removed before attempting to perform
inspection or maintenance.
To maintain product SAFETY and RELIABILITY, repairs,
any other maintenance or adjustment should be per-
formed by Makita Authorized Service Centres, always
using Makita replacement parts.
Nominal diameter of
wood screw (mm)
Recommended size of
pilot hole (mm)
3.1 2.0 – 2.2
3.5 2.2 – 2.5
3.8 2.5 – 2.8
4.5 2.9 – 3.2
4.8 3.1 – 3.4
5.1 3.3 – 3.6
5.5 3.7 – 3.9
5.8 4.0 – 4.2
6.1 4.2 – 4.4
Download manual in English (PDF, 1.36 MB)
(Consider the environment and only print this manual if it is really necessary)

Loading…

Rating

Let us know what you think about the Makita 8281D Impact Drill by leaving a product rating. Want to share your experiences with this product or ask a question? Please leave a comment at the bottom of the page.
Are you satisfied with the Makita 8281D Impact Drill?
Yes No
Be the first to rate this product
0 votes

Join the conversation about this product

Here you can share what you think about the Makita 8281D Impact Drill. If you have a question, first carefully read the manual. Requesting a manual can be done by using our contact form.

More about this manual

We understand that it’s nice to have a paper manual for your Makita 8281D Impact Drill. You can always download the manual from our website and print it yourself. If you would like to have an original manual, we recommend you contact Makita. They might be able to provide an original manual. Are you looking for the manual of your Makita 8281D Impact Drill in a different language? Choose your preferred language on our homepage and search for the model number to see if we have it available.

Specifications

Brand Makita
Model 8281D
Category Impact Drills
File type PDF
File size 1.36 MB

All manuals for Makita Impact Drills
More manuals of Impact Drills

Frequently Asked Questions about Makita 8281D Impact Drill

Our support team searches for useful product information and answers to frequently asked questions. If you find an inaccuracy in our frequently asked questions, please let us know by using our contact form.

What is the difference between an impact drill and a rotary hammer? Verified

Impact drills can be used for drilling holes in bricks and mortar walls. For drilling holes in concrete walls you need a rotary hammer.

This was helpful (113) Read more

Do I need to wear hearing protection when using a drill? Verified

Yes you should. Although the amount of noise produced by a drill can vary between brands and models, long term exposure to loud noise can cause permanent hearing damage. That is why it is a good idea to wear hearing protection.

This was helpful (22) Read more

Can I store power tools in a shed or garage? Verified

In general, you can store power tools in a shed or garage, even if it sometimes freezes there. However, it is better for the lifespan of the power tool to store it in a dry place without major temperature fluctuations. In a shed or garage, differences in temperature can cause condensation to form, which can cause rust. In addition, tools that run on batteries last shorter and do not charge as well at very low temperatures. To be sure how your power tool needs to be stored, always thoroughly read the user manual.

This was helpful (5) Read more
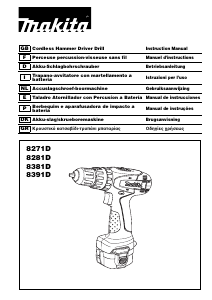
Manual Makita 8281D Impact Drill

Related products

Related categories