
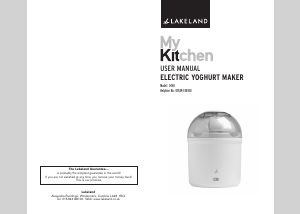
4. Cover with the inner lid. Place the bowl inside the insulated base, and place the
outer lid on top. Plug in the yoghurt maker; the power light will come on. Make a
note of the start time by setting the memory dial on top of the lid.
5. Leave the yoghurt maker undisturbed for 8 hours. There is no need to stir or mix
in the meantime. Many people find it convenient to make yoghurt overnight,
switching on the machine before they go to bed.
6. After 8 hours – or next morning – unplug the yoghurt maker and lift out the lidded
bowl. Let it cool, then store in the fridge for up to 5 days. Please do not place the
insulated base in the fridge, only the bowl. TIP: yoghurt can be frozen but its
consistency will change after thawing, so it is best used as an ingredient or in
cooked dishes.
HELPFUL HINTS
The starter
• Use unflavoured low-fat natural yoghurt, the freshest available with a long Use By
date.
• If you make yoghurt regularly, save a couple of teaspoons of unflavoured yoghurt
from your last batch to start your next.
• Yoghurt made from long-life UHT or evaporated milk tends to be the best starter.
The milk
• Long-life UHT and evaporated milk make the best yoghurt.
• Pasteurised milk often causes problems as it must be very fresh. It must be
boiled, then not too hot or too cold before use. If in doubt about temperature,
please check the milk with a cooking thermometer.
• To make thicker yoghurt, add 2 tablespoons dried skimmed milk powder to the
milk before boiling.
The location
• Yoghurt will take longer to make in a cool, draughty room.
• If your kitchen is too cold (under 20°C) the yoghurt maker will need plugging in
for 5 minutes to warm up before using.
• If possible, choose a draught-free position; draughts will cool the yoghurt maker.
• Movement will cause separation and uneven texture so avoid moving the yoghurt
maker and do not place it on top of a source of vibration e.g. fridge or washing
machine.
• Keep the yoghurt maker away from heat sources such as ovens and stovetops. Do
not place it on a shelf above a radiator.
BEFORE USING FOR THE FIRST TIME
Carefully unpack the yoghurt maker and remove any packaging. Wipe the insulated
base with a soft, damp cloth, then dry. Wash all other parts in hot, soapy water. Rinse
well, then dry.
ABOUT HOME-MADE YOGHURT
Yoghurt is a live milk product which can reproduce itself in warm conditions. Easy and
inexpensive to make at home, all you need is a carton of natural live yoghurt to get
started, some milk and the means of keeping the correct temperature (ideally between
40°C and 47°C): this electric yoghurt maker.
CHOOSING THE MILK
Yoghurt can be made with any type of milk, including evaporated, goat’s, ewe’s and
soya. Calories, fat content and flavour will vary with the type of milk chosen. Yoghurt
made with semi-skimmed or skimmed milk will also have a thinner consistency.
Pasteurised
This milk has been heated to 71°C for 15 seconds, then rapidly cooled. Some bacteria
may remain so pasteurised milk should be heated to boiling point, then allowed to cool
below 50°C before use.
Untreated/goat’s/ewe’s milk
Bring to the boil and simmer for 7 minutes before cooling.
Long-life UHT/sterilised/evaporated/reconstituted milk
All these types of milk have been ready-treated and do not need boiling. Use at room
temperature, not straight from the fridge.
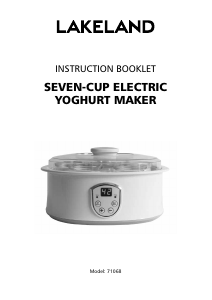
MAKING YOGHURT
1. If you are using pasteurised or untreated milk, heat them as above and leave to
cool.
2. Place the yoghurt maker on a level, dry and sturdy surface, away from draughts,
heat sources and appliances which may vibrate e.g. washing machines and
fridges.
3. As your starter, put 2 teaspoons (10ml) unflavoured natural live yoghurt into the
bowl – the fresher the better, so please check the Use By date on the carton.
Gradually stir in 900ml (1
1
⁄2 pints) milk. Take care not to whip or beat the mixture
too vigorously.


Join the conversation about this product
Here you can share what you think about the Lakeland 3440 Yoghurt Maker. If you have a question, first carefully read the manual. Requesting a manual can be done by using our contact form.