Manual Hoover HGO330HC 011 Vacuum Cleaner
Need a manual for your Hoover HGO330HC 011 Vacuum Cleaner? Below you can view and download the PDF manual for free in English. This product currently has 9 frequently asked questions, 0 comments and has 0 votes. If this is not the manual you want, please contact us.
Is your product defective and the manual offers no solution? Go to a Repair Café for free repair services.
Manual
Loading…
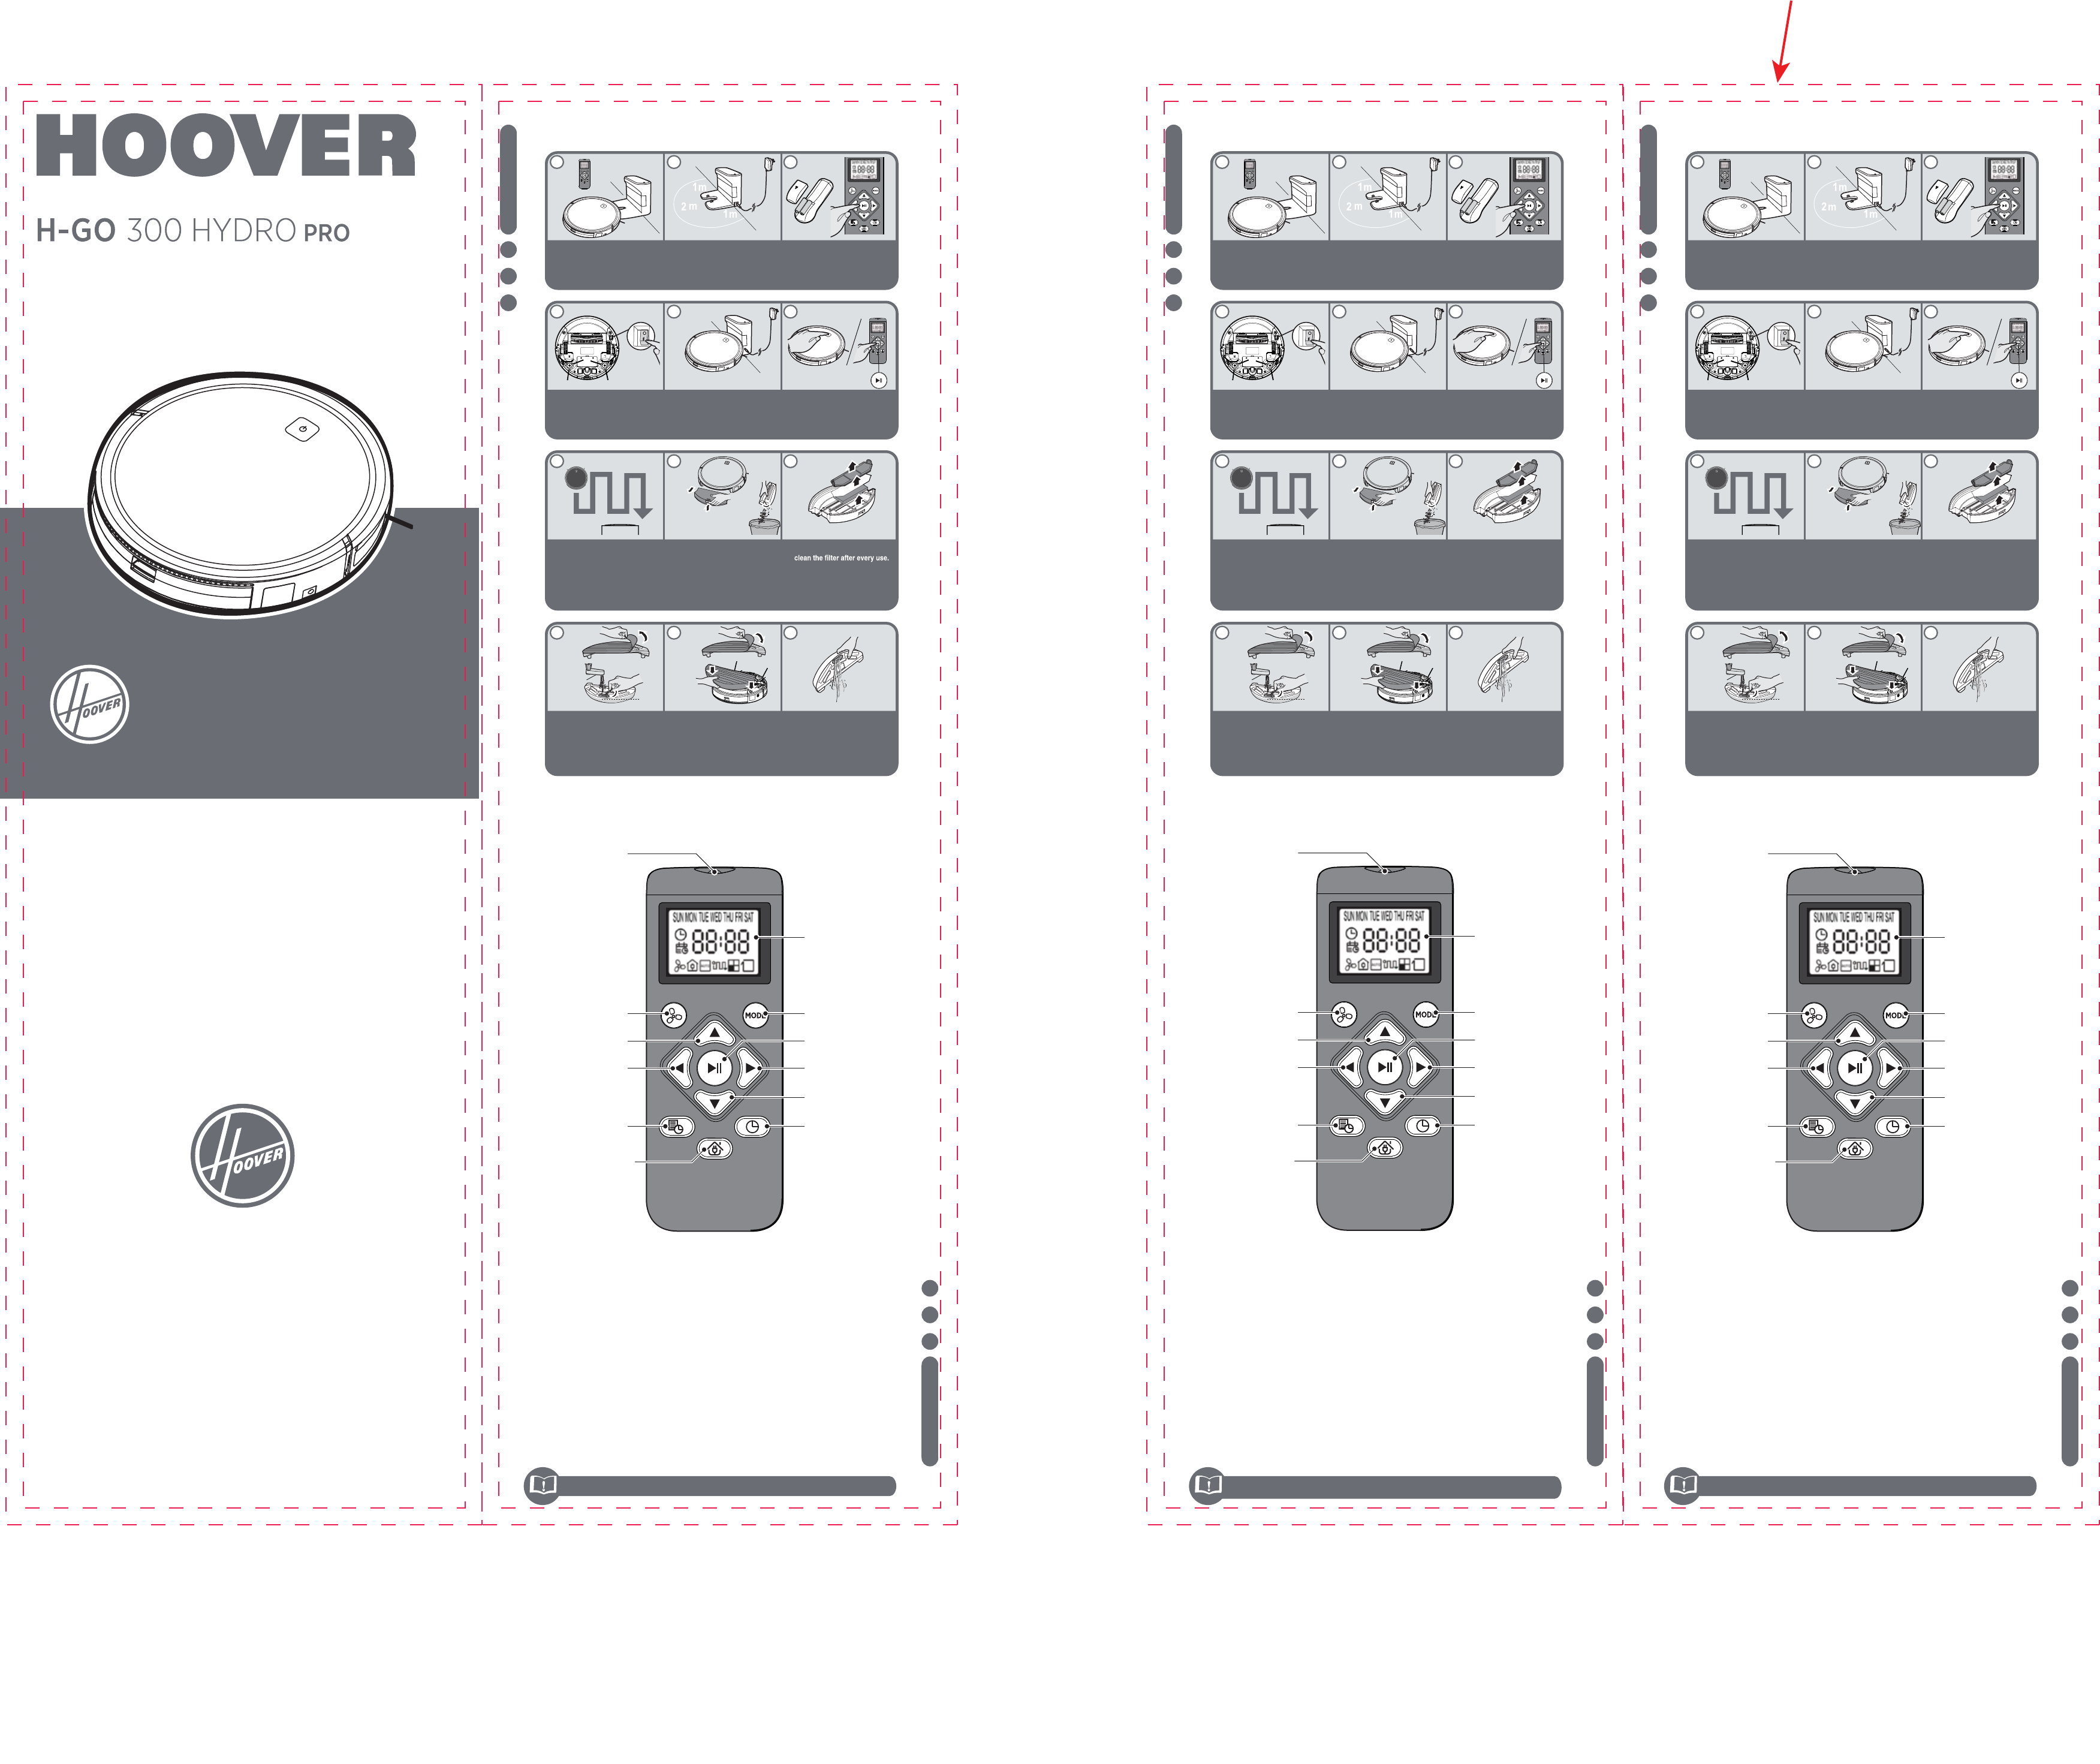

Loading…
Rating
Let us know what you think about the Hoover HGO330HC 011 Vacuum Cleaner by leaving a product rating. Want to share your experiences with this product or ask a question? Please leave a comment at the bottom of the page.More about this manual
We understand that it’s nice to have a paper manual for your Hoover HGO330HC 011 Vacuum Cleaner. You can always download the manual from our website and print it yourself. If you would like to have an original manual, we recommend you contact Hoover. They might be able to provide an original manual. Are you looking for the manual of your Hoover HGO330HC 011 Vacuum Cleaner in a different language? Choose your preferred language on our homepage and search for the model number to see if we have it available.
Specifications
| Brand | Hoover |
| Model | HGO330HC 011 |
| Category | Vacuum Cleaners |
| File type | |
| File size | 1.77 MB |
All manuals for Hoover Vacuum Cleaners
More manuals of Vacuum Cleaners
Frequently Asked Questions about Hoover HGO330HC 011 Vacuum Cleaner
Our support team searches for useful product information and answers to frequently asked questions. If you find an inaccuracy in our frequently asked questions, please let us know by using our contact form.
The hose of my vacuum cleaner is clogged, what can I do? Verified
Detach the hose and look through it to determine if it is actually clogged. If this is the case, you can take a long object such as a broomstick and carefully push it through the hose. This will generally remove any objects that are clogging the hose. If this didn't help you should contact the manufacturer.
This was helpful (1665) Read moreWhat sizes dust bag are there? Verified
There are two sizes that need to be considered. First is the size of the plate with the bag entrance. This determines whether the dust bag will fit a certain vacuum cleaner. Then theres the size of the bag. This is mostly indicated in liters and determines how much dust the bag can hold.
This was helpful (1211) Read moreThe power cord of my vacuum cleaner does not rewind back into the device, what can I do? Verified
It is possible that there is a twist or fold in the cord. Completely roll out the cord a few times and rewind it back into the device under guidance of your hands. If this does not solve the problem, it is possible the mechanism to rewind the cord is broken. In that case, contact the manufacturer or a repair service.
This was helpful (860) Read moreHow do I remove dust and hair from the vacuum cleaner brush head? Verified
Removing dust and hair from the vacuum cleaner brush head has be done manually. If this does not go as desired, it's possible to use a fine comb to remove the remaining dirt.
This was helpful (756) Read moreMy vacuum cleaner makes a whistling noise, what can I do? Verified
This problem is often caused by a full dustbag or filter or when there is an opening that allows air into the hose. Check the dust bag and filter and replace them if necessary. Check the hose for any holes or bad connections. If this does not solve the problem, contact the manufacturer.
This was helpful (727) Read moreWhat setting on the vacuum cleaner brush head should I use? Verified
Nearly all vacuum cleaners have a head with an adjustable brush. Use the brush for hard surfaces to prevent scratches and damage. Turn off the brush for carpeting and rugs.
This was helpful (572) Read moreCan I user a paper dust bag more than once? Verified
This is not advisable. The pores of the bag wat will get saturated, causing a loss in suction and possibly damaging the motor.
This was helpful (376) Read moreWhat is HEPA? Verified
HEPA stands for High-Efficiency Particulate Air. Many vacuum cleaners have a HEPA filter. A HEPA filter will stop at least 85% and at most 99,999995% of all particles of 0,3 micrometer (µm) and up.
This was helpful (367) Read moreCan I use a regular vacuum cleaner to suck up ash? Verified
No, this is absolutely not possible. Ash that seems cooled may still be warm or even hot inside. A regular vacuum cleaner is not designed for this and it can cause a fire. Also, the filters of regular vacuum cleaners are not always suited for retaining extremely small particles such as ash. It can then reach the motor of the vacuum cleaner and cause damage.
This was helpful (367) Read more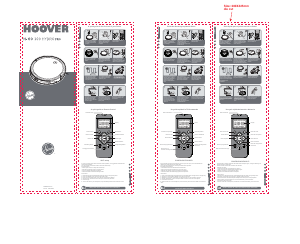


Join the conversation about this product
Here you can share what you think about the Hoover HGO330HC 011 Vacuum Cleaner. If you have a question, first carefully read the manual. Requesting a manual can be done by using our contact form.