Introduction
WARNING
See the Important Safety and Product Information guide in the
product box for product warnings and other important
information.
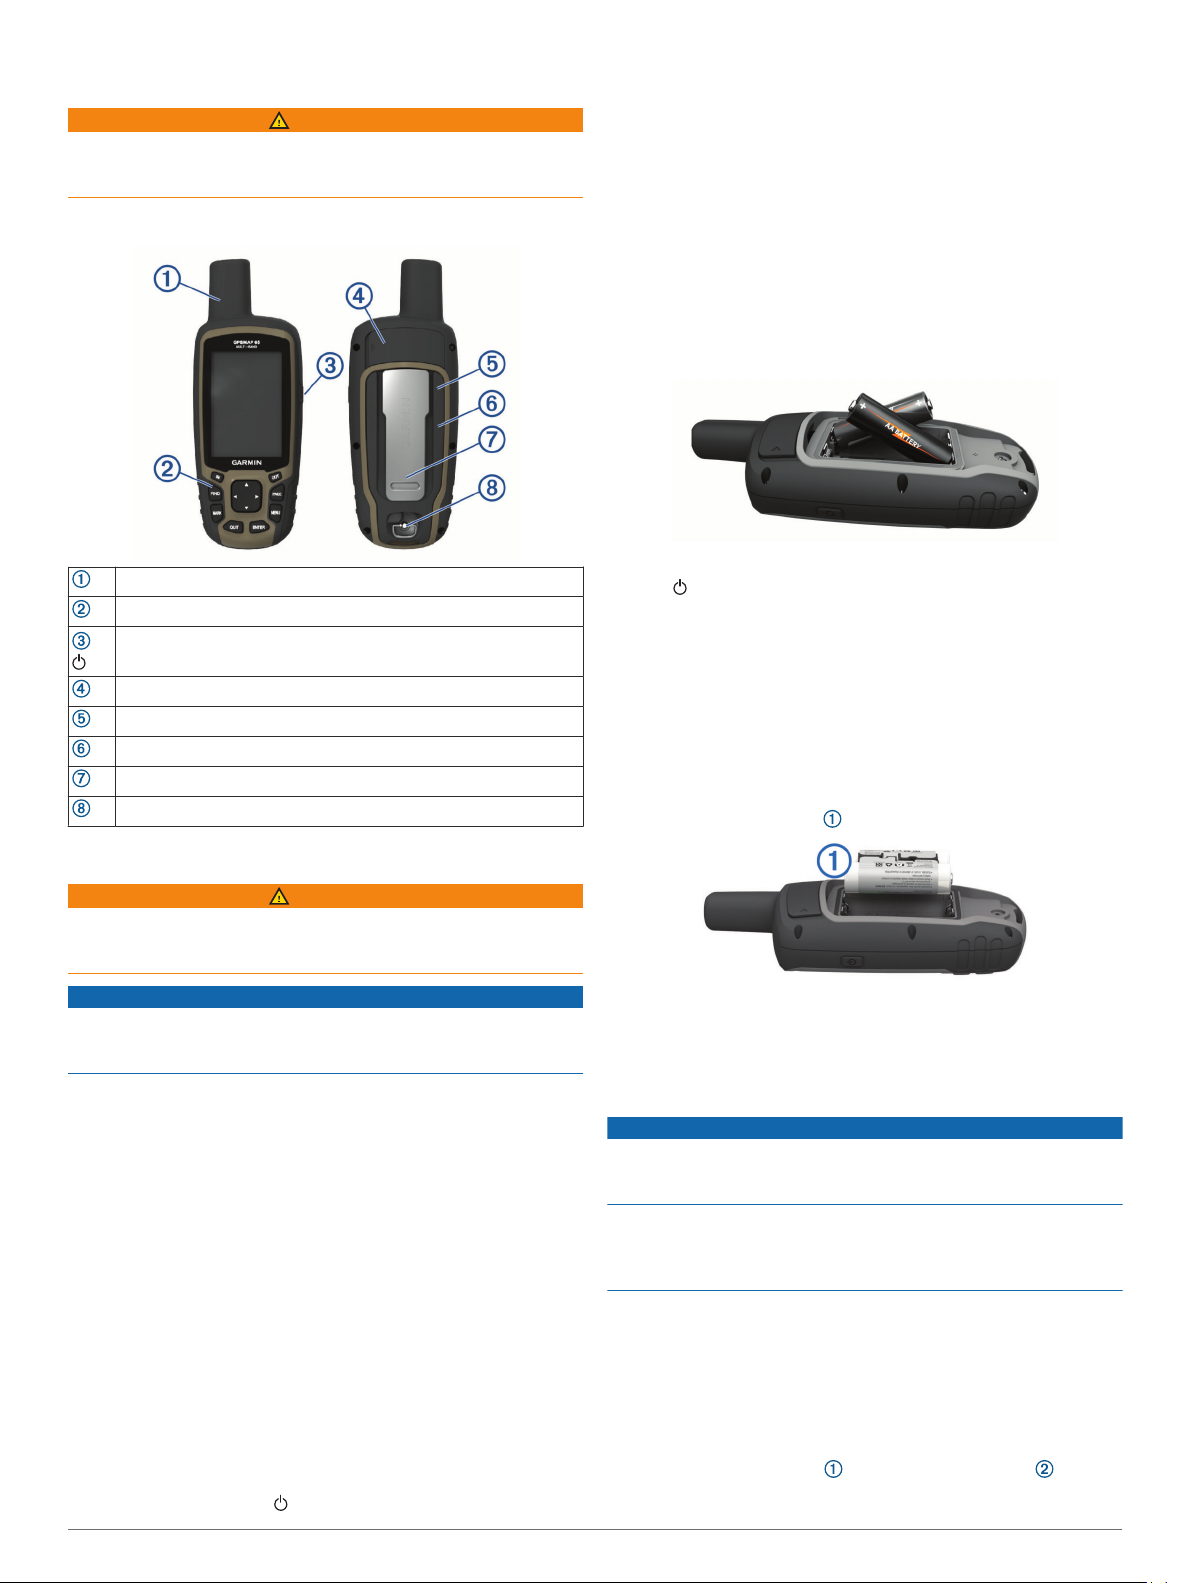
Device Overview
GNSS antenna
Buttons
Power button
Mini-USB port (under weather cap)
microSD
®
card slot (under batteries)
Battery compartment
Mounting spine
Battery cover D-ring
Battery Information
WARNING
The temperature rating for the device may exceed the usable
range of some batteries. Alkaline batteries can rupture at high
temperatures.
NOTICE
Alkaline batteries lose a significant amount of their capacity as
the temperature decreases. Use lithium batteries when
operating the device in below freezing conditions.
Maximizing Battery Life
You can do several things to extend the life of the batteries.
• Reduce the backlight brightness (Adjusting the Backlight
Brightness, page 9).
• Reduce the backlight timeout (Display Settings, page 9).
• Use battery save mode (Turning On Battery Save Mode,
page 1).
• Decrease the map drawing speed (Advanced Map Settings,
page 2).
• Turn off Bluetooth
®
technology (Bluetooth Settings,
page 9).
• Turn off additional satellites (Satellite Settings, page 9).
Turning On Battery Save Mode
You can use battery save mode to prolong the battery life.
From the app drawer, select Setup > Display > Battery
Save > On.
In battery save mode, the screen shuts off when the backlight
times out. You can select to turn on the screen.
Long-Term Storage
When you do not plan to use the device for several months,
remove the batteries. Stored data is not lost when batteries are
removed.
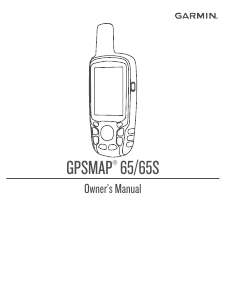
Installing AA Batteries
Instead of the optional NiMH battery pack (Installing a NiMH
Battery Pack, page 1), you can use two alkaline, NiMH, or
lithium batteries. This is useful when you are on the trail and
cannot charge the NiMH battery pack. Use NiMH or lithium
batteries for best results.
1
Turn the D-ring counter-clockwise, and pull up to remove the
cover.
2
Insert two AA batteries, observing polarity.
3
Replace the battery cover, and turn the D-ring clockwise.
4
Hold .
5
Select Setup > System > AA Battery Type.
6
Select Alkaline, Lithium, Traditional NiMH, or Precharged
NiMH.
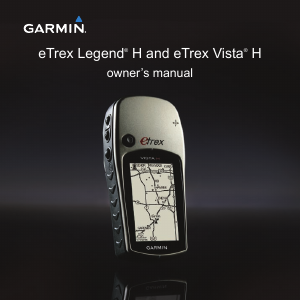
Installing a NiMH Battery Pack
The device operates using a NiMH battery pack (optional) or two
AA batteries (Installing AA Batteries, page 1).
1
Turn the D-ring counter-clockwise, and pull up to remove the
cover.
2
Locate the battery pack .
3
Insert the battery pack, observing polarity.
4
Gently press the battery pack into place.
5
Replace the battery cover, and turn the D-ring clockwise.
Charging the Battery Pack
NOTICE
To prevent corrosion, thoroughly dry the USB port, the weather
cap, and the surrounding area before charging or connecting to
a computer.
Do not attempt to use the device to charge a battery that was
not provided by Garmin
®
. Attempting to charge a battery that
was not provided by Garmin can damage the device and void
the warranty.
Before you can connect the straight connector of the USB cable
to your device, you may need to remove optional mount
accessories.
NOTE: The device does not charge when outside the approved
temperature range (Specifications, page 12).
You can charge the battery using a standard wall outlet or a
USB port on your computer.
1
Pull up the weather cap from the mini-USB port .
Introduction 1


Join the conversation about this product
Here you can share what you think about the Garmin GPSMAP 65 Handheld Navigation. If you have a question, first carefully read the manual. Requesting a manual can be done by using our contact form.