
32
INSTRUCTION MANUAL
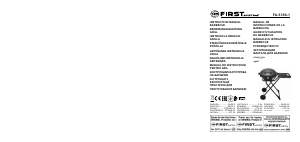
BARBECUE
PLEASE READ THIS INSTRUCTION
CAREFULLY BEFORE USE AND RETAIN FOR
FUTURE REFERENCE
Normal use
• The unit is only intended for grilling suitable
food.
• No other use is permitted! Any liability or
guarantee will cease to apply in the event
of damage caused by incorrect operation,
incorrect use and not observing the safety
regulations.
SAFETY REGULATIONS
• Be careful when you use the unit
• Only connect the unit to an altemating
current supply as per the type plate.
• Do not allow the unit or cable to come into
contact with extremely hot surfaces.
• Do not use the cable rolled up. (this also
applies to any extension cable used)
• The socket must be easily accessible at
any time to ensure that the unit can be
disconnected quickly from the electricity
supply.
• Check the power cable and the unit regularly
for damage.
• Do not use the unit again if the power cable
shows signs of damage or if the unit is itself.
• Danger of injury if necessary remove the
plug carefully and contact your specialist
dealer or customer service.
• The unit should be tted with an RCD and
operated with a nominal residual current
of no more than 30mA. Ask your electrical
installer.
• Do not store or use any easily inammble
materials or sprays near the unit when it is in
use danger of re.
• Do not use the unit in easily combustible
atmospheres (e.g near inammable gases or
spray cans).
• Danger of explosion and re do not use
the unit in rooms with baths, showers or
swimming pools or near wash basins or taps.
• Children or people under the inuence of
drugs or alcohol may only use the unit under
supervision.
• Ensure that children do not have the
opportunity to play with electrical equipment.
• Leave the unit to cool down after use before
you pick it up and put it away.
• Never put plastic parts or any other items
except for the food to be grilled on the grill
rack.
• Watch out of for fat splashing when grilling
meat. Risk of burns
• Do not use any plastic cutlery to put the food
on the grill rack, turn it or remove it.
• The unit must never be used under a running
extractor fan or wall cupboards
• This appliance is not intended for use by
persons (including children) with reduced
physical, sensory or mental capabilities,
or lack of experience and knowledge.
Unless they have been given supervision or
instruction concerning use of the appliances
by a person responsible for their safety.
• If the supply cord is damaged, it must be
replaced by the manufacturer, its service
agent or similarly qualied persons in order
to avoid a hazard.
• Do not operate with an external timer or
remote-control device.
• The connector must be removed before the
appliance is cleaned and that the appliance
inlet must be dried before the appliance is
used again.
• Use only one appliance per plug and always
use an earthed extension cable, with cross
section of at least 1.0mm²
• Only use extension leads after having made
sure that their condition is faultless and use
an earthed wise with a minimum capacity of
10A.
• Put the wire so that unintentional touching or
drawing is impossible.
• Never bring the extension wire in touch with
the hot grill plate.
• Always switch o the appliance before
removing the mains plug.
• Before removing attachments or cleaning the
grill, allow to cool completely.
• Do not use the appliance without the grease
collecting cup or the base.
• Never cover the grill plate with aluminum
foil or trays (this might damage the non-
stick coating)
• Make sure without fail that the device is
installed correctly before you put this into
operation (rst of all if using the trolley).
• Please, ensure that the grill plate must not
touch the heating element-injury danger!
• Place the appliance on a surface that is
resistant to heat. Keep the electric grill at
least 10 cm from any walls when in operation.
• The operating instructions belong to the unit
and must be handed over too if the unit is
passed on.
• Do not use any accessories that are not
expressly approved by the manufacturer.
ASSEMBLING THE UNIT (Fig. 1-14)
1. Take the trolley frame and accessories out
from the packing box. Please make sure that
the trolley frame is placed on a dry, at and
stable surface.
Then let the wheel axle (a) pass through two
holes which are at the end side of the tube.
Set the frame supporter (Z1) to the curved
pipe, x the frame Supporter and pipe with
two M4*6 screws (screws accessories B).
Left and right side are the same setting
method
2. Attach the wheels (b) with the two sides of
the axle (a) respectively.
3. There are two mounting holes on each end
side of the axle (a), insert the “R” pin (c)
through the holes. This will lock the wheels.
4. Press the wheel covers (d) to the wheels (b)
according to those three location tips.
5. Stand up the trolley: First, step on the
middle of supporting tube (I) with right foot,
lift up the side table (II) with right hand whilst
lift the tube for wheel (III) upward with left
hand. Then locate the tube (III) with the
orientation tube which under the side table.
The trolley frame is standing up now.
Fold up the trolley: First, step on the middle
of support tube (I) with right foot, hold up the
side table (II) with right hand whilst your left
hand holds the short edge of support tube
(III) and place it down slowly.
Attention: When folding up the trolley, DON’T
hold the two sides of tube (III) to avoid any
pinch to your hand.
6. After standing up the trolley frame, you
MUST set the safety locking unit (f)
immediately. This safety locking unit is with
self-locking feature. Press the spring (e)
and hook the bent hook (f) on the extension
part (e). Then stop pressing the spring and
it will retract to lock the safety hook unit
automatically.
Attention: Make sure the safety hook unit is
LOCKED during cooking or moving. DO NOT
try to turn or pull the safety hook while using
this appliance.
7. Install the stand tube (g) onto the trolley
tube (II). There is a positioning hole (IV) on
the stand tube (g), which is going to x the
buttom positioning projection of base.
Tighten the stand tube (g) and trolley with
screws and nuts.
8. Set the bowl-shaped base (h ) into the
stand tube (g) to the bottom. Fix the buttom
positioning projection of base into the
positioning hole (IV).
When remove the base from stand tube (g),
please step slightly on the supporting tube
(I), hold the handles of base and take it o.
9. Insert the grease collecting cup (j) into the
bracket supplied for it in the back of bowl-
shaped base (h) of the appliance, in order to
x it well, please buckle the hole on grease
collecting cup into the positioning projection
which is in the middle of the bowl-shaped
base. (Tips: This grease cup can be lled
with little water to make it more easier to
clean).
To get the grease collecting cup out, please
give the it a Slight press, after depart the hole
from the positioning projection, you can take
it out easily.
The screw in buttery shape (N3) is to set the
main griller and frame together.
Attention: The capacity of grease cup is 0.3L,
please pour out the grease once it’s full. The
surface of grease cup is HOT. Please well
protect yourself if needed to touch it while
cooking!
10. Place the grill plate (K) on the base of the
appliance (H). Firstly, insert the heating tube
socket (L) of grill plate into the protective hole
(M) intended for it slantways. Secondly, set
the grill plate horizontally on the appliance
base.
To take grill plate o, please hold up the right
side of the plate and take the pull socket
(L) out of the protective hole (M) slantways.
Before take the grill plate out, make sure it is
cool and not in use.
Attention: The grill plate must be used
together with Bowl-shaped base!
11. Insert the detachable temperature regulator‘s
pin (n) into the heating tube socket (L), it can
plug in the appliance.
When remove the detachable temperature
regulator, please hold the handle of the base
to avoid pushing over the appliance.
Attention: Please take care DON’T be tripped
over by the power cord when operating the
appliance.
Remember to remove the plug after use.
12. Install the cover. Holds the cover handle
(p) and insert the metal plates (o) into the
installation holes (Q) of base.
When remove the cover, please open the
cover and tilt to 45° between cover and grill
plate, and detach out the metal plates (o)
from installation holes (Q). Other angles can
not help to detach the cover but only around
45°.
13. The design of clamshell function and
detachable of this cover makes it more
convenient for using and cleaning.
Attention: If user want to close or open the
cover, please hold the cover handle. Be
careful not to burn yourself as the metal
cover is HOT while cooking.
ENGLISH
ENGLISH
Set the frame supporter (Z1) to the curved pipe, x the frame
Supporter and pipe with two M4*6 screws. Left and right side
are the same setting method



Join the conversation about this product
Here you can share what you think about the First Austria FA-5350-1 Barbecue. If you have a question, first carefully read the manual. Requesting a manual can be done by using our contact form.