
ENG
OPERATING MANUAL
SMOKE SENSOR
FGSS-001-EN-A-v1.01
The Fibaro Smoke Sensor is a universal, optical Z-Wave smoke sensor. The
device can be hard wired (12 or 24 VDC) or battery operated (battery life 3 years*).
Smoke detection is signaled through siren and LED diode blinking. Additionally, the
smoke sensor signal can be sent to an alarm system or fire alarm system hub,
through a NC (normally closed) contact terminals.
The optical sensor detects smoke at an early stage of fire, often before flames
appear and temperature starts to rise significantly. Moreover the device has a
built-in temperature sensor, which can also trigger the alarm once the specified
temperatute threshold is exceeded.
The Fibaro Smoke Sensor is designed to be placed on a wall or ceiling. LED
indicator signals fire, operating mode and used to see if device is within the
Z-Wave network. The smoke sensor is designed to operate in confined spaces,
under normal conditions (lacking smoke, dust, condensed water vapor).
SPECIFICATIONS
Power Supply:
Battery Type:
Power Consumption
(at VDC operation):
Output terminals maximum current
carrying capacity
(SMOKE NC, TAMP NC):
Maximum voltage at output terminals
(SMOKE NC, TAMP NC):
EU standards compliance:
Radio protocol:
Radio frequency:
Range:
Operational Temperature:
Measured Temperature Range:
Temperature Measuring Accuracy:
Dimensions (Diameter x Height):
12 - 24 VDC
CR123A
0,4W
25mA
24V (AC or DC)
EMC 2004/108/EC
R&TTE 1999/5/WE
Z - Wave
868,4 MHz EU;
908,4 MHz US;
921,4 MHz ANZ;
869,2 MHz RU;
up to 50m outdoors
up to 30m indoors
(depending on terrain and building
structure)
0 - 40
o
C
-20 to 100
o
C
0,5
o
C (within 0
o
C - 40
o
C range)
65 x 28 mm
TECHNICAL INFORMATION
• Compatible with any Z-Wave Controller.
• May be connected to any alarm or fire prevention system by hard wiring NC
output
• Extremely easy installation - simply install it in location prone to fire.
• Battery or VDC powered.
• Built-in tamper switch.
• Alarm is signaled by sound and LED diode.
• Fire detection through air temperature measuring.
• Can trigger alarm just by exceeding temperature threshold.
• 3 levels of sensors sensitivity.
• Automatic efficiency test performed every 5 seconds.
• Built-in “black box” allows the device to report and record smoke and temperature
readouts.
I. Z-WAVE NETWORK INCLUSION
There are two ways to include a Fibaro Smoke Sensor into the Z-Wave network:
1) Automatically, using the auto inclusion function (available in constant current
powering mode), or
2) Manually - using the B-button (option available in both powering modes -
hard wired or battery powered).
Including a Fibaro Smoke Sensor into the Z-Wave network in auto inclusion mode:
1) Make sure the Fibaro Smoke Sensor’s power is disconnected and/or the battery
is removed prior to auto inclusion and located within the direct range of Z-Wave
controller.
2) Set the main controller into the learning mode
(see main controller’s operating manual).
3) Connect the power to the sensor to include it into the Z-Wave network.
4) Fibaro Smoke Sensor will be detected and included into the Z-Wave network.
III. SENSOR INSTALLATION
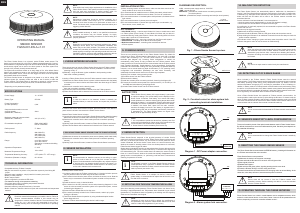
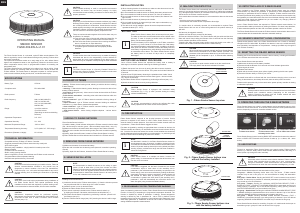
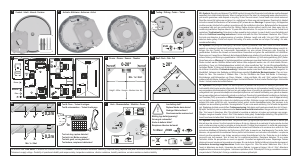
Fig. 1 - Fibaro Smoke Sensor top view.
BATTERY TIPS
Fibaro Smoke Sensor’s battery life is approximately 3 years when
on optimum settings. The current battery level is displayed in the
Home Center 2 interface. Red battery icon means that battery
needs replacement. In order to avoid triggering tamper alarm while
replacing the battery, 2-nd association group’s associations must
be deleted, and Sensor’s parameters’ configuration set to default.
In addition, the device itself, apart from the main controller,
monitors the battery level and a low battery is signaled with a
yellow blinking LED and an intermittent sound alarm (interval set
in parameter 87). The Fibaro Smoke Sensor can signal a low
battery level for approximately 30 days.
i
IV. POWERING MODES
There are two powering modes for the Fibaro Smoke Sensor. By default it’s
powered by a factory included battery. Alternatively it can work with a constant
current, after connecting a 12 / 24 VDC power source to +12/24 and GND
terminals (see diagram #3). Powering mode configuration is carried out
automatically, while sensor is being included into the Z-Wave network. When
battery powered, a Fibaro Smoke Sensor communicates with the Z-Wave network
main controller periodically. Smoke detection is sent immediately. Configuration
parameters and association settings are sent periodically at specified wake up
intervals, or at a manual wake up (triple click B-button). In DC powering mode,
configuration and association parameters are sent when necessary, and
additionally the smoke sensor serves as a Z-Wave signal repeater.
Switching to a constant current powering mode:
1) Exclude a sensor from the Z-Wave network.
2) Disconnect the battery,
3) Install the constant power connecting terminal, observing the diagram #3.
4) Connect the constant current power to the power terminal (12 / 24 VDC) to +12
and GND terminals observing wiring diagram #3.
5) Include Fibaro Smoke Sensor into the Z-Wave network.
NOTE
1. It’s not possible to power the device from a battery and VDC
power source simultaneously. When using a VDC power souce it’s
recommended to use another kind of power back up.
2. Home Center 2 checks the battery level once a day.
NOTE
Read this manual before attempting to install the device. Failure to
observe recommendations included in this manual may be
dangerous or cause a violation of the law. The manufacturer, Fibar
Group Sp. z o.o., will not be held responsible for any loss or
damage resulting from not following the instructions of operating
manual.
NOTE
Work within local code height requirements for installation of the
Fibaro Smoke Sensor. Take special precautions during installation
and use tools and equipment in perfect working order. It’s
recommended to observe ladders, lifts and other obstacles.
NOTE
Maintenance inspections should be perfomed regularly, by a
trained staff member. Fibar Group Sp. z o.o. recommends the
functional and visual checks to be performed at least once a
month. Functional check, includes self test (described below) and
triggering smoke detection.
NOTE
When handled carelessly or used in non-specified environment
conditions, the device may not function properly. It’s highly
recommended to take all safety precautions to ensure safety and
property protection.
NOTE
Depending on the Smoke Sensors internal conditions (e.g. battery
discharge, device failure, etc.) and installation conditions, this
device may not be 100% accurate. This device can significanlty
increase the probability of fire detection. Smoke Sensors must be
tested regularly according to this operating manual and local code.
Ventilation systems, chimneys and potentially dangerous devices
that can cause a fire should be regularly inspected as well.
NOTE
In case the device is not detected, include it manually (as
described below) or reset the sensor and repeat the procedure
above.
i
In order to turn off the auto inclusion function, press the B-button once after the
power source has been connected to the Fibaro Smoke Sensor.
Manual Fibaro Smoke Sensor inclusion:
1) Connect the power source to the Fibaro Smoke Detctor and/or install the battery.
Make sure the device is located within direct range of the Z-Wave controller.
2) Set the main controller into the learn mode (see main controller’s operating
manual).
3) Quickly, triple click the B-button, located on Fibaro Smoke Sensor’s enclosure.
4) Fibaro Smoke Sensor will be detected and included in the Z-Wave network.
II. EXCLUDING FIBARO SMOKE SENSOR FROM THE Z-WAVE NETWORK
1) Make sure the sensor is connected to power source (battery and/or hard wired).
2) Set the main controller into the learn mode (see main controller’s operating
manual)
3) Quickly, triple click the B-button, located on Fibaro Smoke Sensor’s enclosure.
!
!
!
!
!
NOTE
It’s recommended to install the sensor on the ceiling or upper
portion of wall at least 40 cm (2 feet) from corners and other
objects. Particular attention should be paid to any adjacent objects
or devices which can impede smoke’s access to the sensor. It’s
recommended to install Fibaro Smoke Sensor in all rooms prone
to fire, and in between such rooms as well.
i
INSTALLATION NOTES:
1) When choosing location of smoke sensor, make sure the alarm sound can be
easily audible in other rooms in the building.
2) It’s recommended to install the sensor in already decorated, painted rooms.
3) It’s recommended to install the sensor at least 1,5m from air conditioners.
4) Do not install the sensor in insolated places. Keep at least 0,5m distance from
light sources.
5) Do not install the sensor in places prone to draughts.
6) Do not install the sensor in places with high water vapor condensation, e.g.
above stoves, ovens, kettles, etc.
Diagram 1 - DC Power adapter connection.
Diagram 2 - Alarm system hub connection.
DIAGRAMS DESCRIPTION:
+12V - constant power supply terminal, 12/24VDC
-GND - ground terminal
SMOKE NC - potential free, smoke sensor connecting terminals
(for wired systems)
TAMP NC - potential free, tamper connecting terminals (for wired systems).
!
V. SMOKE DETECTION
Fibaro Smoke Sensor responds to the physical presence of smoke. Smoke
presence is required for the device to react. Fibaro Smoke Sensor performs a self
test every 5 seconds (see section VII) and checks for smoke presence. When
smoke is detected, the sensor checks 3 more times, at 1 second interval to see,
whether the smoke is actually present. Once the smoke presence is confirmed,
Fibaro Smoke Sensor triggers an alarm.
Smoke alarm is signaled by sending an appropriate alarm frame to devices and the
Z-Wave controller, opening NC contact, and also by a constant sound signal and
LED diode blinking red. Once the smoke alarm has ceased, the sensor checks 3
times, at 1 second interval, whether the smoke has actually disappeared before
getting back to normal operation, i.e. performing a self test each 5 seconds and
checking for presence of smoke.
NOTE
As described in section V, the Fibaro Smoke Sensor checks for
smoke presence every 5 seconds. In addition, the device checks
for damage and tests the Z-Wave network communication at each
wake up interval (see section VIII).
NOTE
Fibaro Smoke Sensor is a multiple use device, however, for
greater safety, it’s recommended to replace the device with a new
one after a fire occurance.
!
i
VI. DETECTING FIRE THROUGH TEMPERATURE ALARM
Apart from detecting smoke presence, Fibaro Smoke Sensor can detect fire by
recording a rapid temperature rise. Temperature alarm threshold is user defined
(parameter 81). Temperature alarm is signaled by the blinking red LED signaling
diode and an intermittent sound signal.
NOTE
Parameter 81 value is set to 54ºC by default. Any modification of
this parameter may cause the Fibaro Smoke Sensor not to work
within the valid safety regulations of your country.
!
VII. MALFUNCTION DETECTION
The Fibaro Smoke Sensor can automatically detect a malfunction. As described in
section V, the Fibaro Smoke Sensor performs a self test every 5 seconds. If a malfunction
is detected (e.g. damaged smoke chamber) an intermittent sound alarm will start, LED
diode will blink red and alarm will be sent to the Z-Wave network controller and
associated devices.
Once a malfunction has been detected, it’s recommended to:
• check the power source (replace battery or check VDC adapter’s voltage),
• check whether the Smoke Sensor is exposed to direct light.
If a malfunction is continually reported, it’s recommended to replace a the Fibaro Smoke
Sensor with new one.
Self test may be triggered manually:
1) Make sure the device is being powered.
2) Press and hold the B-button untill the LED glows white and short alarm sounds.
3) Keep holding the B-button for an additional 3 seconds from the first beep to check the
smoke chamber operation.
LED indicator colour changing to green and beep mean the positive result. If the LED
indicator changes its colour to red, the sensor is malfunctioning.
NOTE
Any service or repair must be carried out by the manufacturer.
!
VIII. DETECTING OUT OF Z-WAVE RANGE
When included in the Z-Wave network, Fibaro Smoke Sensor tests the network
communication. The Z-Wave network communication test is performed in both hard wired
and battery powering modes during every temperature report. By default, once the
ambient temperature changes by 2ºC, according to parameters 10 and 12 settings. In
addition, in battery mode, the Z-Wave network communication test is performed by poling
the device. In hard wired mode, the Z-Wave network communication test is performed in
time intervals defined by parameter 80 settings. Lack of the Z-Wave network communica-
tion is signaled by an intermittent alarm sound and LED blinking pink.
Once a Fibaro Smoke Sensor has reported no Z-Wave network communication, it’s
recommended to wake up the device by triple clicking the B-button. If it doesn’t stop the
alarm, Z-Wave networks operation and the main controllers operation need to be verified.
The Fibaro Smoke Sensor will cancel the Z-Wave network communication alarm once it
communicates with the network after manual or automatic wake up.
NOTE
It’s not recommended to deactivate the Z-Wave network communication
test.
IX. SENSOR’S SENSITIVITY LEVEL CONFIGURATION
There are 3 sensitivity levels of the optical smoke detector used in Fibaro Smoke Sensor.
By default, the detector is set to the middle sensitivity level. Sensitivity level depends on
the parameter 82 settings.
X. RESETTING THE FIBARO SMOKE SENSOR
The Fibaro Smoke Sensor reset erases the EPROM memory, including all information on
the Z-Wave network and the main controller.
Fibaro Smoke Sensor reset procedure:
1) Make sure the device has the power connected.
2) Press and hold the B-button for 3 seconds. LED will glow white.
3) Short signal will sound.
4) Release the B-button.
5) Wait until the LED glows yellow, signaling entering the 4th menu level.
6) Press the B-button briefly to confirm menu level choice.
Successful reset will be confirmed with the LED changing colour to red and fading. At the
same time, short beep will sound, same as at the power connection.
XI. OPERATING THROUGH THE Z-WAVE NETWORK
Fibaro Smoke Sensor has a built in smoke detector and a temperature sensor, which
makes it a multi channel device. In the Home Center 2 menu it will be presented as two
devices, depending on the main controller software version*:
!
Fig. 2 - Constant current or alarm system hub
connecting terminals installation.
AUX COM Z1 Z2
ALARM
SYTEM HUB
+12/24
GND
SMOKE
NC
TAMP
NC
12/24 VDC
ADAPTER
+
GND
+12/24
GND
SMOKE
NC
TAMP
NC
NOTE
It’s not recommended to change the Fibaro Smoke Sensor’s sensitivity
level.
!
B - button
and LED indicator
TMP
TMP
NOTE
When the self test is triggered manually, the Fibaro Smoke Sensor sends
the command frame to the Z-Wave network controller and to the 1st
Association group devices. After 3 seconds from releasing the B-button,
the alarm cancelling command frame will be sent and the procedure will
be finished.
!
Installing Fibaro Smoke Sensor
1) Include the device into the Z-Wave network (see p.I). Note the inclusion process
may be performed ONLY in direct range of the main controller.
2) If the sensor is hard wired to power source, drill holes in sensor’s cover. Note the
sensor may be connected to a wired alarm system controller or fire prevention
system.
3) Install the sensor’s cover in desired location.
4) If the sensor is to be VDC powered, connect wires observing diagram # 3. If the
sensor is to be connected to an alarm system or fire prevention system, connect
it observing the diagram # 4.
5) Screw the Fibaro Smoke Sensor into the cover.
6) If the sensor is already included in the Z-Wave network, wake it up by triple
clicking the B-button..
7) Test Fibaro Smoke Sensor’s operation by using a dedicated optical smoke
sensor diagnostic tool.
8) Test the Z-Wave network assuring the device is within range.
* Depending on the parameters settings.
Drill holes here
NOTE
Device reset will not remove it from the Z-Wave network main
controller’s memory. Before resetting the device, it must be excluded
from the Z-Wave network.
!
DICTIONARY:
• INCLUSION (Adding) - a device sends "Node Info" frame, to enable user to add
it to Fibaro system (Home Center). To send Node Info frame and put device in
permanent listening mode press B button 3 times. After sending Node Info frame
device waits 5 seconds for Z-Wave frames.
• EXCLUSION (Removing) - removing a device from the Fibaro radio system.
• ASSOCIATION - controlling other devices of Fibaro system
• MultiChannelAssociation - controlling other multichannel devices.
of Fibaro system.



Join the conversation about this product
Here you can share what you think about the Fibaro FGSS-001 Smoke Detector. If you have a question, first carefully read the manual. Requesting a manual can be done by using our contact form.