For F45 filter replacement, please call 1-800-321-1134 or visit our website at
www.dirtdevil.com to locate a dealer nearest you.
1. Plug unit in firmly.
2. Check fuse or breaker. Replace fuse/reset breaker.
3. Take to a Service Center or call 1-800-321-1134.
4. Unplug cleaner.Allow to cool for 30 minutes.
1. Review dirt container removal and replacement.
2. Empty dirt container.
3. Remove filter and clean.
4. Remove nozzle; remove obstruction OR Check nozzle
hose; remove obstruction.
1. Empty dirt container.
2. Review dirt container removal and replacement.
3. Review hose installation.
1. Remove hose and tools; remove obstruction.
2. Remove hose and clean inlet.
3. Empty dirt container.
4. Clean filter.
5. Review turbo tool clog removal.
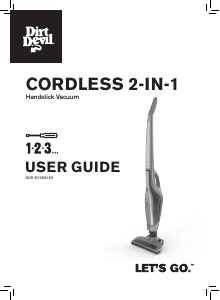
MODE D’EMPLOI
• Veuillez lire attentivement ces instructions avant d’utiliser votre aspirateur
chariot sans sac Dirt Devil
®
.
• Nous pouvons vous aider à assembler cet appareil et répondre à vos
questions, pour cela composez le :
1-800-321-1134 (Canada et États-Unis) • site Web : w w w . d i r t d e v i l . c o m
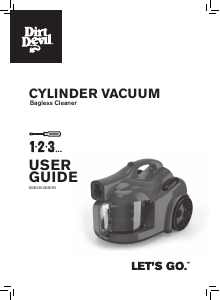
INSTRUCTION MANUAL
• Please read these instructions carefully before using your Dirt Devil
®
Bagless
Canister.
• Let us help you put your cleaner together or answer any questions, call:
1-800-321-1134 (USA & Canada) • website: www.dirtdevil.com
THIS VACUUM IS INTENDED FOR HOUSEHOLD USE ONLY.
IMPORTANT SAFETY INSTRUCTIONS
When using an electrical ap p l i a n c e , basic precautions should always be follow e d ,
including the following:
• READ ALL INSTRUCTIONS BEFORE USING THIS APPLIANCE.
• ALWAYS FOLLOW THESE SAFETY INSTRUCTIONS.
• DO NOT LEAVE VACUUM CLEANER UNATTENDED.
• WARNING: FULLY ASSEMBLE VACUUM CLEANER BEFORE OPERATING.
• WARNING: THE CORDS, WIRES AND/OR CABLES SUPPLIED WITH THIS
PRODUCT CONTAINS CHEMICA L S , INCLUDING LEAD OR LEAD COMPOUNDS,
KNOWN TO THE STATE OF CALIFORNIA TO CAUSE CANCER AND BIRTH
DEFECTS OR OTHER REPRODUCTIVE HARM. WASH HANDS AFTER USING.
WARNING: TO REDUCE THE RISK OF FIRE,
ELECTRIC SHOCK OR INJURY:
• Do not leave appliance when plugged in. Unplug from outlet when not in use and
before servicing.
• Do not use outdoors or on wet surfaces.
• Do not allow to be used as a toy. Close attention is necessary when used by or near children.
• Use only as described in this manual.Use only manufacturer’s recommended at t a c h m e n t s .
• Do not use with damaged cord or plug. If appliance is not working as it should, has
been dropped, damaged, left outdoors, or dropped into water, return it to a service
center for inspection. Call 1-800-321-1134 for the nearest service center.
• Do not handle plug or appliance with wet hands.
• Do not pull or carry by cord, use cord as a
handle, close a door on cord, or pull cord
around sharp edges or corners. Do not run appliance over cord. Keep cord away from
heated surfaces.
• Do not unplug by pulling on cord.To unplug, grasp the plug, not the cord.
• Do not put any object into openings. Do not use with any opening blocked; keep free
of dust, lint, hair and anything that may reduce air flow.
• Keep hair,loose cl o t h i n g , f i n g e r s , and all parts of body away from openings and moving parts.
• Turn off all controls before unplugging.
• Use extra care when cleaning on stairs.
• Look on your vacuum cleaner and follow all label and marking instructions.
• Do not use an extension cord with this cleaner.
• Keep end of hose, wands and other openings away from your face and body. Keep
your hands, feet, hair and clothing away from moving parts.
• Do not use the vacuum cleaner without dirt container and/or filter in place.
• Do not use to pick up flammable or combustible liquids, such as gasoline, or use in
areas where they may be present.
• Store the vacuum cleaner indoors. Put the vacuum cleaner away after use to prevent
tripping accidents.
• Do not pick up anything that is burning or smoking, such as cigarettes,m atches or hot ashes.
• Unplug before connecting turbo tool.
• Hold plug when rewinding onto cord reel. Do not allow plug to whip when rewinding.
SAVE THESE INSTRUCTIONS
FEATURES
TROUBLESHOOTING GUIDE
LIMITED WARRANTY
To the con sumer, R oyal Appliance M fg. C o . warrant s this vacuum cleaner to be free of def ects in material or workmanship
commen cing u pon the date of the original purchase. Refer t o your vacu um cleaner carton for the leng th of warranty and
s a ve you r original sales receipt to validate start of warranty period.
If the vacuum cleaner s hould become defective within t he warranty period, we will repair or replace any defective part s free
of charge. The complete m achine must be delivered
p r e p a i d to any ROYAL Auth oriz ed Sales & Warran ty Service Stat i o n .
Please include com plete description of the problem, day of pu rchase, copy of original sales receipt and your name, a d d r e s s
and telephone number. If you are not near a Warrant y Stat i o n , call the factory for assistance at USA:
1-800-32 1-1134 / CANADA: 1 - 8 0 0 - 3 2 1 - 1 1 3 4 . Use on ly g enuine Roya l
®
replacement part s.
The warranty does not includ e unusual wear, d a m age res ulting from accident or unreasonab le us e of the v acuum cl e a n e r.
This warranty does not cover belts, b r u s h e s , b ag s , f i l t e r s , bulbs or fan d amag e . This warranty does not cover unauthoriz ed
r e p a i r s . This warranty gives you specific legal right s and you m ay also have other rig hts. (O ther rights may vary from stat e
to st ate in the USA).
For quick reference, please record your
vacuum information below.
Model #:
Mfg. Code:
(Mfg. code located on the lower backside of cleaner)
ANY OTHER SERVICING SHOULD BE DONE BY AN AUTHORIZED SERVICE REPRESENTAT I V E
CUSTOMER SERVICE (1-800-321-1134)
In the event that fur ther assistanc e is required, see your Ye l l ow Pages for an authorized Roya l
®
D e a l e r. Costs of any
t r a n s p o r t a tion to and from any place of repair are to be pa id by the ow n e r . The service parts used in this unit are easily
replaced and readily available from an authorized Royal
®
Dealer or retailer. Always identify your cleaner by the model
number and manufacturing code when requesting information or ordering replacement parts. (The model number appears
on the bottom of the cleaner.)
Part # 1-113900-000 • 5/08
N° de référence 1-113900-000 • 5/08
No. de Parte 1-113900-000 • 5/08
AVERTISSEMENT :
L’assemblage de l’appareil comprend
des petites pièces. Ces dernières
présentent un danger d’étouffement.
FRANÇAIS
MANUAL DE INSTRUCCIONES
• Por favor lea estas instrucciones con cuidado antes de usar su aspiradora s i n
b o l s a Dirt Devil
®
.
• Permítanos ayudarle a ensamblar su aspiradora o a contestar sus preguntas, llame al:
1-800-321-1134 (EE.UU. y Canadá) • Sitio Web: www.dirtdevil.com
ADVERTENCIA:
El ensamble de la aspiradora puede incl u i r
partes pequeñas. Las partes pequeñas
pueden presentar riesgo de ahogamiento.
Para tener una referencia rápida, anote por favor
la información de su aspiradora aquí.
No. de modelo:
Código de fabricante:
(El código del fabricante aparece en la parte posterior e inferior
de la aspiradora).
WARNING:
Cleaner assembly may include
small parts. Small parts can
present a choking hazard.
Consignez les renseignements ci-dessous pour
pouvoir les consulter rapidement.
Nº de modèle :
Code de fabrication :
(Le code de fabrication se trouve sur la partie inférieure arrière
de l’aspirateur)
ATTACHMENTS
PROBLEM POSSIBLE REASON POSSIBLE SOLUTION
1. Power cord not firmly plugged into
outlet.
2. Blown fuse or tripped breaker.
3. Needs service.
4. Thermal Protector activated.
1. Dirt container not installed correctly.
2. Dirt container is full.
3. Filter clogged .
4. Nozzle/dirt passage clogged.
1. Dirt container is full.
2. Dirt container not installed correctly.
3. Hose not installed correctly.
1. Hose clogged.
2. Hose inlet clogged.
3. Dirt container is full.
4. Filter clogged.
5. Turbo tool clogged.
Cleaner won’t run
Cleaner won’t
pick-up or low
suction
Dust escaping
from cleaner
Cleaner tools won’t
pick up
CET ASPIRATEUR A ÉTÉ CONÇU POUR USAGE DOMESTIQUE SEULEMENT.
CONSIGNES DE SÉCURITÉ IMPORTANTES
Lorsque vous utilisez un appareil électrique, vous devez toujours respecter certaines
consignes de sécurité, dont les suivantes :
• LISEZ TOUTES LES INSTRUCTIONS AVANT D’UTILISER CET APPAREIL.
• RESPECTEZ TOUJOURS À LA LETTRE CES INSTRUCTIONS DE SÉCURITÉ.
• NE LAISSEZ PAS L’ASPIRATEUR SANS SURVEILLANCE.
• AVERTISSEMENT : ASSEMBLEZ ENTIÈREMENT L’ASPIRATEUR AVANT DE
LE METTRE EN MARCHE.
• AV E RTISSEMENT : LES CORDONS, FILS ÉLECTRIQUES ET/OU CÂBLE
FOURNIS AVEC CE PRODUIT CONTIENNENT DES PRODUITS CHIMIQUES Y
COMPRIS DU PLOMB OU DES COMPOSÉS DU PLOMB CONNU PAR L’ÉTAT
DE CALIFORNIE POUR SON EFFET CANCÉRIGÈNE, POUVANT ENTRAÎNER
DES MALFORMATIONS CONGÉNITALES ET ENDOMMAGER LES ORGANES
DE REPRODUCTION. LAVEZ-VOUS LES MAINS APRÈS TOUTE UTILISATION.
AV E R T I S S E M E N T: POUR RÉDUIRE LES RISQUES
D ’ I N C E N D I E , DE CHOC ÉLECTRIQUE ET DE LÉSION :
• Ne pas quitter l'appareil lorsqu'il est branché. Débrancher de la prise lorsqu'il n'est
pas utilisé et avant entretien.
• Ne pas utiliser dehors ou sur des surfaces mouillées.
Hold hose and match tabs to
align with slot inlets of canister.
Insert hose. Push firmly until
hose locks into place.
Choose any of the
h a n d y acces-
sories to meet
yo ur va riou s
cleaning needs.
Then simply push
it firmly onto the
hose or wand end.
1.
2.
2.
1.
WARNING:
To reduce the risk of electric shock, this appliance has a polarized plug (one blade is wider
than the other). This plug will fit in a polarized outlet only one way. If the plug does not fit fully
in the outlet, reverse the plug. If it still does not fit, contact a qualified electrician to install the
proper outlet. Do not change the plug in any way.
This vacuum cleaner is equipped with a motor protective thermostat. If for some reason your
vacuum overheats, unplug the vacuum from the wall outlet and turn off the switch. Replace
dust bag or empty dust cup and clean filter.Check for blockages in hoses and/or suction inlet.
A l l ow the unit to cool for a minimum of 45 minute s prior to restarting the unit. To resta rt;
re-plug the vacuum into the wall socket and turn the switc h back on.
Attach filter assembly to dirt
container by pushing forward
until it locks into place. Close
lid on the canister.
Replace dirt container by pushing downward
until it locks into place.
4.
3.
AVERTISSEMENT :
Afin de réduire les risques de décharge électrique, cet appareil est muni d’une fiche polarisée
(une tige est plus large que l’autre). Cette fiche ne peut être insérée dans une prise de courant
polarisée que dans un sens. Si la fiche ne s’insère pas complètement dans la prise, i n v e r s e z - l a .
Si elle ne s’insère toujours pas, demandez à un électricien qualifié d’installer la prise ap p r o p r i é e .
Ne modifiez jamais la fiche.
Le moteur de cet aspirateur est protégé par un thermostat. En cas de surchauffe, débranchez
l ’ a s p i r ateu r et mettez l’interrupteur en position arrêt. Remplacez le sac à poussière et nettoyez le
f i l t r e . Vérifiez que les tuyaux et/ou l’orifice d’aspiration ne sont pas obstrués. Laissez l’aspirat e u r
refroidir pendant 45 minutes au minimum avant de l’utiliser. Pour redémarrer l’apirateur,
branchez-le et mettez l’interrupteur en position marche.
WARNING: TO REDUCE THE RISK OF INJURY FROM MOVING PARTS - UNPLUG VACUUM BEFORE SERVICING.
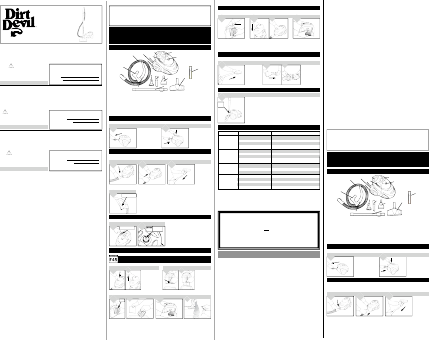
HOW TO OPERATE
DIRT CONTAINER & FILTER: REMOVAL & REPLACEMENT
D I R T CONTAINER & FILTER REMOVAL & REPLACEMENT: CONTINUED
TURBO TOOL: CLOG REMOVAL
Grasp filter tab (Diagram 1) and pull out of dirt con-
t a i n e r. N OT E : For best results, t ap filter ag a i n s t
wastebasket to remove remaining dirt.
1a.
4a.
Remove secon dary fi lter by
pushing down on the filter door
tab and pulling away from the
cleaner.
2.
Before replacing filter, s h a k e
di rt from fil ter by ta p p i n g
against edge of garba ge can or
rinse filter with clean wat e r.
NOTE: Filter must be complete-
ly dry before replacing.
1.
1a.
Grasp handle and
press button with
thumb (Diagram 1).
Lift the dirt contain-
er up and out.w h i l e
holding handle and
pr essi ng bu tton
( D i agram 1a).
Hold dirt contain-
er over wastebas-
ket and press dirt
container empty
button on bottom
of dirt container.
1. 1.
1a.
1.
REMOVE FILTERS
With unit turned
o f f , remove turbo
tool by pulling it
off the end of the
extension wand.
Remove ring on turbo
tool (Diagram 2), p u l l
open and remove cl o g
( D i agr am 2a). S n ap
back into place when
finished and replace
r i n g .
2.
1.
12
16
10
14
15
9
8
11
4
5
3
7
1. Carry Handle
2. On/Off Switch
3. Cord Rewind
4. Dirt Container Release
Button
5. Filter Door
6. Wheel
7. Hose
8. Floor Nozzle
9. Handle Grip
10. Extension Wand
11. Pet Upholstery Tool
12. Crevice Tool
13. Pet Turbo Tool*
14. Tool Storage
15. Pet Tool Adapter*
16. Wand Storage Clip
*must first connect pet tool
adapter to hose when using
pet tools.
6
2
To release cord, p u l l
outward from storag e
location. Do not pull out
past the red tape.
To rewind cord, p u s h
d o wn on cord rewind but-
t o n . Hold on to the plug
while cord is rewinding to
prevent cord from whip-
p i n g .
1.
CORD RELEASE / REWIND
1.
CORD RELEASE CORD REWIND
WARNING: TO REDUCE THE RISK OF INJURY - UNPLUG CLEANER BEFORE REMOVING OR INSTALLING HOSE.
HOSE INSTALLATION AND REMOVAL
ON/OFF SWITCH OPTIONS
ATTACHMENT INSTALLATION
DIRT CONTAINER REMOVAL EMPTY DIRT CONTAINER
ATTACHMENT INSTALLATION AND REMOVAL
1. The hose can be used alone or with many combinations of wands and tools.
2. To store attachments on the unit, simply lock them into the tool storage area
located beneath the handle grip.
3. To remove the tool, pull apart gently. To unlock the wand, rotate and then pull apart.
NOTE: Please follow these instructions for attaching all other accessories.
WARNING: TO REDUCE THE RISK OF INJURY FROM MOVING PARTS - UNPLUG CLEANER BEFORE SERVICING.
1. Plug power cord into outlet.
2. Attach hose and desired a ttachment.
3. Turn power on (ON/OFF switch located on
canister body).
NOTE: For cleaning drapes, throw rugs, or other
l o o s e i t e m s , y ou may need to redu ce the suction to
prevent sucking the item into the cleaning tool. To
reduce suction, adjust speed control located on
canister body.
ON/OFF SWITCH
TOOL STORAGE
SPEED
CONTROL
TAB
STORAGE
BEFORE STORING CLEANER:
1. Turn unit off.
2. Unplug and rewind power cord.
3. Place tools in tool storage located under handle grip.
4. Collapse extension wands and place them into the storage wand clip.
1.
13
1a.
WAND
CLIP
• Ne pas permettre qu'il soit utilisé comme jouet. Être particulièrement attentif lors de
l'utilisation par des enfants ou à leur proximité.
• Ne l'utiliser que tel que décrit dans ce manuel.
• Ne pas utiliser avec un cordon ou une prise endommagés. Si l'appareil ne fonctionne
pas de façon satisfaisante,s'il est tombé, s'il a été endommagé, laissé dehors ou s'il
est tombé dans de l'eau, le retourner à un centre de service après-vente. Appeler le
1-800-321-1134 pour obtenir le centre de service après-vente le plus proche.
• Ne pas tirer sur le cordon électrique ou porter l'aspirateur par le cordon. Ne pas utiliser
le cordon comme poignée, ne pas fermer de porte sur le cordon et ne pas entourer le
cordon autour de bords tranchants ou dans des coins. Ne pas passer l'appareil sur le
cordon. Tenir le cordon à distance des surfaces chauffées.
• Ne pas débrancher en tirant sur le cordon. Pour débrancher, tenir la fiche, non le cordon.
• Ne pas manipuler la prise ou l'appareil avec les mains mouillées.
• Ne pas introduire d'objets dans les ouvertures. Ne pa s utiliser avec une ouverture
b l o q u é e ; maintenir celles-ci exemptes de poussière, de peluche, de cheveux et de
tout ce qui pourrait affecter le passage de l'air.
• Garder les cheveux, les vêtements lâches, les doigts et toutes les parties du corps loin
des ouvertures et des pièces en mouvement.
• Mettre toutes les commandes sur arrêt avant de débrancher.
• Être particulièrement attentif lors du nettoyage d'escaliers.
• Ne pas utiliser l'appareil pour aspirer des liquides inflammables ou combustibles, tels
que l'essence ou dans des endroits où ces produits pourraient être présents.
• Lire et suivre toutes les instructions indiquées sur votre aspirateur.
• Ne pas utiliser de rallonge électrique avec cet aspirateur.
• Garder l’extrémité du tuya u , le tube-rallonge et les autres ouvertures loin de votre visag e
et de votre corps. Garder vos mains, pieds, cheveux et vêtements loin des pièces en
fonctionnement, surtout de la brosse rotative.
• Ne pas utiliser l’aspirateur sans le vide-poussière et/ou les filtres en place.
• Ranger l'aspirateur à l'intérieur. Le ranger ap
rès usage pour que personne ne trébuche.
• Ne pas aspirer quoi que ce soit qui brûle ou qui fume, comme les cigarettes, les
allumettes ou les cendres chaudes.
• Débranchez l’appareil avant de connecter la suceur turbo pour sol.
• Tenez la fiche lors de l’enroulement du cordon. Veillez à ce que la fiche ne cingle pas
lors de l’enroulement du cordon.
VEUILLEZ CONSERVER CES INSTRUCTIONS
1
Replace secondary filter and
close filter door.
5.
2a.
REPLACE FILTERS
CARACTÉRISTIQUES
ACCESSOIRES
Tenir le tu yau et fai re
correspondre les attaches avec
les fentes du raccord de la boîte
cylindrique..
Insérer le tuyau. Appuyez fer-
mement pour enclench er le
tuyau.
Choisir un des
a c c e s s o i r e s
p r atiques pour
s a tisfa ire vos
besoins de n et-
t oyag e . P u i s ,
l'insérer ferme-
ment dan s le
t u yau ou le
t u b e - r a l l o n g e . .
1.
2.
1.
12
16
10
14
15
9
8
11
4
5
3
7
1. Poignée pour transporter
2. Interrupteur de Marche / Arrêt
3. Enrouleur de cordon
4. Bouton de dégagement du
godet à poussière
5. Couvercle du filtre
6. Roulette
7. Tuyau
8. Suceur pour plancher
9. Poignée de saisie
10. Rallonge
11. Accessoire pour aspirer les
poils d'animaux sur les
meubles
12. Suceur plat
13. Turbobrosse pour aspirer les
poils d'animaux*
14. Rangement des accessoires
15. Adaptateur pour accessoires
pour poils d'animaux*
16. Attache de rangement pour
rallonge
* Pou r utiliser les a ccessoire s
pour poils d'animaux, f i x e r
d'abord a u tuyau l'ada ptateur
conçu pour ces acc essoires.
6
2
Pour déclencher le cor-
d o n , tirez ce dernier hors
du logement de range-
m e n t . Ne tirez pas au-
delà du repère rouge..
Pour enrouler le cordon,
appuyer sur le bouton de
l'enrouleur de cordon.
Tenez la fiche lors de
l’enroulement du cordon
pour empêcher ce dernier
de cingler.
1.
DÉCLENCHEMENT/ENROULEMENT DU CORDON
1.
DÉCLENCHEMENT DU CORDON ENROULEMENT DU CORDON
AVERTISSEMENT : POUR RÉDUIRE LE RISQUE DE BLESSURES, DÉBRANCHER L'ASPIRATEUR AVANT DE RETIRER OU
D'INSTALLER LE TUYAU.
INSTALLATION ET RETRAIT DU TUYAU
INSTALLATION DES ACCESSOIRES
13
1
2a.


Join the conversation about this product
Here you can share what you think about the Dirt Devil Sd40000 Vision Pet Vacuum Cleaner. If you have a question, first carefully read the manual. Requesting a manual can be done by using our contact form.