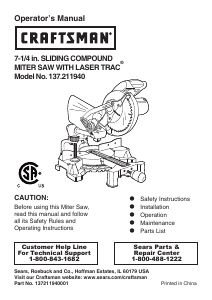
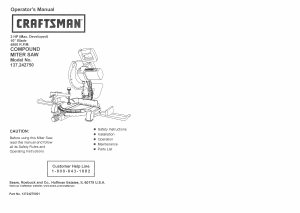
Manual Craftsman 137.242750 Mitre Saw

Need a manual for your Craftsman 137.242750 Mitre Saw? Below you can view and download the PDF manual for free in English. This product currently has 2 frequently asked questions, 0 comments and has 0 votes. If this is not the manual you want, please contact us.

Is your product defective and the manual offers no solution? Go to a Repair Café for free repair services.

Manual

Loading…

ASSEMBLYiNSTRUCTIONS
To avoid injury, do not connect this miter saw to the
power source until it is completely assembled and
adjusted, and you have read and understood this
Operator's Manual.
iNSTALLING THE MITER HANDLE (FIG. A)
!. Thread tile miter handle (1) into the hole (2) located
at the front of the miter table.
SAW BLADE WRENCH (FIG, B)
1.For convenient storage and prevention of loss, there
is a slot (!) in the rear of the cutting head handIe (2)
for storing the blade wrench (3) when not in use.
Fig, B 2
1 x
3
\
/
CUTTING HEAD (FIG. C)
Raising
1. Push down slightly on the cutting handle (1).
2. Pull out the stop latch knob (2).
3.Allow the cutting head (3) to raise to the up position.
To avoid injury and damage to the saw, transport or
store the miter saw with the cutting head locked in the
down position. Never use the stop latch to hold the
cutting head in a down position for cutting operations.
Fig. C
Locking i_
When transporting or storing the miter saw, the cutting
head should always be locked in the down position,
1. Push the cutting head (3) down to its lowest position.
2. Push the stop latch (2) into the locking hole (4).
IMPORTANT: To avoid damage, never carry the
miter saw by the switch handle, the cutting arm, or
the miter table handle. ALWAYS use the hand holds
in the base, or the designated carrying handle.
THE DUST COLLECTION SYSTEM _(FIG,D, D-l)
iNSTALLING THE DUST COLLECTION ELBOW
{FIG. D)
1. Install the larger end of the elbow (1) onto the
exhaust port (2).
NOTE: The elbow can be used to attach either the dust
bag or a vacuum hose to remove sawdust from the
work area. 2
FJg. D
INSTALLING THE DUST BAG (FIG, D-I)
!. Squeeze the metal collar wings (1) of the dust bag
(2).
2. Place the dust bag neck opening around the exhaust
port (3), and release the metal collar wings.
1 2
Fig. Dot
/
iNSTALLING EXTENSION W_NGS {FIG. E)
To avoid injury or possible damage to the tool, support
long work pieces by installing the extension wings to
extend the work support surface,
The extension wings are provided with an end stop
bracket. The extension may be used with or without the
end stop.
To install the end stop bracket:
1.Slide the end stop (I) onto the rail (2) of the one
extension wing. Place at the desired location.
2.Thread the wing bolt (4) into the bracket and tighten.
3. Place the rods into the ho_es(5) provided in the miter
saw base.
4. Insert Phillips screw (6) into tab hote (7) and tighten
to hold the extension rod.
To install without the end stop bracket:
5.Loosen the wing nut and slide the end stop bracket
off the extension wing rods.
6. Install the rods into the saw base holes.
7. Insert the Phillips screw into the tab hole and tighten.
REI_aOVING OR INSTALLAT_NG THE BLADE
1. Only use a 10-inch diameter blade.
2. To avoid injury from an accidental start, make sure
the switch is in the OFF position and the plug is not
connected to the power source outlet.
REMOVING (F_G.F,G, H)
1.Unplug the saw from the outlet.
2. Allow the miter saw to rise to the upright position.
Raise the tower blade guard (1) to the up position.
(Fig. F)
3. Loosen the cover plate screw (2) with a Phillips
screwd river.
4. Rotate the cover plate (3) to expose the arbor screw
(4).
5. Place the blade end wrench over the arbor screw.
Fig: F
6. Locate the arbor lock (5) on the motor, below the
miter saw switch handle. (Fig. G)
7. Press the arbor lock, holding it in firmly while turning
the blade wrench clockwise. The arbor lock will
engage after turning the wrench. Continue to hold
the arbor locking to keep it engaged1 while turning
the wrench clockwise to loosen the arbor screw,
Figo G
Download manual in English (PDF, 4.2 MB)
(Consider the environment and only print this manual if it is really necessary)

Loading…

Rating

Let us know what you think about the Craftsman 137.242750 Mitre Saw by leaving a product rating. Want to share your experiences with this product or ask a question? Please leave a comment at the bottom of the page.
Are you satisfied with the Craftsman 137.242750 Mitre Saw?
Yes No
Be the first to rate this product
0 votes

Join the conversation about this product

Here you can share what you think about the Craftsman 137.242750 Mitre Saw. If you have a question, first carefully read the manual. Requesting a manual can be done by using our contact form.

More about this manual

We understand that it’s nice to have a paper manual for your Craftsman 137.242750 Mitre Saw. You can always download the manual from our website and print it yourself. If you would like to have an original manual, we recommend you contact Craftsman. They might be able to provide an original manual. Are you looking for the manual of your Craftsman 137.242750 Mitre Saw in a different language? Choose your preferred language on our homepage and search for the model number to see if we have it available.

Specifications

Brand Craftsman
Model 137.242750
Category Mitre Saws
File type PDF
File size 4.2 MB

All manuals for Craftsman Mitre Saws
More manuals of Mitre Saws

Frequently Asked Questions about Craftsman 137.242750 Mitre Saw

Our support team searches for useful product information and answers to frequently asked questions. If you find an inaccuracy in our frequently asked questions, please let us know by using our contact form.

Do I need to wear hearing protection when using a mitre saw? Verified

Yes you should. Although the amount of noise produced by a mitre saw can vary between brands and models, long term exposure to loud noise can cause permanent hearing damage. That is why it is a good idea to wear hearing protection.

This was helpful (14) Read more

Can I store power tools in a shed or garage? Verified

In general, you can store power tools in a shed or garage, even if it sometimes freezes there. However, it is better for the lifespan of the power tool to store it in a dry place without major temperature fluctuations. In a shed or garage, differences in temperature can cause condensation to form, which can cause rust. In addition, tools that run on batteries last shorter and do not charge as well at very low temperatures. To be sure how your power tool needs to be stored, always thoroughly read the user manual.

This was helpful (10) Read more
Manual Craftsman 137.242750 Mitre Saw

Related products

Related categories