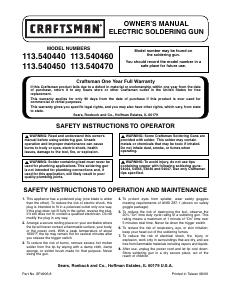
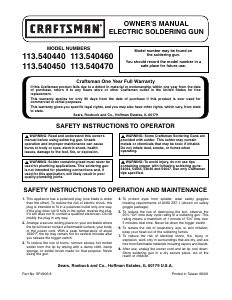
Manual Craftsman 113.540460 Soldering Gun

Need a manual for your Craftsman 113.540460 Soldering Gun? Below you can view and download the PDF manual for free in English. This product currently has 1 frequently asked question, 0 comments and has 0 votes. If this is not the manual you want, please contact us.

Is your product defective and the manual offers no solution? Go to a Repair Café for free repair services.

Manual

Loading…

Assembly
1. Soldering Gun comes complete with solder tip(s).
2. Loosen screws located on the front of the soldering tool
using a #2 Phillips screwdriver.
3. Insert solder tip into openings and tighten down the screws.
Operation
Using Soldering Gun
1. Screws holding tip must always be snug for soldering gun
to function properly. Use a #2 Phillips screwdriver to tighten
screws when necessary. To avoid stripping screws, be
careful not to over-tighten.
2. Clean the surfaces to be soldered together to insure a good
bond. Use a wire brush or sandpaper to remove paint,
varnish, or rust. To remove oil or grease, use alcohol.
3. Select the proper solder type. Rosin core solder is
recommended for work on electrical items such as PC
boards, radio and TV kits, model railroads, etc. The rosin, or
flux, as it is sometimes called, helps clean the soldering
joint as the solder is being melted and helps in the bonding
process.
Another type of solder is ACID core solder. Do not use acid
core solder when soldering electrical connections. Damage
to electrical components may result. Acid core solder is
recommended when soldering some types of steel plates
together, but not for electrical connections.
4. For best results, tin the tip of the soldering gun with a
coating of rosin core solder. This is done by cleaning the tip
with steel wool, then pulling the trigger to heat the tip and
then applying a light coating of new solder to the tip. Excess
solder may be removed with a solder brush, damp sponge
or damp cloth.
5. When soldering, hold soldering gun tip to the two surfaces
(the “joint”) to be soldered at the same time. Pull trigger to
apply heat to the joint. It takes approximately 12 seconds for
the tip to reach soldering temperature. Apply solder to the
joint, NOT to the TIP, but close to the tip. When the surfaces
are sufficiently heated, the solder will flow into the joint. Do
not apply too much solder to the joint. Use just enough to
give strength and a good appearance.
6. Release trigger of gun and set soldering gun in a safe
position to cool.
IMPORTANT: Remember to use your soldering gun with a
20% duty cycle. Never use it continuously for more than
one minute without letting it cool for 4 minutes. Never tie
down the trigger expecting the tip to remain at peak
temperature for soldering. This will damage the tip and the
remainder of the soldering gun.
Maintenance
Taking Care of Your Soldering Gun
Keep tip screws snug. Periodically inspect the tip screws for
looseness and tighten when necessary. However, to avoid
stripping screws, do not over-tighten.
Keep the soldering tip clean. Use steel wool or very fine
sandpaper to clean.
Tin tip before using. Refer to Step 4 of
Operation
.
Changing Tip
1. Remove tip after loosening both screws holding tip.
2. Insert new tip and tighten screws. To avoid stripping screws,
do not over tighten.
NOTE: Soldering gun is not serviceable except to replace tips.
Some models are provided with a light. If the light burns out,
replace it with a 2.25V bulb (G.E. type 222X or equivalent).
The use of non-recommended tips may result in improper tip
temperatures and damage to the gun.
Replacement Tips Available through Sears Service Center
WARNING: To reduce the risk of fire, burns, or
toxic vapors, do not use solvents other than
alcohol for oil or grease removal.
!
WARNING: To avoid burns or electrical shock,
always unplug the soldering gun and allow to cool
before servicing.
!
WARNING: To reduce the risk of injury or
damage to soldering gun, do not use tips
containing copper with the following soldering
guns: 54044, 54045, 54046 and 54047. Use only the
specified Craftsman tips.
!
54024
Containing one each of the tips
at right, fits soldering guns:
54044
54045
54026
Containing one each of the tips
at right, fits soldering guns:
54046
54047
General
Purpose Tip
Tile Cutting
Tip
Troubleshooting
Trouble
Tip does not heat although unit is
plugged in and trigger is depressed.
Probable Cause
1. Tip screws are loose.
2. Tip cracked or broken.
3. Tip is dirty.
Action
Unplug gun from power receptacle
1. Tighten tip screws.
2. Replace with new tip.
3. Clean tip with steel wool or fine
sandpaper.
Download manual in English (PDF, 0.07 MB)
(Consider the environment and only print this manual if it is really necessary)

Loading…

Rating

Let us know what you think about the Craftsman 113.540460 Soldering Gun by leaving a product rating. Want to share your experiences with this product or ask a question? Please leave a comment at the bottom of the page.
Are you satisfied with the Craftsman 113.540460 Soldering Gun?
Yes No
Be the first to rate this product
0 votes

Join the conversation about this product

Here you can share what you think about the Craftsman 113.540460 Soldering Gun. If you have a question, first carefully read the manual. Requesting a manual can be done by using our contact form.

More about this manual

We understand that it’s nice to have a paper manual for your Craftsman 113.540460 Soldering Gun. You can always download the manual from our website and print it yourself. If you would like to have an original manual, we recommend you contact Craftsman. They might be able to provide an original manual. Are you looking for the manual of your Craftsman 113.540460 Soldering Gun in a different language? Choose your preferred language on our homepage and search for the model number to see if we have it available.

Specifications

Brand Craftsman
Model 113.540460
Category Soldering Guns
File type PDF
File size 0.07 MB

All manuals for Craftsman Soldering Guns
More manuals of Soldering Guns

Frequently Asked Questions about Craftsman 113.540460 Soldering Gun

Our support team searches for useful product information and answers to frequently asked questions. If you find an inaccuracy in our frequently asked questions, please let us know by using our contact form.

Can I store power tools in a shed or garage? Verified

In general, you can store power tools in a shed or garage, even if it sometimes freezes there. However, it is better for the lifespan of the power tool to store it in a dry place without major temperature fluctuations. In a shed or garage, differences in temperature can cause condensation to form, which can cause rust. In addition, tools that run on batteries last shorter and do not charge as well at very low temperatures. To be sure how your power tool needs to be stored, always thoroughly read the user manual.

This was helpful (3) Read more
Manual Craftsman 113.540460 Soldering Gun

Related products

Related categories