
SAFETY EQUIPMENT
A comprehensive range of CLARKE safety equipment for use when welding is available from your
local CLARKE dealer.
WELDER SPECIFICATIONS
The technical specifications for your unit are printed on the data plate on the front of the machine.
The data plate carries the following information:
1. Supply Voltage
2. Duty Cycle - percentage of a period of 10 minutes in which the unit can operate at a stated
current output with no risk of over-heating or internal damage. e.g. a unit with a duty cycle of
60% at 80 Amps can weld for 6 minutes over a 10 minute period at 80 Amps. Down time is 4
minutes over a 10 minute period.
3. Primary or input power data, number of phases and supply frequency
4. Fuse Rating
5. Protection
6. Insulation class
7. Type of static characteristic
8. Welder type and batch number
9. Regulation range
ASSEMBLY
1. Refer to the appropriate parts diagram for your machine (190T page 17, 220T page 20, 260T
page 22).
2. Remove the side panel by sliding it upwards and check that all the accessories listed below
are included:
2 wheels 1 gas regulator
1 axle 1 0.6mm welding tip
2 wheel retaining washers 1 0.8mm welding tip
2 castors 1 1.0mm welding tip
1 handle with brackets 1 chain
4 screws 1 mask handle
1 mask body 1 welding torch and lead (fitted)
1 earth lead and clamp
SHOULD ANY PART BE MISSING OR DAMAGED, CONTACT YOUR
LOCAL DEALER FOR REPLACEMENT
3. Attach the handle to the welder unit by sliding the brackets into the holes provided on the front
of the machine, lining up the holes with those in the casing and securing the four screws
provided.
4. Fix the wheels to the back of the unit and the castors to the front.
5. Connect the earth return lead to the negative ( - ) socket on the front panel of the welder unit.
6. Ensure that the side panels are securely closed before using the welder.
7. Connect the torch lead assembly to the welder, following the appropriate instructions below:
TORCH LEAD ASSEMBLY INSTRUCTIONS
MIG 220T and MIG 260T
Plug the torch hose into the socket on the front of the welder and secure by hand screwing in
the threaded connection.
10
TROUBLESHOOTING
Your CLARKE Mig Welder has been designed to give long and trouble free service. If, however,
having followed the instructions in this booklet carefully, you still encounter problems, the
following points should help identify and resolve them. If you have any problems which cannot be
resolved here, please contact your local Clarke dealer.
15
PROBLEM CAUSE REMEDY
1. No ‘life’ from welder Check fuses and mains lead a) Replace fuses as necessary. If
problem persists, return welder
to your local dealer.
b) Check fuse size.
2. No wire feed. Motor malfunction Return welder to your local dealer.
3. Feed motor operates but a) Insufficient feed roller pressure a) Increase roller presure
wire will not feed. b) Burr on end of wire b) Re-cut wire square
c) Liner blocked or damaged c) Clear with compressed air or
replace liner
d) Inferior wire d) Use only good clean wire
4. Wire welds itself to tip a) Wire feed speed too low a) Unscrew tip, cut wire and fit
new tip. Increase wire speed
before operating again.
b) Wrong size tip b) Renew wire liner
5. Wire feeds into ‘bird’s a) Wire welded to tip a) As above plus reduce feed roller
nest’ tangle presure so that if blockage occurs
wire slips on roller, i.e. no feed
b) Wire liner damaged preventing b) Renew wire liner
smooth operation
6. Loose coils of wire tangle Drum brake too slack Tighten drum brake - DO NOT
around wire drum inside OVERTIGHTEN
machine
7. Erratic wire feed a) Drum brake too tight a) Loosen drum brake slightly
b) Feed roller worn b) Check and replace if necessary
c) Insufficient pressure on c) Increase pressure on feed roller
feed roller DO NOT OVERTIGHTEN
d) Wire dirty, rusty, damp or bent d) Re-cut wire & ensure it is clean
e) Liner partially blocked e) Clear with compressed air
8. Poor quality welds a) Insufficient gas at weld area a) Check that gas is not being
blown away by draughts, if so,
move to a sheltered area. If no
draught, increase gas supply
b) Incorrect gas/wire combination b) Consult your Mig welding manual
c) Rusty, painted, damp, oily or c) Ensure workpiece is clean & dry
greasy workpiece d) Ensure wire is clean and dry
d) Rusty/diry wire e) Check ground clamp/workpiece
e) Poor earth contact connection
9. Wire jams in tip when Tip too small Use slightly oversize tip i.e. for 0.8
welding aluminium mm wire use 1 mm tip (Applies to
aluminium only)
10. Welder cuts out whilst in Duty cycle exceeded (auto cut-out Allow welder to cool for 15-30 mins
use operates) before continuing. Note: if duty cycle
is continually exceeded, damage to
the welder may result and welder
output is probably too small for
application.



Join the conversation about this product
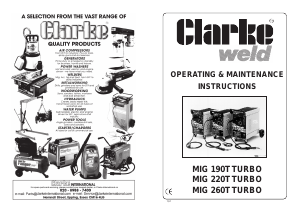
Here you can share what you think about the Clarke MIG 190T Turbo Welder. If you have a question, first carefully read the manual. Requesting a manual can be done by using our contact form.