Manual Carpoint RV-260 TAS Snow Chains

Need a manual for your Carpoint RV-260 TAS Snow Chains? Below you can view and download the PDF manual for free in English. This product currently has 1 frequently asked question, 0 comments and has 0 votes. If this is not the manual you want, please contact us.

Is your product defective and the manual offers no solution? Go to a Repair Café for free repair services.

Manual

Loading…

INSTRUCTION MANUAL
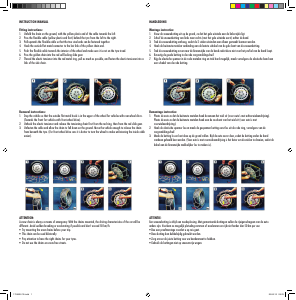
Fitting instructions:
1. Unfold the chain on the ground, with the yellow plastic end of the cable towards the left.
2. Pass the flexible cable (yellow plastic end first) behind the tyre from the left to the right.
3. Pull upwards the flexible cable so that the two steel ends can be fastened together.
4. Hook the outside flat metal connector to the last link of the yellow chain end.
5. Push the flexible cable towards the interior of the wheel and make sure it is not on the tyre tread.
6. Pass the golden chain into the red self-locking slide gear.
7. Thread the elastic tensioner into the red metal ring, pull as much as possible, and fasten the elastic tensioner into a
link of the side chain.
Removal instructions:
1. Stop the vehicle so that the outside flat metal hook is in the upper of the wheel for vehicles with rear-wheel drive.
(Towards the front for vehicles with front-wheel drive).
2. Unhook the elastic tensioner and release the tensioning chain first from the red ring, then from the red slide gear.
3. Unfasten the cable and allow the chain to fall down on the ground. Move the vehicle enough to release the chain
from beneath the tyre. (For front wheel drive cars it is better to turn the wheel to make unfastening the inside cable
easier).
ATTENTION:
A snow chain is always a means of emergency. With the chains mounted, the driving characteristics of the car will be
different. Avoid sudden breaking or accelerating if possible and don’t exceed 50 km/h.
• Trymountingthesnowchainsbeforeyourtrip.
• Thischaincanbeusedbilaterally.
• Payattentiontohavetherightchainsforyourtyres.
• Donotusethechainsonsnow-freestreets.
HANDLEIDING
Montage instructies:
1. Vouw de sneeuwketting uit op de grond, zo dat het gele uiteinde aan de linkerzijde ligt.
2. Schuif de sneeuwketting van links naar rechts (met het gele uiteinde eerst) achter de band.
3. Trek de sneeuwketting omhoog, zodat de 2 stalen uiteinden aan elkaar gemaakt kunnen worden.
4. Haak de buitenste metalen verbinding aan de laatste schakel van de gele kant van de sneeuwketting.
5. Trek de sneeuwketting zover naar de binnenzijde van de band zodat deze niet over het profiel van de band loopt.
6. Bevestig de goude ketting in de rode vergrendelingschuif.
7. Rijg de elastische spanner in de rode metalen ring en trek hard mogelijk, maak vervolgens de elastische band aan
een schakel van de rode ketting.
Demontage instructies:
1. Plaats de auto zo dat de buitenste metalen haak bovenaan het wiel zit (voor auto’s met achterwielaandrijving).
Plaats de auto zo dat de buitenste metalen haak aan de voorkant van het wiel zit (voor auto’s met
voorwielaandrijving).
2. Haak de elastische spanner los en maak de gespannen ketting eerst los uit de rode ring, vervolgens van de
vergrendelingschuif.
3. Maak de ketting los en laat deze op de grond vallen. Rijd de auto zover door, zodat de ketting onder de band
vandaan gehaald kan worden. (Voor auto’s met voorwielaandrijving is het beter om de wielen te draaien, zodat de
kabel aan de binnenzijde makkelijker los te maken is).
ATTENTIE:
Een sneeuwketting is altijd een noodoplossing. Met gemonteerde kettingen zullen de rijeigenschappen van de auto
anders zijn. Voorkom zo mogelijk plotseling remmen of accelereren en rijd niet harder dan 50 km per uur.
•Doeeenproefmontagevoordatuopreisgaat.
•Dezekettingkandubbelzijdiggebruiktworden.
•Zorgervoordejuistekettingvooruwbandenmaattehebben.
•Gebruikdekettingennietopsneeuwvrijewegen.
1724902-13i.indd 1 25-06-12 09:23
Download manual in English (PDF, 0.29 MB)
(Consider the environment and only print this manual if it is really necessary)

Loading…

Rating

Let us know what you think about the Carpoint RV-260 TAS Snow Chains by leaving a product rating. Want to share your experiences with this product or ask a question? Please leave a comment at the bottom of the page.
Are you satisfied with the Carpoint RV-260 TAS Snow Chains?
Yes No
Be the first to rate this product
0 votes

Join the conversation about this product

Here you can share what you think about the Carpoint RV-260 TAS Snow Chains. If you have a question, first carefully read the manual. Requesting a manual can be done by using our contact form.

More about this manual

We understand that it’s nice to have a paper manual for your Carpoint RV-260 TAS Snow Chains. You can always download the manual from our website and print it yourself. If you would like to have an original manual, we recommend you contact Carpoint. They might be able to provide an original manual. Are you looking for the manual of your Carpoint RV-260 TAS Snow Chains in a different language? Choose your preferred language on our homepage and search for the model number to see if we have it available.

Specifications

Brand Carpoint
Model RV-260 TAS
Category Snow Chains
File type PDF
File size 0.29 MB

All manuals for Carpoint Snow Chains
More manuals of Snow Chains

Frequently Asked Questions about Carpoint RV-260 TAS Snow Chains

Our support team searches for useful product information and answers to frequently asked questions. If you find an inaccuracy in our frequently asked questions, please let us know by using our contact form.

On which wheels should I mount my snow chains? Verified

Snow chains should be mounted on the 'drive' wheels of the vehicle. With 4WD vehicles it's best to mount them on the front wheels. Ask your dealer for advice when in doubt.

This was helpful (56) Read more
Manual Carpoint RV-260 TAS Snow Chains