Manual Canarm CP60HPWP Ceiling Fan

Need a manual for your Canarm CP60HPWP Ceiling Fan? Below you can view and download the PDF manual for free in English. This product currently has 1 frequently asked question, 0 comments and has 0 votes. If this is not the manual you want, please contact us.

Is your product defective and the manual offers no solution? Go to a Repair Café for free repair services.

Manual

Loading…

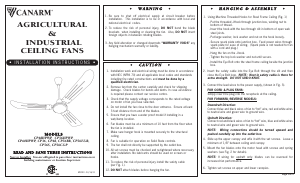
MODELS
MODELS
CP48HPWP, CP56HPWP,
CP60HPWP, CP36, CP48, CP56BR, CP56F&R,
CP56S, CP56C&P
READ AND SAVE THESE INSTRUCTIONS
Note to Installer: You are obligated to pass these instructions on to
building maintenance or location Supervisor.
AGRICULTURAL
&
INDUSTRIAL
CEILING FANS
M0090 - 03/16/11
I N S TA L L AT I O N I N S T R U C T I O N S
W A R N I N G
1. Be sure to shut off electrical supply at circuit breaker before
installation. This installation is to be in accordance with local and
national electrical codes.
2. To reduce the risk of personal injury, DO NOT bend the blade
brackets when installing or cleaning the fan. Also, DO NOT insert
foreign objects in between rotating blades.
3. Any field alteration or changed downrods “WARRANTY VOIDS” any
hanging mechanism warranty or liability.
C A U T I O N
1. Installation work and electrical wiring must be done in accordance
with NEC (NFPA 70) and all applicable local codes and standards
including fire rated constructions and must be done by a
qualified electrician.
2. Remove fan from the carton carefully and check for shipping
damage. Check blades for bends and dents. In case assistance
is required please contact our service centre.
3. Check that the supply voltage corresponds to the rated voltage
on motor of fan you have selected.
4. Do not install the fan close to the door entrance. Ensure at least
3 feet distance from end of the blades.
5. Ensure that you have a water proof model if installing in a
wet/damp location.
6. Fan blades must be at a minimum of 10 feet from the floor when
the fan is installed.
7. Make sure hanger hook is mounted securely to the structural
ceiling.
8. Fan is suitable for operation on Solid State controls.
9. The fan shall not directly be supported by the outlet box.
10. All set screws must be checked and re-tightened where necessary
after installation. No lubricants should be used on screws or
hooks.
11. To reduce the risk of personal injury install the safety cable
(per Fig. 1).
12. DO NOT attach blades before hanging the fan.
H A N G I N G & A S S E M B L Y
1. Using Machine Threaded Hooks for Steel Frame Ceiling (Fig. 1)
- Put the threaded J-Hook through junction box, winding nut to
bottom of thread.
- Insert the hook with the box through slit in bottom of open web
steel joists.
- Put large washer, lock washer and nut on the hook loosely.
- Secure spark plate onto junction box. Feed power wires through
spark plate for ease of wiring. (Spark plate is not needed for fan
with a cord and plug.)
- Hang the fan on the J-hook.
- Tighten the top lock washer and nut until secure.
- Install the Eye Bolt onto the steel frame ceiling beside the junction
box.
2. Insert the safety cable into the Eye Bolt through the slit and then
close the Eye Bolt loop. NOTE: Knot in safety cable is there for
extra strength. DO NOT UNDO KNOT.
3. Connect the lead wires to the power supply, (shown in Fig. 3).
FOR CORD & PLUG FANS:
Simply insert the plug into the receptacle at the ceiling.
FOR FORWARD/REVERSE MODELS:
Downdraft Direction:
Connect blue and black wires of fan to “hot” wire, red and white wires
to neutral wire and green wire to ground wire.
Updraft Direction:
Connect red and black wires of fan to “hot” wire, blue and white wires
to neutral wire and green wire to ground wire.
NOTE: Wiring connections should be turned upward and
pushed carefully up into the outlet box.
4. Slide up the upper canopy and affix it with the set screws. Leave a
minimum of 1/8” between ceiling and canopy.
5. Mount the fan blades onto the motor head with screws and spring
washers (see Fig. 2 for details).
NOTE: If wiring for updraft only: blades can be reversed for
increased fan performance.
6. Tighten set screws on upper and lower canopies.
Page 1 of 3
Download manual in English (PDF, 0.86 MB)
(Consider the environment and only print this manual if it is really necessary)

Loading…

Rating

Let us know what you think about the Canarm CP60HPWP Ceiling Fan by leaving a product rating. Want to share your experiences with this product or ask a question? Please leave a comment at the bottom of the page.
Are you satisfied with the Canarm CP60HPWP Ceiling Fan?
Yes No
Be the first to rate this product
0 votes

Join the conversation about this product

Here you can share what you think about the Canarm CP60HPWP Ceiling Fan. If you have a question, first carefully read the manual. Requesting a manual can be done by using our contact form.

More about this manual

We understand that it’s nice to have a paper manual for your Canarm CP60HPWP Ceiling Fan. You can always download the manual from our website and print it yourself. If you would like to have an original manual, we recommend you contact Canarm. They might be able to provide an original manual. Are you looking for the manual of your Canarm CP60HPWP Ceiling Fan in a different language? Choose your preferred language on our homepage and search for the model number to see if we have it available.

Specifications

Brand Canarm
Model CP60HPWP
Category Ceiling Fans
File type PDF
File size 0.86 MB

All manuals for Canarm Ceiling Fans
More manuals of Ceiling Fans

Frequently Asked Questions about Canarm CP60HPWP Ceiling Fan

Our support team searches for useful product information and answers to frequently asked questions. If you find an inaccuracy in our frequently asked questions, please let us know by using our contact form.

Does it matter what direction my ceiling fan is turning? Verified

Yes, this depends on the season. In warmer seasons the ceiling fan should turn counterclockwise to push cold air down. This air wil evaporate moisture, creating a cooling effect. In colder seasons the ceiling fan should turn clockwise to pull cold air up, which will push warmer air down.

This was helpful (162) Read more
Manual Canarm CP60HPWP Ceiling Fan

Related products

Related categories