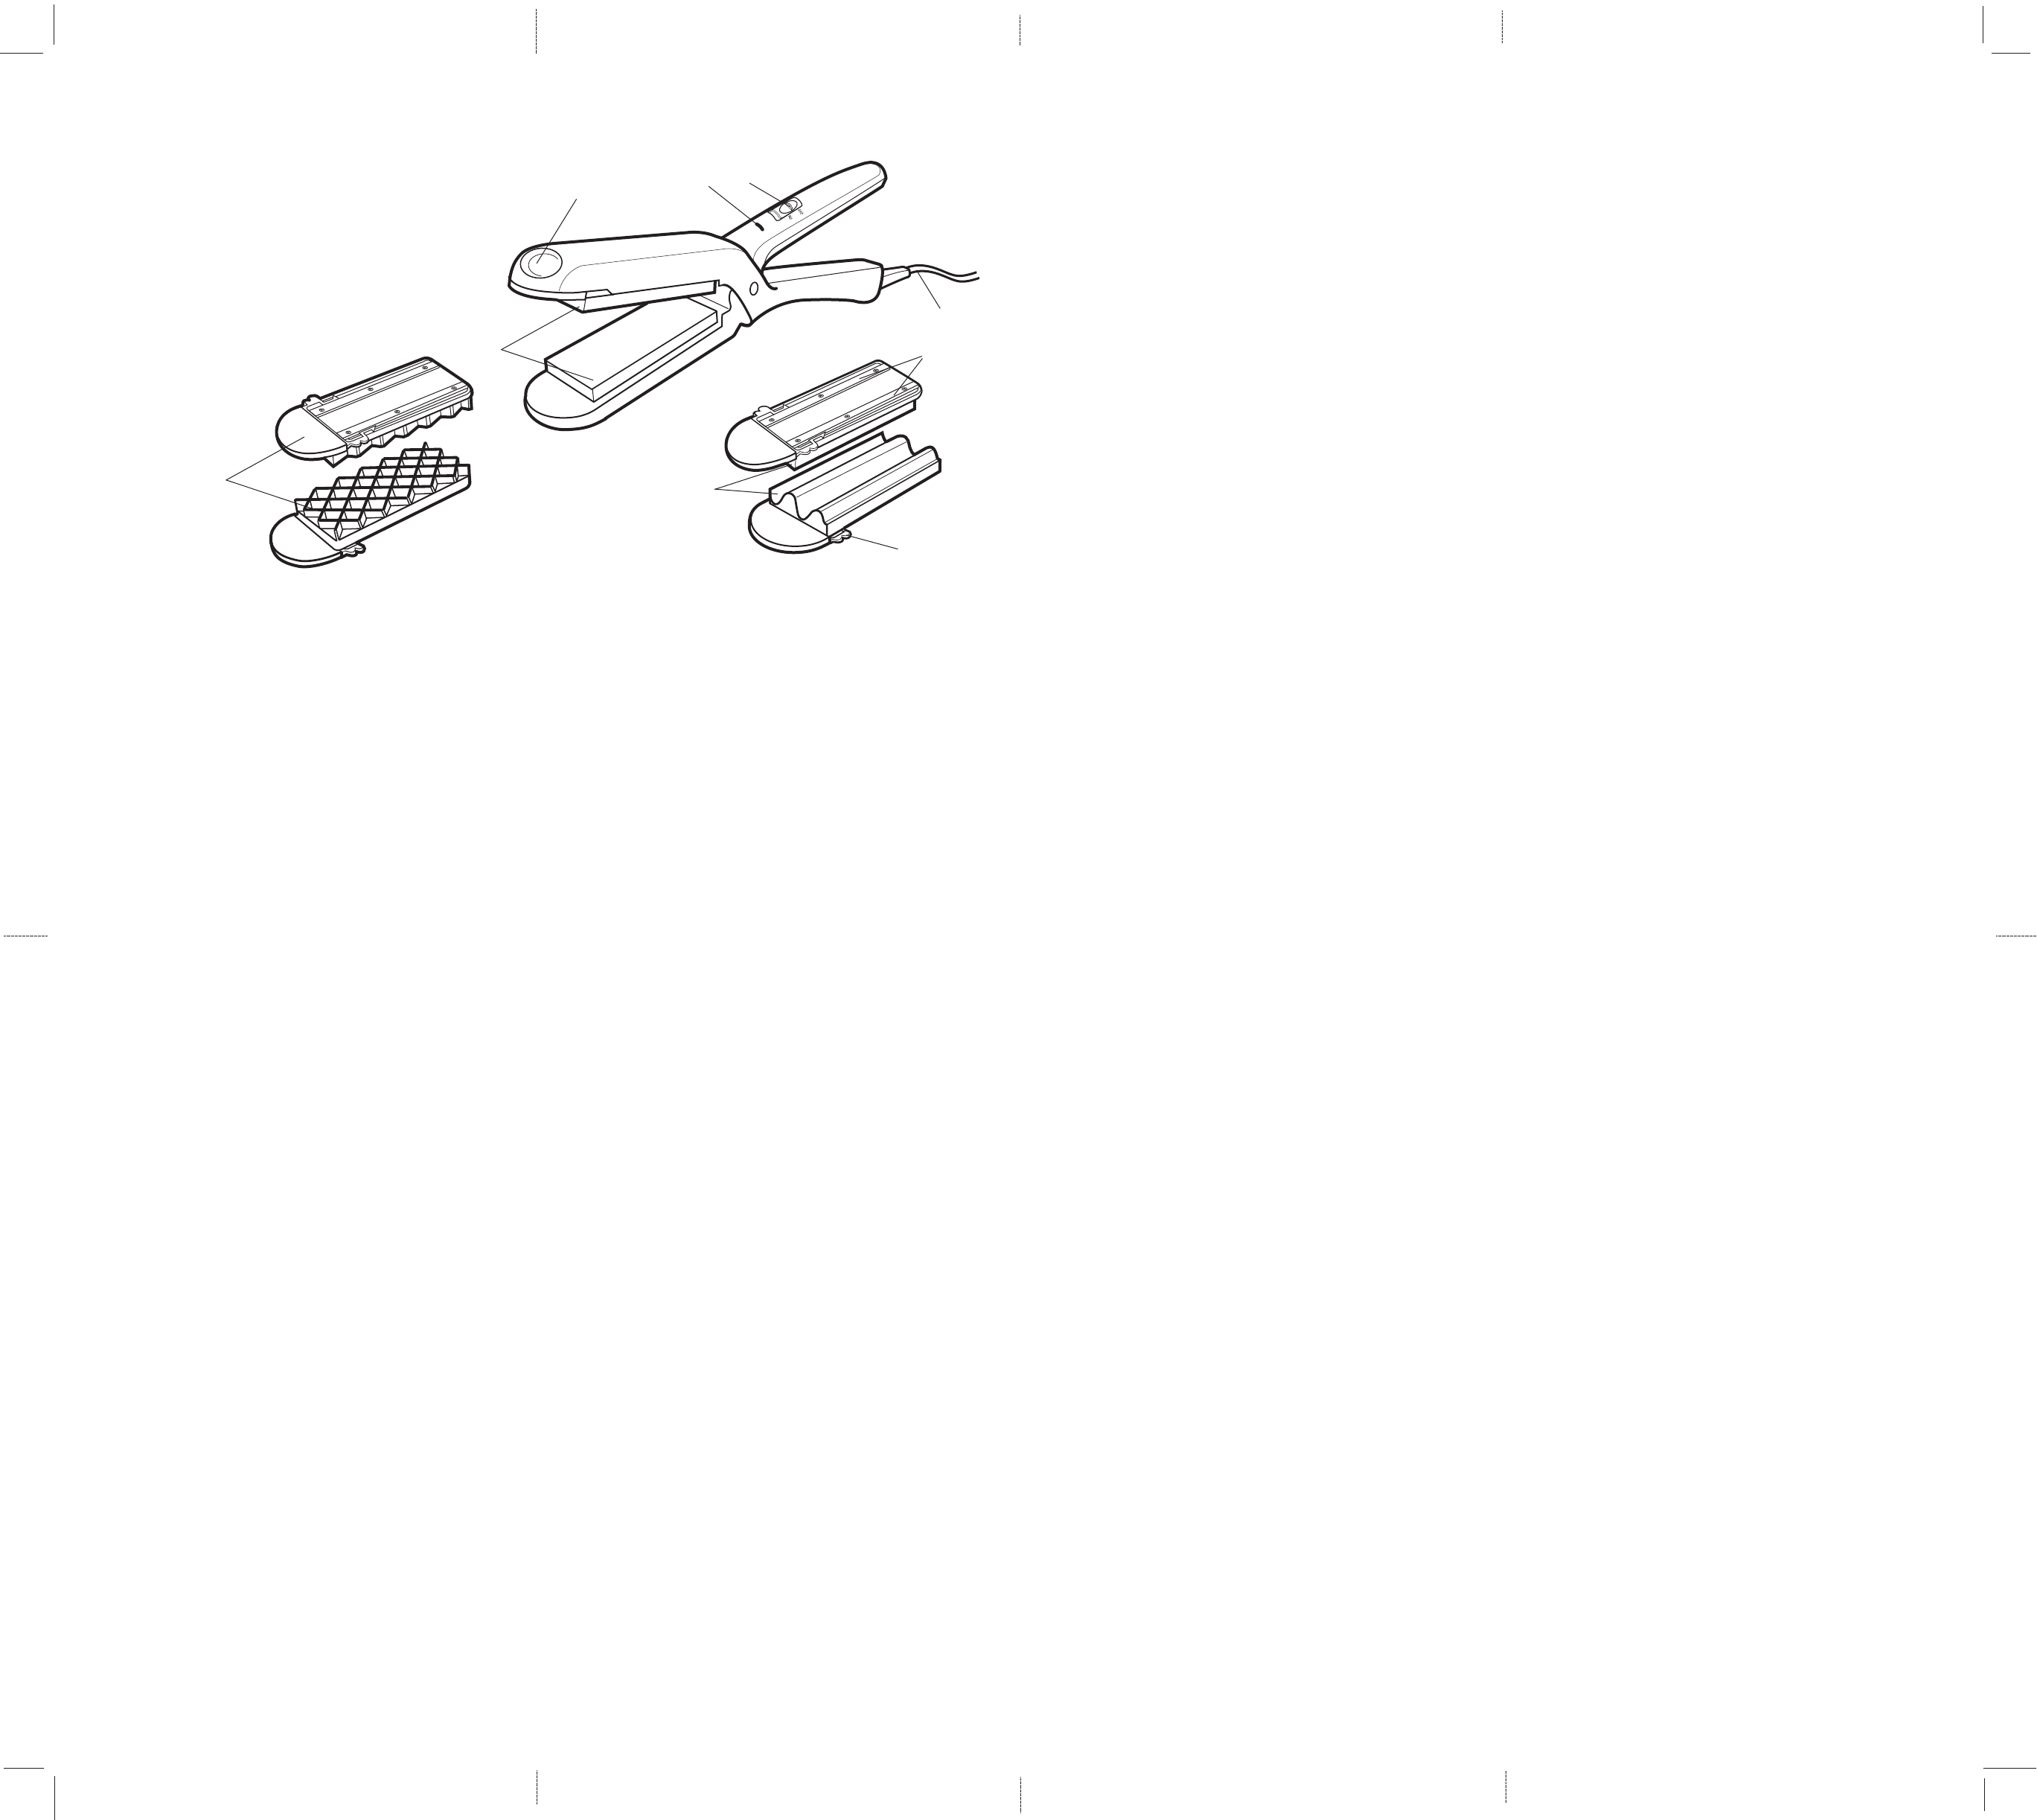
Este producto puede variar ligeramente del que aparece ilustrado. / Product may vary slightly from what is illustrated.
1. Finger Rests
2. Power Indicator Light
3. On/Off switch
4. Cord; keep loosely coiled
† 5. Straightening Plates (Part #833-0217-002)
† 6. Waffle Pattern Plates (Part #833-0220-002)
† 7. Deep Wave Plates (Part #833-0215-022)
8. Tracks
9. Tabs
† Consumer replaceable
1. Descanso para los dedos
2. Luz indicadora de funcionamiento
3. Interruptor de encendido/apagado
4. Cable; enrollarlo holgadamente
† 5. Placas de alisar (Pieza Nº 833-0217-002).
† 6. Placas para rizo entrelazado (Pieza Nº 833-0220-002).
† 7. Placas para ondulación definida (Pieza Nº 833-0215-022)
8. Carriles
9. Guías
† Reemplazable por el consumidor
Como usar
Este aparato es para uso doméstico y puede ser enchufado en cualquier toma de corriente alterna (corriente ordinaria
doméstica).
Importante: Para verificación de la garantía, por favor no retire la etiqueta del cable eléctrico.
IMPORTANTE:
Durante los primeros minutos de su uso inicial, usted notará humo y un ligero olor a quemado. Esto es normal y desaparecerá rápidamente.
COMO INSTALAR LAS PLACAS:
• Asegúrese que la plancha esté desconectada y que las placas estén frías.
• Use las placas en pares iguales únicamente.
• Sujete la plancha con una mano.
• Coloque el dedo pulgar y el índice de la otra mano sobre las guías en ambos costados de la placa.
• Alinee los dos carriles del inferior de la placa con las dos ranuras de la plancha.
• Deslice la placa en la plancha hasta caer en su lugar.
• Repita los mismos pasos para instalar la otra placa.
COMO RETIRAR LAS PLACAS:
• Asegúrese que la plancha esté desconectada y que las placas estén frías.
• Sujete la plancha con una mano.
• Coloque el dedo pulgar y el índice de la otra mano sobre las guías en ambos costados de la placa.
• Aplique presión a las dos guías al mismo tiempo y deslícelas hacia afuera de la plancha.
COMO PRECALENTAR LA PLANCHA:
1. Coloque la plancha en una superficie plana y enchúfela.
2. Enciéndala, déjela que caliente. Toma unos 60 a 90 segundos para que se caliente. Para mejor resultado, permita que la plancha
se caliente de 3 a 5 minutos antes de usar.
COMO ESTILIZAR:
1. Trabaje el cabello en secciones de 2-1/2" de ancho y 3/4" de grosor.
2. Coloque las secciones de cabello entre las placas y oprima la plancha firmemente.
3. Sujete el cabello entre las placas por unos segundos manteniendo cierto grado de tensión.
4. Abra la plancha y suelte el cabello.
COMO ALISAR: Las placas de alisar relajan el cabello ondulado y ayudan a suavizar el cabello crespo rebelde. Para dar mejor toque
de acabado al cabello, antes de alcanzar las puntas, enrolle la plancha hacia adentro y gírela media vuelta.
COMO RIZAR: Las placas de rizar producen un efecto de rizo entrelazado en el cabello.
COMO ONDULAR: Las placas de ondular tienen la profundidad apropiada para crear ondas bien definidas y suaves. Utilícelas para agregar
volumen al cabello.
Cuidado y limpieza
Este aparato requiere poco mantenimiento y no contiene piezas reemplazables por el consumidor.
LIMPIEZA:
1. Desenchufe la plancha y déjela enfriar. La plancha solamente debe limpiarse cuando está fría.
2. Use un paño suave, ligeramente humedecido para limpiar la superficie exterior. No deje que penetre agua u otro líquido
en la plancha.
ALMACENAJE:
• Desconecte la unidad, déjela enfriar y guárdela en un lugar seco y limpio.
• Enrolle el cable holgadamente.
• No enrolle el cable en torno al aparato; esto podría desgastar y romper el cable prematuramente.
• No ponga tensión entre el cable y la unión con el mango del aparato, esto podría debilitar y romper el cable.
• Jamás cuelgue el aparto por el cable eléctrico.
How to Use
This appliance is for household use and may be plugged into any AC electrical outlet (ordinary household current).
Important: For warranty verification, please do not remove line cord sticker.
IMPORTANT:
During the first few minutes of initial use, you may notice smoke and a slight odor. This is normal and will quickly disappear.
TO ATTACH PLATES:
• Be sure unit is unplugged and plates are cool.
• Use only pairs of correctly matched plates.
• Hold iron in one hand.
• Place thumb and index finger of the other hand over the Tabs located on both sides of the plate.
• Align the two Tracks on the underside of the plate with the two grooves on the iron.
• Slide plate into the iron until it snaps into place.
• Repeat procedure for second plate.
TO DETACH PLATES:
• Be sure unit is unplugged and plates are cool.
• Hold iron in one hand.
• Place thumb and index finger of the other hand over the Tabs located on both sides of the plate.
• Apply pressure on both Tabs at the same time and slide plates off from unit.
PRE-HEATING:
1. Rest the iron on a smooth, flat surface, and plug in.
2. Turn on, and allow iron to heat. It takes 60-90 seconds to heat up. For best results, allow iron to heat for 3-5 minutes before using.
STYLING:
1. Work with hair sections that are approximately 2-1/2" wide and 3/4" thick.
2. Place hair between the hot plates and press down firmly.
3. Hold in place for a few seconds, maintaining some tension.
4. Release pressure from handle and allow hair to slip out.
STRAIGHTENING: The Straightening Plates relax overly curly hair and smooth the frizzies. For a finishing touch, turn straightening iron under
a half turn when nearing end of hair.
WAFFLE PATTERN: The Waffling Plates create wavy pattern indentations in your hair.
WAVING: The Deep Waving Plates create richly textured, soft waves or to add overall body and volume in your hair.
Care and Cleaning
This appliance requires little maintenance and contains no user serviceable parts.
CLEANING:
1. Unplug iron and let it cool. Clean the iron only when it is cool.
2. Use a soft, slightly damp cloth to wipe the outside surface. Do not allow water or any other liquid to go into the unit.
STORAGE:
• Unplug appliance and let it cool; store in a clean, dry place.
• Store the cord loosely coiled.
• Never wrap the cord around unit; this could cause the cord to wear prematurely and break.
• Do not put any stress on the cord where it enters the handle, as it could cause the cord to fray and possibly break.
• Never hang unit by the power cord.


Join the conversation about this product
Here you can share what you think about the Black and Decker FI200 Hair Straightener. If you have a question, first carefully read the manual. Requesting a manual can be done by using our contact form.