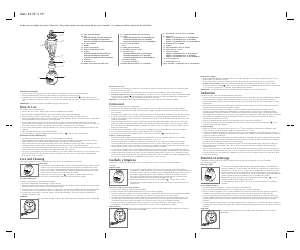
Size: 21.75" x 17"
Instalación de la jarra
1. Antesdeusarlalicuadoraporprimeravez,lavetodassuspartesconexcepcióndelabase.Useeldiagramapara
armardenuevolalicuadora.
2. Coloquelascuchillasdentrodelabasedelajarraygirelabasehacialaderechahastaquedarajustada.
3. Sistema de seguro de cierre:Unavezinstaladaslascuchillasenlajarra,coloquelajarrasobrelabasedelaunidad
ygírelahaciaelcandado( )hastaquedarfija.Elsegurodecierrehaencajadoapropiadamentesipuedeusted
sujetarelasadelajarray alzarlaunidadcompletadeunasolavez.
Importante:Lajarradebeestarinstaladaapropiadamenteparaqueengancheenlabasedelaunidad.
Como usar
Esteproductoessolamenteparausodoméstico.
1. Aseguresedequeningunavelocidadesteseleccionadayconecteelcableaunatomadecorrientestandard.
2. Antesdelicuarlosalimentos,introdúzcalosenlajarraytápela.Asegúresequeeltapóndemedirdelatapaesté
biencolocado.
3. Asegúresequeeltapónestéensulugar.Cuandotriturehielooalimentosduros,mantengaunamanosobrelatapa.
4. Escojalavelocidadquemejorrealicelafuncióndeseadaparalosalimentosobebidas.Asegúresedeoprimirel
botóndevelocidadbajaoalta(LOW/HI)encombinaciónconeldelafuncióndeseada,antesdeseleccionarode
cambiarlavelocidad.
5. Presioneelbotóndepulsaciónyluego,suélteloparalasfuncionesdelicuadorápidoydelicado.Alsoltarseeste
botón,lalicuadoraseapagaautomáticamente.Useelbotónparatriturarhielodelamismamaneraqueelbotón
delcontroldepulso.Paraobtenermejoresresultados,usepulsoscortos.Lalicuadoraseapagacuandosesueltael
botónparatriturarhielo.
6. Sideseaagregaringredientesamediolicuar,retireelmedidordelatapaeintrodúzcalosatravésdelaabertura.
7. Unavezqueterminedelicuar,oprimaelbotóndepulsación(OFF/PULSE).
8. Pararetirarlajarradelabase,sujételadelasaygírelahaciaelsímbolo( )paradesengancharla.
Consejos y técnicas para licuar
• Partalosalimentosenpedazospequeñosdeaproximadamente2cm(
3
⁄
4
”)antesdeagregarlosalalicuadora.
Parapicaryrallar,partalosalimentossólidosenpedazosde2cm(
3
⁄
4
”).
• Cuandolosingredientesseadhieranosalpiquenloscostadosdelajarra,apaguelalicuadorayretirelatapa.
Useunaespátuladegomaparaempujarlosalimentoshacialascuchillas.Tapelajarraycontinúelicuando.
• Algunasdelasfuncionesquenoselogranconéxitoenunalicuadorason:batirclarasdehuevoapuntodenieve,
cremar,deshacerpapas,molercarne,amasar,niextraerjugosdefrutaovegetales.
• Acontinuacióningredientesquenuncadebenintroducirseenlalicuadoraafindenoocasionarledaño:especies
secasyhierbas(licuadassolas),huesos,pedazosgrandesdealimentoscongelados,alimentosduroscomolosnabos.
• Cuandotriturehielo,primeroviertaaguaenlajarray‑despuésagreguehasta6cubosalavez.Sujetebienlatapa
conlamano;useelcontroldepulsooel‑botónparatriturarhielo.Utiliceelmedidorparamediringredienteshasta
60ml(2oz)cuandoañadapocascantidadesdejugodelimón,crema,o‑licores.
Cuidado y limpieza
Elaparatonocontienepiezasreparablesporelconsumidor.Paraservicio,acudaapersonaldeasistencia
calificado.
Limpieza rápida
1. Lacaracterísticalimpiezarápidafacilitalavarlajarraporqueayudaadesprenderlas
partículasdecomida.Puedeusarestacaracterísticallenandolajarraconaguatibiahasta
lamarcaqueindica1,6tazas.Agregueunpocodedetergentedelosaparalasmanchas
persistentes(despuésdeprepararsalsa,malteadas,oaderezodeensalada).Sujetela
tapayoprimaelbotóndelimpiezarápida.Permitaqueelaparatofuncionedurante
5segundosydespuéspresioneelbotóndeapagado(OFF)(A).
2. Desconectelaunidad,girelajarrahaciaelsímbolo( ),retirelajarraylávela.
3. Laspartesdelalicuadorapuedenlavarseamano.Sigalasinstruccionesdelimpiezaa
continuación.
Para lavar a mano las partes de la licuadora
1. Antesdelimpiar,apagueydesconectelalicuadora.
2. Enjuaguelaspartesdeinmediatodespuésdelicuarparafacilitarlalimpieza.
3. Limpielabasedelalicuadoraconunpañohumedecidoyséquelabien.Eliminelasmanchaspersistentesfrotándola
conunaesponjahumedecidaconunlimpiadornoabrasivo.Nosumerjalabaseenningúnlíquido.
4. Laspartesremoviblespuedenserlavadasamanooenunamáquinalavaplatos.Latapa,eltapóndemedir,ylas
cuchillasdebencolocarsesiempreenlabandejasuperiordelamáquina.Lajarradevidriopuedeintroducirseen
labandejainferiordelamáquinalavaplatos.Nocoloquelajarranilaspiezasenlíquidoshirviendo.
5. Sillegaraaderramarselíquidosobrelabase,límpielaconunpañohumedecidoyséquelabien.Nouse
almohadillasnilimpiadoresabrasivosenningunadelaspartesnienelacabadodelalicuadora.
Almacenamiento
Paraunprácticoalmacenamiento,enrolleelcablealrededordelossoportesenelinferior
delabasedelaunidad(B).
Product may vary slightly from what is illustrated. / Este producto puede variar ligeramente del que aparece ilustrado. / Le produit peut différer légèrement de celui illustré.
†1. Bouchon du couvercle (Pièce n° 081049)
†2. Couvercle
Modèle n° BL10450H (Pièce n° 081050DZ102)
Modèle n° BL10450HB (Pièce n° 081050EE)
Modèle n° BL10450HR (Pièce n° BL10450HR-02)
†3. Récipient (Pièce n° 99002)
4. Poignée
†5. Joint d’étanchéité (Pièce n° 09150)
†6. Lames (Pièce n° 77766)
†7. Socle du récipient
Modèle n° BL10450H (Pièce n° 03474DZ101)
Modèle n° BL10450HB (Pièce n° 03474EB)
Modèle n° BL10450HR (Pièce n° BL10450HR-06)
8. Socle de l’appareil
9. Commandes (voir A)
† Pièce amovible e remplaçable par le consommateur
†1. Tapón con medidor (Pieza Nº 081049)
†2. Tapa
Modelo BL10450H (Pieza Nº 081050DZ102)
Modelo BL10450HB (Pieza Nº 081050EE)
Modelo BL10450HR (Pieza Nº BL10450HR-02)
†3. Jarra (Pieza Nº 99002)
4. Asa
†5. Junta (Pieza Nº 09150)
†6. Cuchillas (Pieza Nº 77766)
†7. Base de la jarra
Model BL10450H (Pieza Nº 03474DZ101)
Model BL10450HB (Pieza Nº 03474EB)
Model BL10450HR (Pieza Nº BL10450HR-06)
8. Base de la unidad
9. Controles (Consulte A)
† Remplazable/removible por el consumidor
†1. Lid Cap (Part# 081049)
†2. Lid
Model BL10450H (Part# 081050DZ102)
Model BL10450HB (Part# 081050EE)
Model BL10450HR (Part# BL10450HR-02)
†3. Jar (Part# 99002)
4. Handle
†5. Gasket (Part# 09150)
†6. Blade assembly (Part# 77766)
†7. Jar base
Model BL10450H (Part# 03474DZ101)
Model BL10450HB (Part# 03474EB)
Model BL10450HR (Part# BL10450HR-06)
8. Unit base
9. Controls (see A)
†Consumer replaceable/removable parts
A
BLENDER JAR ASSEMBLY
1. Beforefirstuse,washallpartsexcepttheUnitBase.Put‑theGasketontopoftheBladeAssembly.
2. PlacetheBladeAssemblyintotheJarBaseandturntheJarBaseclockwiseuntiltight.
3. InterlockSystem:PlacetheassembledJarontotheUnitBaseandturntowardlock( )untilsecuredinplace.
You’ve engaged the Interlock System if you lift the Jar Handle and the entire blenderliftstogetherasone
unit.
IMPORTANT:Jarmustbeproperlyassembledtoengageontounitbase.
How to Use
Thisproductisforhouseholduseonly.
1. Besuretheunitis“OFF”andplugthecordintoastandardelectricaloutlet.
2. PlacethefoodtobeblendedintotheJarandplacetheLidontheJarbeforeblending.
3. BesurethattheLidCapisinplace.Whencrushingiceorhardfoods,keeponehandontheLid.
4. Choosethespeedthatbestsuitsyourtaskforfoodorbeverageblending.PresstheLOW/HIbuttonincombination
withthetaskbuttonwhenchoosingorswitchingspeeds.
5. UsethePulsebuttonforafewseconds,thenreleaseforquickordelicateblendingtasks.ReleasingthePulse
automaticallyturnstheBlenderoff.UsetheIceCrushingButtontocrushiceinthesamemannerasthePulse.For
bestresults,useshort“pulses.”TheBlenderwillstopwhenyoureleasetheIceCrushbutton.
6. IfyouwanttoaddingredientswhiletheBlenderison,removetheLidCapanddropingredientsthroughtheLid
opening.
7. Whenfinishedblending,pushtheOff/Pulsebutton.
8. ToremovetheJar,grasptheHandle,twisttowardtheunlock( )andliftitfromtheUnitBase.
BLENDING TIPS AND TECHNIQUES
• Cutfoodintosmallpieces(about
3
⁄
4
”/2cm)beforeaddingtotheBlender.
• WheningredientsstickorspatteralongthesidesoftheJar,stoptheblendingactionandremovetheLid.Usea
rubberspatulatopushfoodtowardtheblades.ReplacetheLid,thencontinueblending.
• SomeofthetasksthatcannotbeperformedefficientlywithaBlenderare:beatingeggwhites,whippingcream,
mashingpotatoes,grindingmeats,mixingdough,andextractingjuicesfromfruitsandvegetables.
• Thefollowingitemsshouldneverbeplacedintheunitastheymaycausedamage:driedspicesandherbs(ground
alone),bones,largepiecesofsolidlyfrozenfoods,toughfoodssuchasturnips.
• Tocrushice,pourliquidintheJarfirst,thenaddupto6icecubes.HoldonehandfirmlyontheLid;pulse,using
theIceCrushbutton.UsetheLidCaptomeasureingredientsupto60ml/2oz.whenaddingingredientslike
lemonjuice,cream,orliqueurs.
Care and Cleaning
Thisproductcontainsnouserserviceableparts.Referservicetoqualifiedservicepersonnel.
FAST CLEAN
1. TheFastCleanfeaturehelpsmakeiteasiertocleantheblenderJarbylooseningfood
particles.YoumayusetheFastCleanfeaturebyfillingtheJarwithlukewarmwater
tothe1.6‑Cupmark.Addalittledishdetergentfortoughcleaningjobs(suchasafter
makingsalsa,shakes,orsaladdressing).HoldtheLidandpresstheFastCleanbutton.
Lettheunitrunforabout5seconds,thenpressOff(A).
2. Unplugtheunit,twisttounlock( ),lifttheJarofftheUnitBase,andrinse.
3. Partsmaybehand‑washed.Followthecleaninginstructionsbelow.
For hand washing parts:
1. Beforecleaning,turnoffandunplugtheBlender.
2. Rinsepartsimmediatelyafterblendingforeasiercleanup.
3. WipetheUnitBasewithadampclothanddrythoroughly.Removestubbornspotsbyrubbingwithadampcloth
andnon‑abrasivecleaner.DonotimmersetheBaseinliquid.
4. Removablepartscanbewashedbyhandorinadishwasher.Lid,LidCap,andBladeAssemblyshouldbeplaced
inthetoprackonly.Theglassjarisbottomrackdishwasher‑safe.Donotplacejarorpartsinboilingliquids.
5. IfliquidsspillintotheBase,wipewithadampclothanddrythoroughly.Donotuseroughscouringpadsor
cleansersonpartsorfinish.
STORAGE
Forconvenientstorage,wrapthecordaroundthefeetonthebottomoftheUnitBase(B).
A
B
Montage du récipient
1. Avantlapremièreutilisation,nettoyertouteslespiècesdumélangeursauflesocledel’appareil.Placerlejoint
d’étanchéitésurledessusdelalame.
2. Placerlalamedanslesocledurécipientettournercelui‑cidanslesenshorairejusqu’àcequ’ilsoitserré.
3. Système d’asservissement :Placerlerécipientassemblédanslesocledel’appareiletlefairetournerversle
pictogrammedeverrouillage( )jusqu’àcequ’ilsoitfixéenplace.Ledispositifd’asservissementestalorsengagé.
Si on soulève la poignée du récipient,toutlemélangeurestsoulevé.
IMPORTANT :Lerécipientdoitêtrebienassembléavantdel'installerdanslesocledel'appareil.
Utilisation
L'appareilestconçupouruneutilisationdomestiqueseulement.
1. S’assurerquel’appareilestenpositionhorstensionetbrancherlecordondansuneprised’alimentationstandard.
2. Placerlesalimentsàmélangerdanslerécipientetplacerlecouverclesurlerécipientavantdecommencer.
3. S'assurerquelebouchonestenplace.Laisserunemainsurlecouverclelorsqu’onconcassedesglaçonsoudes
alimentsdurs.
4. Bienenfoncerleboutondegammedevitesses(LOW/HI)enmêmetempsqueceluidelavitessepourlatâcheà
effectuerlorsqu’onchoisitouqu’onmodifielavitesse.
5. Utiliserleboutonà‑impulsion(P)ouréglerlecadranà‑laposition‑Ppendantquelquessecondes,puisle
relâcherpourmélangerrapidementoudélicatement.Lorsqu’onrelâchecettefonction,lemélangeurs’arrête
automatiquement.SeservirduboutonICECRUSHcommeduboutonà‑impulsionpourconcasserdesglaçons.
Afind’optimiserlesrésultats,s’enservirsurdecourtespériodes.Lemélangeurs’arrêtelorsqu’onrelâchece‑bouton.
6. Pourajouterdesingrédientslorsquelemélangeurfonctionne,retirerlebouchonducouvercleetinsérerles
alimentsparl’ouvertureducouvercle.
7. Unefoislemélangeterminé,appuyersurleboutond’arrêtetàimpulsion(OFF/PULSE).
8. Pourretirerlerécipient,ensaisirlapoignéeetlefairetournerverslepictogrammenonverrouillé( )etle
souleverhorsdusocledel’appareil.
Conseils pratiques
• Couperlesalimentsenpetitsmorceaux(environ2‑cm(
3
⁄
4
‑po))avantdelesajouterdanslemélangeur.Pour
hacherourâper,couperlesalimentssolidesenmorceauxde2‑cm(
3
⁄
4
‑‑po).
• Lorsquedesingrédientsadhèrentauxparoisdurécipientouysontéclaboussés,arrêterl’appareiletenretirerle
couvercle.Seservird’unespatuleencaoutchoucpourrepousserlesalimentsversleslames.Remettrelecouvercle
enplaceetcontinuerà‑mélanger.
• Certainestâchesnesontpaseffectuéesconvenablementdansunmélangeur.Ils’agitdemonterdesblancsd’œufs
enneige,defouetterdelacrème,deréduiredespommesdeterreenpurée,dehacherfinementdelaviande,de
pétrirdelapâteetd’extrairedujusdefruitsoudelégumes.
• Nejamaisplacerlesingrédientssuivantsdansl’appareilcarilspeuventl’endommager‑:desépicesetdesfines
herbesséchées(pourlesmoudreseules),desos,degrosmorceauxd’alimentscongelésetdesalimentsdurs
(commedesnavets).
• Pourconcasserdesglaçons,ilfautd’abordverserduliquidedanslerécipientety‑ajouterjusqu’à6‑grosglaçons.
Tenirlecouverclefermementd’unemain;seservirduboutonàimpulsionICECRUSHpourconcasserlesglaçons.
Seservirdubouchonpourmesurerlesingrédients(auplus60‑ml(2‑oz))à‑ajoutercommedujusdecitron,dela
crèmeoudesliqueurs.
Entretien et nettoyage
L’utilisateurnepeuteffectuerlui‑mêmel’entretiend’aucunepiècedecetappareil.Enconfierl’entretien
àdupersonnelqualifié.
Nettoyage rapide
1. Lafonctiondenettoyagerapidefacilitelenettoyagedurécipientenendécollantles
particulesd’aliments.Onpeututilisercettefonctionenremplissantlerécipientd’eau
tièdejusqu'àlamarquede1,6t.Ajouterunpeudedétergentpourenleverlestaches
tenaces(commeaprèsavoirpréparédelasalsa,deslaitsfrappésouunevinaigrette).
Tenirlecouvercled’unemainetdel’autre,enfoncerleboutondenettoyagerapide(A).
Laisserl’appareilfonctionnerpendantenviron5‑secondespuisl’arrêter.
2. Débrancherl’appareil,fairetournerlerécipientpourledéverrouiller( ),puisle
souleverhorsdusocledel’appareiletlerincer.
3. Onpeutégalementlaverlespiècesà‑lamain.Ilfautalorsrespecterlesconsignes
suivantes.
Lavage manuel des pièces
1. Avantdenettoyerlemélangeur,lemettrehorstensionetledébrancher.
2. Rincerlespiècesimmédiatementaprèsavoirmélangéafind’enfaciliterlenettoyage.
3. Essuyerlesocledel’appareilavecunchiffonhumideetbienl’assécher.Enleverlestachestenacesenfrottantà
l’aided’unchiffonhumideetd’unproduitnettoyantnonabrasif.Nepasimmergerlesocledel’appareil.
4. Lespiècesamoviblespeuventêtrelavéesàlamainouaulave‑vaisselle.Lebouchon,lecouvercleàdeuxbecs
(certainsmodèlesseulement)etleslamesvontseulementdanslepaniersupérieurdulave‑vaisselle.Lerécipient
peutallerdanslapartieinférieurdulave‑vaisselle.Nepasplongerlerécipientnilespiècesdansunliquide
bouillant.
5. Lorsqu’unliquideserenversedanslesocledel’appareil,essuyercedernieravecunchiffonhumideetl’assécher
complètement.Nepasutiliserdetamponsderécuragenideproduitsnettoyantsabrasifssurlespiècesoulefinide
l’appareil.
Rangement
Pourfaciliterlerangement,enroulerlecordonautourdespiedsaubasdusoclede
l’appareil(B).
A


Join the conversation about this product
Here you can share what you think about the Black and Decker BL10450H Blender. If you have a question, first carefully read the manual. Requesting a manual can be done by using our contact form.