
FRANÇAIS ENGLISH DEUTSCH NEDERLANDS ITALIANO ESPAÑOL PORTUGUÊS DANSK
BABYLISS
99 Avenue Aristide Briand
92120 Montrouge
France
www.babyliss.com
2
3
1
4
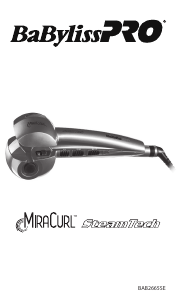
STYLE’UP
MINI FER A ONDULER
Veuillez lire attentivement les consignes de sécurité
avant toute utilisation de l’appareil.
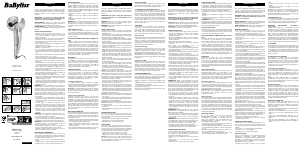
CARACTÉRISTIQUES DU PRODUIT
1. 3 tubes chauants avec revêtement Ceramic - dimensions
des tubes 12,8 x 65 mm
2. Bouton I/O
3. Témoin lumineux de fonctionnement (LED)
4. Embout isolant
UTILISATION
A la première utilisation, il est possible que vous perceviez une
légère émanation de fumée et une odeur particulière : ceci est
fréquent et disparaîtra dès la prochaine utilisation.
• Brancher et allumer l’appareil. Le témoin lumineux
s’allume.
• Laisser l’appareil chauer pendant environ une minute.
Quelques astuces avant de commencer :
- Pour un résultat optimal, utiliser l’appareil sur cheveux
raides ou préalablement lissés.
- Pour un eet plus léger et naturel sur cheveux mi-
longs ou longs, commencer les ondulations à hauteur
d’oreille.
- Pour plus de volume, commencer les ondulations
directement à la racine (en évitant toutefois
d’approcher l’appareil du cuir chevelu).
• Utiliser l’appareil sur cheveux secs.
• Démêler les cheveux.
• Sélectionner une mèche de cheveux et la placer entre les
plaques chquantes de l’appareil.
• Refermer l’appareil sur la mèche en maintenant une
légère pression quelques secondes selon la nature du
cheveu.
• Relâcher et reproduire le geste tout le long de la mèche
en refermant l’appareil sur la dernière ondulation
obtenue pour un résultat plus harmonieux et pour éviter
les faux plis.
• Toujours travailler toujours des racines vers les pointes.
• Nous vous conseillons d’utiliser l’appareil en plaçant la
partie munie des 2 tubes chauants vers l’extérieur. Il
est ainsi plus aisé de visualiser l’endroit exact où il faut
presser l’appareil sur la mèche.
• Laisser refroidir les cheveux avant de les manipuler.
• Froisser les ondulations avec les doigts et les xer à l’aide
d’un léger voile de laque ou une noisette de mousse,
mais ne surtout pas brosser les cheveux.
• Après utilisation, éteigner et débrancher l’appareil.
Laisser refroidir avant de le ranger.
NB : Au cours de chaque utilisation, une légère émanation
de fumée est possible. Ceci peut être dû à de l’évaporation de
sébum ou d’un reste de produits capillaires (soin sans rinçage,
laque, ...) ou de l’humidité contenue dans le cheveu.
ENTRETIEN
• Débrancher l’appareil et le laisser refroidir complètement.
• Nettoyer les plaques à l’aide d’un chion humide et doux,
sans détergent, an de préserver la qualité optimale des
plaques. Ne pas gratter les plaques.
STYLE’UP
MINI CURLING IRON
Please read the following instructions carefully before
using the appliance.
PRODUCT FEATURES
1. 3 heating tubes with ceramic covering - tube dimensions
12.8 x 65 mm
2. I/O button
3. Indicator light (LED)
4. Stay-cool tip
USE
When using the unit for the rst time, you might notice a small
quantity of steam and a distinct odour: this is common and
will disappear by the next use.
• Plug in the appliance and switch on. The indicator light
comes on.
• Leave the appliance to heat for about one minute.
A little advice before you start:
- For best results, use the appliance on straight or
previously straightened hair.
- For a lighter, more natural eect on mid-length or long
hair, start curling at ear height.
- For greater volume, start curling directly at the root (but
do not allow the appliance to come into contact with the
scalp).
• Use the appliance on dry hair.
• Untangle hair.
• Take up a section of hair and place it between the heating
plates of the appliance.
• Close the appliance over the lock of hair and keep gentle
pressure for a few seconds, depending on hair type.
• Release and repeat along the lock of hair, pausing the
appliance on the last curl obtained for a softer result and
to avoid creases.
• Always work from the roots to the tips.
• We recommend you use the appliance with the part tted
with the 2 heating tubes facing outwards. This makes it
easier to see exactly where the appliance needs to be
pressed against the lock of hair.
• Let hair cool down before handling it.
• Use your ngers to break up curls and x them with a
quick spray of lacquer or mousse, but do not brush hair.
• After use, switch o and unplug the appliance. Allow to
cool before storing away.
Note: Each time you use the appliance, you may see some
steam. Do not be concerned, this could be because of
evaporation of the natural oils of the hair, residual hair
products (leave-in hair products, hairspray, etc.) or excess
moisture evaporating from your hair.
MAINTENANCE
• Unplug the appliance and allow to cool completely.
• Clean the plates using a soft, dampened cloth, without
soap, to preserve the optimal quality of the plates. Do not
scratch the plates.
STYLE’UP
MINI LOCKENSTAB
Bitte lesen Sie aufmerksam die Sicherheitshinweise, bevor
Sie das Gerät in Betrieb nehmen.
EIGENSCHAFTEN DES PRODUKTS
1. 3 Heizrohre mit Keramikbeschichtung - Abmessungen
der Rohre 12,8 x 65 mm
2. Taste I/O
3. Betriebsanzeigeleuchte (LED)
4. Isolieraufsatz
GEBRAUCH
Möglicherweise nehmen Sie beim ersten Gebrauch eine
leichte Rauchentwicklung und einen seltsamen Geruch
wahr: dies geschieht häug und wird bereits beim nächsten
Gebrauch nicht mehr vorkommen.
• Gerät an den Netzstrom anschließen und einschalten Die
Anzeigeleuchte leuchtet.
• Das Gerät ca. eine Minute aufheizen lassen.
Einige Tipps, bevor Sie beginnen:
- Für optimale Resultate sollten Sie das Gerät auf glattem
oder vorher geglättetem Haar verwenden.
- Beginnen Sie mit den Wellen auf der Höhe der Ohren,
um bei halblangem oder langem Haar einen legeren,
natürlichen Look zu erzielen.
- Beginnen Sie mit den Wellen direkt am Haaransatz, um
der Frisur mehr Volumen zu verleihen (Vermeiden Sie es
jedoch, das Gerät zu nahe an der Kopfhaut zu halten).
• Das Gerät auf trockenem Haar verwenden.
• Das Haar entwirren.
• Eine Strähne abteilen und sie zwischen die Heizplatten
legen.
• Das Gerät um die Strähne schließen und je nach Haartyp
einige Sekunden lang leichten Druck ausüben.
• Das Gerät lösen und den Vorgang auf der ganzen Länge
der Strähne wiederholen, wobei Sie das Gerät auf der
zuletzt erzeugten Welle ansetzen, um ein harmonisches
Resultat zu erzielen und Knicke zu vermeiden.
• Immer von den Wurzeln in Richtung Spitzen arbeiten.
• Wir raten Ihnen, das Gerät so anzusetzen, dass die beiden
Rohre an der Außenseite liegen. Dann können Sie leichter
die genaue Stelle sehen, an der das Gerät auf die Strähne
gedrückt werden muss.
• Das Haar vor der weiteren Bearbeitung abkühlen lassen.
• Die Wellen leicht mit den Fingern knautschen und mit
einem Hauch von Haarspray oder etwas Frisierschaum
xieren, das Haar aber keinesfalls bürsten.
• Nach dem Gebrauch das Gerät ausschalten und den
Netzstecker ziehen. Vor dem Verstauen abkühlen lassen.
Hinweis: Bei jedem Gebrauch kann sich etwas Dampf
entwickeln. Dies kann daran liegen, dass Talg oder
Rückstände von Haarprodukten (Pegemittel, die nicht
ausgespült werden, Haarlack,...) oder die im Haar enthaltene
Feuchtigkeit verdunsten.
PFLEGE
• Den Netzstecker ziehen und das Gerät vollständig
abkühlen lassen.
• Die Platten mit einem weichen, feuchten Tuch ohne
Reinigungsmittel säubern, um die optimale Qualität der
Platten zu bewahren. Die Platten nicht abkratzen.
STYLE’UP
MINIKRULTANG
Lees deze veiligheidsinstructies zorgvuldig door voordat u
het apparaat gebruikt.
PRODUCTEIGENSCHAPPEN
1. 3 verwarmde buizen met Ceramic-coating - afmetingen
van de buizen 12,8 x 65 mm
2. I/O-knop
3. Indicatielampje (led)
4. Isolerend uiteinde
GEBRUIK
Het is mogelijk dat u een lichte rookontwikkeling en een
specieke geur waarneemt bij het eerste gebruik. Dit komt
vaak voor en zal bij het volgende gebruik verdwijnen.
• Sluit het apparaat aan op het stroomnet en zet het aan.
Het indicatielampje licht op.
• Laat het apparaat gedurende ongeveer een minuut
opwarmen.
Een paar tips voordat u begint:
- Voor een optimaal resultaat gebruikt u het apparaat op
steil of van te voren ontkruld haar.
- Voor een lichter en natuurlijker eect op halang of
lang haar begint u met de krullen ter hoogte van de
oren.
- Voor meer volume begint u direct bij de wortel met
krullen (vermijd altijd dat het apparaat de hoofdhuid
raakt).
• Gebruik het apparaat op droog haar.
• Ontwar het haar.
• Kies een pluk haar en plaats deze tussen de verwarmde
platen van het apparaat.
• Sluit het apparaat op de lok en oefen enkele seconden
lichte druk uit, afhankelijk van het haartype.
• Laat weer los en herhaal deze handeling over de hele
lok. Sluit het apparaat op de laatst gemaakte krul voor
een harmonieuzer resultaat en om valse vouwen te
voorkomen.
• Werk altijd van de wortels naar de punten toe.
• We raden u aan om het apparaat te gebruiken met de
kant met de twee verwarmde buizen naar buiten toe
gericht. Zo is het gemakkelijker om de precieze plek te
zien waar u het apparaat op de pluk haar moet drukken.
• Laat het haar afkoelen voordat u het in model brengt.
• Breng de krullen met uw vingers in model en houd ze zo
met een beetje haarlak of mousse. Kam het haar niet.
• Zet het apparaat na gebruik uit en haal de stekker uit het
stopcontact. Laat het apparaat goed afkoelen voordat u
het opbergt.
NB: Tijdens het gebruik is altijd een lichte rookontwikkeling
mogelijk. Dit kan te wijten zijn aan de verdamping van talg of
van restjes haarproducten (leave-in conditioner, haarlak enz.)
of aan het vocht dat in het haar aanwezig is.
ONDERHOUD
• Haal de stekker uit het stopcontact en laat het apparaat
volledig afkoelen.
• Reinig de platen met een vochtig en zacht doekje zonder
schoonmaakmiddel om de platen in optimale staat te
houden. Schrob de platen niet schoon.
STYLE’UP
MINI-FERRO PER ONDE
Prima di utilizzare l’apparecchio, leggere attentamente le
indicazioni in materia di sicurezza.
CARATTERISTICHE DEL PRODOTTO
1. 3 tubi riscaldanti con rivestimento Ceramic - dimensioni
dei tubi 12,8 x 65 mm
2. Pulsante I/O
3. Spia luminosa di funzionamento (LED)
4. Punta isolante
UTILIZZO
Al primo utilizzo, è possibile percepire un odore particolare e
una leggera emanazione di fumo: accade spesso, ma la cosa
sparirà al successivo utilizzo.
• Collegare e accendere l’apparecchio. La spia luminosa si
accende.
• Lasciare riscaldare l’apparecchio per circa un minuto.
Consigli prima di iniziare:
- Per un risultato ottimale, utilizzare l’apparecchio sui
capelli dritti o precedentemente lisciati.
- Per un eetto più leggero e naturale su capelli lunghi o
di lunghezza media, iniziare a creare le onde all’altezza
dell’orecchio.
- Per un maggiore volume, iniziare a creare le onde
direttamente alla radice (evitando però di avvicinare
l’apparecchio al cuoio capelluto).
• Utilizzare l’apparecchio sui capelli asciutti.
• Districare i capelli.
• Selezionare una ciocca di capelli e posizionarla tra le
piastre riscaldanti dell’apparecchio.
• Richiudere l’apparecchio sulla ciocca applicando una
leggera pressione per qualche secondo in funzione del
tipo di capello.
• Lasciare e riprodurre il gesto sull’intera ciocca, chiudendo
l’apparecchio sull’ultima onda creata in modo da ottenere
un risultato più armonioso ed evitare increspature.
• Operare sempre dalle radici verso le punte.
• Si consiglia di utilizzare l’apparecchio posizionando la
parte dotata dei 2 tubi riscaldanti verso l’esterno. Risulta
quindi più facile visualizzare il punto esatto in cui premere
l’apparecchio sulla ciocca.
• Lasciare rareddare i capelli prima di manipolarli.
• Scuotere le onde con le dita e ssarle con un leggero
strato di lacca o una noce di schiuma, ma soprattutto non
spazzolare i capelli.
• Dopo l’utilizzo, spegnere e staccare l’apparecchio dalla
corrente. Lasciar rareddare prima di riporlo.
NB: Durante ogni utilizzo, è possibile che fuoriesca del fumo.
La cosa può essere dovuta all’evaporazione del sebo o a un
residuo di prodotto per la cura dei capelli (prodotti senza
risciacquo, lacca...), oppure all’umidità contenuta nel capello.
MANUTENZIONE
• Staccare l’apparecchio dalla corrente e lasciare che si
rareddi completamente.
• Pulire le piastre con un panno umido e morbido, senza
detersivi per non compromettere la qualità ottimale delle
piastre. Non utilizzare materiali abrasivi sulle piastre.
STYLE’UP
MINI RIZADOR
Lea atentamente estas instrucciones de seguridad antes
de utilizar el aparato.
CARACTERÍSTICAS DEL PRODUCTO
1. 3 tubos calentadores con revestimiento Ceramic -
dimensiones de los tubos 12,8 x 65 mm
2. Interruptor «I/O»
3. Indicador luminoso de funcionamiento (LED)
4. Punta aislante
MODO DE EMPLEO
Al usar el aparato por primera vez, es posible que perciba
una ligera emanación de humo y un olor particular: es algo
habitual y no volverá a ocurrir tras el primer uso.
• Conecte el aparato y enciéndalo. El indicador luminoso
se encenderá.
• Deje que el aparato se caliente durante un minuto
aproximadamente.
Algunos trucos antes de empezar:
- Para conseguir un resultado óptimo, use el aparato con
el cabello lacio o previamente alisado.
- Para conseguir un efecto más ligero y natural con media
melena o cabello largo, comience a rizar a la altura de
la oreja.
- Para conseguir más volumen, comience a rizar
directamente a la altura de la raíz (evitando acercar el
aparato del cuero cabelludo).
• Use el aparato con el cabello seco.
• Desenrede el cabello.
• Seleccione un mechón del cabello y colóquelo entre las
placas calentadoras del aparato.
• Cierre el aparato sobre el mechón ejerciendo una ligera
presión durante unos segundos en función del tipo de
cabello.
• Suelte el mechón y repita el gesto a lo largo del mechón
cerrando el aparato sobre el último rizo para conseguir un
resultado más armonioso y para evitar los falsos pliegues.
• Siempre realice el proceso de la raíz hacia las puntas.
• Le aconsejamos que use el aparato colocando la parte
con los 2 tubos calentadores hacia el exterior. Así es
más fácil y cómodo poder ver el lugar exacto en el que
necesita apretar el aparato sobre el mechón.
• Espere a que el cabello se enfríe antes de manipularlo.
• Pliegue los rizos con los dedos y fíjelos con una ligera
pulverización de laca o una pequeña cantidad de
espuma, pero sobre todo no cepille el cabello.
• Después de usarlo, apague y desenchufe el aparato.
Espere a que se enfríe antes de guardarlo.
Nota: Es posible que en cada uso perciba una ligera
emanación de humo. Puede tratarse de evaporación de
grasa del cuero cabelludo, de restos de productos capilares
(acondicionador sin aclarado, laca, etc.) o de la humedad del
cabello.
MANTENIMIENTO
• Desenchufe el aparato y déjelo enfriar completamente.
• Limpie las placas con un paño húmedo y suave, sin
detergente, para conservar las placas en perfecto estado.
No las rasque con ningún objeto.
STYLE’UP
FERRO PARA ONDULAR EM MINIATURA
Queira ler atentamente as indicações de segurança antes
de utilizar o aparelho.
CARACTERÍSTICAS DO PRODUTO
1. 3 tubos aquecedores com revestimento em cerâmica -
dimensões dos tubos 12,8 x 65 mm
2. Interruptor I/O
3. - Testemunho luminoso de funcionamento (LED)
4. Extremidade isolante
UTILIZAÇÃO
Durante a primeira utilização, é possível que se aperceba de
um odor particular: este problema é frequente e desaparece
durante a próxima utilização.
• Ligue o aparelho à corrente elétrica e ative-o. O
testemunho luminoso acende-se e começa a piscar.
• Deixe o aparelho aquecer durante cerca de um minuto.
Algumas dicas antes de começar:
- Para um resultado ideal, utilize o aparelho sobre
cabelos lisos ou alisados.
- Para obter um efeito mais ligeiro e natural nos cabelos
médios ou compridos, comece a ondulação à altura da
orelha.
- Para obter mais volume, comece a ondulação
diretamente na raiz (evitando no entanto de aproximar
o aparelho do couro cabeludo).
• Utilize a aparelho com os cabelos secos.
• Desembarace os cabelos.
• Selecione uma madeixa de cabelos e coloque-a entre as
duas placas quentes do aparelho.
• Volte a fechar o aparelho xando a madeixa e exercendo
uma pressão ligeira durante alguns segundos,
dependendo da natureza dos seus cabelos.
• Volte a soltar e repita o gesto ao longo da madeixa,
voltando a fechar o aparelho na última ondulação obtida
para obter um resultado mais harmonioso e para evitar
dobras não naturais.
• Trabalhe sempre a partir das raízes em direção às pontas.
• Aconselhamos utilizar o aparelho colocando a parte
equipada com 2 tubos em direção ao exterior. Desta
forma, é mais fácil visualizar o local exato para pressionar
o aparelho sobre a madeixa.
• Deixe arrefecer os cabelos antes de mexer nos mesmos.
• Solte as ondulações com os dedos e xe-as com um
pouco de laca ou de espuma, mas não escove os cabelos.
• Após a utilização, desligue o aparelho e retire a cha da
tomada. Deixe arrefecer antes de arrumar.
Note: Durante cada utilização, é possível que seja libertado
algum fumo. Isto pode dever-se à evaporação de sebo ou de
restos de produtos para tratamento capilar (cuidado sem
enxaguar, laca,...) ou de humidade contida nos cabelos.
MANUTENÇÃO
• Desligue o aparelho e deixe-o arrefecer completamente.
• Limpe as placas com um pano suave e humedecido, sem
detergentes, para preservar a qualidade das placas. Não
esfregue as placas.
STYLE’UP
MINI KRØLLEJERN
Læs sikkerhedsforanstaltningerne omhyggeligt, inden
apparatet tages i brug.
PRODUKTETS EGENSKABER
1. 3 varmerør med keramisk belægning - rørerens
dimensioner 12,8 x 65 mm
2. I/O-knap
3. Kontrollampe, der lyser når apparatet er tændt (LED)
4. Isolerende endestykke
ANVENDELSE
Det er muligt, når du anvender apparatet første gang, at der
kan forekomme lidt røg og en speciel lugt: Dette er normalt og
lugten forsvinder efter anvendelse af apparatet første gang.
• Sæt stikket i kontakten og tænd for apparatet.
Kontrollampen tændes.
• Lad apparatet opvarme i ca. et minut.
Et par gode råd før start:
- For et optimalt resultat anvendes apparatet på glat
eller allerede glattet hår.
- For en lettere og mere naturlig eekt på halvlangt eller
langt hår starter du med at krølle i ørehøjde.
- For mere volumen starter du med at krølle direkte
fra rødderne (undgå, at apparatet nærmer sig
hovedbunden).
• Anvend apparatet på tørt hår.
• Red håret ud.
• Tag en hårlok og anbring den mellem pladerne. Luk
derefter apparatet.
• Luk pladerne om hårlokken, mens der fastholdes et let
tryk et par sekunder alt efter hårets natur.
• Slip og gentag handlingen langs hele lokken ved at
lukke apparatet om den sidst opnåede krølle for et mere
harmonisk resultat og for at undgå uheldige folder.
• Arbejd altid fra hårrødderne mod hårspidserne.
• Vi anbefaler, at apparatet anvendes ved at placere delen
med de to varmerør udefter. Det er på den måde lettere
at se det præcise sted, hvor apparatet skal presses mod
lokken.
• Lad håret køle af, inden håret styles.
• Kram krøllerne med ngrene og ksér dem med lidt lak
eller en smule mousse, men undgå især at børste håret.
• Sluk efter brug for apparatet og tag stikket ud af
kontakten. Lad den køle af, inden den lægges på plads.
NB: Der kan under hver anvendelse forekomme en let
røg. Dette kan skyldes fordampning af talg eller en rest af
hårprodukter (produkter, der ikke skylles ud, hårlak, ...) eller
fugt i håret.
VEDLIGEHOLDELSE
• Tag stikket ud og lad apparatet køle fuldstændigt af.
• Gør pladerne rene med en blød og fugtig klud, uden
rengøringsmiddel, for i så høj grad som muligt at bevare
pladernes kvalitet. Krads ikke på pladerne.
Fabriqué en Chine
Made in China
H120E IB.indd 1 19/04/2016 10:14 AM


Join the conversation about this product
Here you can share what you think about the BaByliss H120E Hair Styler. If you have a question, first carefully read the manual. Requesting a manual can be done by using our contact form.