
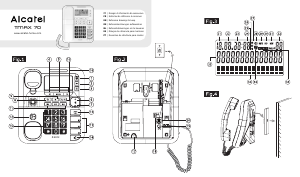
1. INSTALACIÓN
Conecte el cable en
espiral al microteléfono
(A) y al conector
situado en el lado
izquierdo del teléfono
(B).
Conecte el cable telefónico a la toma situada en la parte
posterior del teléfono y a la toma
mural.
Pegue la etiqueta de números de
emergencia en el lugar adecuado.
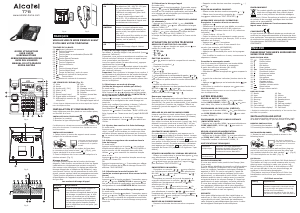
2. COLOCACIÓN MURAL
Invierta la lengüeta de montaje mural (pequeña pieza de
plástico estriado) ubicada en la base con una moneda.
Perfore dos orificios de 6 mm a una distancia de 100 mm.
Coloque dos tacos y luego atornille tornillos para madera
(1)
(3,5 mm de diámetro y 30 mm de largo).
Monte la base en los 2 tornillos deslizándola hacia abajo.
3. USO GENERAL
3.1 INDICACIÓN LUMINOSA DE LLAMADA ENTRANTE /
MENSAJE EN ESPERA
Cuando recibe una llamada, el indicador parpadea al
mismo ritmo que el timbre. También se ilumina cuando se
toma la línea.
Si está conectado a una centralita telefónica privada
ALCATEL equipada con mensajería, el indicador luminoso
de mensaje en espera se encenderá para indicarle la
presencia de un mensaje en su buzón de voz.
La marcación se puede realizar de dos formas:
descolgando el microteléfono y marcando,
marcando sin descolgar.
3.2 MARCACIÓN SIN DESCOLGAR
Pulse el botón del altavoz y marque el número de su
interlocutor. Descuelgue para establecer la conversación.
3.3 UTILIZACIÓN DEL MANOS LIBRES
Si está en comunicación, con el microteléfono descolgado
y desea escuchar y conversar con su interlocutor por el
altavoz:
Pulse la tecla y cuelgue el microteléfono.
Las personas que están a su alrededor pueden
participar en la conversación.
Ajuste el volumen del altavoz con las teclas y .
Descuelgue el microteléfono para volver a una
conversación confidencial.
3.4 AJUSTE DEL VOLUMEN DEL MICROTELÉFONO
Cuando se desactiva el modo manos libres, puede
aumentar el volumen sonoro del microteléfono.
Pulse la tecla .
Para restaurar el volumen inicial, pulse la tecla .
3.5 TECLA SECRETO
La tecla Secreto pone en espera a su interlocutor para
que éste no pueda oírle durante su conversación con una
tercera persona.
Cada 10 segundos se escucha 1 bip en la línea.
Para reanudar la conversación, vuelva a pulsar la tecla
Secreto.
4. CONEXIÓN Y UTILIZACIÓN DE LOS AURICULARES**
Conexión
Conecte el cable de los auriculares (RJ9) a la toma situada en
la base del teléfono.
•
•
•
•
•
•
•
•
•
•
•
•
•
•
•
•
•
•
Utilización en modo auriculares
Una vez conectados los auriculares:
Para contestar a una llamada
entrante:
Pulse la tecla . Esta tecla se
retroilumina en ámbar.
Al final de la conversación,
pulse nuevamente para cortar la comunicación.
Para hacer una llamada:
Pulse la tecla y luego marque el número o pulse una
de las memorias directas.
En todo momento puede retomar la comunicación:
En modo manos libres: pulse y retire los auriculares
para escuchar.
En microteléfono: descuelgue el microteléfono y retire los
auriculares para escuchar.
5. USO DE LAS MEMORIAS
NOTA: Durante la programación, el Temporis 380 se comunica
con una serie de "bips".
1 bip: cada tecla pulsada es validada por 1 bip.
2 bips: la programación es correcta.
3 bips: la programación es incorrecta. Vuelva a empezar. Su
teléfono puede almacenar hasta 10 números de 24 dígitos.
5.1 PROGRAMACIÓN DE LAS MEMORIAS
Programación sin llamar
Descuelgue el microteléfono.
Pulse la tecla Programación.
Introduzca el número.
Pulse una de las diez teclas de memoria.
Programación durante una llamada
Descuelgue el microteléfono.
Introduzca el número. Pulse la tecla.
Programación durante una conversación con o sin
interlocutor.
Pulse una de las diez teclas de memoria.
5.2 MARCACIÓN DE UN NÚMERO EN MEMORIA
Descuelgue el microteléfono.
Pulse una de las diez teclas de memoria. El número se
marca automáticamente.
5.3 BORRAR UNA MEMORIA
Descuelgue el microteléfono.
Pulse dos veces la tecla Programación.
Pulse la tecla correspondiente a la memoria que desea
borrar.
6. ELECCIÓN Y AJUSTE DEL TIMBRE
Puede elegir y ajustar una de las cuatro melodías
disponibles cuando su teléfono esté sonando o en cualquier
momento después de entrar en el modo Programación.
6.1 CUANDO SU TELÉFONO SUENA
La modificación del timbre puede efectuarse mientras el
teléfono suena.
Pulse la tecla 1, 2, 3 ó 4 para cambiar la melodía.
Sus modificaciones se han memorizado y puede contestar
la llamada.
6.2 EN MODO PROGRAMACIÓN
Para acceder al modo Programación:
Pulse y mantenga pulsadas las teclas 1 y 3
simultáneamente.
Descuelgue el microteléfono.
Libere las teclas.
El acceso al modo Programación se confirma con 1 bip.
Para ajustar el timbre:
Pulse la tecla Programación, luego la tecla 1 (se escucha
la melodía inicial).
Pulse una tecla entre 1 y 4 para cambiar la melodía.
Para ajustar el volumen del timbre:
Seleccione en el interruptor de volumen de timbre ( ):
bajo ( ) /medio( ) / fuerte ( ).
7. BLOQUEO DEL TELÉFONO
Gracias a una contraseña de 4 dígitos, se puede:
Evitar el acceso a la programación de melodías de timbre.
Evitar el acceso a la configuración para uso profesional.
Limitar las llamadas a números de teléfono de hasta 6
dígitos como máximo.
La contraseña inicial es 0000.
7.1 ACCESO AL MODO DE PROGRAMACIÓN
Dispone de 3 operaciones. Debe volver a entrar en el
modo Programación para poder utilizarlas.
Pulse y mantenga pulsadas las teclas 4 y 6
simultáneamente.
Descuelgue el microteléfono.
Libere las teclas.
7.2 BLOQUEO/DESBLOQUEO
Vuelva a entrar en el modo Programación (ver § 7.1) y
luego:
Pulse la tecla Programación seguida de la tecla 1.
Bloqueo
Pulse la tecla .
Cuelgue el microteléfono.
Desbloqueo
Pulse la tecla .
Introduzca la contraseña.
Cuelgue el microteléfono.
7.3 MODIFICACIÓN DE LA CONTRASEÑA
Vuelva a entrar en el modo Programación (ver § 7.1) y
luego:
Pulse la tecla Programación seguida de la tecla 2.
Introduzca la contraseña inicial. Se escucharán 2 bips.
Introduzca la nueva contraseña de 4 dígitos. Se
escucharán 2 bips.
Vuelva a introducirla para confirmarla. Se escucharán 2
bips.
Cuelgue el microteléfono.
7.4 SI OLVIDA LA CONTRASEÑA
Vuelva a entrar en el modo Programación (ver § 7.1) y luego:
Pulse la tecla Programación seguida de la tecla 0.
Pulse la tecla .
Se escucharán 2 bips.
Cuelgue el microteléfono.
Esta operación borra TODOS los registros, EXCEPTO las
memorias. La palabra de paso se actualiza a 0000.
8. CONFIGURACIÓN PARA USO PROFESIONAL
Este capítulo no le concierne si su Temporis 380 está
conectado directamente a la red pública.
8.1 ACCESO AL MODO PROGRAMACIÓN
Dispone de 2 operaciones. Debe volver a entrar en el
modo Programación para poder utilizarlas.
Pulse y mantenga pulsadas las teclas 1 y 3
simultáneamente.
Descuelgue el microteléfono.
Libere las teclas.
8.2 TIPO DE MARCACIÓN
Pulse la tecla Programación seguida de la tecla 2.
Para la marcación por impulsos
Pulse la tecla .
Cuelgue el microteléfono.
Para la marcación por tonos
Pulse la tecla .
Cuelgue el microteléfono.
8.3 DURACIÓN DEL FLASH (R)
Vuelva a entrar en el modo Programación y luego:
Pulse la tecla Programación seguida de la tecla 3.
Pulse: 1 para un flash de 100 ms,
2 para un flash de 300 ms,
3 para un flash de 600 ms.
Cuelgue el microteléfono.
9. PRECAUCIONES DE USO / CARACTERÍSTICAS
TÉCNICAS
Cuidado, no deje que su teléfono entre en contacto con el
agua. No obstante, existe la posibilidad de utilizar un paño
ligeramente húmedo para limpiar el aparato.
Para limpiar su aparato, utilice un paño húmedo. No
utilizar disolventes (alcohol, tricloretileno, acetona, etc.) ni
pulverizadores ya que podría correr el riesgo de dañar su
aparato.
•
•
•
•
•
•
•
•
•
•
•
•
•
•
•
•
•
•
•
•
•
•
•
•
•
•
•
•
•
•
•
•
•
•
•
•
•
•
•
•
•
•
•
•
•
•
•
•
•
•
•
•
•
•
•
•
•
En caso de tormenta, se recomienda no utilizar el teléfono.
Los teléfonos Temporis 380 están destinados a emitir y
recibir comunicaciones telefónicas y a conectarse a la red de
telecomunicaciones pública o privada española.
Estos productos han sido diseñados para conectarse en una
línea telefónica analógica de tipo TRT3 (tensión de red de
telecomunicaciones) en el sentido de la norma EN60950-1.
10. GARANTIA EUROPEA
O
Informamos que deberá leer atentamente el manual de utilización
incluido en este embalaje.
El producto Temporis 380 está conforme con las normas
técnicas europeas, certificado con la marcación CE.
El producto que acaba de adquirir es un producto tecnológico, que
debe ser manipulado con cuidado.
Este producto dispone de una garantía legal en los
términos y condiciones aplicables a la venta de bienes de
consumo del país donde compró el producto.
Para cualquiera información relativa a esta garantía legal,
pregunte a su vendedor.
Sin perjuicio de toda y cualquier garantía legal del que el producto
se beneficie, Atlinks garantiza que el producto que consta en el
presente embalaje es conforme a las especificaciones técnicas
indicadas en el manual de utilización, durante el periodo de
garantía. Este periodo de garantía tendrá inicio en la fecha de
la compra de un Producto no usado, que se presume que sea la
fecha que consta en la factura o en el ticket de compra emitido
por su vendedor y en el que figura el nombre del vendedor, y
por un periodo de: Veinticuatro (24) meses para el teléfono, con
excepción de los consumibles, accesorios y baterías.
Cualquiera reclamación realizada en el ámbito de esta garantía
y durante el periodo de garantía, deberá ser acompañada del
Producto completo, el cual deberá ser devuelto al vendedor
al que compró el Producto a la dirección correspondiente a su
establecimiento de venta, tan pronto como surja o sea conocido
el defecto, juntamente con el justificante de la compra, ya
sea la factura o el ticket de compra emitido por el vendedor
especificando el lugar de la compra y el número de serie del
Producto.
Durante el periodo de garantía, el Producto o la pieza que posea
un defecto en su diseño, materiales o acabamientos será reparado
o sustituido, gratuitamente, por u producto o pieza idénticos o
por lo menos equivalentes en lo que se refiere a funcionalidades
y desempeños. Si la reparación o la sustitución se revelasen
imposibles o fueran desproporcionadas desde el punto de vista
comercial teniendo en cuenta el valor del Producto, ATLINKS
reembolsará el precio que fue pagado en la compra del Producto o
sustituirá el Producto por un producto equivalente.
En los más amplios términos permitidos por la ley, el Producto
o pieza reparados o substituidos, que pueden ser nuevos o
remodelados, se benefician de una garantía de noventa (90)
días a partir de la fecha de la reparación o sustitución, o hasta
el fin de la garantía inicial del Producto, si esta fuese superior
a los noventa (90) días. En el caso de que el periodo en que
estuviese privado del uso del Producto por causa de la reparación
o sustitución (siempre que el Producto con defecto se entregue a
su vendedor hasta que sea puesto a su disposición) fuera superior
a seis días, el periodo de garantía será alargado por el periodo
excedente correspondiente. No obstante, si el plazo de la garantía
legal en el caso de sustitución o reparación en vigor en su país
fuese superior, sólo será aplicable la garantía legal.
Se excluyen de la presente garantía los siguientes casos:
Productos dañados por un mal uso o utilización del Producto
no conforme a las instrucciones del manual de usuario;
Por una conexión incorrecta o uso inadecuado del producto,
en particular con accesorios incompatibles en los términos
que constan en el manual de utilización;
Por causa de que el Producto haya sido abierto, modificado o
equipado con piezas de sustitución no aprobadas;
Remoción del número de serie o alteración de modo que el
número de serie se torne ilegible.
Desgaste normal, incluido el desgaste normal de los
accesorios, baterías y pantallas;
No haber respetado las normas técnicas y de seguridad
vigentes en el área geográfica de utilización;
Productos que hayan sufrido golpes o caídas;
Daños resultantes de rayos, oscilaciones de energía,
proximidad a una fuente de calor radiación, agua, exposición
a temperatura excesiva, humedad u otras condiciones
ambientales o cualquier causa externa al Producto.
Negligencia o manutención incorrecta;
Daños causados por servicios de manutención o reparación
fuera de un centro homologado Atlinks.
Si el producto reexpedido no estuviese cubierto por la garantía,
recibirá un presupuesto de reparación que mencionará el coste de
análisis y los costes logísticos que serán cobrados en el caso de
que pretenda que el Producto le sea devuelto.
Esta garantía es válida en el país donde usted ha comprado el
producto, con la condición de que sea un miembro de la Unión
Europea. No es válida para compras realizadas desde países no
miembros de la Unión Europea.
Sin perjuicio de las disposiciones legales imperativas, todas las
garantías que no están descritas en el presente documento son
expresamente excluidas.
EN LOS MÁS AMPLIOS TÉRMINOS PERMITIDOS POR LA LEY
APLICABLE.
ESTA GARANTIA ES EXCLUSIVA DE TODAS Y CUALESQUIERA
OTRAS GARANTIAS, EXPRESAS O IMPLÍCITAS, INCLUIDO,
PERO CON LIMITACIÓN, LAS GARANTIAS DE CALIDAD
MERCANTIL O DE ADAPTACION A UN OBJETO PARTICULAR;
ATLINKS DECLINA CUALQUIER RESPONSABILIDAD POR
PÉRDIDA O DETERIORO DE DATOS, INACTIVIDAD, PÉRDIDA
DE OPORTUNIDADES DE NEGOCIOS, LUCRO CESANTE,
PÉRDIDA DE CLIENTELA O DE OTRA VENTAJA ECONOMICA ,
O, EN GENERAL POR CUALESQUIERA DAÑOS INDIRECTOS,
INMATERIALES, CONSECUTIVOS O ACCESORIOS;
LA RESPONSABILIDAD DE ATLINKS ESTÁ LIMITADA AL
VALOR DE COMPRA DEL PRODUCTO, SALVO EN EL CASO DE
NEGLIGENCIA, DOLO O DE RESPONSABILIDAD OBJETIVA DEL
PRODUCTOR Y RESPONSABILIDAD POR MUERTE O DAÑOS
PERSONALES.
11. SEGURIDAD
¡No utilizar el teléfono para señalar una fuga de gas
permaneciendo cerca de esta fuga!
En caso de tormenta, se recomienda no utilizar ningún teléfono.
Por la presente ATLINKS declara que el teléfono Temporis 380
está en conformidad con las exigencias esenciales y las demás
disposiciones pertinentes de la directiva 1999/5/CE.
12. MEDIO AMBIENTE
Este símbolo indica que el aparato electrónico fuera de
uso se debe desechar de forma independiente y nunca
junto a los residuos domésticos. Con este propósito, la
Unión Europea ha establecido un sistema de recogida y
reciclaje específico con el que la responsabilidad recae
sobre productores.
¡Conservemos el medio ambiente en el que vivimos!
13. DECLARACIÓN DE CONFORMIDAD
Por la presente ATLINKS declara que Temporis 380 es conforme
a las exigencias esenciales y otras disposiciones pertinentes de la
directiva 1999/5/CE.
•
•
•
•
•
•
•
•
•
•
•
•
•
A)
B)
C)
1. SETUP
Plug one end of the spiral
cord into the handset at
(A), and the other end
into the socket on the left
side of the phone (B).
Plug the telephone cord
into the socket on the back of the
set and into the wall socket.
Affix the emergency number label
in the appropriate place.
2. WALL MOUNTING
Turn over the wall mounting peg (small grooved plastic part)
on the base using a coin.
Drill two 6 mm holes 100 mm apart.
Fit two wall plugs and screw in wood screws
(1)
(3.5 mm in
diameter and 30 mm long).
Mount the base on the 2 screws by pulling it downwards.
3. GENERAL USE
3.1 RINGER LAMP / MESSAGE WAITING LAMP
This light flashes in time with the ringer when you receive
a call. It goes out as soon as you take the line.
If you are connected to an ALCATEL PABX with a voicemail
service, the message waiting lamp tells you there is a
message in your mailbox.
There are two different ways of dialling:
by lifting the handset, then dialling.
by dialling in on-hook mode.
3.2 DIALLING IN ON-HOOK MODE
Press the hands-free key then dial your correspondent's
number. Pick up the handset to talk.
3.3 HANDS-FREE MODE
If you are talking to somebody on the handset, and you
want to hear and talk to them over the loudspeaker
instead:
Press and replace the handset.
The people around you can join in the conversation.
Adjust the volume using the and keys.
Lift the handset to return to private conversation mode.
3.4 HANDSET VOLUME CONTROL
When the hands-free function is off, you can increase the
handset volume.
Press the key.
To return to the initial volume, press the key.
3.5 MUTE
The Mute key puts your correspondent on hold so that you
can talk to someone else without the first person hearing.
1 beep is emitted on the line every 10 seconds.
To resume the conversation, press the Mute key again.
4. CONNECTING AND USING AN ADDITIONAL
HEADSET**
Connection
Plug the RJ9 headset cord into the socket on the base of the
telephone.
Headset mode
Once the headset is plugged in:
To take an incoming call:
Press the key. It will be
backlit in amber.
At the end of the conversation,
press again to end the call.
To place a call:
Press the key and then dial the number or press one of
the direct memories.
At any time, you may continue the conversation:
In hands-free mode: Press and remove the headset
to hear.
On the handset: Pick up the handset and remove the
headset to hear.
5. USING THE MEMORIES
NOTE: In programming mode, your Temporis 380
communicates with you by emitting a number of beeps.
1 beep: every key press is acknowledged by a beep.
2 beeps: programming correct.
3 beeps: programming error. Start again from the beginning.
Your telephone set can store 10 numbers of up to 24 digits.
5.1 PROGRAMMING THE MEMORIES
Programming without calling
Pick up the handset.
Press the Programming key.
Enter the number.
Press one of the ten memory keys.
Programming while calling
Pick up the handset.
Dial the number.
Press the Programming key, whether you are already in
conversation or not.
Press one of the ten memory keys.
5.2 MEMORY DIALLING
Pick up the handset.
Press one of the ten memory keys. The stored number is
dialled automatically.
5.3 ERASING A MEMORY
Pick up the handset.
Press the Programming key twice.
Press the key corresponding to the memory to be
erased.
6. SELECTING AND ADJUSTING THE RINGTONE
You have a choice of four ringtones. You can adjust
the volume when the phone rings or by going into
Programming mode.
6.1 WHEN A CALL COMES IN
You can change the ringtone as the phone is ringing.
Press 1, 2, 3 or 4 to select a ringtone.
Your modifications are memorized, and you can answer
the call.
6.2 IN PROGRAMMING MODE
To go into programming mode:
Press and hold keys 1 and 3 simultaneously.
Pick up the handset.
Release the keys.
Access to programming mode is confirmed by 1 beep.
To adjust the ringtone:
Press the Programming key then key 1(current melody is
heard).
•
•
•
•
•
•
•
•
•
•
•
•
•
•
•
•
•
•
•
•
•
•
•
•
•
•
•
•
•
•
•
•
•
•
•
•
•
•
To change the ringtone, press a key from 1 to 4.
To adjust the ringing volume:
Use the ringing volume switch ( ): low ( ) / mid ( ) /
high ( ).
7. LOCKING THE TELEPHONE
Using a 4-digit password, you can:
block access to the ringtone volume control.
block access to the configuration for professional use.
block calls to phone numbers with more than 6 digits.
The initial password is 0000.
7.1 ACCESSING THE PROGRAMMING MODE
For each of the 3 operations, you need to go into
Programming mode first.
Press and hold keys 4 and 6 simultaneously.
Pick up the handset.
Release the keys.
7.2 LOCK / UNLOCK
Go into Programming mode again (see § 7.1) and then:
Press the Programming key followed by 1.
Lock
Press the key.
Replace the handset.
Unlock
Press the key.
Enter the password.
Replace the handset.
7.3 MODIFYING THE PASSWORD
Go into Programming mode again (see § 7.1) and then:
Press the Programming key followed by 2.
Enter the current password. 2 beeps are emitted.
Enter the new 4-digit password. 2 beeps are emitted.
Enter it a second time. 2 beeps are emitted.
Replace the handset.
7.4 IF YOU FORGET THE PASSWORD
Go into Programming mode again (see § 7.1) and then:
Press the Programming key followed by 0.
Press the key.
2 beepsare emitted.
Replace the handset.
This operation clears ALL the settings, EXCEPT the
memories. The password is reset to 0000.
8. CONFIGURATION FOR PROFESSIONAL USE
Skip this chapter if your Temporis 380 is connected
directly to the public network.
8.1 ACCESSING THE PROGRAMMING MODE
For each of the 2 operations, you need to go into
Programming mode first.
Press and hold keys 1 and 3 simultaneously.
Pick up the handset.
Release the keys.
8.2 TYPE OF DIALLING
Press the Programming key followed by 2.
For pulse dialling
Press the key.
Replace the handset.
For tone dialling
Press the key.
Replace the handset.
8.3 FLASH DURATION (R)
Go into Programming mode again and then:
Press the Programming key followed by 3.
Press: 1 for a 100 ms flash,
2 for a 300 ms flash,
3 for a 600 ms flash.
Replace the handset.
9. PRECAUTIONS OF USE / TECHNICAL
SPECIFICATIONS
Caution: never let your telephone set come into contact with
water. You may, however use a damp cloth to clean your
telephone.
For cleaning your set, use only a damp cloth; do not use
solvents (alcohol, trichloroethylene, acetone…) and sprays
which may damage your set.
During storms, you are advised not to use the telephone.
The Temporis 380 telephones are designed for making and
receiving telephone calls and for connection to a private or
public service telephone network.
Appliances designed for connection to a TNV3-class analogue
telephone line as defined in European safety standard
EN60950-1.
10. PRODUCT WARRANTY
Please read carefully the user’s guide included in this package.
Temporis 380 is certified as conforming to European technical
standards, as evidenced by the CE Mark affixed thereto.
The product you have just bought is a technological product,
which must be handled with care.
UK legislation, including Sale of Goods Acts and
regulations, imply certain conditions which may apply
to the product you have purchased from the retailer
(statutory warranty). These include conditions relating to
quality.
For information concerning the statutory warranty, please consult
the retailer who sold the product to you (seller).
Without prejudice to any statutory warranty from which the
product benefits, ATLINKS Europe whose registered office
address is at 22 quai Gallieni 92150 Suresnes France warrants
that the product contained in this package complies with the
technical specifications set forth in the user’s guide, during
a warranty period commencing on the date of purchase of
an unused Product, which shall be presumed to be the date
appearing on the invoice or the receipt issued by the seller, upon
which appears the seller’s name and continuing for: Twenty-
four (24) months for the telephone, excluding consumables,
accessories and batteries.
Together with any claim made under this warranty during the
warranty period, the complete Product must be returned to the
seller as soon as the defect appears or is discovered, together
with proof of purchase, consisting of an invoice or receipt issued
by the seller specifying the place of purchase and the serial
number of the Product.
Any Product or Product part found, during the warranty period,
to have a defect in design, materials or workmanship shall be
repaired or replaced, at no cost to you, by a product or part
that is identical or at least equivalent in terms of function and
performance. If repair or replacement is not possible on a
commercially reasonable basis, ATLINKS will refund the purchase
price of the Product or replace the Product by an equivalent
product.
The repaired or replaced Product or part, which, may be new or
refurbished, shall be under warranty for a period of ninety (90)
days from the date of repair or replacement, or until the end of
the initial warranty period if that exceeds the said ninety (90)
days; the warranty period shall also be extended by any period
exceeding six days between the date the defective Product is
delivered to the seller and the date that the repaired or replaced
Product is placed at your disposition.
This warranty does not apply in case of:
damage caused by installing or using the Product otherwise
than in accordance with the instructions contained in the user’
s guide;
improper connection or abnormal use of the Product,
in particular together with incompatible accessories, as
stipulated in the user’s guide;
a Product that has been opened, modified or fitted with
unapproved replacement parts;
removal of the serial number or defacement rendering the
serial number illegible;
normal wear and tear, including normal wear and tear of
accessories, batteries and screens;
non-compliance with technical and safety standards in force in
the geographical area of utilization;
Products having suffered an impact or a fall;
damage caused by lightning, power surge, proximity to a
source of heat or radiation, water damage, exposure to
excessive temperature, humidity or other environmental
conditions or any other cause external to the Product;
negligent or defective maintenance;
damage caused by servicing, modification or repair
performed by any person other than an authorized ATLINKS
service provider.
If the returned Product is not covered by the warranty, you will
receive a repair estimate giving the processing cost and the
•
•
•
•
•
•
•
•
•
•
•
•
•
•
•
•
•
•
•
•
•
•
•
•
•
•
•
•
•
•
•
•
•
•
•
•
•
•
•
•
•
•
•
•
•
•
•
transport fees that will be charged if you wish the Product to be
returned to you.
This warranty is applicable where the Product is lawfully
purchased, in the United Kingdom .
All warranties other than the warranty set forth herein are
expressly excluded. Nothing in this warranty shall exclude or limit
conditions or warranties implied by law including the statutory
warranty.
ATLINKS shall:
only be responsible to you for losses suffered by you that are a
foreseeable consequence of a defect in the Product;
not be responsible to you for losses that result from a defect in
the Product which fall into the following categories:
loss of income or revenue;
loss of profit;
loss of business;
loss of anticipated savings;
loss of data;
any waste of time; or
downtime or loss of use;
However this clause shall not prevent claims for foreseeable loss
of, or damage to, your physical property;
Nothing in this warranty excludes or limits in any way ATLINKS
liability for:
death or personal injury caused by our negligence;
fraud or fraudulent misrepresentation;
any breach of the obligations implied by section 12 of the
Sale of Goods Act 1979 or section 2 of the Supply of Goods
and Services Act 1982;
defective products under the Consumer Protection Act
1987; or
any other matter for which it would be illegal or unlawful for
ATLINKS to exclude or attempt to exclude liability.
11. SAFETY
This telephone is not designed for Emergency calls when the main
power fails.
Do not use your telephone to notify a gas leak or other potential
explosion hazard.
Do not open your device or its power supply to avoid risk of
electrical shock. Do not attempt to open the batteries, as they
contain hazardous chemical substances.
Your telephone must be located in a dry place away from hot,
humide and direct sunlight condition. To avoid radio signal
interference, place the phone at least 1 meter away from other
electrical appliances or other phones.
12. ENVIRONMENT
This symbol means that your inoperative electronic
appliance must be collected separately and not mixed
with the household waste. The European Union has
implemented a specific collection and recycling system
for which producers are responsible.
Help us protect the environment in which we live!
13. DECLARATION OF CONFORMITY
ATLINKS hereby declares that the Temporis 380 conforms to the
essential requirements and other relevant provisions of directive
1999/5/CE.
a)
b)
i)
ii)
iii)
iv)
v)
vi)
vii)
i)
ii)
iii)
iv)
v)
1. INSTALLATION
Connecter le cordon spiralé
au combiné (A) et à la prise
située sur le côté gauche
du téléphone (B).
Connecter le cordon
téléphonique à la prise
droite située à l'arrière du poste
et à la prise murale.
Coller l’étiquette indiquant
les numéros d’urgence à l’
emplacement approprié.
2. INSTALLATION MURALE
Retourner la petite pièce en plastique striée située sur la base
à l’aide d’une pièce de monnaie.
Percer deux trous de 6 mm espacés de 100 mm.
Insérer des chevilles puis visser des vis à bois
(1)
(3,5 mm de
diamètre et 30 mm de long).
Fixer la base sur les 2 vis en la tirant vers le bas.
•
•
•
•
•
•
•
3. USAGE GÉNÉRAL
3.1 TÉMOIN LUMINEUX D'APPEL / DE MESSAGE EN ATTENTE
Le voyant clignote à la même cadence que la sonnerie
quand vous recevez un appel. Il s'éteint dès que vous
décrochez.
Si vous êtes relié à un central téléphonique privé ALCATEL
avec messagerie, le témoin lumineux de message en
attente vous informe de la présence d'un message dans
votre boîte vocale.
Vous avez le choix entre deux modes de numérotation :
numérotation après décrochage du combiné,
numérotation sans décrocher.
3.2 NUMÉROTER SANS DÉCROCHER
Appuyer sur la touche Mains-libres, puis composer le
numéro du correspondant. Décrocher pour établir la
conversation.
3.3 UTILISER LE MODE MAINS-LIBRES
Si vous êtes en conversation, combiné décroché, et que
vous souhaitez entendre et communiquer avec votre
correspondant sur le haut-parleur :
Appuyer sur la touche puis raccrocher le combiné.
Les personnes autour de vous peuvent participer à la
conversation.
Régler le volume sonore à l'aide des touches et .
Reprendre le combiné pour revenir à une conversation
confidentielle.
3.4 RÉGLER LE VOLUME SONORE DANS LE COMBINÉ
Vous pouvez amplifier le volume sonore du combiné en
cours de communication.
Appuyer sur la touche .
Pour revenir au niveau initial, appuyer sur la touche .
3.5 TOUCHE SECRET
La touche Secret met en attente votre correspondant et
vous permet de converser avec une tierce personne sans
être entendu de votre premier interlocuteur.
Un bip est émis sur la ligne toutes les 10 secondes.
Pour reprendre la conversation, appuyer de nouveau sur
la touche Secret.
4. BRANCHEMENT ET UTILISATION DU CASQUE**
Branchement
Raccorder le cordon du casque (RJ9) à la prise située sur la
base du téléphone.
Utilisation en mode casque
Une fois le casque connecté :
Pour prendre un appel entrant :
Appuyer sur la touche . Cette
touche devient rétro-éclairée en
ambre.
En fin de communication, appuyer de nouveau sur pour
couper la communication.
Pour appeler :
Appuyer sur la touche puis composer le numéro ou
appuyer sur une des mémoires directes.
A tout moment, vous pouvez reprendre la communication :
En mode mains-libres : appuyer sur et enlever le
casque pour entendre.
En combiné : décrocher le combiné et enlever le casque
pour entendre.
5. UTILISER LES MÉMOIRES
REMARQUE : En mode programmation, votre Temporis 380
communique avec vous par émission de "bips".
1 bip : chaque appui sur une touche est validé par 1 bip.
2 bips : la programmation est correcte.
3 bips : la programmation est erronée. Recommencer depuis le
début. Votre poste peut enregistrer 10 numéros à 24 chiffres.
5.1 PROGRAMMER LES MÉMOIRES
Programmer sans appel
Décrocher le combiné.
Appuyer sur la touche Programmation.
Entrer le numéro.
Appuyer sur l'une des dix touches mémoires.
Programmer au cours d'un appel
Décrocher le combiné.
Entrer le numéro.
Appuyer sur la touche Programmation, en cours de
conversation avec un correspondant ou non.
Appuyer sur l'une des dix touches mémoires.
5.2 NUMÉROTER DEPUIS UNE MÉMOIRE
Décrocher le combiné.
Appuyer sur l'une des dix touches mémoires. Le numéro
pré-enregistré est composé automatiquement.
5.3 EFFACER UNE MÉMOIRE
Décrocher le combiné.
Appuyer deux fois sur la touche Programmation.
Appuyer sur la touche correspondant à la mémoire à
effacer.
6. SÉLECTIONNER ET RÉGLER LA SONNERIE
Vous avez le choix entre quatre mélodies, dont vous
pouvez régler le volume lorsque la sonnerie de votre
téléphone retentit ou quand vous passez en mode de
programmation.
6.1 LORS DE LA RÉCEPTION D’UN APPEL
Vous pouvez modifier la mélodie au moment où vous
recevez un appel.
Appuyer sur la touche 1, 2, 3 ou 4 pour sélectionner une
mélodie.
Les changements apportés sont mémorisés. Vous pouvez
prendre l'appel.
6.2 EN MODE PROGRAMMATION
Pour passer en mode programmation :
Maintenir les touches 1 et 3 enfoncées simultanément.
Décrocher le combiné.
Relâcher les touches.
L'accès au mode programmation est confirmé par
l'émission d'un bip.
Pour régler la sonnerie :
Appuyer sur la touche Programmation, puis sur la touche
1 (vous entendez la mélodie en cours).
Pour changer la mélodie, appuyer sur une touche entre 1
et 4.
En mode veille :
Pour régler le niveau de la sonnerie, déplacer le curseur
( ) situé sur le côté droit de la base vers le niveau faible
( ), moyen ( ) ou fort ( ).
7. VERROUILLER LE POSTE
À l'aide d'un mot de passe à 4 chiffres, vous pouvez :
interdire l'accès au réglage du volume de la sonnerie,
interdire l'accès à la configuration pour un usage
professionnel,
limiter les appels à des numéros de téléphone n'excédant
pas 6 chiffres.
Le mot de passe initial est 0000.
7.1 ACCÉDER AU MODE PROGRAMMATION
Vous pouvez exécuter 3 opérations, en repassant à chaque
fois en mode de programmation.
Maintenir les touches 4 et 6 enfoncées simultanément.
Décrocher le combiné.
Relâcher les touches.
7.2 VERROUILLER / DÉVERROUILLER
Repasser en mode programmation (cf. §7.1), puis :
Appuyer sur la touche Programmation, puis sur 1.
Verrouiller
Appuyer sur la touche .
Raccrocher le combiné.
Déverrouiller
Appuyer sur la touche .
Entrer le mot de passe.
Raccrocher le combiné.
7.3 CHANGER LE MOT DE PASSE
Repasser en mode programmation (cf. §7.1), puis :
Appuyer sur la touche Programmation, puis sur 2.
Taper le mot de passe en cours. 2 bips sont émis.
•
•
•
•
•
•
•
•
•
•
•
•
•
•
•
•
•
•
•
•
•
•
•
•
•
•
•
•
•
•
•
•
•
•
•
•
•
•
•
•
•
•
•
•
•
•
Entrer le nouveau mot de passe à 4 chiffres. 2 bips sont
émis.
Entrer une seconde fois ce mot de passe. 2 bips sont
émis.
Raccrocher le combiné.
7.4 EN CAS D’OUBLI DU MOT DE PASSE
Repasser en mode programmation (cf. §7.1), puis :
Appuyer sur la touche Programmation, puis sur 0.
Appuyer sur la touche .
2 bips sont émis.
Raccrocher le combiné.
Cette dernière opération efface TOUTE la programmation,
SAUF les mémoires.
Le mot de passe est réinitialisé à 0000.
8. CONFIGURATION POUR UN USAGE PROFRESSIONNEL
Si votre Temporis 380 est directement connecté au
réseau public, ce chapitre ne vous concerne pas.
8.1 ACCÉDER AU MODE PROGRAMMATION
Vous pouvez exécuter 2 opérations, en repassant à chaque
fois en mode de programmation.
Maintenir les touches 1 et 3 enfoncées simultanément.
Décrocher le combiné.
Relâcher les touches.
8.2 TYPE DE NUMÉROTATION
Appuyer sur la touche Programmation, puis sur 2.
Pour la numérotation par impulsions
Appuyer sur la touche .
Raccrocher le combiné.
Pour la numérotation à fréquences vocales
Appuyer sur la touche .
Raccrocher le combiné.
8.3 TEMPS DE FLASHING (R)
Repasser en mode programmation, puis :
Appuyer sur la touche Programmation, puis sur 3.
Appuyer sur : 1 pour un flash de 100 ms,
2 pour un flash de 300 ms,
3 pour un flash de 600 ms.
Raccrocher le combiné.
9. PRECAUTIONS D'EMPLOI / CARACTERISTIQUES
TECHNIQUES
Attention, ne jamais mettre l’appareil au contact de l’eau.
Pour nettoyer votre poste, utilisez un chiffon légèrement
humidifié ; n’employez ni solvant (alcool, trichloréthylène,
acétone,…) ni sprays divers, ils risquent d’endommager le
poste.
En cas d’orage, il est recommandé de ne pas se servir du
téléphone.
Les Temporis 380 sont destinés à émettre et recevoir des
communications téléphoniques et à être raccordés au réseau
de télécommunications public ou privé français.
Ces produits sont conçus pour être connectés à une ligne
téléphonique analogique de classe TRT3 (tension de réseau de
télécommunications) au sens de la norme EN60950-1.
10. GARANTIE PRODUIT
Vous êtes priés de lire attentivement le guide d’utilisation inclus
dans ce coffret.
Le produit Temporis 380 est un équipement agréé
conformément à la réglementation européenne, attesté par le
marquage CE.
Le produit que vous venez d’acheter est un produit
technologique, il doit être manipulé avec soin.
A noter
O
: vous disposez d’une garantie légale sur ce produit
conformément à la réglementation applicable à la vente des
biens de consommation dans le pays dans lequel vous avez
effectué cet achat.
Pour toute information relative à cette garantie légale, veuillez
vous adresser à votre revendeur.
Sans préjudice de la garantie légale dont les produits
bénéficient, ATLINKS Europe dont le siège social est situé 22,
quai Gallieni 92150 Suresnes, France garantit que le produit
figurant dans le présent coffret est conforme à ses spécifications
techniques figurant dans le guide d’utilisation inclus dans le
présent coffret, et ce pendant une période de garantie, comptée
à partir de la date d’achat du Produit neuf, la date figurant sur
votre facture ou votre ticket de caisse où est indiqué le nom de
votre revendeur faisant foi, et égale à
O
: Vingt quatre (24) mois
pour l’appareil téléphonique, à l’exclusion des consommables,
accessoires et batteries.
Pour toute réclamation au titre de cette garantie pendant la
période de garantie, vous devez retourner le Produit au complet,
auprès de votre revendeur, accompagné de la preuve d’achat,
constituée par la facture ou ce ticket de caisse émis par votre
revendeur, indiquant le lieu de l’achat et le numéro de série du
Produit, suivant l’apparition ou la découverte de la défectuosité.
Atlinks s’engage à réparer tout élément défectueux du fait d’un
vice de conception, de matière ou de fabrication, à ses frais, ou
à le remplacer, à ses frais, par un élément identique ou au moins
équivalent en termes de fonctionnalités et de performances.
Si la réparation ou le remplacement s’avèrent impossibles à
des conditions commerciales normales, le Produit vous sera
remboursé ou remplacé par un Produit équivalent.
Dans la limite maximum autorisée par le droit applicable, le
produit ou l’élément de remplacement, qui peut être neuf ou
reconditionné, est garanti pendant une période de quatre vingt
dix (90) jours à compter de la date de réparation ou jusqu’à la
date de fin de la période de garantie initiale si cette dernière est
supérieure à quatre vingt dix (90) jours, étant précisé que toute
période d’immobilisation du Produit d’au moins sept (7) jours
s’ajoutera à la durée de garantie restant à courir.
Cette garantie ne s’applique pas dans les cas suivants
O
:
Installation ou utilisation non conforme aux instructions figurant
dans le guide de l’utilisateur,
Mauvais branchement ou utilisation anormale du Produit,
notamment avec des accessoires non compatibles, comme
indiqué sur le guide d’utilisation,
Produit ouvert, modifié ou remplacé au moyen de pièces non
agréées,
numéro de série effacé, illisible, détérioré,
Usure normale, y compris l’usure normale des accessoires,
batteries et écrans,
Non respect des normes techniques et de sécurité en vigueur
dans la zone géographique d’utilisation,
Produit ayant subi un choc ou une chute,
Produit détérioré par la foudre, une surtension électrique, une
source de chaleur ou des rayonnements, un dégât des eaux,
l’exposition à des conditions de température, d’humidité ou
autres conditions ambiantes excessives ou toute autre cause
extérieure au produit,
Une négligence ou un entretien défectueux,
Une intervention, une modification ou une réparation effectuées
par une personne non agréée par Atlinks.
Si le Produit retourné n’est pas couvert par la garantie, vous
recevrez un devis de réparation qui mentionnera le coût
d’analyse et les frais de transport qui vous seront facturés si
vous souhaitez que le Produit vous soit retourné.
Cette garantie est valable dans le pays dans lequel vous avez
régulièrement acheté le Produit, à condition que ce pays soit un
membre de l’Union Européenne.
Sous réserve des dispositions légales en vigueur, toutes
garanties autres que celle décrite aux présentes sont
expressément exclues.
DANS LA MESURE MAXIMUM AUTORISEE PAR LA LOI APPLICABLE,
A) LA PRESENTE GARANTIE EST, EXCLUSIVE DE TOUTES
AUTRES GARANTIES EXPRESSES OU IMPLICITES, Y COMPRIS
MAIS DE MANIERE NON LIMITATIVE, DES GARANTIES DE
QUALITE MARCHANDE OU D’ADAPTATION A UN OBJET
PARTICULIER;
B) ATLINKS DECLINE TOUTE RESPONSABILITE POUR PERTE OU
DETERIORATION DE DONNEES, PERTE D’USAGE
O
MANQUE A
GAGNER, PERTE DE CHANCE, DE CHIFFRE D’AFFAIRES OU DE
REVENUS, PERTES D’EXPLOITATION, DOMMAGES INDIRECTS,
O
IMMATERIELS, CONSECUTIFS OU INCIDENTS;
C) LA RESPONSABILITE D’ATLINKS EST LIMITEE A LA
VALEUR D’ACHAT DU PRODUIT, SAUF FAUTE LOURDE OU
INTENTIONELLE, ET SAUF DOMMAGE CORPOREL.
11. SÉCURITÉ
!Ne pas utiliser votre poste téléphonique pour signaler
une fuite de gaz à proximité de cette fuite.
En cas d’orage, il est préconisé de n'utiliser aucun téléphone.
•
•
•
•
•
•
•
•
•
•
•
•
•
•
•
•
•
•
•
•
•
12. ENVIRONNEMENT
Ce symbole signifie que votre appareil électronique hors
d'usage doit être collecté séparément et non jeté avec
les déchets ménagers. Dans ce but, l'Union Européenne a
institué un système de collecte et de recyclage spécifique
dont les producteurs ont la responsabilité.
!Aidez-nous à préserver l'environnement dans lequel nous
vivons.
13. DÉCLARATION DE CONFORMITÉ
Par la présente ATLINKS déclare que le Temporis 380 est
conforme aux exigences essentielles et autres dispositions
pertinentes de la directive 1999/5/CE.
1. INSTALLATION
Ein Ende des Spiralkabels
in den Anschluss am Hörer
(A) und das andere in die
Buchse an der linken Seite
des Telefonapparats (B)
einstecken.
Das Telefonkabel in die
Buchse an der Rückseite des
Telefonapparats und das andere
Ende in die Telefonwandbuchse
einstecken.
Das Etikett mit den
Notrufnummern an die dafür
vorgesehene Stelle kleben.
2. WANDANBRINGUNG
Das an der Basisstation befindliche kleine Kunststoffteil durch
Einführen einer Münze in die Nut drehen.
Im Abstand von 100 mm zwei 6-mm-Löcher in die Wand
bohren.
In jedes Loch einen Dübel einstecken und dann Holzschrauben
eindrehen
(1)
(Durchmesser 3,5 mm, Länge 30 mm).
Die Basistation durch Ziehen nach unten auf den Schrauben
fixieren.
3. ALLGEMEINE BEDIENUNG
3.1 SIGNALISIERUNG ANRUF / NACHRICHT
Diese Lampe blinkt im gleichen Rhythmus wie der Rufton,
wenn Sie angerufen werden. Sie erlischt, sobald Sie den
Anruf entgegennehmen.
•
•
•
•
•
•
•
FRANÇAIS
Wenn Sie an ein privates, mit einem Nachrichtenspeicher
versehenes ALCATEL-Telefonsystem angeschlossen sind,
informiert Sie die Nachrichtenleuchte darüber, dass in
Ihrem Nachrichtenspeicher Nachrichten eingegangen
sind.
Sie können auf zwei verschiedene Arten wählen:
durch Abnehmen des Hörers und Wählen.
durch Wählen, während der Hörer aufliegt.
3.2 WÄHLEN BEI AUFLIEGENDEM HÖRER
Die Lautsprechertaste drücken und dann die Nummer des
Gesprächspartners wählen. Den Hörer abnehmen, um das
Gespräch zu führen.
3.3 FREISPRECHFUNKTION
Wenn Sie während eines Gesprächs mit abgehobenem
Hörer Ihren Gesprächspartner über den Lautsprecher
hören und mit ihm sprechen möchten, gehen Sie wie
folgt vor:
Die Taste drücken und den Hörer auflegen.
Die umstehenden Personen können am Gespräch
teilnehmen.
Die Lautstärke mit den Tasten und einstellen.
Wieder zum Gespräch mit dem Hörer zurückkehren.
3.4 EINSTELLEN DER LAUTSTÄRKE DES HÖRERS
Sie können die Lautstärke des Hörers einstellen, wenn
der Lautsprecher abgestellt ist.
Die Taste drücken.
Um zur ursprünglichen Lautstärke zurückzukehren, die
Taste drücken.
3.5 STUMMSCHALTEN
Die Stummschalt-Taste drücken. Während Ihr
Gesprächspartner wartet, kann er Sie jetzt nicht mehr
hören.
Sie vernehmen alle 10 Sekunden 1 Aufmerksamkeitston.
Um das Gespräch wieder aufzunehmen, die
Stummschalt-Taste erneut drücken.
4. ANSCHLUSS UND VERWENDUNG DES
KOPFHÖRERS**
Anschluss
Schließen Sie das Kopfhörerkabel
(RJ9) an den Anschluss auf der
Basisstation des Telefons an.
Bedienung im Kopfhörer-Modus
Nachdem der Kopfhörer angeschlossen ist:
Einen eingehenden Anruf entgegennehmen:
Die Taste drücken, woraufhin sie bernstein leuchtet.
Nach Ende des Gesprächs erneut die Taste drücken,
um die Verbindung abzubrechen.
Einen Anruf tätigen:
Die Taste drücken und dann die Rufnummer wählen
oder eine der Direktwahltasten drücke.
Sie können jederzeit auf folgende Modi umschalten:
Freisprechmodus: die Taste drücken und den
Kopfhörer abnehmen.
Hörermodus: den Hörer abheben und den Kopfhörer
abnehmen.
5. VERWENDUNG DER RUFNUMMERNSPEICHER
HINWEIS: Bei der Programmierung kommuniziert Ihr Temporis
380 mit Ihnen über Aufmerksamkeitstöne.
1 Aufmerksamkeitston: Bei der Programmierung wird jeder
Tastendruck durch einen Aufmerksamkeitston bestätigt.
2 Aufmerksamkeitstöne: Zeigen an, dass die Programmierung
korrekt ist.
3 Aufmerksamkeitstöne: Zeigen an, dass bei der
Programmierung etwas nicht stimmt: Beginnen Sie die
Programmierung noch einmal von vorne.
Ihr Telefonapparat kann 10 Nummern mit jeweils bis zu 24
Ziffern speichern.
5.1 PROGRAMMIEREN DER RUFNUMMERNSPEICHER
Programmieren, wenn Sie kein Gespräch führen
Den Hörer abnehmen.
Die Programmiertaste drücken.
Die Nummer eingeben.
Eine der zehn Speichertasten drücken.
Programmieren während eines Gesprächs
Der Hörer ist abgenommen.
Die Nummer eingeben.
Die Programmiertaste drücken (ob Sie sich in einem
Gespräch befinden oder nicht).
Eine der zehn Speichertasten drücken.
5.2 WÄHLEN DER RUFNUMMER AUSGEHEND VON EINEM
SPEICHEREINTRAG
Den Hörer abnehmen.
Eine der zehn Speichertasten drücken. Die gespeicherte
Nummer wird automatisch gewählt.
5.3 LÖSCHEN EINES SPEICHEREINTRAGS
Den Hörer abnehmen.
Die Programmiertaste zweimal drücken.
Die Speichertaste drücken, auf der die zu löschende
Nummer gespeichert ist.
6. WAHL UND LAUTSTÄRKE DES RUFTONS
Während Ihr Telefon klingelt und jederzeit, nachdem Sie
in den Programmiermodus übergegangen sind, können
Sie eine der vier Melodien auswählen und die Lautstärke
des Ruftons einstellen.
6.1 WENN IHR TELEFON KLINGELT
Sie können den Rufton ändern, während Ihr Telefon
klingelt.
Eine der Tasten 1, 2, 3 oder 4 drücken, um den Klang
zu ändern.
Die Änderungen sind gespeichert. Sie können den Anruf
entgegennehmen.
6.2 IM PROGRAMMIERMODUS
Zugang zum Programmiermodus:
Die Tasten 1 und 3 gleichzeitig gedrückt halten.
Den Hörer abnehmen.
Die Tasten loslassen.
Der Zugang zum Programmiermodus wird mit 1
Aufmerksamkeitston bestätigt.
Einstellung der Lautstärke des Ruftons:
Die Programmiertaste und dann auf 1 drücken (die
aktuelle Melodie ertönt).
Durch Drücken auf 1, 2, 3 oder 4 kann die Melodie
geändert werden.
Lautstärke des Ruftons einzustellen:
Den Schalter für die Ruftonlautstaerkeregelung auswählen
( ):niedrig ( ) / mittel ( ) / hoch ( ).
7. SPERREN DES TELEFONS
Mit einem aus vier Ziffern bestehenden Passwort können
Sie:
den Zugang zur Programmierung des Ruftons
unterbinden.
den Zugang zur Konfiguration für die professionelle
Benutzung unterbinden.
die Anrufe auf Telefonnummern mit maximal sechs
Ziffern begrenzen.
Das Standardpasswort ist 0000.
7.1 ZUGANG ZUM PROGRAMMIERMODUS
Sie können drei Vorgänge durchführen. Begeben Sie sich
vor jedem dieser Vorgänge in den Programmiermodus.
Die Tasten 4 und 6 gleichzeitig gedrückt halten.
Den Hörer abnehmen.
Die Tasten loslassen.
7.2 SPERREN / ENTSPERREN DES APPARATS
Begeben Sie sich erneut in den Programmiermodus (siehe
§ 7.1) und gehen Sie dann folgendermaßen vor:
Die Programmiertaste und dann auf 1 drücken.
Sperren
Die Taste drücken.
Auflegen.
Entsperren
Die Taste drücken.
•
•
•
•
•
•
•
•
•
•
•
•
•
•
•
•
•
•
•
•
•
•
•
•
•
•
•
•
•
•
•
•
•
•
•
•
•
•
•
•
•
•
ESPAÑOL
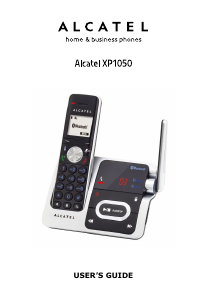
TEMPORIS 380
ENGLISH
DEUTSCH
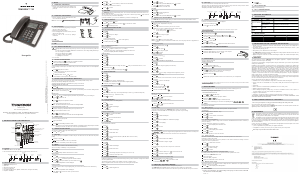
Lengüeta de colocación mural
Navegador
10 memorias
Tecla de programación
y ajuste de memorias
Teclas de acceso
a servicios
adicionales*
Silencio
Tecla manos
libres
Tecla de acceso directo
a los auriculares
Ajuste de volumen
Rellamada
Pausa
Ergot pour fixation murale
Navigateur
10 mémoires
directes
Touche de
programmation
des mémoires
Touche d’accès
aux services
supplémentaires*
Secret
Touche
Mains-libres
Touche d'accès
direct au casque
Règler le volume
Bis
Pause
* Dependiendo de la disponibilidad técnica del servicio y de la
suscripción de un abono con el operador.
Peg for wall mounting
Navigator
10 memory
keys
Memory and set
programming
keys
Additional services
access key*
Mute
Hands-free
key
Headset direct
access key
Adjust the audio volume level
Redial
Pause
Stift für die Wandanbringung
Navigator
10 Speicher-
plätze
Programmiertaste
für den
Rufnummernspeicher
Tasten für den
Zugang zu den
Zusatzdiensten*
Stummschalten
Lautsprechertaste
Direktzugang
zum Kopfhörer
Einstellung der Lautstärke
Wahlwieder-
holung
Pause
* Vorbehaltlich der technischen Verfügbarkeit des Dienstes und
seines Abonnements beim Netzbetreiber.
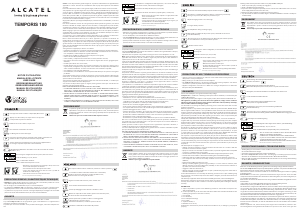
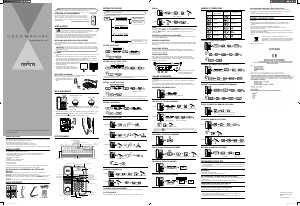
Position murale Position horizontale
Posición mural Posición de sobre mesa
**Equipo no suministrado con el Temporis 380. Sus auriculares
deben tener un conector RJ9. Por favor utilice auriculares
compatibles con la norma EN60950-1 y diseñados para ser
conectados a teléfonos.
Wall mounted position
Horizontal position
(1)The screws are not supplied in the package.
* If the service is technically available and you subscribe for it
with the operator.
**Not supplied with the Temporis 380. Your headset must have
an RJ9 connector. Please use headsets that are compliant with
EN60950-1 and designed to be used with telephones.
Position bei
Wandanbringung
Horizontalposition
**Nicht im Lieferumfang von Temporis 380 enthalten. Ihr
Kopfhörer muss einen Anschluss RJ9 haben. Verwenden Sie
Kopfhörer, die mit der Norm EN60950-1 kompatibel sind und
für den Anschluss an Telefonapparate bestimmt sind.
**Equipement non fourni avec votre Temporis 380. Votre
casque doit disposer d'un connecteur RJ9. Veillez à utiliser des
casques compatibles avec la norme EN60950-1 et conçus pour
être connectés à des téléphones.
* Sous réserve de disponibilité technique du service et de
souscription d’un abonnement auprès de l’opérateur.
(1) Los tornillos no son suministrados en el paquete.
(1) Die Schrauben sind nicht im Lieferumfang enthalten.
NOTICE D’UTILISATION
USER GUIDE
BEDIENUNGSANLEITUNG
MANUALE DELL’UTENTE
GEBRUIKERSHANDLEIDING
MANUAL DE UTILIZACIÓN
MANUAL DE UTILIZAÇÃO
ATLINKS Europe
22, quai Gallieni -
92150 Suresnes - France
Model no.: TEMPORIS 380
A/W No.: 10000870 Rev.0
Printed in China
Spiral cord socket
(A)
(B)
Toma del cable en
espiral
(A)
(B)
Prise cordon spiralé
(A)
(B)
Spiralkabel-
Steckdose
(A)
(B)
Prise casque
Toma auriculares
Headset socket
Kopfhöreranschluss
(1) Les vis ne sont pas fournies dans l’emballage.
www. alcatel-business.com

Join the conversation about this product
Here you can share what you think about the Alcatel Temporis 380 Phone. If you have a question, first carefully read the manual. Requesting a manual can be done by using our contact form.
reply | This was helpful (24) (Translated by Google)
reply | This was helpful (12) (Translated by Google)
reply | This was helpful (1) (Translated by Google)
reply | This was helpful (0) (Translated by Google)
reply | This was helpful (0)
reply | This was helpful (0)
reply | This was helpful (0) (Translated by Google)