
WW
Fork Leg
Zip-Ties
A
2
3
C
L
O
S
E
O
P
E
N
Magnet
Sweep Path
Spoke
Bladed
Spoke
Magnet
Bladed Spoke
Magnet
A
2
3
C
L
O
S
E
O
P
E
N
Wireless Speed
Transmitter
A
2
3
C
L
O
S
E
O
P
E
N
Spacer Tip
Alignment
Mark
MOUNTING BRACKET & HEAD UNIT (
RT255/255L/277/288/288L)
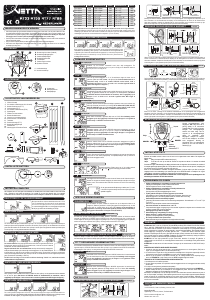
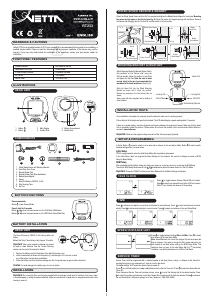
Attach Mounting Bracket & Bracket Rubber Pad to the handlebar on the
“Sensor/Transmitter side” using the Zip-Ties provide. Adjust its position
to your liking and tighten the Zip-Ties.
Note: Be sure to leave enough
slack in the wire to accommodate the movement of fork and
handlebars. (See Fig. A)
Slide the Head Unit into the Mounting Bracket as shown until it clicks
into position. Remove by pressing in the two locking tabs as shown.
Secure wire with tape supplied and by winding it around cables.
Locking Tab Locking Tab
UNLOCK UNLOCK
Wired Mounting Bracket
Head Unit
SETUP & PROGRAMMING
SERVICE TIMER RT 255|255L|277|288|288L
SPEED/ DISTANCE UNIT RT 255|255L|277|288|288L
INSTALLATION TESTS
Once installation is complete, the computer should be tested to make sure it is working properly.
To test the Speed Sensor/Transmitter installation:
Pick up the front of the bicycle and spin the front wheel. The LCD should display a speed- reading within 2-3 seconds.
To test the Cadence Sensor installation (RT277):
Advance the LCD to the CAD Mode using or . Turn the crank backwards or ride the bicycle a short distance. After a
few revolutions, a cadence reading should display on the LCD.
If there is no speed-reading or cadence reading, check the alignment and spacing between the magnet and
sensor/transmitter. Make sure that the Head Unit is completely locked into position. If these checks do not solve the
problem, talk to an Authorized Vetta’s Retailer or connect to www.vetta.com
.
Important: Make sure the magnets locking screw and all Zip-Ties are properly tightened.
Service Timer could be programmed with a selected number of ride time (hours or days) or distance as the interval for
servicing the bicycle or any component on it, such as a front or rear shock.
The default settings “0000” means the Service Timer is turned off.
Press to scroll flashing hr (hour), day or dst (distance) as the Service Timer unit. Press to select the desired Service
Timer unit.
When the desired Service Timer unit has been chosen, press to scroll the flashing digit to the desired number. Press
1
to select this number and advance to next digit. Repeat this procedure until all digits are selected. Press to advance
the next Setup Mode. ( Maximum settings: hour / day / distance = 1999 / 999 / 9999 )
2
1 2
2
1
2
1
In Setup, Button is used to select or set a value and to advance to the next digit or Mode. Button is used to switch
between settings and to increase values.
Initial Setup
All RT200 series computers are programmed to enter the Initial Setup Mode after new battery replacement or all clear
total reset (press , & simultaneously for 3 seconds in any Mode).
In the Initial Setup, riders can program the Basic Settings for the computer, the content of settings are same as NOM
Setup for Basic Setting.
Important: The computer CANNOT exit the Initial Setup Mode until all the Basic Settings are finished.
NOM Setup
After completed the Initial Setup, riders can change any values or correct any errors by re-entering the NOM Setup.
To enter the NOM Setup Mode press & hold & simultaneously when the lowest screen is in the CLK Mode. Press
3
any time to exit and advance to the previous Mode.
1
1 2
2
3
1 2
2 2 2
1
When the Ride Time (the elapsed time for Service
Timer) or the elapsed distance begins to flash, press
2
to reset to zero;
OR press to reserve the digits, and advance to the
next Setup Mode.
Important:
In the Initial Setup, the elapsed time [distance] for
Service Timer doesn’t exist.
OR OR
1
1 2
1
2 1
2
1 2 1
2
2
1
Press to toggle between flashing M/hr and KM/hr. Press to select
and advance to the next Setup Mode.
Note: Speed/Distance Unit cannot be changed if there have been ride
data on screens. If you want to change the Unit, please make sure you
had cleared all ride data before entering the NOM Setup Mode. This
restriction does not apply to the Initial Setup after the 1
st
time battery
installation, new battery replacement or All Clear Total Reset.
12/24 CLOCK RT 255|255L|277|288|288L
TIME RT 255|255L|277|288|288L
2
Press to toggle between flashing 12 and 24 hour formats. Press
1
to select your desired format (without PM icon implies AM in 12
hour format) and advance to Time setting.
Press to advance hour digits to correct hour (hold button for rapid advance). Press to select and advance to minute
setting. Press to advance minute digits to correct minute. Press to select and advance to the next Setup Mode.
2 1 2
2
2
1
2
1
WHEEL/ TIRE SIZE RT 255|255L|277|288|288L
Press to toggle between flashing circ (circumference) and tire (tire type). Press to select the desired and advance
the settings.
If pre-set to circ (see Table of Tire Size Vs Circ), press to scroll the flashing digit to the desired number. Press to
select this number and advance to next digit. Repeat this procedure until all four digits are selected.
If pre-set to tire, press to scroll the flashing 700c, 650c, 27in, 26in, 24in, 20in or 16in. Press to select and advance
to next setting to complete the Tire Size. Again, press to scroll and press to finalize the Tire Size and advance to
the next Setup Mode.
ODOMETER RT 255|255L|277|288|288L
Press to scroll the flashing digit to the desired number. Press to select this number and advance to next digit. Repeat
this procedure until all five digits are selected. Press to advance the next Setup Mode. (Maximum setting: 99999)
TIRE SIZE CIRC
700c x 20mm 2074
700c Tubular 2130
650c x 23mm 1990
650c x 20mm 1945
27” x 1.25” 2161
27” x 1.125” 2155
26” x 2.3” 2135
TIRE SIZE CIRC
700c x 38mm 2180
700c x 35mm 2168
700c x 32mm 2155
700c x 30mm 2145
700c x 28mm 2136
700c x 25mm 2124
700c x 23mm 2105
TIRE SIZE CIRC
26” x 1.0” 1913
24” x 1.9/1.95” 1916
20” x 1.25” 1618
16” x 2.0” 1253
16” x 1.95” 1257
16” x 1.5” 1206
TIRE SIZE CIRC
26” x 2.25” 2115
26” x 2.1” 2095
26” x 2.0” 2074
26” x 1.9/1.95” 2055
26” x 1.75” 2035
26” x 1.5” 1985
26” x 1.25” 1953
2 1 1
FUNCTIONS
AUTO START RT288|288L
When Auto Start is On: The computer exit the Sleep Mode as soon
as it receives the speed signal or any button is pressed.
When Auto Start is Off: To conserve battery run time, the computer
will only exit the Sleep Mode when any button is pressed.
Press to toggle between flashing OFF or ON. Press to select
and advance to next Setup Mode.
2
F or LAP
RT 255|255L|277|288|288L
SMARTLITE RT 255L|288L
SPD
RT 255|255L|277|288|288L
SmartLite will turn on the night light for 3 seconds between pre-set intervals when any button is pressed. Press to toggle
between OFF and ON. When SmartLite is set to OFF, press to exit the Setup Mode. When SmartLite is set to ON, press to
select and advance the hour setting. Press to advance the hour digits to desired hour [range of Fr (from): 1:00 PM to 11:00 PM;
range of To (to): 1:00 AM to 11:00 AM]. Press to select and exit the Setup mode.
Speed is shown at all times on middle display. It is accurate to 0.1 M/hr or KM/hr and the
maximum reading is 139.9 M/hr or 199.9 KM/hr.
2 2
2
2
2
1
1
1
1
2
2
1
1
2 1
Press to scroll the flashing F (Freeze Frame Memory), LAP (Lap Data) and OFF (both of Freeze Frame Memory and
Lap). Press to select and advance to next Setup Mode.
Note: The icon or in the Normal Display Modes indicates F or Lap has been chosen.
2
1
2
1
1
2
1
2 1 1
1
1 2 1
21
2
The types and number of Modes of the upper screen are same as the lower screen. Depending on users’ habits, they can
decide where to put the desired Modes either on the upper or lower screen.
Press to change the Upper Screen Modes.
Press to change the Lower Screen Modes.
To enter the NOM Setup Mode, press & hold & simultaneously for 2 seconds when the lowest screen is in the CLK Mode,
Press at anytime to exit.
To reset all ride data (DST, AVG SPD, MAX SPD, RT, AVG/CAD*, MAX/CAD*) to zero, press & hold and simultaneously for 2
seconds when the lowest screen is in the DST Mode. (* RT277 Only)
1 2
2
1
1
2
3
Note: The icon Auto in the Normal Display Modes indicates the programmable Auto Start has been chosen.
2



Join the conversation about this product
Here you can share what you think about the Vetta RT255L Cycling Computer. If you have a question, first carefully read the manual. Requesting a manual can be done by using our contact form.