Manual Vango Bute 400 Tent

Need a manual for your Vango Bute 400 Tent? Below you can view and download the PDF manual for free in English. This product currently has 7 frequently asked questions, 0 comments and has 0 votes. If this is not the manual you want, please contact us.

Is your product defective and the manual offers no solution? Go to a Repair Café for free repair services.

Manual

Loading…

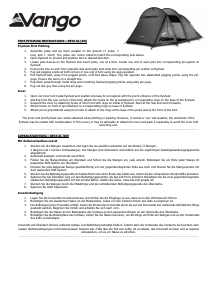
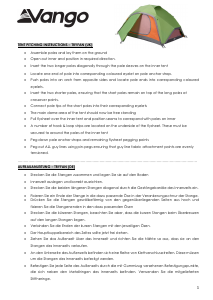
TENT PITCHING INSTRUCTIONS BUTE (UK)
FLYSHEET FIRST PITCHING:
Open out flysheet and position in required direction
Locate pole sleeves on roof section of flysheet and insert the curved roof poles
Insert the corresponding upright poles to the roof poles
On both sides of the tent, locate the ends of each pole into the corresponding ring & pin
Tighten all the tensions straps at the base of the poles.
Attach all flysheet pole clips onto poles
Lay the flysheet and poles on the ground
Securely peg out the rear corners of the tent
Locate the front pegging points and pull away from rear (this is easier if a second person holds the steel pole in an upright position). When fully tensioned
away from the rear, insert pegs.
Insert the fibreglass poles into the front and rear pole sleeves and locate the ends onto the pins on the steel pole
The groundsheet should be flat and wrinkle free
Peg out the remaining poles and pegging points using pin pegs at the base of poles
Peg out ALL guy lines using pin-pegs ensuring that guy line fabric attachment points are evenly tensioned.
INNER ATTACHMENT:
Open out inner tent inside flysheet and position doorways to correspond with the living area
Suspend the inner by attaching toggles of inner tent through rings on inside of flysheet
The inner attachments are colour coded to match the clips on the roof of the flysheet
Do the rear first and work forward
It is advisable to remove the inner when taking down the tent when wet.
RING & PIN SYSTEM:
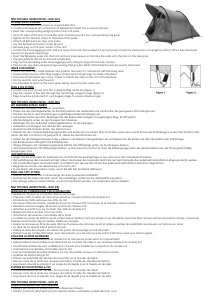
Locate one end of pole onto the corresponding metal pin (figure 1)
Peg the corners of the tent through the metal rings using pin-pegs (figure 2)
Pegs should be positioned at a 45 degree angle to ensure maximum grip
TENT PITCHING INSTRUCTIONS BUTE (DE)
MIT AUßENZELTAUFBAU ZUERST:
Außenzelt auslegen und korrekt ausrichten.
Finden Sie die Gestängekanäle an der Dachsektion des Außenzelts und stecken Sie die gebogenen Dachstangen ein.
Stecken Sie die zu den Dachstangen zugehörigen Senkrechtstangen ein.
Auf beiden Seiten des Zelts: Befestigen Sie die Enden aller Stangen im zugehörigen Ring- & Stift-System.
Alle Spanngurte unten an den Stangen fest anziehen.
Befestigen Sie alle Außenzelt-Halterungsklemmen an den Stangen.
Außenzelt und Stangen auf dem Boden auslegen.
Stecken Sie die hinteren Ecken des Zelts fest aus.
Fixieren Sie die vorderen Befestigungspunkte und ziehen Sie von hinten (das ist leichter, wenn eine zweite Person die Stahlstange in aufrechter Position hält).
Wenn das Zelt von hinten voll gespannt ist, setzen Sie die Klammern ein.
Setzen Sie die Fiberglasstangen in die vorderen und hinteren Stangenhüllen ein und fixieren Sie die Enden auf den Steckstiften der Stahlstange
Die Bodenplane sollte glatt und knitterfrei sein.
Übrige Stangen und Verankerungspunkte mithilfe der Stiftheringe unten an den Stangen fixieren.
ALLE Abspannleinen mit Stiftheringen fixieren, wobei darauf zu achten ist, dass die Befestigungspunkte der Abspannleinen an der Plane gleichmäßig
festgezogen sind.
INNENBEFESTIGUNG:
Legen Sie die Innenzelte im Außenzelt aus und richten Sie die Eingänge so aus, dass sie in den Wohnbereich führen.
Die Aufhängung des Innenzelts erfolgt, indem die Knebel des Innenzelts durch die auf der Innenseite des Außenzelts befindlichen Ringe gesteckt werden.
Die Innenhalterungen sind farbcodiert und farblich auf die auf dem Dach des Außenzelts befindlichen Klemmen abgestimmt.
Beginnen Sie hinten und arbeiten Sie sich nach vorn.
Es ist ratsam, das Innenzelt zu lösen, wenn Sie das Zelt bei Nässe abbauen.
RING-UND-STIFT-SYSTEM:
Fixieren Sie ein Ende der Vorbaustange am dazu passenden Metallstift
Stecken Sie die Ecken des Zelts durch die Metallringe, indem Sie die Arretierstifte benutzen.
Die Heringe sollten in einem Winkel von 45 Grad platziert werden, um maximalen Halt zu erzielen.
TENT PITCHING INSTRUCTIONS BUTE (FR)
MONTAGE EN COMMENÇANT PAR LE DOUBLE TOIT:
Déferler le double toit et orienter dans le sens requis
Passer les mâts courbes du toit par les manches correspondantes du double toit
Introduire les mâts verticaux aux mâts du toit
Des deux côtés de la tente, joindre les bouts de chaque mât à l'anneau et la cheville correspondants
Reserrer toutes les sangles de tension en bas de chaque mât
Attacher aux mâts tous les crochets des mâts du double toit
Etaler par terre le double toit et ses mâts
Attacher et sécuriser les coins arrière de la tente
Localiser les points de fixation avant et tirer depuis l'arrière (c'est plus simple si une deuxième personne tient l'arceau d'acier en position droite). Lorsqu'il est
maintenu bien tendu depuis l'arrière, insérer les chevilles.
Insérer les arceaux en fibre de verre dans les fourreaux des arceaux avant et arrière, puis fixer les extrémités aux piquets, sur l'arceau en acier
Le tapis de sol devrait être à plat et sans plis
Planter le reste des piquets, en utilisant les points de piquetage en bas des mâts
Planter tous les cordes d'ancrage avec des piquets, en s'assurant que les points d'attache soient sous tension égale
ATTACHER LA TENTE ANTÉRIEURE:
Déferler la tente intérieure sous le double toit et orienter les portes selon le compartiment
Faire pendre la tente intérieure en attachant les crochets de celle-ci aux anneaux intérieurs du double toit
Les attaches intérieures sont codifiées par couleurs pour faciliter les connections du double toit
Commencer par derrière et travailler vers l'avant
Il est recommandé de retirer l'intérieur, en cas d'humidité, lorsque l'on démonte la tente.
Système de fixation Ring & Pin
Placer une extrémité de l'arceau de la porche sur la cheville de métal
Fixer les coins de la tente aux anneaux de métal, à l'aide de chevilles de fixation
Les piquets doivent se planter à un angle de 45 degrés pour le maximum de prise
SYSTÈME DE FIXATION RING & PIN:
• Placer une extrémité de l'arceau de la porche sur la cheville de métal
• Fixer les coins de la tente aux anneaux de métal, à l'aide de chevilles de fixation
• Les piquets doivent se planter à un angle de 45 degrés pour le maximum de prise
TENT PITCHING INSTRUCTIONS BUTE (IT)
PRIMO MONTAGGIO DEL TELO ESTERNO:
Aprire il telo esterno e posizionarlo nella direzione richiesta
Fissare i manicotti dei paletti sul tetto del telo esterno ed inserire i paletti del tetto curvi
Download manual in English (PDF, 0.13 MB)
(Consider the environment and only print this manual if it is really necessary)

Loading…

Rating

Let us know what you think about the Vango Bute 400 Tent by leaving a product rating. Want to share your experiences with this product or ask a question? Please leave a comment at the bottom of the page.
Are you satisfied with the Vango Bute 400 Tent?
Yes No
Be the first to rate this product
0 votes

Join the conversation about this product

Here you can share what you think about the Vango Bute 400 Tent. If you have a question, first carefully read the manual. Requesting a manual can be done by using our contact form.

More about this manual

We understand that it’s nice to have a paper manual for your Vango Bute 400 Tent. You can always download the manual from our website and print it yourself. If you would like to have an original manual, we recommend you contact Vango. They might be able to provide an original manual. Are you looking for the manual of your Vango Bute 400 Tent in a different language? Choose your preferred language on our homepage and search for the model number to see if we have it available.

Specifications

Brand Vango
Model Bute 400
Category Tents
File type PDF
File size 0.13 MB

All manuals for Vango Tents
More manuals of Tents

Frequently Asked Questions about Vango Bute 400 Tent

Our support team searches for useful product information and answers to frequently asked questions. If you find an inaccuracy in our frequently asked questions, please let us know by using our contact form.

Can I store my tent when it's wet? Verified

Only for very short periods of time. When a tent is stored while wet for a week or longer, it can get moldy. This is harmful for your tent and possibly your health.

This was helpful (384) Read more

How do I impregnate a tent? Verified

Pitch the tent, clean the cloth and let it dry. Apply the impregnation agent on the cloth with a plant sprayer or other spray. It is also possible to use a paint roller or brush. The cloth needs to be fully saturated with the impregnation agent. Also treat the inside of the tent. Thoroughly clean any windows with a moist cloth. Do not let the impregnation agent dry on it. Let the tent cloth fully dry. Repeat the treatment if needed.

This was helpful (285) Read more

Can I repair a tear or hole in the canvas of my tent myself? Verified

There are special pieces of self-adhesive patches of cloth available for synthetic tent canvases. Stick one of these patches on both sides of the hole or tear. For cotton tent canvases or mixed material tent canvases it's best to use patches that can be ironed on. This will require an iron.

This was helpful (218) Read more

The zipper of my tent won't run smoothly, what can I do? Verified

When a zipper is running smoothly, use a dry PTFE spray or silicone spray. Do not spray onto the cloth and preventively spray to prevent future problems.

This was helpful (156) Read more

There are water drops on the inside of the tent, does this mean it is leaking? Verified

No, this is probably condensation. Make sure the tent is properly ventilated to keep condensation at a minimum.

This was helpful (129) Read more

What tent pegs are best to use for which surfaces? Verified

On grassland or forest surfaces you can use semi circular or plastic pegs. On rocky surfaces you need to use rock pegs. On clay surfaces you can use semi circular, plastic or universal pegs. On gravel surfaces you need semi circular or universal pegs and on sand you need to use wooden pegs.

This was helpful (105) Read more

The impregnation agent leaves white stains or a white haze on the tent cloth, what can I do about this? Verified

If the agent leaves a white haze or white stains on the tent cloth, this means you have applied more impregnation agent on those areas. This is not harmful and the stains often disappear over time. It is not advisable to use less impregnation agent to prevent stains. The cloth needs to be fully saturated with the impregnation agent to give good results.

This was helpful (97) Read more
Manual Vango Bute 400 Tent

Related products

Related categories